Skip to content
DisclaimerTerms Of UseGDPR PolicyCookie Policy

Cooking Wells

  • Home
  • Drinks
  • Appetizers
  • Dinner
  • Dessert
  • About
  • Contact
  • Privacy Policy
DisclaimerTerms Of UseGDPR PolicyCookie Policy

NO-ING-IMG

- 1 pound boneless, skinless chicken thighs, cut into 1-inch cubes - 1/4 cup soy sauce - 2 tablespoons sesame oil - 2 tablespoons brown sugar - 1 tablespoon gochujang (Korean chili paste) - 1 tablespoon minced garlic - 1 tablespoon minced ginger - 2 green onions, finely chopped (plus extra for garnish) - 1 tablespoon sesame seeds - Skewers (soaked in water if using wooden ones) These ingredients work together to create a savory and spicy flavor. The chicken thighs stay juicy due to their fat content. Soy sauce adds saltiness, while sesame oil gives a rich taste. Gochujang brings heat and depth. Brown sugar balances the flavors with sweetness. Garlic and ginger provide aromatic notes that enhance the dish. - Extra chopped green onions for garnish - Rice or lettuce leaves for serving - Pickled vegetables for a crunchy side Garnishes add color and freshness. Lettuce wraps can make a fun way to enjoy the skewers. Pickled veggies introduce a tangy crunch, enhancing each bite. - Medium mixing bowl for the marinade - Whisk for mixing ingredients - Grill or grill pan for cooking - Skewers (wooden or metal) for threading the chicken - Tongs for turning the skewers on the grill Having the right tools makes your cooking easier and more fun. A good grill ensures even cooking. Use tongs to keep your hands safe from the heat. Enjoy your cooking adventure and the delicious flavors that follow! {{ingredient_image_1}} To start, gather your ingredients for the marinade. In a medium bowl, mix together: - 1/4 cup soy sauce - 2 tablespoons sesame oil - 2 tablespoons brown sugar - 1 tablespoon gochujang - 1 tablespoon minced garlic - 1 tablespoon minced ginger - 2 green onions, finely chopped Whisk these ingredients well. The mix should smell sweet and spicy. This marinade will make the chicken tasty and tender. Next, take your 1 pound of cubed chicken thighs. Add the chicken pieces to the marinade. Make sure each piece gets a good coat. This helps the flavors soak in. Cover the bowl with plastic wrap and place it in the fridge. Let it sit for at least 30 minutes. For better flavor, marinate for up to 2 hours. Now it's time to grill! Preheat your grill to medium-high heat. If you're using wooden skewers, soak them in water for 30 minutes. This prevents burning. Thread the marinated chicken onto the skewers. Leave a little space between each piece. This helps them cook evenly. Place the skewers on the grill. Cook them for about 10-12 minutes. Turn them occasionally to get nice grill marks. In the last few minutes, sprinkle sesame seeds over the skewers. This toasts them and adds crunch. Once done, take the skewers off the grill and let them rest for a couple of minutes. Garnish with extra chopped green onions before serving. Enjoy your delicious Korean BBQ chicken skewers! To get real Korean flavors, use fresh ingredients. The gochujang adds heat and depth. Pair it with soy sauce and sesame oil for a balanced taste. Marinate the chicken for at least 30 minutes. If you can wait longer, two hours works best. This allows the flavors to soak in deeply. Use green onions and garlic to brighten the dish. These ingredients add freshness that makes each bite pop. Grilling over medium-high heat helps create a nice char. Ensure your grill is hot before adding the skewers. This helps seal in the juices. Space out chicken pieces to allow even cooking. Turn skewers every few minutes for uniform grilling. Watch the chicken closely to avoid burning. The goal is juicy chicken with beautiful grill marks. For added flavor, sprinkle sesame seeds during the last minutes of grilling. One common mistake is not marinating long enough. This can make the chicken bland. Another mistake is overcrowding the skewers. If the pieces are too close, they won’t cook evenly. Always soak wooden skewers in water for 30 minutes. This prevents them from burning on the grill. Lastly, don’t skip the resting time after grilling. Letting the skewers rest keeps the chicken juicy and delicious. Pro Tips Marinate Longer for More Flavor: Allow the chicken to marinate for at least 2 hours, or even overnight, to enhance the depth of flavor in each bite. Use High Heat: Grilling at medium-high heat ensures a nice sear on the chicken while keeping it juicy inside. Avoid cooking at low temperatures. Soak Skewers: If using wooden skewers, soak them in water for at least 30 minutes before grilling. This prevents them from burning on the grill. Rest Before Serving: Let the skewers rest for a few minutes after grilling. This allows the juices to redistribute, making the chicken more tender and flavorful. {{image_2}} You can swap chicken with many other proteins. Tofu works great for a plant-based dish. Use firm tofu and press it to remove extra water. This helps the marinade soak in better. You can also try beef for a richer flavor. Choose cuts like sirloin or flank steak. Just cut them into similar-sized pieces as the chicken for even cooking. Want to change the taste? You can infuse different flavors into the marinade. For a spicy kick, add more gochujang or some chili flakes. If you prefer sweet, increase the brown sugar. You can also add pineapple juice for a fruity twist. This adds a nice balance to the heat. Experiment with garlic or ginger to create your perfect flavor. How you serve the skewers can change the meal. You can wrap the chicken in lettuce leaves for a fun bite. This is refreshing and keeps it light. Another option is to serve the skewers over rice or in a bowl. Top with veggies and sauces to create a delicious meal. Feel free to try different sides, like kimchi or pickled radish, for extra flavor. After you make your Korean BBQ chicken skewers, let them cool. Place leftovers in an airtight container. Store them in the fridge for up to 3 days. Make sure to keep them sealed to avoid drying out. If you plan to eat them later, it's best to store them right away. If you want to freeze your skewers, wrap them tightly in plastic wrap. Then, place them in a freezer bag. You can freeze them for up to 3 months. When you’re ready to eat, thaw them in the fridge overnight. This helps to keep the chicken juicy. To reheat your skewers, use a grill or an oven. Heat the grill to medium heat and cook for about 5 minutes. This brings back the grill marks and flavor. Alternatively, place them in a preheated oven at 350°F for 10-15 minutes. You want the chicken to be heated through but not dry. Enjoy your tasty leftovers! Yes, you can use chicken breast. Chicken breast is leaner than thighs. It may cook faster. This can lead to a drier texture. If you choose breasts, watch the cooking time closely. Gochujang is a thick Korean chili paste. It adds heat and sweetness. You can find it in Asian grocery stores. Many regular grocery stores also carry it. Look in the international aisle. Marinate the chicken for at least 30 minutes. For the best flavor, 2 hours is ideal. This allows the chicken to soak up the marinade. Longer marination adds depth and richness to the taste. Korean BBQ Chicken Skewers go great with many sides. Here are a few ideas: - Steamed rice - Kimchi - Cucumber salad - Grilled vegetables - Lettuce wraps These sides add freshness and balance to your meal. Korean BBQ Chicken Skewers are a fun and tasty meal. We covered the key ingredients and how to prepare them. The marinating and grilling steps are simple but crucial for great taste. I shared tips for authentic flavors and common mistakes to avoid. You can also try different proteins and flavors. Make sure to store leftovers properly. With this guide, you’re ready to impress at your next meal. Enjoy the deliciousness of homemade Korean BBQ!

Korean BBQ Chicken Skewers Flavorful Grilling Recipe

If you love bold flavors and fun grilling, you’re in for a treat! Today, I’ll show you how to make

To make a tasty pesto pasta salad, you need some key items: - 8 oz tri-color fusilli pasta - 1 cup fresh basil leaves - 1/2 cup grated Parmesan cheese These ingredients form the base of your dish. The tri-color fusilli adds fun colors and texture. The fresh basil brings a bright flavor, while the Parmesan adds a creamy touch. You’ll want some extra ingredients to enhance the taste: - 1/3 cup pine nuts (lightly toasted) - 2 cloves garlic, minced - 1/2 cup extra virgin olive oil Pine nuts add a nutty crunch. Garlic gives a wonderful aroma. Extra virgin olive oil makes the pesto smooth and rich. To make your salad even better, consider these fresh add-ins: - 1 cup cherry tomatoes, halved - 1 small cucumber, diced - 1/4 red onion, finely chopped Cherry tomatoes add sweetness and color. Cucumber brings a crisp bite, and red onion offers a mild sharpness. These fresh ingredients brighten the salad and make it more vibrant. For the full recipe, check out the detailed instructions provided in the [Full Recipe]. To cook the tri-color fusilli pasta, start by bringing a large pot of salted water to a boil. Add the pasta and stir it gently. Follow the package instructions for cooking time, usually around 8 to 10 minutes. To achieve that perfect al dente texture, taste the pasta a minute or two before the time is up. It should be firm but not hard. Once done, drain the pasta in a colander and rinse it under cold water. This stops the cooking and prevents sticking. Set the pasta aside to cool. Now, let's make the pesto! Grab your food processor. Add the fresh basil leaves, grated Parmesan cheese, lightly toasted pine nuts, and minced garlic. Sprinkle in a pinch of salt and pepper. Pulse the mixture until it is finely chopped. With the processor running, slowly drizzle in the extra virgin olive oil. This step helps create a smooth, creamy pesto. Taste your pesto and adjust the seasoning, adding more salt or pepper if needed for flavor. In a large mixing bowl, combine the cooled pasta with the halved cherry tomatoes, diced cucumber, and finely chopped red onion. Now, it’s time to mix in the pesto! Pour the pesto over the pasta and add a tablespoon of lemon juice. Toss everything well to coat the pasta and vegetables evenly. Ensure every bite is packed with flavor. Taste the salad and adjust the seasoning with more salt, pepper, or even more lemon juice if it needs a bit more zing. For the best flavor, chill the salad in the fridge for at least 30 minutes before serving. This allows the ingredients to blend beautifully. For the full recipe, check the previous section. Fresh vs. dried herbs I always choose fresh basil for my pesto sauce. Fresh herbs give the best flavor. Dried herbs don’t have the same bright taste. If you can't find fresh basil, try to use a mix of dried herbs, but be aware the taste will be different. Adjusting garlic intensity Garlic is key in pesto. If you want a strong garlic flavor, use more cloves. For a milder taste, reduce the garlic. Remember, you can always add more garlic later if you want. Start with two cloves, and adjust based on your taste. Garnishing ideas for presentation For a lovely look, garnish your salad with extra pine nuts. A sprinkle of grated Parmesan adds a nice touch. You can also add whole basil leaves for color. Presentation matters, and these small touches can make a big difference. Best serving temperature Serve your pesto pasta salad cold or at room temperature. Chilling the salad helps the flavors blend. It tastes best after sitting for at least 30 minutes in the fridge. This waiting time lets the ingredients get to know each other. How to keep the salad fresh Store any leftover salad in an airtight container. This keeps the salad fresh for up to three days. If you notice the pasta soaking up the pesto, add a little olive oil before serving again. When to consume leftovers For the best taste, eat your leftovers within three days. After this time, the salad may lose flavor and texture. Always check for any signs of spoilage before eating. Enjoy your meals fresh for the best experience! {{image_2}} You can easily change ingredients in pesto pasta salad. If you want a vegan dish, skip the Parmesan cheese. Use nutritional yeast instead. It gives a cheesy flavor without dairy. You can also try cashew cheese for a creamy texture. If you need gluten-free options, choose gluten-free pasta. Many brands make great pasta from rice or corn. These options keep the dish tasty and light. To add more flavor, think about roasting your veggies. Roasted bell peppers or zucchini can give a nice touch. The sweet and smoky taste will surprise you. You can also add protein. Grilled chicken or shrimp works well. This makes the salad heartier and more filling. Just make sure to cook the protein before mixing it in. Seasonal changes can inspire your salad. In summer, toss in fresh fruits like strawberries or peaches. They add a sweet twist and brighten the dish. In the fall, consider adding roasted butternut squash or apples. These ingredients give warmth and depth to the flavor. You can adapt this salad to match any season. For the full recipe, check out the Pesto Pasta Salad Delight section. To keep your pesto pasta salad fresh, store it in the fridge. Use a tight-sealing container. Glass containers work well for this purpose. Make sure the salad is completely cool before sealing. This prevents moisture buildup and keeps flavors intact. I do not recommend freezing pesto pasta salad. It can change the texture and flavor. If you must, freeze it before adding fresh veggies. To thaw, place it in the fridge overnight. Stir well before serving to mix flavors again. In the fridge, your pesto pasta salad lasts about three to five days. Look for signs of spoilage, like an off smell or changes in color. If the pasta feels slimy or the veggies look mushy, it's time to toss it. Always trust your senses when checking for freshness. It takes about 15 minutes to prep. Cooking the pasta adds another 30 minutes, making a total of 45 minutes. This includes chilling time, which helps the flavors blend. I recommend tri-color fusilli for its fun shape and color. Other great options include penne or rotini. These shapes hold the pesto well, giving you great flavor in every bite. Yes, you can! I suggest making it a day ahead. Just store it in the fridge. This waiting time helps the flavors develop. If you make it early, add a little olive oil before serving to refresh it. For a full recipe, check out the Pesto Pasta Salad Delight. Pesto pasta salad combines fresh ingredients and simple steps. You need tri-color fusilli, basil, and Parmesan to create a vibrant dish. By adding garlic and olive oil, you build rich flavor. Don't forget fresh veggies like tomatoes and cucumber. Remember to store leftovers properly for the best taste. This salad can easily adapt to any season or diet. You can experiment with flavors and textures. Enjoy making your unique version, and share it with friends for a fresh, tasty meal!

Pesto Pasta Salad Fresh and Flavorful Recipe Guide

Are you ready to make a dish that bursts with fresh flavor? My Pesto Pasta Salad is a delightful blend

- 2 lbs chicken thighs, boneless and skinless - 3 tablespoons Sriracha sauce - 4 tablespoons honey The heart of the dish is the chicken thighs. They have great flavor and stay juicy. Sriracha sauce brings heat and depth. Honey adds a sweet touch that balances the spice. - 2 tablespoons soy sauce - 1 tablespoon garlic, minced - 1 tablespoon ginger, finely grated - 1 tablespoon rice vinegar - 1 teaspoon sesame oil The marinade makes the chicken shine. Soy sauce gives it umami. Garlic and ginger add a fresh kick. Rice vinegar brings brightness, while sesame oil adds richness. - 2 green onions, chopped (for garnish) - Sesame seeds (for garnish) - 2 tablespoons olive oil - Salt and pepper to taste Garnishes are key for presentation. Green onions add color and flavor. Sesame seeds provide crunch. Olive oil, salt, and pepper enhance the dish’s overall taste. For the full recipe, check out the details above! To start, you need to make the marinade. Grab a medium bowl. Add the Sriracha sauce, honey, soy sauce, minced garlic, grated ginger, rice vinegar, sesame oil, salt, and pepper. Use a whisk to mix everything well. This step is key to ensure all flavors blend nicely. Next, let’s marinate the chicken. Take the chicken thighs and place them into a large resealable plastic bag or a shallow dish. Pour the marinade over the chicken, making sure each piece is covered. Seal the bag or cover the dish. Refrigerate for at least 30 minutes. For even better taste, let it marinate for up to 4 hours. Now, it’s time to bake. Preheat your oven to 400°F (200°C). Line a baking sheet with parchment paper or grease it lightly with olive oil. Take the chicken out of the marinade and let the extra drip off. Place the thighs on the baking sheet, leaving space between them. Bake for 25-30 minutes. Check that the chicken reaches an internal temperature of 165°F (74°C). If you like a charred finish, broil the chicken for an extra 2-3 minutes. Just watch it closely to avoid burning. After baking, let the chicken rest for 5 minutes before slicing. This makes it juicy. Garnish with chopped green onions and sprinkle sesame seeds on top for added flair and crunch. For the full recipe, refer back to the main section. To get the best flavor, marinate the chicken well. I recommend marinating for at least 30 minutes. If you have time, let it sit for up to 4 hours. This allows the chicken to soak up all the tasty goodness. - Use a resealable bag for easy mixing and coating. - Make sure all pieces are covered in the marinade. This helps every bite burst with flavor. You can cook Spicy Honey Sriracha Chicken in different ways. Baking is easy and effective, but grilling gives a nice char. - Grilling: Preheat your grill to medium-high. Cook each side for about 6-7 minutes. - Broiling: After baking, turn on the broiler for 2-3 minutes for a crispy finish. Just keep a close eye on it to avoid burning. Pair this chicken with great sides for a complete meal. Here are some ideas: - Rice or quinoa: These grains soak up the sauce well. - Steamed veggies: Broccoli or green beans add color and crunch. - Salad: A fresh salad balances the spicy chicken. For a fun presentation, slice the chicken and arrange it on a platter. Add chopped green onions and sesame seeds for a pop of color. This makes your dish look as good as it tastes! For the full recipe, check out the previous sections. {{image_2}} You can easily change the heat in Spicy Honey Sriracha Chicken. To make it hotter, add more Sriracha. You can also use red pepper flakes or chili paste. If you want it milder, reduce the Sriracha. You can replace it with a sweet chili sauce or even barbecue sauce. These changes let you find the perfect spice level for your taste. Feel free to swap ingredients to suit your needs. If you're out of soy sauce, use tamari or coconut aminos. For honey, maple syrup or agave nectar works well. You can also try using chicken breasts or even shrimp instead of chicken thighs. Each protein brings its own flavor and texture to the dish. You can serve this dish in many fun ways. Try making wraps with tortillas and fresh veggies. Toss the chicken into a salad for a light meal. You can also create rice or grain bowls loaded with your favorite toppings. Each style makes the dish unique and exciting! For the full recipe, check out the complete guide. Store your Spicy Honey Sriracha Chicken in an airtight container. This keeps moisture in and prevents odors from mixing. If you want to freeze it, let the chicken cool first. Place it in a freezer-safe bag. Squeeze out the air and seal it tightly. You can freeze it for up to three months. To reheat your chicken, use an oven for the best results. Preheat the oven to 350°F (175°C). Place the chicken on a baking sheet. Cover it with foil to keep it moist. Heat for about 15-20 minutes until warmed through. You can also use a microwave, but the oven keeps the texture nice. Leftovers are safe to eat for about three to four days in the refrigerator. If you freeze the chicken, it stays good for up to three months. Always check for any off smell or odd texture before eating. Enjoy your flavorful meal again! For the full recipe, check out the earlier sections. You can serve this chicken with many great sides. Think about fluffy white rice or fragrant jasmine rice to soak up the sauce. Steamed broccoli or green beans add a nice crunch. You could also try a simple salad with fresh greens, cherry tomatoes, and a light dressing. For something heartier, roasted sweet potatoes or crispy potatoes would be excellent. All of these sides work well with the spicy and sweet flavors of the chicken. Yes, you can prepare this dish ahead of time. Just marinate the chicken and store it in the fridge. Doing this helps the flavors soak in well. You can marinate it for 30 minutes or up to 4 hours. If you want to save time, you can also cook the chicken and keep it in the fridge. Just let it cool, then store it in an airtight container. It stays fresh for about 3 days. Absolutely! This recipe is great for meal prep. You can portion the chicken into separate containers with your chosen sides. It reheats well in the microwave. Just make sure to keep the chicken in an airtight container to maintain its flavor. The spicy honey Sriracha chicken can last in the fridge for up to 4 days. You can also freeze it for longer storage. When you’re ready to eat, just thaw and reheat. Enjoy your meals without the fuss! For more detailed instructions, check out the Full Recipe. This blog post covered a simple and tasty recipe for Spicy Honey Sriracha Chicken. You learned about the key ingredients, marinade tips, and baking instructions. I shared useful suggestions for flavor and alternative cooking methods. We also discussed how to store leftovers and answered common questions. Enjoy trying this dish with your favorite sides. It’s not just food; it’s an experience. Get creative with variations and explore how this recipe can fit your meals. A great meal awaits you!

Spicy Honey Sriracha Chicken Flavorful Dinner Delight

Are you ready for a flavor explosion? My Spicy Honey Sriracha Chicken is your ticket to a delicious dinner. This

To make a great creamy tomato basil soup, you need just a few key items. Here’s what you will need: - 4 cups ripe tomatoes, chopped (or 2 cans of whole peeled tomatoes) - 1 medium onion, diced - 3 cloves garlic, minced - 1 cup vegetable broth - 1 teaspoon sugar - 1 teaspoon dried basil - 1 teaspoon dried oregano - 1 cup heavy cream (or coconut cream for a dairy-free version) - 2 tablespoons olive oil - Salt and pepper to taste - Fresh basil leaves for garnish These ingredients come together to create a rich and creamy soup. The tomatoes give it a sweet and tangy flavor. The basil adds freshness, while the cream makes it smooth and velvety. You can play around with your soup by adding fun ingredients. Some great options include: - Red pepper flakes for a spicy kick. - Grated Parmesan for extra depth. - Chopped carrots or celery for added texture. - Basil pesto for a burst of flavor. If you want a lighter soup, you can use low-fat milk instead of cream. Fresh tomatoes are delightful in summer when they are in season. They add a bright flavor and vibrant color. However, canned tomatoes are great for convenience. They are ripe and juicy, perfect for soups. Both options work well in this recipe. If you use fresh tomatoes, try to pick ripe ones. If you go for canned, choose whole peeled tomatoes for a smoother texture when blended. This soup is simple to make. You can find the full recipe above for more details! To start your soup, you need to prepare the aromatics. Heat 2 tablespoons of olive oil in a large pot over medium heat. Once the oil is warm, add 1 diced onion. Sauté the onion for about 5 minutes. You want it to become soft and translucent. Next, add 3 minced garlic cloves. Cook this for about 1 minute until it smells great. The aroma will make your kitchen feel warm and inviting. Now, it’s time to build the flavor of your soup. Add 4 cups of chopped ripe tomatoes to the pot. If you don’t have fresh tomatoes, you can use 2 cans of whole peeled tomatoes. Pour in 1 cup of vegetable broth to give it depth. Then, add 1 teaspoon of sugar, 1 teaspoon of dried basil, and 1 teaspoon of dried oregano. These will enhance the taste. Stir everything together and bring it to a gentle boil. Once it boils, reduce the heat and let it simmer uncovered for about 20 minutes. This allows the flavors to meld beautifully. After simmering, it's time to blend. Use an immersion blender to puree the soup until it’s smooth. If you don’t have one, carefully transfer the soup in batches to a blender. Once it’s blended, return the soup to the pot. Stir in 1 cup of heavy cream for that creamy texture. If you want a dairy-free option, use coconut cream. Season with salt and pepper to taste. Heat the soup through for an additional 5 minutes without boiling. When serving, ladle the soup into bowls and add fresh basil leaves on top for a lovely touch. - Full Recipe: Heavenly Creamy Tomato Basil Soup To get the best creamy texture, start with heavy cream. This gives your soup a rich feel. If you want a lighter option, use coconut cream. Blend the soup until smooth. An immersion blender works great for this. If you don’t have one, a regular blender works too, but do it in batches. Always return the soup to the pot after blending. This keeps it warm and ready to serve. Add a teaspoon of sugar to balance the acidity of the tomatoes. This simple trick makes a big difference. You can also toss in some red pepper flakes for a little heat. If you love fresh herbs, try adding chopped parsley or thyme. These herbs can brighten the soup's flavor. Taste as you go. Adjust salt and pepper to your liking, too. This creamy tomato basil soup pairs well with crusty bread. Grilled cheese is another classic match. For a lighter option, serve it with a fresh salad. A sprinkle of Parmesan cheese on top adds a nice touch. Want to impress? Garnish with fresh basil leaves right before serving. For the full recipe, check out Heavenly Creamy Tomato Basil Soup. {{image_2}} If you want a dairy-free soup, use coconut cream instead of heavy cream. It adds a sweet, rich flavor that pairs well with tomatoes. Simply swap 1 cup of heavy cream for 1 cup of coconut cream in the recipe. This change keeps the soup creamy while making it suitable for those who avoid dairy. To make your soup heartier, add protein like shredded chicken or beans. Cooked chicken adds a nice texture and flavor. If you prefer beans, use canned white beans or chickpeas. Stir in about 1 cup of your chosen protein after blending the soup. This addition makes the soup filling and turns it into a complete meal. You can easily change the soup based on the season. Add vegetables like zucchini, carrots, or spinach for extra nutrition. Simply chop the veggies and sauté them with the onions and garlic. This way, you keep the soup fresh and exciting all year round. Adjust the herbs and spices to complement the new flavors. For more details, refer to the Full Recipe for Heavenly Creamy Tomato Basil Soup. To store leftover soup, let it cool first. Then, pour it into an airtight container. You can keep it in the fridge for up to three days. If you want to enjoy it later, freezing is a great option. When freezing, use freezer-safe containers. Leave some space at the top, as soup expands when frozen. Label the container with the date. It can last in the freezer for about three months. When you're ready to eat, thaw it in the fridge overnight. To reheat, you have a few options. You can use the stove or microwave. For the stove, heat it in a pot over medium heat. Stir often to avoid burning. For the microwave, use a microwave-safe bowl. Heat it in short bursts and stir in between. Always check the temperature before serving. Yes, you can make creamy tomato basil soup ahead of time. This soup tastes even better after a day. Just let it cool, then store it in a container. When you’re ready to eat, reheat it on the stove. Stir often to keep it smooth. Creamy tomato basil soup lasts about 3 to 5 days in the fridge. Make sure to keep it in a sealed container. The flavors will stay fresh, but it’s best to eat it sooner for the best taste. Yes, you can use fresh herbs instead of dried ones. Fresh basil is great for this soup. Use about three times more fresh herbs than dried. So, if the recipe calls for 1 teaspoon of dried basil, use 3 teaspoons of fresh basil. It adds a bright flavor! You can serve this soup with many tasty sides. Here are a few ideas: - Grilled cheese sandwiches - Crusty bread or baguette - A fresh green salad - Garlic bread These sides complement the soup well and make a tasty meal. For the full recipe, check out the Heavenly Creamy Tomato Basil Soup section above! Creamy tomato basil soup is delicious and easy to make. You learned about the key ingredients, cooking steps, and tips for perfect texture. Variations let you customize the soup to fit your taste. Whether you prefer dairy-free options or want to add protein, there’s something for everyone. Store leftovers properly to keep the flavor fresh. Keep this recipe handy for lunch or dinner. Enjoying this cozy soup will make your day better. Now, grab your ingredients and start cooking!

Creamy Tomato Basil Soup Simple and Flavorful Recipe

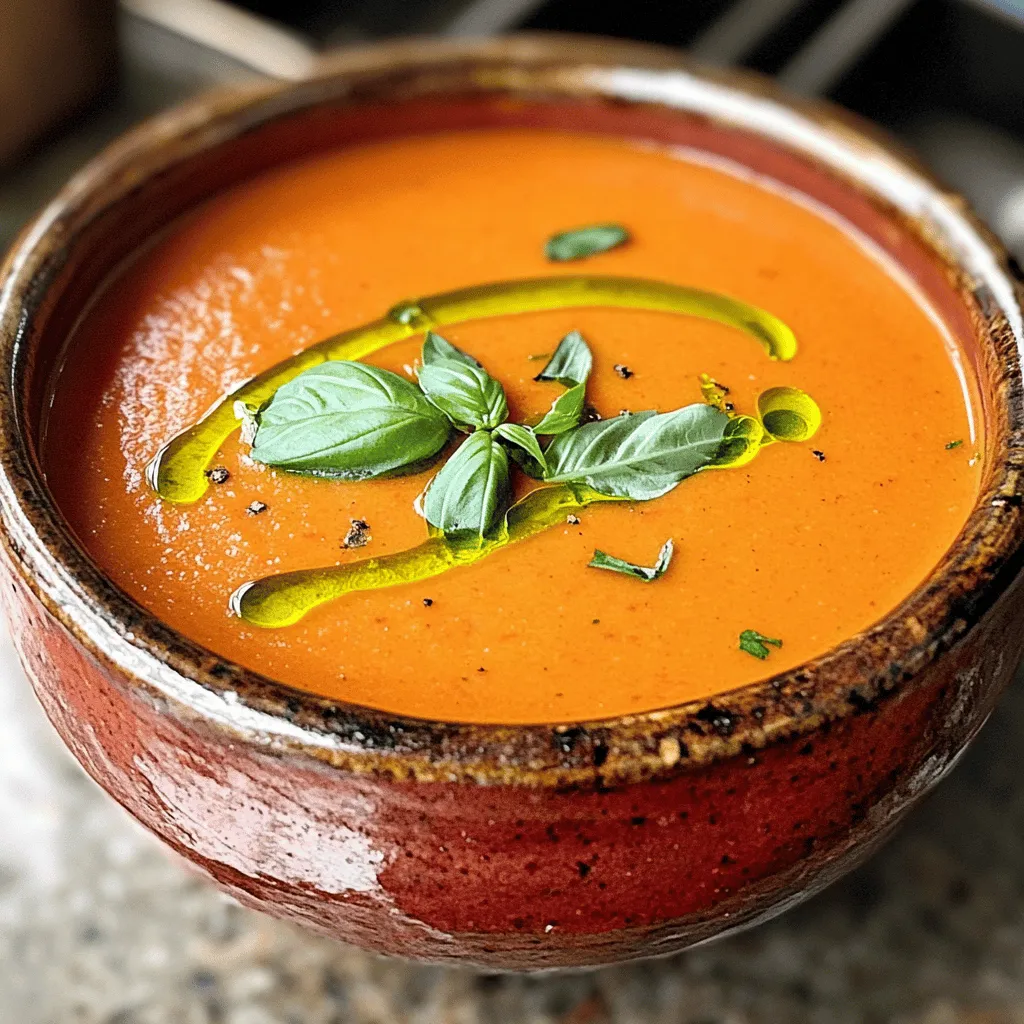
If you crave a warm bowl of comfort, look no further! This creamy tomato basil soup is simple and full

To make Parmesan Herb Roasted Potatoes, gather these key items: - 2 pounds baby potatoes, halved - 1/4 cup olive oil - 1/2 cup grated Parmesan cheese - 3 cloves garlic, minced - 2 teaspoons dried Italian herbs (oregano, thyme, basil) - Salt and pepper to taste - Fresh parsley, chopped (for garnish) These simple ingredients pack a lot of flavor. The baby potatoes become crispy and golden, while the Parmesan adds a nice salty touch. You will need a few basic tools for this recipe: - A large mixing bowl - A baking sheet - Parchment paper - A sharp knife - A cutting board Using parchment paper helps with cleanup and keeps the potatoes from sticking. Feel free to get creative with your seasonings! Here are some ideas: - Add a pinch of red pepper flakes for heat. - Swap dried herbs for fresh ones if you have them. - Try adding lemon zest for a fresh twist. Experimenting with these flavors can elevate your potatoes. Enjoy the cooking process! For the complete recipe, check out the Full Recipe. To start, gather all your ingredients. You will need: - 2 pounds baby potatoes, halved - 1/4 cup olive oil - 1/2 cup grated Parmesan cheese - 3 cloves garlic, minced - 2 teaspoons dried Italian herbs (oregano, thyme, basil) - Salt and pepper to taste - Fresh parsley, chopped (for garnish) Wash the baby potatoes well. Cut them in half to help them cook evenly. Mince the garlic finely so it blends well with the potatoes. In a large mixing bowl, add the halved potatoes. Pour in the olive oil, then add the minced garlic and dried herbs. Sprinkle salt and pepper over the mix. Toss everything together. Ensure every potato half gets coated in the oil and seasonings. This step is key to great flavor. Now, preheat your oven to 425°F (220°C). While it heats, spread the coated potatoes in a single layer on a large baking sheet lined with parchment paper. This helps with easy cleanup and prevents sticking. Next, sprinkle the grated Parmesan cheese generously over the top of the potatoes. Place the baking sheet in the oven. Roast for 25 to 30 minutes. Stir the potatoes halfway through. This helps them roast evenly. When they are golden and crispy, take them out. Let them cool slightly. Then, garnish with fresh parsley before serving. Enjoy your flavorful side dish! To get that crispy texture, follow a few key steps. First, make sure your potatoes are dry before you coat them. Excess moisture can lead to soggy potatoes. After mixing the potatoes with oil and seasonings, spread them out evenly on the baking sheet. This helps them cook evenly. Stir them halfway through cooking for a uniform crisp. A hot oven is key, so preheat it to 425°F (220°C). This temperature helps create that golden, crunchy crust. You can change the flavors to fit your taste. Try adding crushed red pepper for heat or lemon zest for brightness. You can swap Italian herbs with fresh herbs like rosemary or dill. If you love spice, toss in some paprika or cumin. Mixing in different cheeses, like cheddar or feta, can also add a fun twist. Experimenting with flavors keeps the dish exciting every time you make it. These roasted potatoes pair beautifully with many dishes. Serve them alongside grilled chicken or fish for a complete meal. They also work well with a fresh salad or a hearty stew. For a fun twist, top them with sour cream or a drizzle of balsamic glaze. Garnishing with fresh parsley adds color and flavor! These potatoes are a great side for any occasion. Check out the Full Recipe for more details! {{image_2}} You can swap herbs based on what you like. Try fresh rosemary for a strong flavor. Chives bring a nice onion taste. You can also use dill for a fresh twist. Just remember, fresh herbs are often stronger than dried ones. Adjust the amounts as needed. Experiment with combinations. You might find a new favorite mix. If you want to change the cheese, go ahead! Grated Pecorino Romano offers a saltier kick. Nutritional yeast gives a cheesy flavor without dairy. You can also use a dairy-free Parmesan if you're avoiding dairy. Just sprinkle it on like you would with regular cheese. Each option gives a unique taste to the dish. To make this dish vegan, skip the cheese and use nutritional yeast. You can also use coconut oil instead of olive oil for a different flavor. The potatoes will still taste amazing with herbs and garlic. This way, everyone can enjoy them, no matter their diet. Feel free to get creative with spices for extra flavor. For the full recipe, check out the steps above. After enjoying your Parmesan Herb Roasted Potatoes, let them cool. Place leftovers in an airtight container. Store them in the fridge for up to 3 days. This keeps them fresh and tasty. If you want to keep them longer, consider freezing. To reheat your potatoes, use the oven for best results. Preheat your oven to 350°F (175°C). Spread the potatoes on a baking sheet. Heat them for about 10-15 minutes, or until they are hot. This helps regain crispiness. You can also use a microwave, but they may become soft. You can freeze these potatoes if you have extras. Place cooled potatoes in a freezer-safe bag. Remove as much air as possible before sealing. You can freeze them for up to 2 months. When ready to eat, thaw them overnight in the fridge. Then, reheat as mentioned above. This method helps keep the flavor intact. Yes, you can use different potatoes. Yukon Gold or red potatoes work well. Both types add a creamy texture. They also absorb flavors nicely. Just keep the cooking time the same. If you choose larger potatoes, cut them into smaller pieces. This helps them cook evenly and become crispy. To add spice, use red pepper flakes. Start with a pinch and adjust to taste. You can also add diced jalapeños or hot sauce. Mix these spicy ingredients in with the olive oil. This way, the heat spreads evenly over the potatoes. Enjoy the kick! Parmesan Herb Roasted Potatoes pair well with many dishes. Serve them next to grilled chicken or steak. They also complement roasted vegetables nicely. For a light meal, enjoy them with a green salad. The flavors balance well together, making a hearty plate. For the complete details, check out the Full Recipe. This includes all the steps and tips to make your dish perfect. Enjoy making this delicious side! In this post, we covered how to make tasty Parmesan Herb Roasted Potatoes. We discussed key ingredients, essential tools, and various seasoning options. You learned each step, from prepping to roasting. I shared tips for crispiness and flavor changes. We also explored storage and reheating options. These potatoes are easy to make and fun to enjoy. Now, you have all you need to create your own delicious dish. Take your time, experiment, and enjoy every bite!

Parmesan Herb Roasted Potatoes Flavorful Side Dish

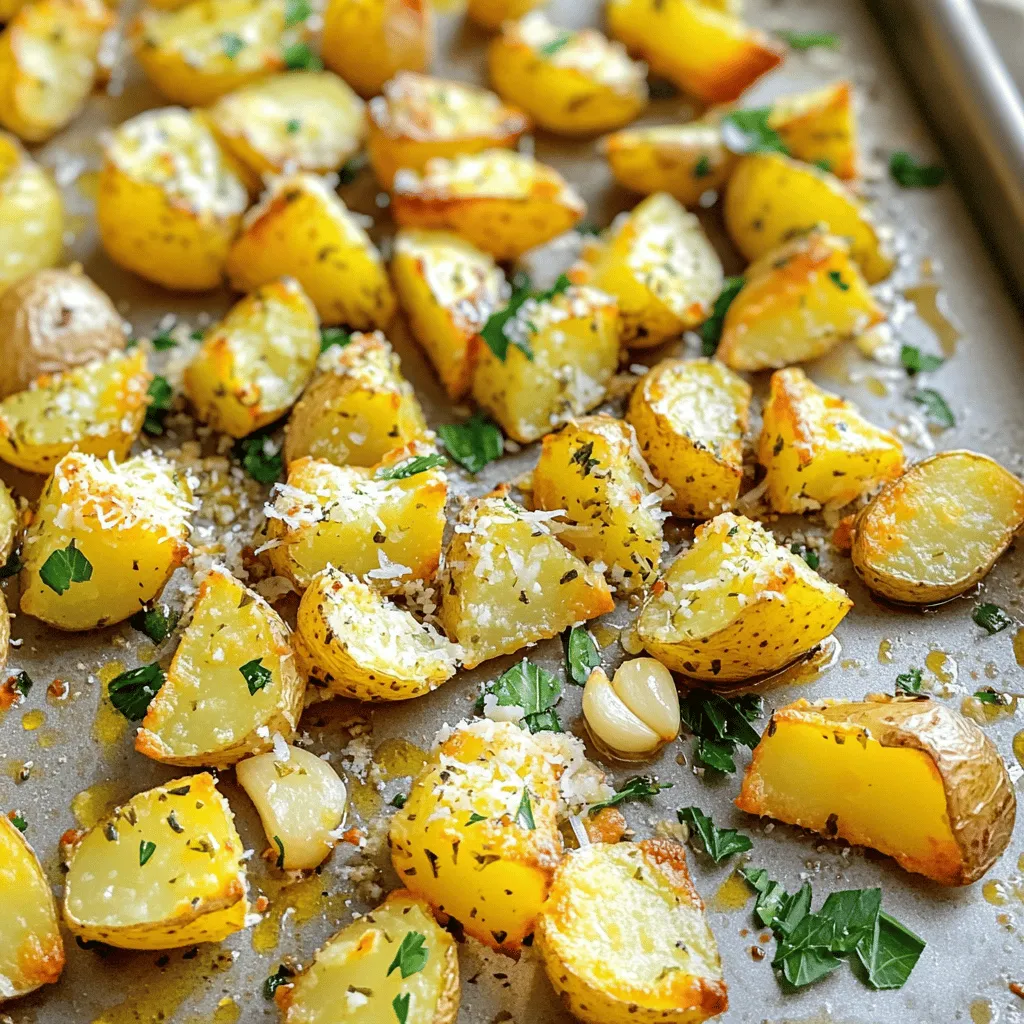
Looking for a side dish that impresses without the fuss? Parmesan Herb Roasted Potatoes are here to save your meal!

To make Chicken Avocado Burritos, you need some key ingredients. Here is your list: - 2 cups cooked chicken, shredded (grilled or rotisserie) - 1 ripe avocado, diced - 1 cup cooked rice (white or brown) - 1 cup black beans, drained and rinsed - 1 cup corn (canned or frozen) - 1 cup pico de gallo (or fresh salsa) - 1 teaspoon cumin - 1 teaspoon garlic powder - 1 teaspoon lime juice - 4 large flour tortillas - 1 cup shredded cheese (cheddar or Mexican blend) - Salt and pepper to taste - Fresh cilantro, chopped (for garnish) These ingredients give your burritos a hearty and tasty base. The chicken adds protein, while the avocado brings creaminess. Adding fresh ingredients makes your burritos even better. The pico de gallo adds a burst of flavor and color. Corn gives a nice crunch and sweetness. Black beans not only add protein but also fiber. Together, they create a balance of tastes and textures. You can also add more ingredients for extra flavor. Consider these options: - Jalapeños for heat - Sour cream for creaminess - Lime wedges for squeezing - Extra spices like chili powder or paprika These optional items can take your burritos to the next level. Feel free to mix and match based on what you like. If you want the full recipe, check out the details I provided earlier. Enjoy making these delicious burritos! To start, gather your ingredients. You need cooked chicken, diced avocado, rice, black beans, corn, pico de gallo, cumin, garlic powder, lime juice, and salt and pepper. In a large bowl, combine the chicken, avocado, rice, black beans, corn, and pico de gallo. Sprinkle in the cumin and garlic powder. Add lime juice, salt, and pepper to taste. Mix gently until everything is well combined. This filling is full of flavor and nutrients. Now, let's put it all together. Take a clean surface and lay out each flour tortilla. Spoon a generous amount of the chicken mixture onto the center of each tortilla. Don't be shy; you want a hearty burrito! Next, sprinkle shredded cheese on top of the filling. Then, fold in the sides of the tortilla and roll it tightly from the bottom up. Make sure to enclose the filling completely. The burrito should be snug but not bursting. It's time to cook! Heat a skillet over medium heat. Place the burritos seam-side down in the skillet. Cook each side for about 3-4 minutes. You want the tortillas to turn golden brown and crispy. This step adds a nice crunch. Once done, remove them from the skillet and let them cool slightly. Slice the burritos in half and garnish with fresh cilantro for a pop of color and flavor. Each bite will be a delight! To shred chicken, use two forks. Hold one fork steady. Use the other fork to pull the chicken apart. This method breaks the meat easily. For best results, use warm chicken. Cold chicken can be tough to shred. If you have leftover rotisserie chicken, that works great too. You can also use a stand mixer with a paddle attachment. Just mix on low speed for a few seconds. To wrap burritos well, use large flour tortillas. Start with a good amount of filling in the center. Leave space on the sides. Fold the sides in first. Then, roll the bottom up tightly. This keeps all the filling inside. Make sure to seal the burrito seam-side down. This helps it stay closed while cooking. You can also brush the outside with oil for extra crispiness. Seasonings make a big difference in taste. I use cumin and garlic powder for warmth. A splash of lime juice brightens the flavors. You can also add chili powder for a kick. Fresh herbs like cilantro add freshness. Feel free to adjust the spices to your liking. Taste the filling before wrapping. This way, you can ensure the flavor is just right. For more ideas, check out the Full Recipe for different flavor options. {{image_2}} You can easily switch up the chicken for tasty veggies. Try using grilled zucchini, bell peppers, or mushrooms. You can also add extra beans for protein. Black beans or pinto beans work well. This swap keeps the flavors fresh and light. The creamy avocado still shines through, making the burrito delicious. If you love heat, add some spice to your burritos. You can mix in diced jalapeños or a spoonful of hot sauce. For a smoky flavor, try chipotle peppers in adobo sauce. These will give your burrito a nice kick. Remember to adjust the heat based on your taste. Not a fan of flour tortillas? You have options! Try whole wheat tortillas for a healthier choice. Corn tortillas are gluten-free and add a nice flavor. You can even use lettuce wraps for a low-carb option. Each choice changes the taste and feel of your burrito, so experiment to find your favorite. For the full recipe, check out the Savory Chicken Avocado Burritos section. Leftover burritos can stay fresh. Wrap each burrito tightly in plastic wrap. Place them in an airtight container. This keeps them from drying out. Store them in the fridge for up to three days. If you want to keep them longer, consider freezing. To reheat your burritos, use the oven for the best taste. Preheat your oven to 350°F (175°C). Remove any plastic wrap and place the burrito on a baking sheet. Heat for about 15-20 minutes. This warms the inside and keeps the tortilla crispy. You can also use a microwave, but it may not stay crispy. Heat for about 1-2 minutes, checking often. Freezing burritos is easy and smart. After wrapping each burrito, place them in a freezer-safe bag. Squeeze out as much air as possible. Label the bags with the date. You can freeze them for up to three months. When ready to eat, thaw overnight in the fridge. Then, reheat as mentioned above. This way, you always have a tasty meal ready! You can find the full recipe for these burritos to help you get started. You can easily prepare Chicken Avocado Burritos in advance. Start by making the filling. Mix the cooked chicken, diced avocado, rice, black beans, corn, pico de gallo, and spices in a bowl. Store this mixture in the fridge for up to three days. When you are ready to eat, just fill the tortillas and cook them as directed. This method saves time and keeps your burritos fresh. Yes, you can use many other proteins. Ground beef or turkey works well. Tofu is a great choice for a vegetarian option. Shrimp or fish adds a fun twist. Choose what you like best and adjust cooking times as needed. Each protein brings its own flavor, making the burrito unique. Several side dishes complement Chicken Avocado Burritos perfectly. Consider serving them with: - Mexican rice - Refried beans - Chips with salsa - A fresh green salad - Grilled veggies These sides add color and taste to your meal. They make your dining experience even better. For more ideas, check the Full Recipe section. We explored how to make Chicken Avocado Burritos step by step. We covered key ingredients, the right way to prepare them, and tips for perfect results. You learned variations for different tastes and how to store your burritos. These burritos are easy and fun to make. Whether for a busy weeknight or a meal prep day, they fit many needs. Enjoy your delicious burritos, and feel free to get creative with them!

Hearty Chicken Avocado Burritos Easy to Make Today

If you’re craving a tasty meal that’s easy to make, you’ve come to the right place! These hearty Chicken Avocado

- 2 cups fresh broccoli florets - 1 large apple (Honeycrisp or Granny Smith) - ½ cup shredded carrots - ¼ cup red onion, finely chopped - ¼ cup roasted sunflower seeds - ½ cup Greek yogurt (or vegan yogurt) - 1 tablespoon honey or maple syrup - 1 tablespoon apple cider vinegar - Salt and pepper to taste For this Broccoli Apple Salad, I focus on fresh, bright ingredients. First, choose your broccoli carefully. Look for bright green florets with no yellowing. A crisp apple adds a sweet crunch. I love Honeycrisp for its sweetness or Granny Smith for a tart kick. Next, shredded carrots add color and a bit of sweetness. Red onion brings a sharp bite, balancing the flavors. Roasted sunflower seeds add texture and nutty flavor. For the dressing, I use Greek yogurt for creaminess. You can swap it for a plant-based yogurt if preferred. Honey or maple syrup adds a touch of sweetness. Apple cider vinegar provides a tangy contrast. Don’t forget to season with salt and pepper to bring all the flavors together. This blend creates a light, refreshing dish perfect for any meal. Use the ingredients above to create a simple yet delicious salad. You can find the Full Recipe elsewhere in this article. Start by washing the broccoli florets under cool water. Make sure to remove any dirt. Cut the florets into bite-sized pieces. This helps them mix well with other ingredients. Next, bring a pot of water to a boil. Blanch the broccoli in the boiling water for about 2 minutes. This step brightens the color and keeps it crisp. After that, transfer the broccoli to an ice bath. This stops the cooking and keeps the broccoli fresh. In a large bowl, combine the blanched broccoli with diced apple, shredded carrots, and chopped red onion. Mixing these ingredients adds color and flavor. Toss everything gently to ensure even mixing. You want every bite to have a bit of everything. In a small bowl, whisk together Greek yogurt, honey or maple syrup, apple cider vinegar, salt, and pepper. Mixing these ingredients creates a creamy dressing. Make sure it’s smooth and well combined. Taste the dressing and adjust the seasoning as needed. You may want it sweeter or saltier. Pour the dressing over the broccoli mixture. Fold the salad gently to coat everything evenly in the dressing. Finally, sprinkle roasted sunflower seeds on top. This adds a nice crunch and flavor. Give it one last gentle toss. Your Broccoli Apple Salad is now ready to enjoy! For the complete recipe, check the [Full Recipe]. To make a great broccoli apple salad, you need fresh ingredients. Look for bright green broccoli with tight florets. The stalks should feel firm and not limp. For the apples, choose ones that are crisp and firm, like Honeycrisp or Granny Smith. They add a nice crunch and sweet-tart flavor to the salad. Blanching the broccoli helps keep its bright green color and crisp texture. Boil water in a large pot. Once boiling, add the broccoli florets for about 2 minutes. After that, quickly transfer them to an ice bath. This stops the cooking and keeps the broccoli crunchy. Drain well before mixing it with other ingredients. If you want to switch things up, you can change the dressing. Instead of Greek yogurt, try tahini for a nutty flavor. A vinaigrette made with olive oil and lemon juice also works well. It gives a light and zesty taste. For sweeteners, honey is great, but maple syrup is a good choice too. If you prefer less sugar, try using agave syrup or even mashed ripe bananas for natural sweetness. Serving your salad well makes it even more appealing. Use a large, colorful bowl to show off the bright greens and reds. You can also serve it on individual plates for a nice touch. For garnishes, consider adding extra sunflower seeds on top. They add crunch and look pretty. A sprinkle of fresh parsley or chives can brighten the dish and add flavor. For the full recipe, check out the details above. {{image_2}} You can easily change this salad to fit your taste. Adding nuts or seeds gives it extra crunch. Try walnuts, almonds, or pumpkin seeds. Each adds a nice bite and healthy fats. Incorporating dried fruits can also add sweetness. Dried cranberries or raisins work great. They contrast well with the crunchy broccoli. Plus, they bring natural sugars to the mix. Seasonal versions of this salad keep it fresh and fun. In summer, try adding berries or peaches. In fall, diced pears or pomegranate seeds shine. Each season brings new flavors and colors. To make it a meal, add protein sources. Grilled chicken, chickpeas, or crumbled feta cheese boost the dish. This way, you can turn a simple salad into a hearty meal. For the full recipe, visit the Broccoli Apple Crunch Salad section. To keep your broccoli apple salad fresh, store it in an airtight container. This will help lock in moisture and flavor. Place the container in the fridge right after serving. The salad stays fresh for about 2 to 3 days. However, the apple may brown a bit over time. To slow this down, sprinkle lemon juice on the apple pieces before mixing them in. I do not recommend freezing broccoli apple salad. Freezing can change the texture of the salad. The broccoli and apples may become mushy when thawed. If you want to freeze it, try leaving out the dressing. You can freeze the salad for up to a month. When ready to enjoy, thaw it in the fridge overnight. Mix in the dressing just before serving for the best taste. You can find the full recipe in the above sections. To make a vegan Broccoli Apple Salad, simply swap the Greek yogurt for a vegan yogurt. You can use coconut, almond, or soy yogurt. For a sweetener, use maple syrup instead of honey. This keeps the salad creamy and sweet without any dairy. Yes, you can prepare this salad ahead of time. To keep it fresh, store the dressing separately. Mix the salad ingredients and chill. Add the dressing right before serving. This keeps everything crisp and tasty. This salad pairs well with grilled chicken or fish. You can also serve it with sandwiches or wraps. It makes a great side dish for any meal. Try it with quinoa or rice bowls for a complete meal. For the full recipe, check out the Broccoli Apple Crunch Salad. Enjoy! This blog post gives you a great broccoli apple salad recipe. We covered the ingredients, preparation steps, and storage tips. You can easily customize it with your favorite fruits and nuts. Remember, freshness matters. Use crisp veggies and enjoy your salad right away or store it well for later. Don't hesitate to try different dressings or flavors. With these tools, you can make a delicious, healthy dish that fits your needs. Enjoy exploring and making it your own!

Broccoli Apple Salad Refreshing and Nutritious Delight

Looking for a fresh and healthy side dish? Let me introduce you to the Broccoli Apple Salad—my go-to recipe for

- 8 oz spaghetti or rice noodles - 2 tablespoons vegetable oil - 3 garlic cloves, minced - 1 thumb-sized piece of ginger, grated - 2 tablespoons Szechuan peppercorns, toasted and crushed - 2 tablespoons chili paste (adjust for spiciness) - 2 tablespoons soy sauce (low sodium recommended) - 1 tablespoon rice vinegar - 1 tablespoon sugar - 1 cup bell peppers, julienned (red, yellow, or green) - 1 cup snow peas, trimmed - 3 green onions, chopped - Sesame seeds for garnish - Fresh cilantro for garnish To make the Spicy Szechuan Noodles, gather these ingredients first. You need fresh items for the best taste. The noodles can be spaghetti or rice noodles based on your choice. I love using rice noodles for a more authentic flavor. Next, you need a mix of aromatics. Garlic and ginger make the dish pop. Szechuan peppercorns are unique and give a special zing. They add a gentle numbing heat. Chili paste is key to the spice level. You can adjust it to fit your heat preference. Low sodium soy sauce keeps the dish balanced without too much salt. Rice vinegar adds a nice tang, while sugar helps to balance the heat. Finally, colorful veggies like bell peppers and snow peas add crunch. Green onions, sesame seeds, and cilantro make great garnishes. They give the dish a fresh look and taste. For the complete cooking process, check the Full Recipe. Keep these ingredients handy, and you will create a dish that impresses everyone! Start by bringing a large pot of salted water to a boil. This salt adds flavor to the noodles. Once the water is boiling, add 8 oz of spaghetti or rice noodles. Cook them according to the package instructions. Drain the noodles when done, and save some pasta water. This water can help if the sauce needs adjusting later. In a bowl, mix together 2 tablespoons of soy sauce, 1 tablespoon of rice vinegar, 1 tablespoon of sugar, and 2 tablespoons of chili paste. You can adjust the heat by adding more chili paste if you want. This sauce gives the noodles their bold flavor. Heat 2 tablespoons of vegetable oil in a large skillet over medium heat. Add 3 minced garlic cloves, 1 thumb-sized piece of grated ginger, and 2 tablespoons of crushed Szechuan peppercorns. Sauté these for 1-2 minutes until they smell great. Be careful not to burn them. Next, add 1 cup of julienned bell peppers and 1 cup of trimmed snow peas to the skillet. Stir-fry for about 3-4 minutes, until the vegetables are bright and still crisp. Now, it’s time to bring everything together. Add the cooked noodles to the skillet with the sautéed vegetables. Pour the sauce over the noodles and vegetables. Toss everything gently to combine. If the mixture seems dry, add a bit of the reserved pasta water. This helps achieve the right consistency. Once everything is heated through, remove the skillet from the heat. Finish the dish with chopped green onions, sesame seeds, and fresh cilantro for extra flavor and color. Serve the spicy Szechuan noodles while hot. Enjoy the bold and flavorful taste that brings Szechuan cuisine right to your table! For more details, check out the Full Recipe. To make your Szechuan noodles stand out, you must balance flavors well. First, adjust the spiciness with chili paste. Start with two tablespoons, then taste. If you like it hotter, add more chili paste a little at a time. This way, you control the heat without overpowering the dish. Next, balance sweetness with sugar. The sugar helps tone down the spice a bit. Try one tablespoon first, and taste again. If the dish feels too spicy, a pinch more sugar can help. This balance makes the noodles delicious. Choosing the right noodle is key for great texture. I recommend using spaghetti or rice noodles. Spaghetti gives a nice chew, while rice noodles absorb flavors well. Whichever you choose, cook according to package instructions for the best results. When it comes to vegetables, keep them crunchy. I use bell peppers and snow peas for color and crunch. Stir-fry them for just a few minutes. You want them vibrant and slightly tender, not mushy. This way, they add a nice bite to your dish. To make your Szechuan noodles look restaurant-worthy, focus on garnishing. After plating, sprinkle some chopped green onions on top. They add color and a fresh taste. Next, add a dash of sesame seeds for crunch. Lastly, a few sprigs of fresh cilantro enhance the look and flavor. This simple touch makes your meal pop. For the full recipe, be sure to check out the detailed steps. {{image_2}} You can easily make this dish vegetarian. Swap the meat for tofu or mushrooms. Tofu adds protein and absorbs flavors well. Use firm tofu for a nice texture. Sauté it until golden for extra taste. Mushrooms give a rich, umami flavor. Shiitake or portobello work wonderfully here. Both options keep the dish bold and satisfying. For a gluten-free version, choose rice noodles and tamari. Rice noodles are light and cook quickly. They absorb the spicy sauce well. Tamari is a great substitute for soy sauce. It has a similar flavor but is gluten-free. This option keeps the dish tasty for those avoiding gluten. Want to add more protein? Chicken, beef, or shrimp are excellent choices. Thinly slice the chicken or beef for quick cooking. Cook meat until browned and add it to the stir-fry. Shrimp cooks fast and adds a sweet flavor. This variation makes the noodles even heartier. Each protein option brings its own unique taste. Check out the Full Recipe for all the details! To keep your spicy Szechuan noodles fresh, place them in an airtight container. This helps prevent drying out. Refrigerate the noodles within two hours of cooking. They will stay good for up to three days. When ready to eat, check for any signs of spoilage. If they look or smell off, it’s best to discard them. When you’re ready to enjoy leftovers, there are a few good ways to reheat them. The best method is using a skillet. Heat a bit of oil over medium heat. Add the noodles and stir them well until hot. This method helps keep the flavors strong and the texture nice. You can also use the microwave. Place the noodles in a bowl, cover with a damp paper towel, and heat for one to two minutes. Stir halfway through for even heating. If you want to save some noodles for later, freezing is a great choice. First, let the noodles cool completely. Then, transfer them to a freezer-safe bag. Remove as much air as possible before sealing. They can last up to three months in the freezer. When you’re ready to eat, thaw them overnight in the fridge. Reheat them using the methods mentioned above for the best taste and texture. For the full recipe, check out the complete guide to making these delicious noodles. Szechuan noodles are a spicy dish from China. They feature bold flavors and a mix of textures. You usually find them stir-fried with colorful veggies and a spicy sauce. The unique taste comes from Szechuan peppercorns, which give a numbing heat. You can use spaghetti or rice noodles for a great bite. Yes, you can prepare Szechuan noodles ahead of time! Cook the noodles and veggies, then store them separately. Keep the sauce in a jar for easy access. When you are ready, heat everything in a pan. This method saves time on busy days. If you don't have Szechuan peppercorns, you can use alternatives. Crushed red pepper flakes add heat but lack the unique flavor. You can also try black pepper or allspice for different tastes. Just remember, these substitutes will change the dish's character a bit. Adjusting the spice level is easy! Start with less chili paste in the sauce. Taste and add more if you want more heat. You can also add sugar to balance the spice. If it gets too hot, add a splash of vinegar to cut the heat. Enjoy the heat just the way you like it! For the full recipe, check out the section above. This recipe for Szechuan noodles combines flavorful ingredients and simple steps. You can cook the noodles, prepare a tasty sauce, and sauté fresh veggies in no time. Adjust the spice and sweetness to suit your taste. Consider the variations for vegetarian or gluten-free options. Proper storage ensures your leftovers stay delicious. Enjoy these noodles as a quick weeknight meal or a fun dish for friends. Happy cooking!

Spicy Szechuan Noodles Bold and Flavorful Recipe

Craving an explosion of flavors? You’ve come to the right place! In this post, I’ll guide you through making Spicy

- 4 salmon fillets (6 oz each) - 2 tablespoons sesame oil - 2 tablespoons soy sauce (low sodium) - 1 tablespoon fresh ginger, grated - 2 cloves garlic, minced - 1 tablespoon honey - 1 tablespoon rice vinegar - 1 tablespoon sesame seeds (white or black) - 2 green onions, sliced (for garnish) - Salt and pepper to taste - Optional: Fresh cilantro for garnish You will love how these ingredients come together. Each one adds a unique touch to the dish. The salmon fillets stand out as the star, rich in omega-3 fats. Using sesame oil and soy sauce gives a savory base. The fresh ginger and garlic add a nice kick. Honey balances the flavors with a sweet note. Garnishes like sesame seeds and green onions make it pretty. They also add texture and freshness. A splash of rice vinegar brightens the dish too. You can even add cilantro if you like fresh herbs. With the right mix of ingredients, you create a dish that's both flavorful and healthy. You can find the full recipe above, where I share all the steps to make this delicious salmon. - Preheat the oven to 400°F (200°C). - Prepare the marinade by combining sesame oil, soy sauce, ginger, garlic, honey, and rice vinegar. I find that starting with a hot oven is key to getting the best texture. The marinade adds a rich flavor to the salmon. Mix all the marinade ingredients in a bowl. Whisk until smooth. That simple step sets the stage for great taste. - Season salmon fillets with salt and pepper, place on baking sheet, and pour marinade over them. - Let the salmon marinate for at least 15 minutes before baking. Season each salmon fillet lightly with salt and pepper. This enhances the dish's flavor. Place the fillets on a lined baking sheet. Pour the marinade over the salmon, ensuring each piece gets coated. Allow the salmon to marinate for 15 minutes. This wait is worth it; it helps the fish absorb all those flavors. - Sprinkle sesame seeds over salmon and bake for 12-15 minutes. - Check for doneness; salmon should flake easily with a fork. Once the salmon has marinated, sprinkle sesame seeds on top. This adds a nice crunch. Bake it in the preheated oven for 12-15 minutes. Keep an eye on it. You want the salmon to flake easily with a fork. This shows it is done perfectly. Enjoying this dish is easy, and it is filled with flavor! For the complete instructions, check the Full Recipe section. - Use a meat thermometer to ensure salmon reaches 145°F (63°C) for safe consumption. - Adjust cooking time based on the thickness of the salmon fillets. Cooking salmon well can be tricky. If your fillet is thick, it may need a bit more time. A thinner piece cooks faster, so keep an eye on it. Using a meat thermometer helps you avoid overcooking. I find that pulling it out just before it hits 145°F lets it stay juicy. - Marinate for a longer duration for deeper flavor infusion (up to 1 hour). - Consider using fresh herbs to enhance the marinade's aroma and taste. Marinating salmon is key to flavor. I often let it sit for at least 30 minutes. If you have time, an hour works wonders! Fresh herbs like cilantro or parsley can add bright notes to your dish. You can mix them right in or sprinkle them on top before serving. - Pair with steamed vegetables or rice for a complete meal. - Drizzle with additional sesame oil before serving for extra flavor. I love serving baked sesame ginger salmon with steamed broccoli or green beans. They add color and nutrients to your plate. A drizzle of sesame oil on top just before serving gives an extra punch. You can also add a side of fluffy rice for a hearty meal. For the full recipe, check earlier sections. Enjoy your cooking! {{image_2}} You can easily change the flavors of this dish. Add citrus zest like lime or orange for a tangy twist. This brightens the dish and adds freshness. Another idea is to swap honey with maple syrup. This gives the fish a different sweet note that pairs well with the ginger. You don’t have to stick with salmon! You can use other fish like trout or cod while keeping the marinade the same. Each fish brings its own taste and texture. If you want a crunch, swap sesame seeds for crushed nuts. This adds a nice texture contrast and a nutty flavor. Grilling is a fun cooking method for this dish. Grill the salmon over medium heat to give it a smoky flavor. It’s a great way to enjoy the outdoors while cooking. If you prefer a very tender texture, try slow cooking. This method makes the salmon melt in your mouth and enhances the flavors well. Store leftovers in an airtight container in the refrigerator for up to 3 days. I recommend keeping the salmon covered to lock in moisture. When you're ready to eat, reheat gently in the oven. This helps avoid drying it out. You can also use the microwave if you're in a hurry, but it may not be as tasty. You can freeze marinated salmon prior to cooking for up to 3 months. This is a great way to save time on busy days. Just place the marinated salmon in a freezer bag, and squeeze out the air before sealing. When you're ready to cook, thaw it in the refrigerator overnight. This keeps the salmon juicy and flavorful before baking. For even reheating, always use the oven. This retains the salmon's texture. Preheat your oven to 350°F (175°C) and place the salmon on a baking sheet. Heat for about 10 minutes or until warm. Avoid reheating in the microwave for best results, as it can make the salmon rubbery. Enjoy your delicious meal again! - Look for the salmon to flake easily with a fork and have an opaque color. This means it is done and safe to eat. The flesh should not be raw or translucent. - Yes, just ensure it is thawed completely before proceeding with the recipe. Thawing helps the salmon cook evenly. You can thaw it in the fridge overnight or use the cold water method for quicker results. - Consider serving with jasmine rice, quinoa, or a fresh salad. These sides add texture and balance. They also soak up the delicious sauce from the salmon. - 15 minutes is recommended, but marinating for up to 1 hour enhances flavor. This allows the marinade to seep into the fish. The longer it sits, the more tasty it becomes. - You can find the full recipe below in the ingredients and instructions sections. This will guide you step-by-step for a perfect dish every time. This blog post covered how to make baked sesame ginger salmon. You learned the key ingredients, marinating steps, and cooking tips to make the dish delicious. Remember, marinating adds flavor, and adjusting the cooking method gives variety. You can also store leftovers safely and enjoy them later. With these simple steps, you can impress anyone at your table. Enjoy experimenting with flavors and serving this tasty meal!

Baked Sesame Ginger Salmon Flavorful and Healthy Dish

Are you looking for a healthy dish that bursts with flavor? Baked sesame ginger salmon is a perfect choice! This

- 2 cups graham cracker crumbs - 1/2 cup unsalted butter, melted - 1/4 cup granulated sugar - 4 (8 oz) packages cream cheese, softened - 1 cup granulated sugar - 1 tablespoon vanilla extract - 1 vanilla bean, split and seeds scraped out - 4 large eggs - 1 cup sour cream - Zest of 1 lemon - 1/4 teaspoon salt When making this cheesecake, use high-quality cream cheese. It makes the filling smooth and rich. Let the cream cheese soften at room temperature. This step helps with mixing. For the vanilla bean, look for one that feels plump and fragrant. The seeds add amazing flavor. Fresh lemon zest brightens the cheesecake, making it taste fresh and light. You can swap graham cracker crumbs with digestive biscuits. They bring a different taste but work well. If you don’t have unsalted butter, use salted butter. Just skip adding extra salt. For a lighter version, try using Greek yogurt instead of sour cream. It gives a similar creaminess with less fat. If you can't find a vanilla bean, use more vanilla extract. One extra teaspoon can work in a pinch. {{ingredient_image_1}} To start, grab a medium bowl. Mix together 2 cups of graham cracker crumbs, 1/2 cup melted butter, and 1/4 cup granulated sugar. Stir until it looks like wet sand. This mix should hold together when pressed. Next, take a 9-inch springform pan. Press the mix firmly into the bottom. Make sure it spreads evenly. Now, bake this crust in a preheated oven at 350°F for 10 minutes. After that, remove it and let it cool while you work on the filling. In a large mixing bowl, add 4 packages of softened cream cheese. Use an electric mixer on medium speed to beat it until smooth and creamy. This should take about 2-3 minutes. Gradually add 1 cup of granulated sugar. Scrape down the sides of the bowl to mix it well. Next, add 1 tablespoon of vanilla extract, the seeds from a split vanilla bean, 1 cup of sour cream, the zest of 1 lemon, and 1/4 teaspoon of salt. Mix everything until it is fluffy and well combined. Now, it's time to add the eggs. Lower the mixer speed to low and add the eggs one at a time. Mix just until combined. Be careful not to over-mix, as this can create air bubbles that may cause cracks. Pour the cream cheese filling over your cooled crust. Smooth the top with a spatula. Bake the cheesecake at 325°F for 55-60 minutes. The edges should be set, but the center can still jiggle a bit. When it's done, turn off the oven and let the cheesecake cool inside for one hour. This helps to prevent cracks. Once it cools, take it out of the oven and refrigerate it for at least 4 hours. For the best flavor, chill it overnight. To get a smooth and creamy cheesecake, use room temperature cream cheese. Cold cream cheese can lead to lumps. Mix it well for 2-3 minutes. This helps to blend it fully. Also, add eggs one at a time on low speed. This keeps the mix smooth and light. Avoid over-mixing after adding the eggs. Too much air makes the cheesecake rise and fall, which can ruin the texture. Cracks can happen, but you can prevent them. First, bake the cheesecake at a lower temperature, around 325°F. This helps it bake evenly. Also, let the cheesecake cool in the oven after baking. Turn off the oven and keep the door slightly open for an hour. This gradual cooling prevents cracks. Lastly, do not over-mix your batter. Too much air in the mix can cause cracks as it bakes. For a delightful presentation, serve your cheesecake with fresh fruit. Strawberries, blueberries, or raspberries add color and flavor. You can also add a drizzle of chocolate or caramel sauce on top. A dollop of whipped cream makes it extra special. For a twist, sprinkle some lemon zest on top. It gives a fresh taste that pairs well with the rich cheesecake. Enjoy your creation! Pro Tips Room Temperature Ingredients: Ensure that your cream cheese and eggs are at room temperature before mixing. This helps achieve a smooth filling and prevents lumps. Prevent Cracks: To prevent cracks in your cheesecake, avoid over-mixing after adding the eggs. Mix just until combined and maintain a gentle hand. Cooling Technique: After baking, leaving the cheesecake in the oven with the door ajar for an hour allows it to cool gradually, reducing the risk of cracks. Flavor Enhancements: For extra flavor, consider adding a splash of almond extract or a pinch of nutmeg to the filling for a unique twist on traditional cheesecake. {{image_2}} You can change the flavor of the vanilla bean cheesecake easily. Try adding other extracts like almond or coconut. You can also mix in spices such as cinnamon or nutmeg for a warm touch. If you want a fruity twist, fold in some lemon or orange zest. This adds a fresh pop to each bite. While graham cracker crumbs are classic, you can use other options. Ground nuts, like almonds or pecans, make a great crust. You can also try crushed cookies, like Oreos or gingersnaps. Just mix them with melted butter and press them into your pan. Each crust gives a unique taste and texture. Toppings can elevate your cheesecake game. Fresh fruit, like berries or slices of mango, adds color and flavor. A drizzle of chocolate or caramel sauce can bring sweetness. You can also use whipped cream for a light touch. For a crunch, sprinkle some chopped nuts or toffee bits on top. These options make your cheesecake look stunning and taste even better. To keep your vanilla bean cheesecake fresh, store it in the fridge. Use an airtight container or wrap it well with plastic wrap. This helps the cheesecake stay moist and tasty. If you plan to enjoy it later, don’t add toppings until you're ready to serve. You can freeze cheesecake for longer storage. First, wrap the whole cheesecake in plastic wrap. Then, place it in a freezer-safe bag. When you're ready to eat it, move the cheesecake to the fridge to thaw overnight. This way, it will retain its creamy texture. When stored in the fridge, your cheesecake stays good for up to five days. If you freeze it, it can last up to three months. Check for spoilage if you see any discoloration or an off smell. If it looks or smells strange, it's best to throw it away. Making vanilla bean cheesecake takes about 6 hours in total. This includes 20 minutes of prep time and 55-60 minutes of baking. After baking, let it cool in the oven for an hour. Then, chill it in the fridge for at least 4 hours for the best flavor. If you can, chill it overnight. This waiting time helps the flavors blend well. Yes, you can use different types of cheese. Cream cheese is the main cheese for this recipe. However, you could mix in mascarpone or ricotta for a twist. Just keep the texture in mind. Cream cheese gives a rich and smooth result, while other cheeses can alter the flavor and texture. Serve cheesecake chilled for the best taste. You can slice it plain or add toppings. Fresh fruit, chocolate sauce, or whipped cream all make great choices. To serve, run a knife around the edges before removing the springform pan. This way, you get nice clean slices for everyone to enjoy. We covered all the key parts of making a great cheesecake. We discussed the ingredients you'll need, helpful tips, and smart substitutions. I walked you through each step, from crust to cooling. You learned tricks for texture and how to avoid cracks. We explored tasty variations and the best ways to store your cheesecake. Remember, a well-made cheesecake is rich and creamy, so enjoy every bite. Now, it's your turn to create a cheesecake that's sure to impress!

Vanilla Bean Cheesecake Delightful and Creamy Recipe

Get ready to treat yourself! This Vanilla Bean Cheesecake recipe is simple, creamy, and delightful. You’ll love how easy it

Older posts
Newer posts
← Previous Page1 … Page60 Page61 Page62 … Page86 Next →

dsad

© 2026 Cooking Wells • Built with GeneratePress

Our Policies

  • Copyright Policy
  • Cookie Policy
  • GDPR Policy
  • Privacy Policy
  • Disclaimer
  • Terms Of Use

More Information

  • Home
  • About
  • Contact
  • Appetizers
  • Dessert
  • Dinner
  • Drinks
©2026, Cooking Wells About Back To Top