Skip to content
DisclaimerTerms Of UseGDPR PolicyCookie Policy

Cooking Wells

  • Home
  • Drinks
  • Appetizers
  • Dinner
  • Dessert
  • About
  • Contact
  • Privacy Policy
DisclaimerTerms Of UseGDPR PolicyCookie Policy

NO-ING-IMG

- 2 large cucumbers - 1 cup shredded red cabbage - 1 carrot - 1/4 cup fresh cilantro Cucumbers are the star of this dish. They are crisp and hydrating. I prefer large cucumbers for this slaw. Shredded red cabbage adds a nice crunch and a pop of color. Carrots bring sweetness and bright orange hues. Fresh cilantro gives a burst of flavor and freshness. - 2 tablespoons rice vinegar - 1 tablespoon honey - 1 teaspoon sesame oil For the dressing, rice vinegar adds a tangy taste. Honey balances the vinegar's acidity with sweetness. Sesame oil gives a rich, nutty flavor that ties everything together. - 1 teaspoon fresh ginger - 1/2 teaspoon red pepper flakes - Salt and pepper to taste Fresh ginger adds warmth and depth. Red pepper flakes bring a gentle heat to the slaw. Salt and pepper enhance all the flavors and make each bite better. For the Full Recipe, you can find all the details to create this dish. Enjoy crafting your refreshing cucumber slaw! To start, you will need to slice and peel the cucumbers. Use a sharp knife for clean cuts. Thin slices give the slaw a nice crunch. Next, shred the cabbage. I find using a box grater or a food processor makes this easy. Lastly, grate the carrot. This adds color and sweetness. Combine these veggies in a large bowl. Toss them gently to mix everything well. Now, let’s whisk together the dressing ingredients. In a smaller bowl, add the rice vinegar, honey, and sesame oil. Then, grate fresh ginger into the bowl. Add red pepper flakes, salt, and pepper. Whisk until all the ingredients blend together. This dressing will give the slaw a zesty kick that you will love. Pour the dressing over the mixed vegetables. Toss everything together so the dressing coats each piece. Let the slaw sit for at least 15 minutes. This time helps the flavors blend well. The cucumbers will also release some moisture, making the slaw even better. Serve it chilled or at room temperature. This dish is perfect as a side. For the full recipe, check the Zesty Cucumber Slaw section. To make your cucumber slaw even better, try adding fresh herbs. Mint or dill can give it a bright taste. You can also add nuts like peanuts or almonds for a nice crunch. This extra texture makes every bite more fun and satisfying. Let your slaw sit for at least 15 minutes. This helps the flavors mix well. It also allows the cucumbers to lose some water, which improves texture. Always use fresh ingredients for the best taste. Fresh veggies make the slaw crisp and vibrant. This slaw pairs well with grilled meats like chicken or fish. It adds a cool contrast to hot dishes. You can also serve it as a light lunch. Just add some protein like grilled shrimp or tofu, and you have a tasty meal. {{image_2}} For a rich twist, you can make creamy cucumber slaw. Simply add mayonnaise or yogurt to the mix. Start with about 1/2 cup of mayo or yogurt. This will give the slaw a smooth texture. Mix it in with the dressing before you combine it with the veggies. This version is great for those who love creamy salads. It pairs well with grilled meats and adds a nice touch to picnics. If you like heat, try spicy cucumber slaw. You can add jalapeños or chili paste to kick it up a notch. Start with one finely chopped jalapeño. If you want it even spicier, add a teaspoon of chili paste. Mix these in with the veggies and dressing. This version brings a fun zing to the dish and really wakes up your taste buds. It’s perfect for summer barbecues or taco nights. You can also switch up the dressing for different flavors. Try using balsamic vinegar or lime juice instead of rice vinegar. For balsamic, use the same amount as the rice vinegar. If you choose lime juice, start with the juice of one lime. This adds a fresh and tangy taste to the slaw. Feel free to experiment with herbs like dill or mint for extra zest. These alternative dressings keep the dish light and refreshing. For the full recipe, check out the Zesty Cucumber Slaw. To store leftover cucumber slaw, place it in an airtight container. This keeps the slaw fresh. Make sure the container seals well to avoid air exposure. You can also cover the bowl tightly with plastic wrap. Keep it in the fridge to maintain its crunch. Avoid adding dressing to the slaw until you are ready to eat. This prevents sogginess. You can safely keep cucumber slaw in the fridge for about 3 days. After that, the texture may change. If it gets too soft, it might not taste as good. Always check for any off smells or changes in color before eating. If you notice any, it’s best to throw it away. Freezing cucumber slaw is not the best option. Cucumbers contain a lot of water, which makes them mushy when thawed. The texture will not be the same. If you want to save the slaw, consider freezing the dressing instead. You can then mix it with fresh veggies later. This keeps the flavors intact and ensures a crisp texture. To keep your cucumber slaw crispy, start by using fresh cucumbers. Slice them thinly and sprinkle salt on them. This draws out excess moisture. Let them sit for about 10 minutes, and then rinse and drain. This method keeps the cucumbers crunchy. You can also add crunchy veggies like carrots or bell peppers for more texture. Yes, you can make cucumber slaw ahead of time. Prepare the veggies and dressing separately. Mix them just before serving. If you mix too early, the slaw may become soggy. Store the slaw in the fridge for up to two days. Keep the dressing in a sealed jar for freshness. Cucumber slaw pairs well with many dishes. Try it with grilled chicken or fish. It also works great with tacos or sandwiches. Use it as a fresh side for barbecues. You can even serve it on top of burgers for a crunch. Cucumber slaw is healthy and low in calories. Each serving has about 60 calories. Cucumbers are mostly water, making them hydrating. They also provide vitamins and minerals. The veggies in the slaw add fiber, which is good for digestion. The dressing is light and uses simple ingredients. You can find the complete Zesty Cucumber Slaw recipe [here](#). Cucumber slaw offers a refreshing crunch with simple ingredients. You learned how to prepare it and enhance its flavor. Try variations like creamy or spicy to keep meals exciting. Proper storage helps maintain freshness, so no waste occurs. Overall, cucumber slaw is a healthy, versatile dish you can enjoy. Don't hesitate to experiment and find your perfect twist!

Cucumber Slaw Simple and Refreshing Side Dish

Ready to add a burst of freshness to your meals? Cucumber slaw is a simple and tasty side dish that

To make Zucchini Chickpea Patties, gather these key ingredients: - 2 medium zucchinis, grated - 1 can (15 oz) chickpeas, drained and rinsed - 1/2 cup breadcrumbs (or gluten-free alternative) - 1/4 cup grated Parmesan cheese (or nutritional yeast for a vegan option) - 1/4 cup fresh parsley, chopped - 2 green onions, sliced - 2 cloves garlic, minced - 1 teaspoon ground cumin - 1 teaspoon smoked paprika - Salt and pepper to taste - 1 large egg (or a flax egg for a vegan option) - Olive oil for frying Having fresh, quality ingredients makes a big difference. The zucchinis add moisture, while chickpeas give protein. You can swap breadcrumbs with gluten-free ones if needed. For vegan diets, use nutritional yeast and a flax egg. Variations can keep this meal exciting. Try adding spices like chili powder for heat or fresh herbs like dill or cilantro for extra flavor. You can also play with cheese types or skip it altogether. This flexibility helps you create your perfect patty. For the full recipe, refer to the earlier section. Enjoy the cooking process! 1. Grate zucchini and remove moisture Start by grating the zucchinis. Use a box grater or a food processor. After grating, place the zucchini in a clean kitchen towel. Squeeze out as much moisture as you can. This helps keep the patties from being soggy. 2. Mash chickpeas and mix with other ingredients Open a can of chickpeas. Drain and rinse them well. Use a fork or a potato masher to mash them in a large bowl. Aim for a coarsely blended texture. You still want some chunks for good flavor. Next, add the grated zucchini, breadcrumbs, Parmesan cheese, parsley, green onions, minced garlic, cumin, smoked paprika, salt, and pepper. Mix everything until it’s well combined. 3. Form and cook the patties Beat one large egg in a small bowl. If you prefer a vegan option, mix 1 tablespoon of ground flaxseed with 2.5 tablespoons of water and let it sit for five minutes. Add the egg or flax egg to the mixture and stir well. Now, form the mixture into patties about 2-3 inches in diameter. You should yield around 8-10 patties depending on size. 4. Cooking tips for perfect patties Heat olive oil in a skillet over medium heat. Once hot, add the patties. If your skillet is small, cook in batches. Fry each patty for about 4-5 minutes on each side. You want them to be golden brown and crispy. After cooking, place the patties on a plate lined with paper towels. This will help drain any excess oil. For the full recipe, check out the detailed instructions above! To make great zucchini chickpea patties, moisture control is key. Start by grating the zucchinis and put them in a clean kitchen towel. Squeeze out the moisture. This step helps keep the patties from being soggy. If you want a vegan option, use a flax egg. Mix 1 tablespoon of ground flaxseed with 2.5 tablespoons of water. Let it sit for five minutes until it thickens. This will bind the ingredients well. Frying techniques matter too. Heat olive oil in a skillet over medium heat. When the oil is hot, add the patties carefully. Cook for about four to five minutes on each side. They should look golden brown and crispy. This method ensures a nice texture and flavor. Use these tips to make Zesty Zucchini Chickpea Patties that everyone will love. For the full recipe, be sure to check out the complete instructions. {{image_2}} You can easily change the taste of your zucchini chickpea patties. Adding spices or herbs gives them a fresh twist. Try adding a pinch of cayenne for heat or fresh basil for a sweet flavor. You can also mix in Italian seasoning or herbs de Provence for a fragrant touch. If you need a gluten-free option, use almond flour or crushed oats instead of breadcrumbs. These alternatives work great and keep the patties firm. They taste just as good and add a nutty flavor. For extra creaminess, consider using vegan cheese substitutes. Nutritional yeast adds a cheesy flavor without dairy. You can also try vegan cream cheese for a richer taste. These small changes can make your patties unique and delicious. Explore these variations to find your favorite. Each option adds its own charm to the dish. For the full recipe, check out the complete instructions above. To keep your zucchini chickpea patties fresh, refrigerate them within two hours of cooking. Place them in an airtight container. They will stay good for up to three days in the fridge. If you want to store them for a longer time, freezing is the way to go. First, let the patties cool completely. Then, layer them between parchment paper in a freezer-safe bag. They can last for up to three months in the freezer. When you are ready to eat them again, reheating is simple. For the best texture, heat a skillet over medium heat. Add a little olive oil and place the patties in the pan. Cook them for about 4-5 minutes on each side until they are warm and crispy again. You can also use an oven. Preheat it to 375°F (190°C) and bake for about 10-15 minutes. This method helps keep the outside nice and crunchy. With these storage tips, your zucchini chickpea patties will stay tasty and ready for your next meal! Can I make these patties ahead of time? Yes, you can make these patties ahead of time. Form the patties and store them in the fridge for up to 24 hours. This saves time when you're ready to cook. You can also freeze them. Just make sure to place parchment paper between each patty before freezing. This way, they won't stick together. What can I substitute for chickpeas? If you don’t have chickpeas, you can use black beans or white beans. Mash them the same way you do with chickpeas. Each option brings a different flavor and texture, but all work well in this recipe. How do I know when they are cooked? You can tell the patties are cooked when they turn golden brown on the outside. They should feel firm to the touch. If they are crispy and browned on both sides, they are ready to enjoy! Can I bake these instead of frying? Yes, you can bake these patties for a healthier option. Preheat your oven to 400°F (200°C). Place the patties on a baking sheet lined with parchment paper. Bake for about 20-25 minutes, flipping halfway through. They will be less crispy but still tasty. This way, you can enjoy Zucchini Chickpea Patties with less oil. For the full recipe, check the earlier section! In this blog post, we explored how to make delicious zucchini chickpea patties. You learned the key ingredients, step-by-step instructions, and helpful tips. I shared flavor variations, storage methods, and answers to common questions. These patties are simple to prepare and very tasty. Mix and match ingredients to suit your taste. Enjoy these healthy treats anytime!

Zucchini Chickpea Patties Simple and Flavorful Meal

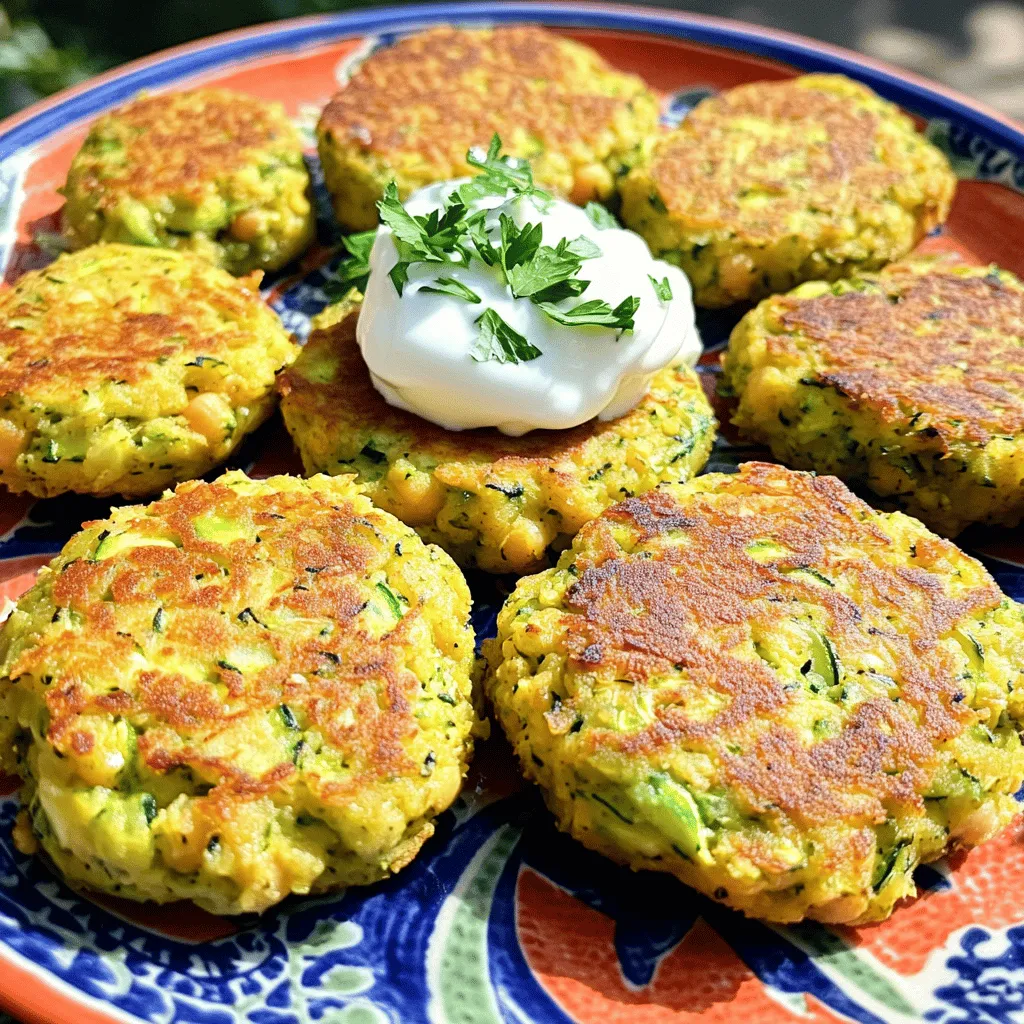
Looking for a quick and tasty meal that bursts with flavor? Zucchini Chickpea Patties are the answer! These simple patties

To make a peach blueberry cobbler, you'll need some simple, fresh ingredients. Here’s what to gather: - 4 ripe peaches, peeled and sliced - 2 cups fresh blueberries - 1/2 cup granulated sugar - 1 teaspoon cinnamon - 1 teaspoon vanilla extract - 1 tablespoon lemon juice - 1 cup all-purpose flour - 1/2 cup brown sugar - 1 tablespoon baking powder - 1/2 teaspoon salt - 1/2 cup unsalted butter, melted - 1 cup milk These main ingredients create a sweet and fruity base for your cobbler. The peaches bring a juicy sweetness, while the blueberries add a burst of tart flavor. Want to make your cobbler extra special? Consider adding these optional ingredients: - 1/4 teaspoon nutmeg for warmth - 1 tablespoon of cornstarch to thicken the fruit - A splash of almond extract for a nutty twist - Fresh mint leaves for garnish These additions can deepen the flavors and make your dish stand out. Feel free to experiment with what you have on hand. If you don't have something on hand, you can easily swap ingredients. Here are some ideas: - Use frozen peaches or blueberries for convenience - Substitute coconut milk for regular milk for a dairy-free option - If you're out of granulated sugar, brown sugar works well too - Use whole wheat flour instead of all-purpose flour for added nutrition With these flexible options, you can create a delicious cobbler that fits your pantry and taste. For the full recipe, check the earlier section. Start by washing your peaches and blueberries. Peel the peaches, then slice them into thin pieces. In a big bowl, mix the sliced peaches with 2 cups of fresh blueberries. Add 1/2 cup of granulated sugar, 1 teaspoon of cinnamon, 1 teaspoon of vanilla extract, and 1 tablespoon of lemon juice. Toss the fruit gently until it is well coated. This step brings out the fruit's sweet flavors. Once mixed, transfer it into a greased 9x13 inch baking dish. In a separate bowl, whisk together 1 cup of all-purpose flour, 1/2 cup of brown sugar, 1 tablespoon of baking powder, and 1/2 teaspoon of salt. Pour in 1/2 cup of melted unsalted butter and 1 cup of milk. Stir until just combined. Don’t worry if it looks lumpy; this is normal! You want a batter that is thick but still spreadable. Spoon the cobbler batter evenly over the fruit mixture in your baking dish. Now, it’s time to bake your cobbler! Preheat your oven to 375°F (190°C). Place your cobbler in the oven and bake for 30-35 minutes. Keep an eye on it. You want the top to turn golden brown and the fruit to bubble around the edges. Once it looks perfect, remove it from the oven. Let it cool for about 10 minutes before serving. For a delightful touch, serve it warm with a scoop of vanilla ice cream or whipped cream on top. Enjoy! To get the best texture, use ripe peaches. They should feel soft yet firm. Fresh blueberries add a juicy burst. The batter should be thick but not dry. Spoon it gently over the fruit. This keeps the fruit from sinking. Bake until the top is golden brown and the fruit bubbles. You can add a pinch of nutmeg with the cinnamon. This gives a warm taste. Fresh mint leaves are great for a fresh kick. Try using almond extract instead of vanilla for a twist. You can also mix in a bit of orange zest for added brightness. One mistake is using overly ripe fruit. It can turn mushy in the oven. Another is overmixing the batter. This can make the cobbler dense. Make sure your oven is preheated. A cold oven can lead to uneven baking. Lastly, don’t rush the cooling time. It helps the cobbler set properly and makes serving easier. {{image_2}} To make a gluten-free version, swap the all-purpose flour with a gluten-free blend. Look for a blend that has xanthan gum. This gum helps with texture and binding. Use the same amount of gluten-free flour as the recipe calls for. The rest of the ingredients stay the same. You will still enjoy that sweet, fruity goodness. To make this cobbler vegan, replace the milk with almond milk or oat milk. For the butter, use coconut oil or a vegan butter substitute. Simply melt it like you would with regular butter. The rest of the recipe remains unchanged. You will still get a delightful taste and texture without any animal products. Want to switch things up? Try other fruits for a fun twist. Apples and raspberries work great together. You can also mix strawberries and peaches for a summer delight. Cherries add a nice tartness that pairs well with blueberries. Mix and match to find your favorite combo. Each fruit brings its own flavor profile, making each cobbler unique. To store leftover cobbler, let it cool first. Place it in an airtight container. You can keep it in the fridge for up to three days. This helps maintain its texture and flavor. Cover the top with plastic wrap to prevent drying out. If you want to freeze your cobbler, wait until it cools completely. Cut it into slices for easier thawing. Wrap each slice tightly in plastic wrap. Then, place the wrapped slices in a freezer-safe bag or container. You can freeze it for up to three months. Make sure to label the bag with the date. To reheat your cobbler, preheat the oven to 350°F (175°C). Place the cobbler in an oven-safe dish. Cover it with foil to keep it moist. Heat it for about 20 minutes. For individual slices, microwave them for about 30-45 seconds. Enjoy your delicious cobbler warm, just like when it was fresh! For the full recipe, check the section above. Yes, you can use frozen fruit. Just make sure to thaw and drain them first. This helps avoid extra water in your cobbler. Frozen peaches and blueberries work well, too. Your cobbler is done when it is golden brown on top. The fruit should bubble around the edges. A toothpick inserted in the batter should come out clean, showing it has cooked through. I love serving my cobbler warm with a scoop of vanilla ice cream. Whipped cream is another great choice. Fresh mint leaves add a nice touch too! Yes, you can prepare the fruit and batter ahead of time. Just store them separately in the fridge. When ready to bake, combine them in the baking dish and follow the baking instructions. For the complete recipe, check out the Full Recipe section. You’ll find all the steps and ingredients needed for this yummy dish. Peach blueberry cobbler is delicious and easy to make. We explored key ingredients, prep steps, and helpful tips. We also looked at tasty variations, storage tips, and answers to common questions. Remember, you can use fresh or frozen fruit depending on what you have. With practice, you’ll avoid common mistakes and nail the perfect texture. This recipe lets you enjoy fresh flavors any time. Happy baking, and enjoy your cobbler with friends and family!

Peach Blueberry Cobbler Simple and Delicious Recipe

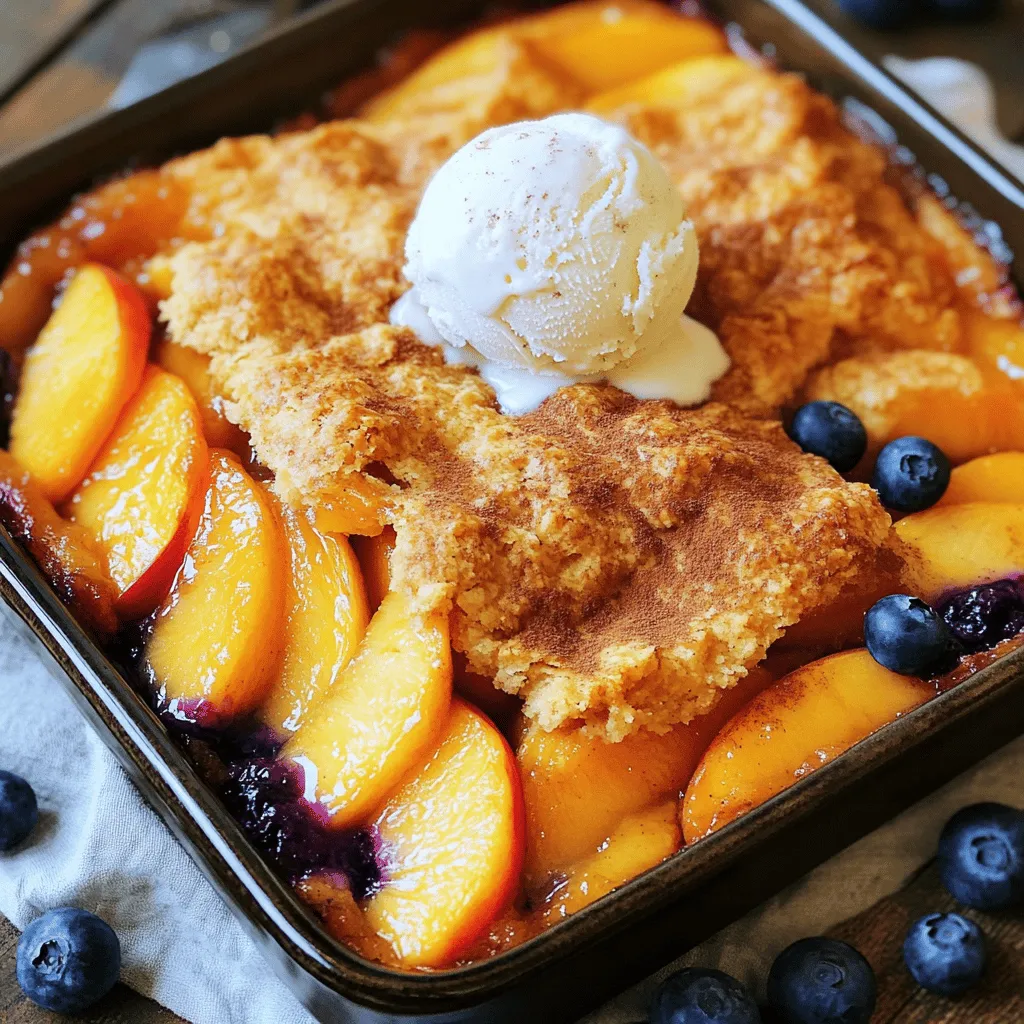
Craving a warm, sweet dessert that’s easy to make? Look no further! My Peach Blueberry Cobbler recipe combines juicy peaches

To make delicious zucchini oat muffins, gather these key ingredients: - 1 medium zucchini, grated - 1 cup rolled oats - 1 cup whole wheat flour - 1/2 cup brown sugar (or coconut sugar for a healthier option) - 1/2 cup unsweetened applesauce - 1/3 cup honey or maple syrup - 1/4 cup vegetable oil or melted coconut oil - 1 large egg - 1 teaspoon vanilla extract - 1 teaspoon baking powder - 1/2 teaspoon baking soda - 1/2 teaspoon cinnamon - 1/4 teaspoon salt - Optional: 1/2 cup chocolate chips or nuts for added texture Each ingredient in these muffins offers unique health benefits: - Zucchini: Low in calories and high in fiber, zucchini helps keep you full. - Rolled oats: Rich in whole grains, oats support heart health and digestion. - Whole wheat flour: This flour adds fiber and nutrients compared to white flour. - Brown sugar: A natural sweetener that adds a hint of molasses flavor. - Unsweetened applesauce: It reduces fat and sugar while adding moisture. - Honey or maple syrup: Natural sweeteners that provide antioxidants. - Vegetable oil or coconut oil: These healthy fats support heart health. - Egg: Adds protein and helps with structure in baking. - Vanilla extract: Enhances flavor and may boost mood. - Baking powder and baking soda: These leavening agents help muffins rise. - Cinnamon: A spice that adds warmth and may lower blood sugar levels. - Salt: Balances flavors and enhances sweetness in baked goods. - Chocolate chips or nuts: Optional ingredients that add taste and texture. Don’t worry if you lack certain ingredients! Here are some easy swaps: - Zucchini: Substitute with carrot or apple for different flavors. - Whole wheat flour: Use almond flour or oat flour for a gluten-free option. - Brown sugar: Replace with coconut sugar or maple syrup for a lighter choice. - Applesauce: Use mashed banana if you prefer a different fruit flavor. - Egg: Use a flax egg or applesauce for a vegan version. - Vegetable oil: Swap with olive oil or melted butter for taste. - Chocolate chips: Try dried fruit or seeds for a healthier touch. These muffins are flexible, so mix and match to fit your taste! For the full recipe, check out the instructions above. Start by preheating your oven to 350°F (175°C). This helps the muffins bake evenly. Next, grab a medium zucchini and grate it using a box grater. If your zucchini has a lot of water, squeeze it in a clean towel to remove excess moisture. This keeps your muffins from being too soggy. In a large bowl, mix the dry ingredients. Combine 1 cup of rolled oats, 1 cup of whole wheat flour, and 1/2 cup of brown sugar. Add 1 teaspoon of baking powder, 1/2 teaspoon of baking soda, 1/2 teaspoon of cinnamon, and 1/4 teaspoon of salt. Stir well to blend all the dry ingredients together. In a separate bowl, whisk together the wet ingredients. You will need 1/2 cup of unsweetened applesauce, 1/3 cup of honey or maple syrup, and 1/4 cup of vegetable oil. Add 1 large egg and 1 teaspoon of vanilla extract. Mix until smooth and creamy. Pour the wet ingredients into the bowl with dry ingredients. Add the grated zucchini and optional mix-ins like chocolate chips or nuts. Stir gently until just combined; a few lumps are fine. Next, divide the batter evenly among your muffin cups, filling each about 2/3 full. Bake in the preheated oven for 18-20 minutes. To check if they’re done, insert a toothpick in the center. If it comes out clean, they’re ready! Let the muffins cool in the tin for 5 minutes before transferring them to a wire rack to cool completely. Enjoy your tasty and healthy zucchini oat muffins! For the full recipe, check out the recipe section above. To get the best texture, make sure to squeeze out excess moisture from the zucchini. This keeps the muffins light and fluffy. If you leave too much water in, the muffins can turn out dense and soggy. Mix the wet and dry ingredients just until combined. Overmixing can lead to tough muffins. A few lumps are okay; they will bake out. Once your muffins cool, store them in an airtight container. They stay fresh for up to three days at room temperature. If you want to keep them longer, freeze them. Place them in a freezer-safe bag and store for up to three months. To enjoy, just thaw them at room temperature or warm them in the microwave for a few seconds. If your muffins sink in the middle, you might have added too much liquid. Check your measurements carefully next time. If they come out dry, try using a little more applesauce or oil. If the tops burn before the center is cooked, lower your oven temperature and bake a bit longer. Always test with a toothpick to check if they are done. {{image_2}} You can spice up your zucchini oat muffins with simple additions. Try adding a pinch of nutmeg for warmth. A splash of almond extract can enhance the flavor. Use ground ginger for a little zing. These spices bring different flavors and aromas. Experimenting with these can make each batch unique. Adding nuts and seeds can improve the texture and nutrition. Chopped walnuts or pecans give a nice crunch. Sunflower seeds or pumpkin seeds add healthy fats and protein. You can also mix in shredded coconut for a tropical twist. These add-ins make your muffins more filling and fun. To make these muffins vegan, swap the egg for flaxseed meal. Use 1 tablespoon of flaxseed mixed with 2.5 tablespoons of water. For gluten-free muffins, replace the whole wheat flour with almond or gluten-free flour. You can also use oat flour for a consistent flavor. These changes keep muffins tasty while meeting different diets. Feel free to check the Full Recipe for more ideas! To keep your zucchini oat muffins fresh, store them in an airtight container. This will help prevent them from drying out. Place a piece of parchment paper between layers if you stack them. Muffins taste best within three days. For longer freshness, consider refrigerating them. Just remember to let them cool completely before storing. Freezing is a smart way to preserve your muffins. Wrap each muffin in plastic wrap or foil. Then, place them in a freezer-safe bag. This method helps keep them fresh for up to three months. When you’re ready to enjoy, take out the desired number and thaw them at room temperature or in the fridge overnight. Reheating your zucchini oat muffins is simple. You can use a microwave for quick heating. Just heat each muffin for 15-20 seconds. If you prefer a crusty exterior, use your oven. Preheat the oven to 350°F (175°C) and heat for about 5-10 minutes. This will restore warmth and texture, making them taste freshly baked again. For more details, you can check the Full Recipe. Yes, you can! Whole wheat flour works great. You could also try almond flour or oat flour. Each flour gives the muffins a unique taste and texture. Experimenting with different flours can lead to fun results. Just keep in mind that some flours might change the moisture level. You may need to adjust the liquid in the recipe to balance it out. To make sugar-free muffins, you can use ripe bananas or applesauce. Both add natural sweetness. You can also use stevia or monk fruit sweetener. These options are great for cutting sugar while keeping the flavor. Just remember, using natural sweeteners can change the moisture level. Adjust the liquid in the recipe if needed. You can add carrots, sweet potatoes, or even spinach! Carrots give a nice sweetness. Sweet potatoes add creaminess and flavor. Spinach adds nutrients without changing the taste much. Just make sure to grate or puree the veggies to keep the texture smooth. This way, your muffins stay soft and fluffy. You can find the full recipe [here](#). You learned how to make tasty zucchini oat muffins with healthy ingredients. Each step, from mixing to baking, is simple. I shared tips for texture and storage, plus fun variations to try. Feel free to swap ingredients or make these muffins fit your diet. Now, you can enjoy a wholesome treat that’s easy and fun to make. Try it out, and enjoy your muffins fresh or stored for later!

Zucchini Oat Muffins Tasty and Healthy Snack Idea

Looking for a tasty and healthy snack? Zucchini oat muffins are your answer! Packed with nutrients, these muffins combine the

To make these triple berry muffins, you will need the following ingredients: - 1 cup all-purpose flour - 1/2 cup rolled oats - 1/2 cup granulated sugar - 1 tablespoon baking powder - 1/2 teaspoon salt - 1/2 teaspoon cinnamon - 1/2 cup milk (or almond milk) - 1/4 cup vegetable oil - 1 large egg - 1 teaspoon vanilla extract - 1/2 cup fresh blueberries - 1/2 cup fresh raspberries - 1/2 cup chopped strawberries - Optional: Turbinado sugar for topping I love using fresh berries for the best flavor. Choose ripe blueberries, raspberries, and strawberries. You can mix and match, but this trio works wonders together. If fresh berries are hard to find, frozen berries can work too. Just make sure to thaw them and drain any excess liquid before adding them to your batter. To add a little extra crunch and sweetness, consider using turbinado sugar on top. It creates a nice, crispy layer that contrasts beautifully with the soft muffin. You could also sprinkle some cinnamon or top with a dollop of whipped cream for fun. This will definitely make your muffins stand out! For the full recipe, check out the details above. 1. Preheating the Oven and Preparing the Muffin Tin Preheat your oven to 375°F (190°C). This step is key for even baking. Line a muffin tin with paper liners or grease it well with oil. This will help your muffins come out easily. 2. Mixing Dry Ingredients In a large bowl, add the following dry ingredients: - 1 cup all-purpose flour - 1/2 cup rolled oats - 1/2 cup granulated sugar - 1 tablespoon baking powder - 1/2 teaspoon salt - 1/2 teaspoon cinnamon Whisk them together until they are evenly mixed. This mix gives flavor and texture. 3. Combining Wet Ingredients In a separate bowl, whisk together: - 1/2 cup milk (or almond milk) - 1/4 cup vegetable oil - 1 large egg - 1 teaspoon vanilla extract Mix these well until they are blended. This mixture adds moisture to the muffins. 4. Folding in the Berries Pour the wet mixture into the dry ingredients. Stir gently until just combined. Be careful not to overmix. Then, fold in the berries: - 1/2 cup fresh blueberries - 1/2 cup fresh raspberries - 1/2 cup chopped strawberries This step adds bursts of flavor and color to the muffins. 5. Filling Muffin Cups Spoon the batter into the prepared muffin tin. Fill each cup about two-thirds full. If you want, sprinkle a little turbinado sugar on top for extra crunch. This topping gives a nice texture. - Recommended Baking Temperature Bake the muffins at 375°F (190°C). This temperature helps them rise perfectly. - Baking Time Guide Bake for 18-22 minutes. The muffins should be golden brown when done. - Checking for Doneness To check, insert a toothpick into the center of a muffin. If it comes out clean, your muffins are ready! This is a great way to ensure they are baked through. Follow these steps for a delightful treat. For the complete recipe, check out the Full Recipe section. Enjoy your baking! - How to Prevent Overmixing Overmixing can make muffins tough. Mix your wet and dry ingredients until they just combine. A few lumps are okay! This keeps your muffins light and fluffy. - Tips for Fluffier Muffins To make your muffins fluffier, use room temperature ingredients. Cold eggs or milk can slow down the rise. Also, don’t skip the baking powder. It helps your muffins rise nicely. - Using Frozen Berries Frozen berries work well too! Just make sure not to thaw them first. You want to add them straight to the batter. This prevents the color from bleeding into the mix. - Ideas for Serving Serve your muffins warm on a rustic wooden board. You can also place them in a basket lined with a colorful napkin. This makes them look inviting and fun! - How to Garnish for Aesthetic Appeal Add a few fresh berries on the side for a pop of color. You can sprinkle some powdered sugar on top, too. This little touch makes your muffins look like a treat from a bakery! {{image_2}} You can use different berries to change the flavor of your muffins. Each berry brings its own taste. For example, blackberries add a tangy twist, while strawberries give a sweet touch. You can mix any berries you like. The key is to keep the total amount the same: 1.5 cups of berries. Using seasonal berries is a fun idea. In summer, choose fresh blueberries, raspberries, or strawberries. Fall brings cranberries, which can add a tart flavor. Winter offers frozen berries, which work great, too! Just remember to thaw them first and drain any extra liquid. If you need to make gluten-free muffins, swap the all-purpose flour for a gluten-free blend. Many blends work well in muffins. Just ensure it has a good amount of starch for fluffiness. For vegan muffins, replace the egg with a flax egg. To make a flax egg, mix one tablespoon of ground flaxseed with three tablespoons of water. Let it sit for five minutes until it thickens. You can also use almond milk instead of regular milk, keeping the recipe dairy-free. These adjustments help everyone enjoy this tasty treat! For the full recipe, check out the full recipe section. To keep your muffins fresh, store them in an airtight container. This will help keep moisture in and prevent them from drying out. If you do not have an airtight container, you can use plastic wrap. Just make sure to cover them well. Place the muffins at room temperature away from direct sunlight. They will taste best this way. Recommended Storage Duration You can store your muffins at room temperature for up to three days. If you want to keep them longer, consider freezing them. This will help maintain their taste and texture for a few months. To freeze muffins, let them cool completely first. Wrap each muffin in plastic wrap, then place them in a freezer bag. This extra layer protects them from freezer burn. Make sure to squeeze out any air before sealing the bag. Thawing Instructions When you are ready to enjoy your muffins, take one out of the freezer. Remove the plastic wrap and place it on a plate. You can thaw it at room temperature for about an hour. If you want it warm, pop it in the microwave for about 10-15 seconds. Enjoy them fresh, just like when you baked them! For the full recipe, check out the earlier sections. Can I use frozen berries in my muffins? Yes, you can use frozen berries. They add great flavor and work well. Just remember to toss them in a bit of flour. This helps to prevent them from sinking in the batter. How do I know when my muffins are done baking? To check if your muffins are ready, insert a toothpick into the center. If it comes out clean, they are done. The tops should be golden brown and spring back when lightly pressed. Can I make the batter ahead of time? You can make the batter ahead of time. Just cover it and chill in the fridge for up to 2 hours. When you're ready, just fill the muffin cups and bake as usual. What can I serve with triple berry muffins? These muffins pair well with many treats. Try serving them with butter, cream cheese, or even a dollop of yogurt. Fresh fruit or a drizzle of honey can also add a nice touch. How do I adjust the recipe for a different serving size? Adjusting the recipe is simple. Just multiply each ingredient by the number of servings you want. For example, if you want 24 muffins, double each ingredient. Keep an eye on baking time, as larger batches may need a few extra minutes. For the full recipe, check out the earlier section. You learned how to make delicious triple berry muffins. We covered the key ingredients, like fresh berries and optional toppings. The step-by-step instructions help you prepare and bake these treats easily. I shared tips to avoid overmixing and ideas for serving. These muffins can be fun to customize with different berries or dietary needs. Proper storage keeps them fresh longer, and freezing offers more options. Enjoy your baking, and feel free to experiment with flavors and variations!

Triple Berry Muffins Delightfully Easy Recipe

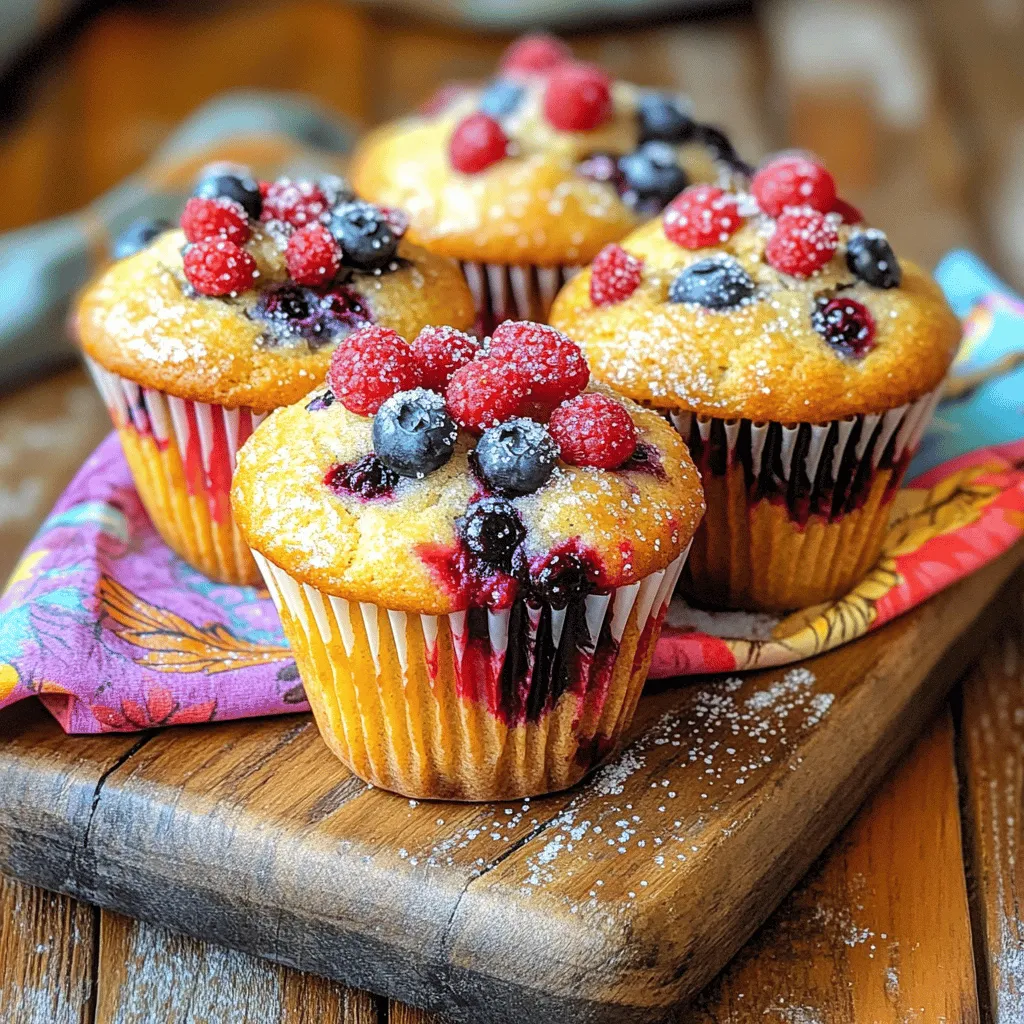
Looking for a sweet treat that’s simple and delicious? You’ll love these Triple Berry Muffins! They burst with fresh fruit

- 2 pounds baby potatoes, halved - 3 tablespoons olive oil - 2 tablespoons fresh lemon juice - Zest of 1 lemon - 1 teaspoon garlic powder - 1 teaspoon onion powder - 1 teaspoon dried oregano - 1 teaspoon dried thyme - Salt and pepper to taste - Fresh parsley, chopped for garnish Using baby potatoes makes this dish easy to prepare. Their small size means they cook quickly. Halve the potatoes for even cooking and better flavor absorption. Measure out the olive oil and lemon juice for the best taste. Fresh lemon juice adds zest, while the zest enhances the aroma. Keep your garlic and onion powders handy; they add depth to the dish. Use dried oregano and thyme to round out the flavors. Don’t forget to add salt and pepper to taste; they are essential for a balanced dish. You can change the flavor profile with some easy swaps. Consider adding fresh herbs like rosemary or basil for a new twist. If you want a kick, try adding a pinch of red pepper flakes. For a smoky flavor, include smoked paprika. You can also mix in some grated Parmesan cheese before roasting for richness. This recipe is flexible, so feel free to experiment! For the full recipe, check out the details above. To start, turn your oven to 400°F (200°C). Preheating is key for crispy potatoes. It helps them cook evenly and develop that nice golden color. Next, get 2 pounds of baby potatoes. Cut them in half and place them in a large mixing bowl. Add 3 tablespoons of olive oil, 2 tablespoons of fresh lemon juice, and the zest of one lemon. Sprinkle in 1 teaspoon each of garlic powder, onion powder, dried oregano, and dried thyme. Don’t forget salt and pepper to taste! Toss everything together. Make sure each potato is coated well. This mix gives your potatoes great flavor. Now, take a baking sheet and line it with parchment paper. Spread the coated potatoes in a single layer. Place them in the oven and roast for 30 to 35 minutes. Halfway through, toss the potatoes for even cooking. They should come out golden and crispy. Once done, let them cool for a couple of minutes. Finish by garnishing with fresh chopped parsley. Enjoy this simple and tasty side! You can find the full recipe for more details. To get crispy potatoes, you must follow a few simple steps. First, cut the baby potatoes into halves. Smaller pieces will crisp up better. After mixing them with oil and spices, spread them out on the baking sheet. Make sure they don’t touch. This allows warm air to circulate and crisp them up. Halfway through baking, toss the potatoes. This helps them brown evenly. Seasoning is key to tasty potatoes. Use fresh lemon juice and zest for a bright flavor. I love adding garlic and onion powder for depth. Dried oregano and thyme bring in an earthy taste. Don't forget salt and pepper! Use these to your liking. You can adjust them based on your taste. Always mix well so every piece is coated. You don’t need fancy tools for this recipe. A large mixing bowl works for mixing. A baking sheet lined with parchment paper helps with easy cleanup. Use a spatula for tossing the potatoes. An oven thermometer can help check the temperature. This ensures your oven is at the right heat. For the full recipe, check out the detailed steps above. {{image_2}} You can switch up the herbs for more flavor. Try using fresh rosemary or dill. Both add a nice twist. You can also mix in fresh basil for a sweet touch. If you want a kick, use fresh cilantro. Each herb brings its unique taste, making the dish fun and exciting. Lemon is great, but other citrus fruits work too. You can use lime for a zesty flavor. Grapefruit juice adds a bold twist. Orange juice gives a sweeter taste that pairs well with the potatoes. Experiment with different citrus to find your favorite! Consider adding extra veggies for more color and nutrients. Bell peppers or red onions roast nicely with potatoes. For a crunchy topping, sprinkle some breadcrumbs or nuts before baking. You can also add grated cheese right after roasting for a melty finish. Let your creativity shine with these fun options. For the complete recipe, check out the Full Recipe. After enjoying your Lemon Herb Roasted Potatoes, let them cool to room temperature. Place the cooled potatoes in an airtight container. This helps keep them fresh and tasty. Store them in the fridge for up to three days. If you want, you can add a piece of parchment paper to keep moisture away. To reheat the potatoes, you can use the oven or microwave. For the oven, preheat it to 350°F (175°C). Spread the potatoes on a baking sheet. Heat for about 15 minutes, until they are hot and crispy. If you use a microwave, place them on a microwave-safe plate. Heat for 1-2 minutes, checking to avoid overheating. You want them warm, not dry. You can freeze these roasted potatoes if you have leftovers. After cooling, place them in a freezer-safe bag. Remove as much air as possible before sealing. The potatoes can stay fresh for up to three months in the freezer. When ready to eat, thaw them overnight in the fridge. Reheat them in the oven for the best texture. For detailed cooking steps, check the Full Recipe. Yes, you can use different types of potatoes. Yukon Gold, red potatoes, or even sweet potatoes work well. Each type brings its own taste and texture. Yukon Gold gives a creamy feel, while red potatoes are waxy and hold their shape. Sweet potatoes add a unique sweetness. Just cut them to a similar size for even cooking. These potatoes pair well with many dishes. You can serve them with grilled chicken, steak, or fish. They also go great with salads or roasted veggies. For a complete meal, try them with a fresh green salad and a tangy dressing. They are a versatile side that fits many meals. Leftovers can last about 3 to 4 days in the fridge. Store them in an airtight container to keep them fresh. When you want to eat them again, just reheat in the oven or microwave. They may lose some crispness, but they will still taste great. For the best flavor, enjoy them within a few days. You can find the full recipe at the beginning of this article. This post covered every step for making delicious Lemon Herb Roasted Potatoes. We explored key ingredients, precise measurements, and variations for taste. I shared tips for achieving crispy potatoes and the best ways to store leftovers. Use these insights to enjoy your cooking and impress your friends. Feel free to experiment with herbs and spices that you love. Happy cooking!

Lemon Herb Roasted Potatoes Simple and Tasty Side

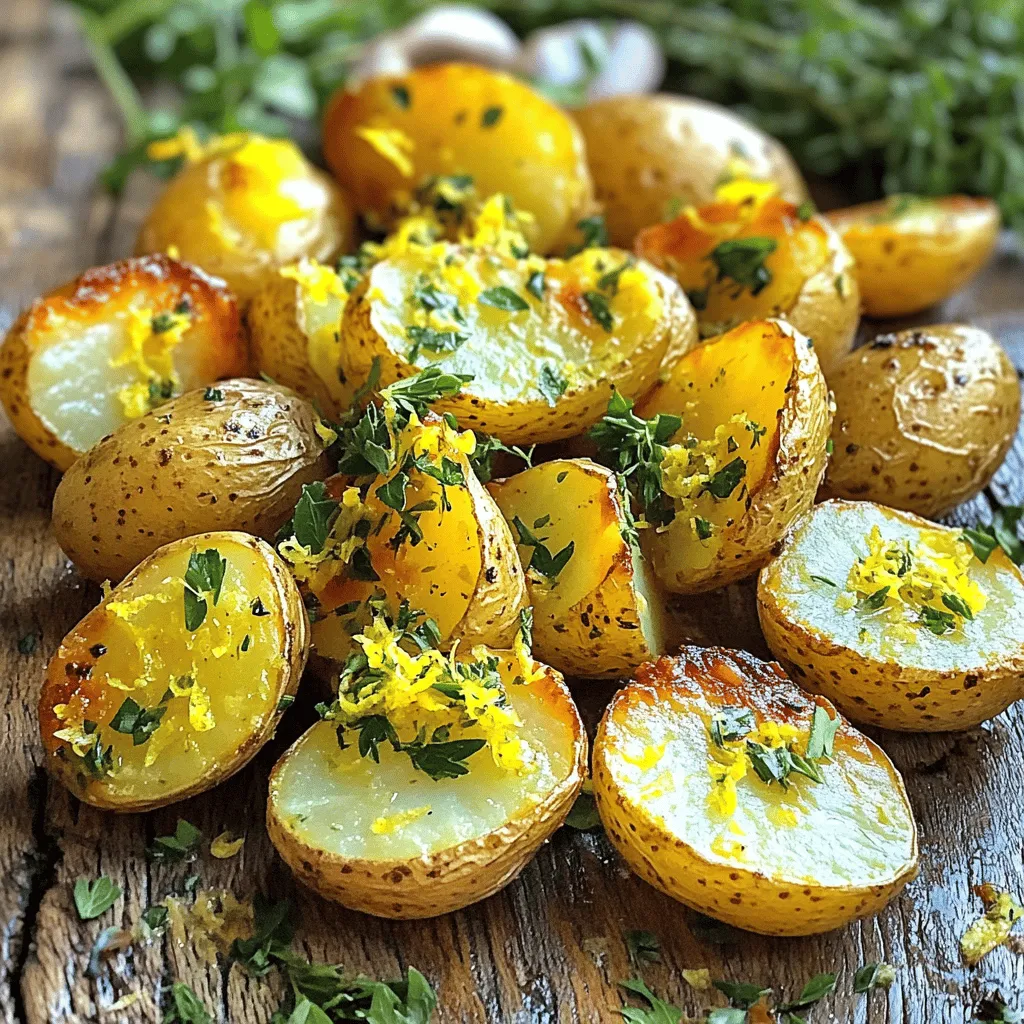
Are you ready to elevate your mealtime with a side dish that bursts with flavor? In this post, I’ll show

- 2 boneless, skinless chicken breasts, sliced into strips - 1 cup buttermilk - 1 teaspoon garlic powder - 1 teaspoon onion powder - 1 teaspoon smoked paprika - 1 teaspoon dried oregano - 1 teaspoon dried thyme - 1 cup all-purpose flour - 1 cup breadcrumbs (preferably panko for extra crunch) - Salt and pepper to taste - Vegetable oil for frying You can swap buttermilk for regular milk mixed with a bit of vinegar. This gives a similar tang. If you don’t have garlic or onion powder, fresh garlic and onion work too. Use fresh herbs instead of dried if you have them. You can replace all-purpose flour with gluten-free flour or cornstarch for a gluten-free option. Each ingredient plays a key role in making chicken tenders crisp and tasty. - Chicken breasts provide a lean protein base. They cook quickly and stay juicy. - Buttermilk tenderizes the chicken and adds flavor. It helps create a nice crust. - Spices like garlic powder and smoked paprika boost flavor. They add depth and warmth. - Breadcrumbs, especially panko, give that crunchy texture we all love. - Flour helps the coating stick. It also adds to the crispiness when fried. - Salt and pepper enhance all the flavors in the dish. - Vegetable oil is crucial for frying. It helps achieve that golden, crispy exterior. For the full recipe, check out the Crispy Herb-Infused Chicken Tenders. Start by gathering your chicken and ingredients. Take the chicken breasts and slice them into strips. I like to make them about one inch wide. This size cooks evenly and stays juicy. Next, mix the buttermilk with garlic powder, onion powder, smoked paprika, oregano, and thyme in a large bowl. This mix adds great flavor and helps the breading stick. Place the chicken strips in the bowl, cover it, and let it chill in the fridge for at least one hour. If you have time, marinate them overnight for even more taste. Once your chicken is marinated, it’s time to coat it. Set up two bowls: one with seasoned flour and the other with breadcrumbs. Make sure to add salt and pepper to the flour. Take each chicken strip from the marinade. Let the extra liquid drip off, then coat it in the flour. Shake off any excess flour. After that, dip the strip back into the buttermilk mixture briefly. This step helps the breadcrumbs stick better. Finally, roll the chicken in the breadcrumbs and press gently. This ensures a nice, even coating. Now comes the fun part—frying! Heat about one inch of vegetable oil in a large frying pan. Aim for a temperature of 350°F (175°C). You can check this with a kitchen thermometer. Carefully add the chicken strips in batches. Avoid crowding the pan, as this can lower the oil's temperature. Fry each side for around 4-5 minutes. Look for a golden brown color that shows they are ready. Once cooked, move the chicken tenders to a plate lined with paper towels. This helps soak up extra oil. Serve them hot with your favorite dipping sauces for a tasty treat. Enjoy your crispy chicken tenders! For a detailed recipe, you can check the Full Recipe. To get that perfect crispy texture, start with panko breadcrumbs. They are light and airy, giving your chicken a great crunch. After marinating, let the chicken strips rest for a few minutes. This helps the coating stick better. When frying, use enough oil to cover the chicken halfway. This ensures even cooking and crispiness. Flip the chicken only once to avoid losing that crunchy layer. Marinating is key for flavor and juiciness. Use buttermilk for the best result. It tenderizes the chicken and adds great taste. For extra flavor, try adding hot sauce or lemon juice to your marinade. You can marinate the chicken for one hour at a minimum. However, if you have time, let it sit overnight. This makes the chicken even tastier. Serve your chicken tenders with a variety of dipping sauces. Honey mustard, ranch, or barbecue sauce are all great choices. You can also pair them with a fresh salad for a complete meal. Arrange the tenders on a pretty platter and add some herbs for color. This makes your meal look inviting and fun. For a side, try crispy fries or a light coleslaw. Enjoy your delicious chicken tenders with friends and family! {{image_2}} You can make baked chicken tenders for a healthier option. Start with the same marinated chicken. Instead of frying, place the coated chicken on a baking sheet. Use parchment paper for easy cleanup. Spray the chicken lightly with cooking spray. Bake at 400°F (200°C) for about 20-25 minutes. Flip halfway through for even cooking. You’ll still enjoy a crispy outside and juicy inside. Adding spices can change the taste of your chicken tenders. Try adding cayenne pepper for heat or Italian herbs for a fresh twist. You can also mix in some parmesan cheese with the breadcrumbs. For sauces, offer options like buffalo sauce, sweet chili sauce, or a tangy barbecue sauce. A squeeze of lemon can brighten the flavors too. Experiment to find your favorite combo. Kids love fun shapes and flavors. Use cookie cutters to shape chicken tenders into dinosaurs or stars. You can also create a fun dipping station. Offer a variety of dips like ketchup, ranch, or honey. To make them more appealing, serve with colorful veggies or fruit on the side. This keeps mealtime fun and exciting for little ones. For the full recipe, check out the [Full Recipe]. After enjoying your chicken tenders, let them cool down. Place leftovers in an airtight container. Make sure they are sealed tightly. Store them in the fridge for up to 3 days. If you have a lot, consider portioning them out. This way, you can grab just what you need later. To reheat chicken tenders, you have a few great options. For the best texture, use an oven. Preheat the oven to 375°F (190°C). Place the tenders on a baking sheet and heat for 10 to 15 minutes. You can also use an air fryer. Set it to 350°F (175°C) and cook for about 5 to 7 minutes. Both methods keep the tenders crispy. If you're in a hurry, a microwave will work too. Heat them in short bursts, checking often. They won’t be as crispy, but they’ll still taste good. Freezing is a great way to save chicken tenders. First, let them cool completely. Then, wrap each piece in plastic wrap. Place the wrapped tenders in a freezer bag. Squeeze out all the air before sealing. They will stay fresh for up to 2 months. To thaw them, move the bag to the fridge for the night. You can also use the microwave, but be careful not to cook them. Once thawed, use the reheating methods mentioned above. This keeps them tasty and enjoyable. For more details, check the Full Recipe. To cook chicken tenders well, use a meat thermometer. Insert it into the thickest part of the chicken. The right temperature is 165°F (74°C). This ensures the chicken is safe to eat. Uniformly sized strips also help with even cooking. Fry the chicken until golden brown for the best flavor and texture. You can marinate chicken for 30 minutes to 24 hours. For a quick soak, 30 minutes is enough to add flavor. If you want a deeper taste, marinate overnight. Just remember, if you marinate too long, the texture can change. The acid in the marinade can make the chicken mushy. Yes, you can make chicken tenders gluten-free. Instead of all-purpose flour, use a gluten-free flour blend. For the breadcrumbs, use gluten-free panko. These swaps will keep the crispiness you want. Always check labels to ensure all ingredients are gluten-free. Chicken tenders started in the United States. They became popular in the 1970s. The name "tender" comes from the tender meat used in the dish. Many people love them for their taste and ease. They fit well in meals for kids and adults alike. In this post, we covered delicious chicken tenders. We looked at key ingredients and ideas for substitutions. You learned step-by-step ways to prepare, coat, and fry. I shared tips for a crispy texture and fun serving ideas. We explored healthier versions and storage tips too. Making chicken tenders can be simple and fun. Enjoy experimenting with flavors and variations. You now have all you need to create perfect chicken tenders!

Classic Chicken Tenders Crispy and Easy Dinner Guide

Are you ready to make the perfect chicken tenders? In my Classic Chicken Tenders Crispy and Easy Dinner Guide, I’ll

- 1 medium head of cauliflower - 2 tablespoons vegetable oil - 2 large eggs - 1 cup mixed vegetables - 2 green onions - 3 cloves garlic - 2 tablespoons low-sodium soy sauce - 1 tablespoon sesame oil - Salt and pepper to taste - Optional: 1 teaspoon grated ginger The main ingredient is cauliflower. It gives this dish a great texture and flavor. You can grate the cauliflower to make it look like rice. This method helps keep the meal low in carbs. The vegetable oil adds a nice touch to the cooking process. It helps the veggies cook evenly. Eggs add protein and make the dish filling. I like to use a mix of colorful veggies, like carrots and peas. They bring a nice sweetness and crunch. Green onions add a fresh taste. They also make the dish look pretty. Garlic gives it a wonderful aroma. Soy sauce adds depth to the flavor, while sesame oil adds a nutty note. If you want an extra kick, try adding grated ginger. It enhances the taste. This mix of ingredients makes a great meal that is both tasty and healthy. This dish has low calories and high fiber. One serving has about 150 calories. It contains around 10 grams of carbs and 4 grams of protein. Cauliflower is a superfood. It's low in calories and high in vitamins. It also has antioxidants, which help keep you healthy. Eating cauliflower can support weight loss. It fills you up without adding many calories. Using cauliflower in your meals is an easy way to eat healthy. It helps you stay on track with your low-carb goals. For the full recipe, check out the Easy Cauliflower Fried Rice. To start, prepare your cauliflower. You can either grate it or use a food processor. - Grating: Use a box grater to shred the cauliflower into tiny pieces. - Processing: Cut the cauliflower into small florets. Pulse them in a food processor until they look like rice. Next, prep your vegetables and eggs. Chop your mixed vegetables into small bits. This helps them cook evenly in the pan. For the eggs, crack them into a bowl and beat them lightly with a fork. Now, let’s cook! Heat a large skillet or wok over medium heat and add one tablespoon of vegetable oil. - Sautéing Vegetables: Add your mixed vegetables to the hot oil. Cook for 3-4 minutes until they get tender. Next, push the veggies to one side of the skillet. Pour the beaten eggs into the empty side. Scramble the eggs until they are fully cooked. Mix them with the vegetables. Now, add minced garlic to the skillet. If you’re using ginger, add it now too. Stir-fry everything for one more minute until it smells great. Next, add the cauliflower rice and soy sauce. Mix everything well. Cook for another 5-7 minutes, stirring often. You want the cauliflower to be tender but not mushy. Finally, drizzle sesame oil on top. Season with salt and pepper to taste. Add in the chopped green onions, saving some for garnish. Toss everything together to mix it well. Remove your dish from heat and serve hot. Garnish with reserved green onions. Enjoy this tasty, low-carb meal. For more details, check the Full Recipe. To avoid mushy cauliflower rice, ensure you don't overcook it. Cauliflower cooks quickly, so keep an eye on it while it’s in the pan. Aim for a tender yet firm texture. This way, your fried rice stays light and fluffy. The ideal cooking time for vegetables is about 3-4 minutes over medium heat. This lets them soften without losing their crunch. If you add them in with your cauliflower, they might turn mushy. Seasoning is key to a tasty dish. Use low-sodium soy sauce to avoid overpowering flavors. You can also add a splash of sesame oil at the end for a nutty taste. If you like a bit of spice, try adding red pepper flakes or sriracha. For added taste, consider using fresh herbs like cilantro or basil. You can also mix in roasted nuts for crunch or swap in other veggies you enjoy. Adding ginger can boost flavor, too. A teaspoon of grated ginger will give your dish a warm, spicy kick. For the full recipe, check out the Easy Cauliflower Fried Rice section. {{image_2}} You can boost this dish with high-protein options. Tofu, chicken, or shrimp are great choices. They add flavor and help fill you up. Just add them to the skillet after sautéing the veggies. Cook until they’re done, then mix everything together. Other vegetables also work well. Try bell peppers, broccoli, or snap peas. They add more color and crunch. Mix and match based on what you like or have on hand. This way, you can make your dish unique and tasty. For keto-friendly options, swap out the soy sauce for coconut aminos. It has a similar taste but fewer carbs. You can also skip the peas and corn to lower carbs even more. Spicing it up is easy! Try adding different sauces like sriracha or teriyaki. They give your fried rice a fun twist. Just remember to use them in small amounts. You want to enhance the flavor without overpowering the dish. To keep your Easy Cauliflower Fried Rice fresh, store it in an airtight container. This helps keep moisture out. You can also use plastic wrap to cover the dish tightly. Leftovers stay good in the fridge for about 3 to 4 days. Remember to cool it down before storing. This helps prevent condensation. The best way to reheat cauliflower fried rice is on the stovetop. Heat a skillet over medium heat and add a splash of oil. This method keeps the texture nice. Stir it often to heat evenly. You can also use the microwave. Place it in a microwave-safe bowl and cover it with a damp paper towel. This helps keep moisture in. Avoid reheating too long, or it will become mushy. Can I use frozen cauliflower for this recipe? Yes, you can use frozen cauliflower rice. Just thaw and drain it well before cooking. This saves time and gives you a quick low-carb option. How to make it vegan-friendly? To make cauliflower fried rice vegan, skip the eggs. Replace them with tofu or chickpeas for protein. You can also add extra veggies for texture and flavor. What's the best way to serve cauliflower fried rice? I like to serve it hot right from the skillet. Garnish with green onions for a fresh touch. It pairs well with soy sauce or sriracha for extra flavor. How long does this dish take to cook? This dish takes about 20 minutes from start to finish. The prep is quick, and cooking goes fast. Tips for making a larger batch? To make more, double the ingredients. Use a big skillet or wok to avoid overcrowding. Cook in batches if needed to keep everything evenly cooked. For more details, check out the Full Recipe. Cauliflower rice offers a tasty, low-carb alternative packed with nutrition. You learned how to prepare, cook, and store this dish with great tips. Whether you're adding proteins or adjusting flavors, you can make it your own. You can enjoy a healthy meal in no time. Remember, experimenting with ingredients boosts taste and nutrition. Embrace your kitchen creativity and serve this delightful dish any time!

Easy Cauliflower Fried Rice Flavorful Low-Carb Meal

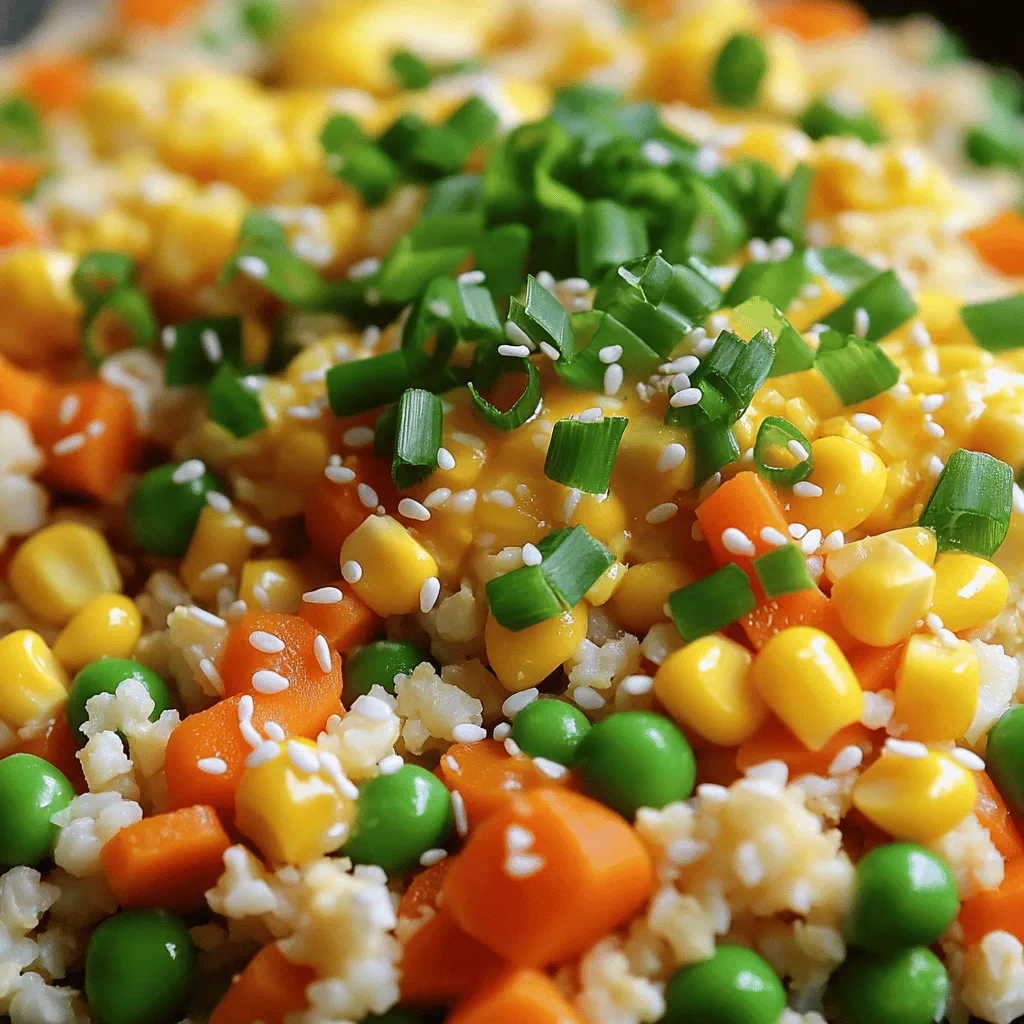
Looking for a quick, tasty meal that fits your low-carb diet? I’ve got the perfect solution: Easy Cauliflower Fried Rice!

For these muffins, you need simple, healthy items. Gather these ingredients: - 2 ripe bananas, mashed - 1/3 cup melted coconut oil - 1/2 cup honey or maple syrup - 2 large eggs - 1 teaspoon vanilla extract - 1 teaspoon baking soda - 1/2 teaspoon salt - 1 teaspoon cinnamon - 1 1/2 cups whole wheat flour - 1 cup fresh or frozen blueberries These ingredients come together to make a tasty snack. You can add a crunch to your muffins. Try using: - 1/4 cup chopped nuts (walnuts or pecans) Nuts add great texture and flavor. They also boost the muffin's health benefits. Each ingredient plays a role in making these muffins healthy. - Bananas: They add natural sweetness and potassium. - Coconut oil: This oil offers healthy fats. - Honey or maple syrup: Both sweeteners provide energy and taste. - Eggs: They help bind the muffins and add protein. - Whole wheat flour: This flour adds fiber, helping digestion. - Blueberries: They are rich in antioxidants and vitamins. - Cinnamon: It gives flavor and may support blood sugar control. These muffins are not just delicious; they are also full of good nutrients. For the full recipe, check the main section. Start by preheating your oven to 350°F (175°C). This step ensures even baking. While the oven heats, prepare your muffin tin. Use paper liners or grease it with cooking spray. In a large bowl, mash the ripe bananas until smooth. Next, add the melted coconut oil. Mix them well until they blend together. Then, pour in the honey or maple syrup. Stir until the mixture is fully combined. Now, beat in the eggs one at a time. Each egg adds moisture and helps the muffins rise. After that, add the vanilla extract for a sweet aroma. In a separate bowl, combine the baking soda, salt, cinnamon, and whole wheat flour. This mix gives the muffins a nice rise and flavor. Gradually add this dry mix to the wet ingredients. Stir gently until just combined; avoid overmixing to keep them fluffy. Finally, gently fold in the blueberries and chopped nuts if you like. This adds texture and bursts of flavor in every bite. Once your batter is ready, evenly distribute it into your prepared muffin tin. Fill each cup about 3/4 full to allow room for rising. Place the muffin tin in the preheated oven. Bake for 18 to 20 minutes. To check if they are done, insert a toothpick into the center of a muffin. If it comes out clean, your muffins are ready. Let the muffins cool in the tin for about 5 minutes. This helps them firm up a bit before moving. After that, transfer them to a wire rack to cool completely. To ensure even cooking, try to use ripe bananas. They add natural sweetness and moisture. Make sure to mix the batter just enough; overmixing can make muffins dense. If you’re using frozen blueberries, do not thaw them before adding. This helps to keep the batter cool and prevents them from bleeding. Another tip is to rotate your muffin tin halfway through baking. This allows for even browning on all sides. Enjoy your healthy blueberry banana muffins as a nutritious snack! For the full recipe, check out the details above. If you're missing an ingredient, don't worry. You can swap some items easily. For example, if you lack whole wheat flour, use all-purpose flour instead. This will work fine, but it may change the taste a bit. You can also replace honey with agave syrup for a different sweet note. If you want a dairy-free option, use almond milk instead of eggs. Just remember, these swaps might affect texture and taste. To get moist muffins, use ripe bananas. They add natural sweetness and moisture. Be careful not to overmix the batter. Mixing too much can lead to tough muffins. When you fold in the blueberries, do it gently. This keeps the muffins soft and fluffy. Lastly, check the baking time. Overbaking will dry them out. Aim for a toothpick that comes out clean but not dry when checking for doneness. Avoid these common pitfalls for the best muffins. First, don’t skip the preheating step. It helps the muffins rise properly. Second, measure your flour correctly. Too much flour can make muffins dense. Use the spoon-and-level method for accuracy. Third, don’t skip the salt. Salt enhances the flavors and balances sweetness. Lastly, let the muffins cool before eating. They taste better when allowed to set a bit. Follow these tips and enjoy delicious, healthy blueberry banana muffins! For the full recipe, check out the details above. {{image_2}} You can easily make these muffins gluten-free. Use almond flour or a gluten-free flour blend. Both options keep the muffins moist and tasty. Just remember to use a 1:1 gluten-free flour mix for best results. Feel free to mix in other fruits! Chopped strawberries, raspberries, or even apples work great. You can also add spices like nutmeg for an extra kick. This keeps the muffins fresh and exciting each time you bake. To make these muffins vegan, swap the eggs for flax eggs. Mix one tablespoon of ground flaxseed with three tablespoons of water. Let it sit for a few minutes to thicken. You can also replace honey with maple syrup for sweetness. This way, everyone can enjoy these healthy treats! Don’t forget to check the Full Recipe for detailed instructions. To keep your muffins fresh, place them in an airtight container. This helps lock in moisture. You can also wrap them in plastic wrap before storing. Keep them at room temperature for up to three days. If you want to keep them longer, refrigeration is not the best choice. It can make them dry. Freezing is a great option. First, let the muffins cool completely. Then, place them in a freezer-safe bag. Remove as much air as possible to prevent freezer burn. You can freeze them for up to three months. When ready to eat, take one out and let it thaw at room temperature. For a warm treat, microwave it for about 15-20 seconds. These muffins last three days at room temperature. After that, check for signs of spoilage. If you see mold or a dry texture, it’s time to toss them. A stale smell also means they are no longer good. Enjoy your Healthy Blueberry Banana Muffins fresh, and check out the Full Recipe for more tips! You can use any oil you like. Olive oil and vegetable oil work well. Applesauce is another option for a low-fat choice. It keeps the muffins moist and adds flavor. You can even try melted butter if you prefer. Each option gives a different taste, so feel free to experiment. Check your muffins at 18 minutes. Insert a toothpick into the center. If it comes out clean, they are ready. If there is batter on the toothpick, bake for another 1-2 minutes. The tops should be golden brown and spring back when you touch them. Trust your senses; the smell will also tell you! Yes, you can make mini muffins! Just reduce the baking time. Bake them for about 10-12 minutes. Use a mini muffin tin and fill each cup about halfway. They are perfect for snacks or lunchboxes. Enjoy smaller bites of this healthy treat! For the complete recipe, check out the Full Recipe section above. In this post, we explored how to make healthy blueberry banana muffins. We covered key ingredients and their benefits, step-by-step baking instructions, and tips for moist muffins. We also discussed exciting variations like gluten-free and vegan options. Remember to store your muffins properly to keep them fresh. With these tips, you can bake delicious muffins every time. Enjoy trying new flavors and sharing them with friends!

Healthy Blueberry Banana Muffins for a Nutritious Snack

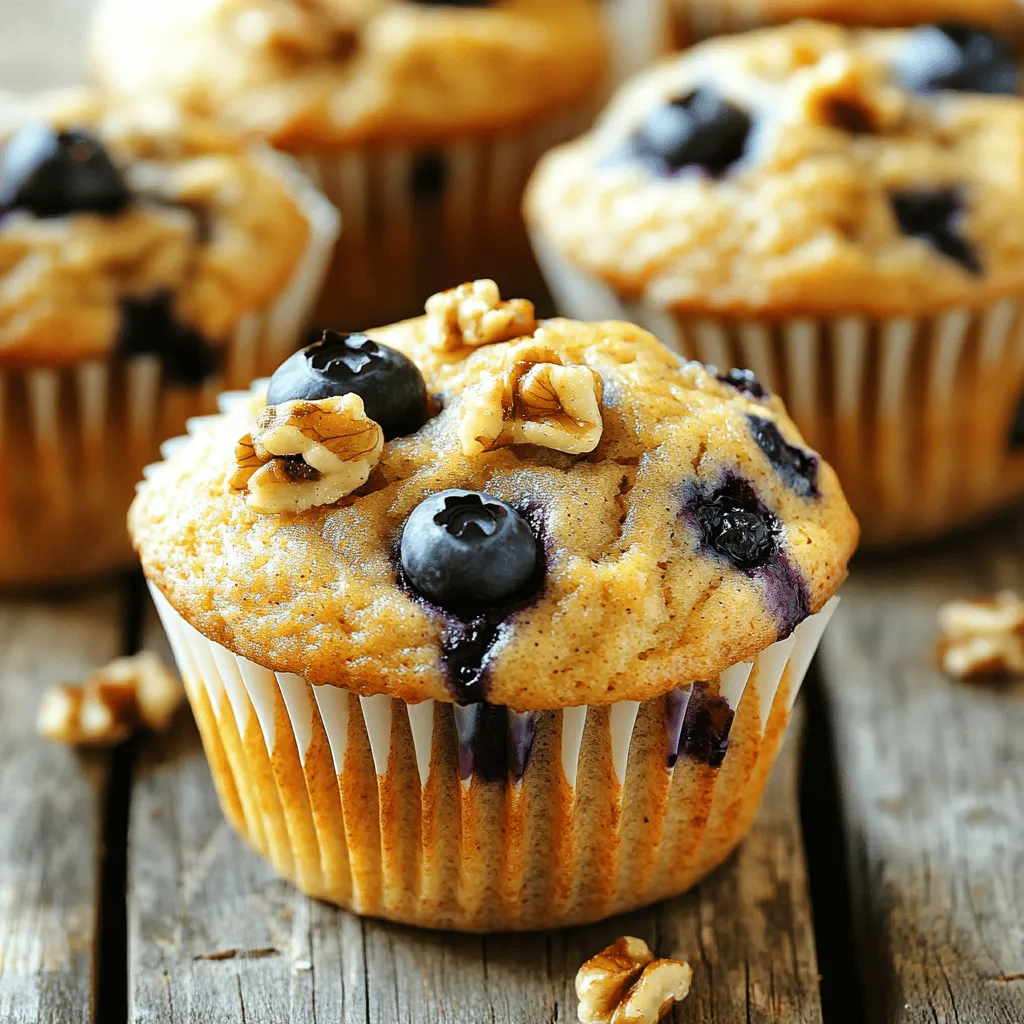
Are you ready to dive into a tasty treat? These Healthy Blueberry Banana Muffins make a perfect snack for both

- 2 cups cooked chicken, shredded - 1 cup cream cheese, softened - 1 cup shredded cheddar cheese - 1/2 cup black beans, drained and rinsed - 1/2 cup corn kernels (canned or frozen) - 1 teaspoon cumin - 1 teaspoon garlic powder - 1 teaspoon onion powder - Salt and pepper to taste - 10-12 small flour or corn tortillas - Cooking spray or olive oil for brushing - Fresh cilantro and lime wedges for serving I love using simple ingredients for baked chicken taquitos. This list combines flavors that make each bite tasty. Chicken Alternatives If you want a different taste, try shredded pork or beef instead of chicken. You can also use rotisserie chicken for a quick meal. Cheese Variations Swap cheddar with pepper jack for a spicy kick. Or use mozzarella for a milder, stretchy cheese. Dairy-Free Options To make this dish dairy-free, use vegan cream cheese. You can also choose nutritional yeast for a cheesy flavor without the dairy. The right ingredients make all the difference. Use fresh items for the best taste. Feel free to play around and find what you love! For the full recipe and all the steps, check out the Full Recipe section. 1. Preheat the Oven: Set your oven to 425°F (220°C). This step gets your oven ready to make those taquitos crispy. 2. Prepare the Filling: In a large bowl, mix together the cooked chicken, cream cheese, cheddar cheese, black beans, corn, cumin, garlic powder, and onion powder. Blend well until all ingredients are combined. Don’t forget to add salt and pepper to taste. This filling is what makes your taquitos so tasty. 3. Warm the Tortillas: Heat the tortillas in a dry skillet for about 20 seconds on each side. This softens them and makes them easier to roll. A warm tortilla will hold the filling better. 1. Fill the Tortillas: Take one warm tortilla and place 2-3 tablespoons of the chicken mixture in the center. Roll it tightly from one end to the other. Make sure to secure the filling inside. Repeat this process with all the tortillas. 2. Prepare for Baking: Lay the rolled taquitos seam-side down on a baking sheet lined with parchment paper. Lightly spray or brush them with cooking spray or olive oil. This will help them get crispy while baking. 3. Baking Time and Temperature: Place your baking sheet in the preheated oven. Bake for 15-20 minutes until the taquitos are golden brown and crispy. Keep an eye on them to avoid burning. 1. Garnishing Ideas: Once out of the oven, let the taquitos cool for a few minutes. Garnish with fresh cilantro for a pop of color. 2. Best Dipping Sauces: Serve your taquitos with lime wedges. You can also add salsa or guacamole on the side for dipping. These sauces enhance the flavor and make each bite even better. For the full recipe, check out the detailed guide on making these crispy baked chicken taquitos. Correct Oven Temperature To get crispy taquitos, preheat your oven to 425°F (220°C). This heat locks in moisture and keeps the outside crunchy. If your oven runs cool, the taquitos may turn out soggy. Always use an oven thermometer for accuracy. Prepping Tortillas Properly Warm your tortillas before filling. This makes them bend without breaking. Heat them in a dry skillet for 20 seconds on each side. This step helps keep the filling inside when you roll them up. Using Rotisserie Chicken I love using rotisserie chicken for this recipe. It cuts down on prep time. Just shred the chicken and mix it with your other ingredients. You get great flavor without the work of cooking chicken from scratch. Batch Preparation Tips Make a large batch of taquitos and freeze them. After baking, let them cool, then pack them in an airtight container. You can bake some later for a quick meal. This saves time and makes for easy snacks. Game Day Snacks These taquitos are perfect for game day. Serve them with salsa or guacamole for a crowd-pleasing snack. They are easy to grab and eat while cheering for your team. Quick Weeknight Meals On busy nights, these taquitos shine. They are quick to make and bake. Serve them with a fresh salad or veggies for a complete meal. You can enjoy a tasty dinner without spending hours in the kitchen. {{image_2}} You can change up your baked chicken taquitos with fun flavors. I love adding spicy options, like jalapeños. Just chop them finely and mix them into the filling. This adds heat and excitement. If you want a veggie-filled version, try adding spinach or bell peppers. They add flavor and color! You don’t have to bake taquitos every time. An air fryer is a great choice! Just set it to 400°F (200°C) and cook for about 10-12 minutes. Check them often for crispiness. If you prefer pan-frying, heat some oil in a skillet. Cook each taquito for about 2-3 minutes on each side until golden brown. If you need gluten-free options, use corn tortillas instead of flour. They work perfectly and stay delicious. Want vegetarian taquitos? Skip the chicken and use beans or mushrooms for the filling. Add more cheese or veggies to keep them tasty. You can always mix and match based on what you like! To keep your taquitos fresh, store leftovers in the fridge. Place them in an airtight container. This helps keep moisture out and flavor in. They should stay tasty for up to three days. If you want to save them longer, freezing is a great option. - Refrigeration Tips: Let the taquitos cool down before storing. This prevents steam from making them soggy. You can also wrap each taquito in plastic wrap for extra protection. - Best Practices for Freezing: For freezing, lay taquitos flat on a baking sheet first. Freeze them for about an hour. Once frozen, transfer them to a freezer bag. This way, they won’t stick together. They can last up to three months in the freezer. When you’re ready to enjoy your taquitos again, reheating them properly makes a big difference. - Oven Method for Best Results: Preheat your oven to 400°F (200°C). Place the taquitos on a baking sheet. Heat them for about 10-15 minutes. This will make them nice and crispy again. - Microwave Quick Fixes: If you're in a rush, you can use the microwave. Place the taquitos on a microwave-safe plate. Heat in short bursts of 30 seconds. Keep an eye on them to avoid making them soggy. Knowing how long taquitos last helps you avoid waste. - How Long Do They Last?: If stored in the fridge, taquitos last about three days. In the freezer, they can last up to three months. - Signs of Spoilage: Check for any off smells or a change in texture. If they feel mushy or smell funny, it’s best to throw them out. Always trust your senses to keep your meals safe. Can I make taquitos ahead of time? Yes, you can prepare them in advance. Just fill and roll the taquitos. Place them in a covered dish in the fridge. When you are ready to bake them, just pop them in the oven. How can I make them spicier? To add heat, mix in diced jalapeños or hot sauce. You can also use spicy cheese for an extra kick. Adjust the spices in the filling to match your taste. What should I serve with taquitos? Taquitos pair well with salsa, guacamole, or sour cream. You can also serve them with a fresh salad for a crunchy side. Are taquitos healthy? Baked chicken taquitos can be a healthy choice. They use lean chicken and veggies. Baking instead of frying cuts down on fat. Portion control helps too. Can I make taquitos without cheese? Yes! You can skip cheese and add more veggies. Try using mashed avocado or beans for creaminess. How to customize the filling for picky eaters? For picky eaters, keep it simple. Use just chicken and cheese. You can add familiar veggies like corn. Let them choose their favorite dips. What is the best way to fry taquitos if I don’t want to bake? If you prefer frying, heat oil in a pan. Fry taquitos seam-side down until golden brown. Turn them for even cooking. Drain on paper towels to remove excess oil. For the full recipe, check out the detailed instructions provided. In this article, we explored how to make baked chicken taquitos. We discussed the key ingredients, step-by-step instructions, and helpful tips for perfect results. You can easily customize these taquitos, making them fit your taste. Whether you want a snack for game day or a quick dinner, taquitos are great. Enjoy experimenting with flavors and cooking methods to make them your own. With practice, you will impress everyone with your delicious creations.

Baked Chicken Taquitos Crispy and Flavorful Treat

If you’re craving a snack that’s both crispy and packed with flavor, you’ve come to the right place! These Baked

Older posts
Newer posts
← Previous Page1 … Page75 Page76 Page77 … Page86 Next →

dsad

© 2026 Cooking Wells • Built with GeneratePress

Our Policies

  • Copyright Policy
  • Cookie Policy
  • GDPR Policy
  • Privacy Policy
  • Disclaimer
  • Terms Of Use

More Information

  • Home
  • About
  • Contact
  • Appetizers
  • Dessert
  • Dinner
  • Drinks
©2026, Cooking Wells About Back To Top