Skip to content
DisclaimerTerms Of UseGDPR PolicyCookie Policy

Cooking Wells

  • Home
  • Drinks
  • Appetizers
  • Dinner
  • Dessert
  • About
  • Contact
  • Privacy Policy
DisclaimerTerms Of UseGDPR PolicyCookie Policy

NO-ING-IMG

To make easy homemade bagels, you only need a few key ingredients: - 4 cups all-purpose flour - 1 tablespoon sugar - 1 tablespoon salt - 1 tablespoon instant yeast - 1 ½ cups warm water (about 110°F) - 2 tablespoons honey (for boiling) Each ingredient plays a vital role. The all-purpose flour gives the bagels their structure. Sugar helps the yeast grow and adds a slight sweetness. Salt adds flavor and controls yeast activity. Instant yeast makes the dough rise fast. Warm water activates the yeast. Honey gives the bagels a nice shine and flavor when boiled. Add some flair to your bagels with toppings. Here are some great options: - Sesame seeds - Poppy seeds - Everything bagel seasoning These toppings make your bagels more fun and tasty. You can mix and match them as you like. Try adding them while the bagels are still wet. This helps them stick better. For the full recipe, you can check out the detailed steps to make these delicious bagels. To start, you need to combine warm water, sugar, and instant yeast in a large bowl. Use about 1 ½ cups of warm water, around 110°F. Add 1 tablespoon of sugar and 1 tablespoon of instant yeast. Mix it well and let it sit for about 5 minutes. You will see it become frothy. This froth shows that the yeast is alive and ready to help your bagels rise. Next, it’s time to make the dough. Gradually add 4 cups of all-purpose flour and 1 tablespoon of salt to the yeast mixture. Stir everything together with a wooden spoon until a shaggy dough forms. Now, turn the dough onto a lightly floured surface. Knead it for about 8 to 10 minutes. You want the dough to feel smooth and elastic. This step is key to a good bagel texture. Once your dough is ready, let it rise. Place it in a greased bowl and cover it with a damp cloth. Let it sit in a warm place for about 1 hour. It should double in size. After it rises, punch it down gently. Divide the dough into 8 equal pieces. Shape each piece into a ball. Then, use your thumb to create a hole in the center, forming a bagel shape. Now, prepare to boil the bagels. In a large pot, bring 10 cups of water to a boil. Add 2 tablespoons of honey to the water. This will give your bagels a nice sheen. Lower each bagel into the boiling water one at a time. Boil them for 1 minute on each side. This step is crucial for that chewy texture we love in bagels. Next, preheat your oven to 425°F (220°C). Line a baking sheet with parchment paper to prevent sticking. After boiling, remove the bagels with a slotted spoon. Place them on the prepared baking sheet. While they are still wet, you can sprinkle your choice of toppings. Bake the bagels for 20 to 25 minutes, or until they are golden brown. Enjoy the smell as they bake! To get bagels with the best texture, kneading is key. Knead the dough for about 8 to 10 minutes. This builds gluten, making the bagels chewy and strong. Use a light touch when kneading. Make sure your work surface is not too sticky. A little flour helps keep things moving smoothly. Rising conditions are also vital. Find a warm spot in your kitchen. I like to place the bowl near a sunny window or in a slightly warm oven. Cover the dough with a damp cloth. This keeps it moist and helps it rise faster. The dough should double in size within an hour. One big mistake is overproofing the dough. If you let it rise too long, the bagels can collapse. Watch the dough closely. When it’s doubled, it’s ready to shape. Another mistake is using the wrong water temperature for boiling. The water should be just boiling, not too hot. Adding honey to the water gives your bagels a nice shine and flavor. This step is key to a great bagel. For mixing, use a large bowl. Glass or stainless steel works best. These materials help you see the dough rise. A sturdy wooden spoon is great for mixing the ingredients. When it comes to baking, use a baking sheet lined with parchment paper. This prevents sticking and makes cleanup easy. For kneading, a smooth surface like a countertop or a large cutting board is ideal. This gives you room to work and shape the dough well. {{image_2}} Bagels can be fun to change. You can make garlic and herb bagels by adding minced garlic, dried herbs, and olive oil to the dough. This mix gives you a tasty twist. For cheddar cheese bagels, fold in shredded cheese before shaping them. The cheese melts and creates a rich flavor. If you need a gluten-free option, you can use gluten-free flour. Look for a blend that works for baking. You should also adjust the yeast ratios. Gluten-free flour often needs more yeast for the right rise. You can make bagels that match the season. For fall, try pumpkin spice bagels. Add pumpkin puree and spices like cinnamon and nutmeg to the dough. This gives a warm flavor. For the holidays, create holiday-themed bagels. Top them with festive seeds or even colored sprinkles. You can find the full recipe for the basic bagel dough earlier. Enjoy experimenting! To keep your bagels fresh, store them at room temperature. Place them in a paper bag or a bread box. This keeps moisture away and prevents them from getting soggy. Avoid plastic bags, as they trap moisture and make the bagels soft. For long-term storage, freezing is a great option. Wrap each bagel in plastic wrap. Then, place them in a freezer-safe bag. This helps prevent freezer burn. You can freeze bagels for up to three months without losing flavor. When it’s time to enjoy your bagels, reheating is key to keeping them fresh. You can use an oven or a toaster. For the oven, preheat it to 350°F (175°C). Place the bagels on a baking sheet and heat for about 10 minutes. This keeps them crusty on the outside and warm inside. If you want a quicker option, use a toaster. Slice the bagel in half and toast it until golden brown. This method gives a nice crunch, perfect for enjoying with your favorite spread. Making bagels in advance can save you time. You can prepare the dough and shape the bagels. Then, let them rise and freeze them before boiling. This way, you can boil and bake them fresh later. Alternatively, you can freeze bagels after baking them. Just be sure to let them cool completely first. This ensures they stay fresh and tasty. When you’re ready, just reheat them as mentioned above. For the full recipe, check out the section on how to make these delicious bagels. Making bagels from scratch takes about 1 hour and 30 minutes total. Here’s the breakdown: - Prep Time: 15 minutes - Rising Time: 1 hour - Boiling and Baking Time: 20-25 minutes You can enjoy fresh bagels in just over an hour and a half! You must boil bagels before baking. Boiling gives bagels their chewy crust. It helps set the shape and enhances the texture. Without boiling, bagels will not have that classic bite. The secret to chewy bagels lies in the ingredients and technique. Use high-protein all-purpose flour. This flour creates a strong gluten structure. Knead the dough well for 8-10 minutes. This builds the gluten and improves the texture. You can use bread flour, but there are pros and cons. - Pros: - Higher protein content - Chewier texture - Cons: - May require more water - Can make dough tougher Both flours work, but all-purpose flour is best for beginners. For the full recipe, check out the details in the earlier section! Making homemade bagels is simple and fun. You only need a few essential ingredients, some time, and a bit of effort. By following clear steps, you can create bagels that impress everyone. Remember to think about variations and storage to keep your bagels fresh. Avoid common mistakes to ensure the best results. With practice, you will master the art of bagel making and enjoy delicious treats anytime. Now, get baking and savor the joy of your homemade bagels!

Easy Homemade Bagels Simple Yet Delicious Recipe

Making bagels at home is easier than you think! With just a few simple ingredients, you can create soft, chewy,

- 1 pre-made pizza dough or 1 pound homemade pizza dough - 1 cup cooked chicken breast, shredded - 1/2 cup BBQ sauce (spicy or regular) - 1 cup mozzarella cheese, shredded - 1/2 cup red onion, thinly sliced - 1/4 cup fresh cilantro, chopped - 1 jalapeño, thinly sliced (optional, for extra heat) - 1 teaspoon olive oil - Salt and pepper to taste For the dough, I love using brands like Pillsbury or Trader Joe's. They offer great taste and save time. If you're making it at home, use high-quality flour. For BBQ sauce, Sweet Baby Ray's is a crowd-pleaser. It pairs well with chicken. For cheese, I recommend part-skim mozzarella. It melts well and keeps the pizza light. Fresh cilantro adds a burst of flavor, so grab the freshest bunch you can find. If you want a lighter option, try using grilled tofu instead of chicken. For a different sauce, you can use ranch dressing or hot sauce. If red onion isn't your favorite, green onions work just as well. You can swap mozzarella for cheddar or even goat cheese for a unique twist. If you need a gluten-free option, use a gluten-free pizza crust or cauliflower crust. First, preheat your oven to 475°F (245°C). This heat helps make a crispy crust. If you have a pizza stone, place it in the oven while it heats. For the dough, you can use store-bought or make your own. If you pick homemade dough, roll it out on a floured surface. Aim for your favorite thickness. If using store-bought, stretch it out to fit your stone or baking sheet. In a medium bowl, mix the shredded chicken with 1/4 cup of BBQ sauce. Make sure all the chicken gets coated well. This step is key for flavor. You can use spicy BBQ sauce for more heat or regular for a milder taste. If you want extra spice, slice a jalapeño to add later. Now, spread the remaining BBQ sauce over the dough. Leave a small edge around the border. Evenly place the BBQ chicken on top. Next, sprinkle the shredded mozzarella cheese over the chicken. Add the sliced red onion for a nice crunch. If you like it spicy, place the jalapeño slices on top. Bake the pizza in the oven for about 12-15 minutes. Look for a golden crust and bubbly cheese. When it's ready, take it out and let it cool for a couple of minutes. Finally, sprinkle fresh cilantro on top, add salt and pepper, and slice it up. Enjoy your spicy BBQ chicken pizza! For the complete process, check out the Full Recipe. For the best pizza dough, start with a clean surface. If you use pre-made dough, let it sit for 15 minutes. This helps it stretch better. If you make your own, knead it well. A good dough has a smooth texture. Roll it out to your desired thickness. A thicker crust gives you a chewy bite. A thinner crust gets crispy. To bake your pizza perfectly, preheat your oven to 475°F (245°C). If you have a pizza stone, put it in the oven while it heats. This helps the crust get crispy. Once the oven is hot, bake your pizza for 12-15 minutes. Keep an eye on the cheese; it should be bubbly and slightly golden. If the edges brown too fast, lower the temperature. Seasoning is key to a tasty pizza. Use salt and pepper on the chicken and veggies. This enhances their natural flavors. If you love heat, add cayenne or chili flakes. Fresh herbs like cilantro add brightness. You can also mix spices into the BBQ sauce for extra kick. Try garlic powder or smoked paprika. These simple tips will make your spicy BBQ chicken pizza sing with flavor! {{image_2}} You can mix up your spicy BBQ chicken pizza by adding different toppings. Try using bacon bits for a smoky flavor. Bell peppers add a nice crunch, and corn brings sweetness. For a gourmet touch, add goat cheese or blue cheese. You can even use pineapple for a sweet twist that balances the spice. If you need a gluten-free option, there are great pre-made crusts available. Cauliflower crust is a popular choice. It’s lower in carbs and still tasty. You can make your own by mixing riced cauliflower with cheese and eggs. This way, you enjoy the same great flavors without the gluten. To adjust the spice, change the BBQ sauce. Use a milder sauce if you prefer less heat. You can also add more or fewer jalapeños. If you want to crank up the heat, try adding crushed red pepper flakes or hot sauce. This way, you can create the perfect spicy BBQ chicken pizza to suit your taste. For the full recipe, check out the section above. You can keep leftover spicy BBQ chicken pizza in the fridge. Place slices in an airtight container. Make sure they cool first. This keeps the crust from getting soggy. Leftover pizza stays fresh for about three to four days. When you’re ready to eat, reheating is key. Use an oven for the best taste. Preheat it to 375°F (190°C). Place the pizza on a baking sheet. Heat it for about 10 to 12 minutes. This warms the pizza and makes the crust crispy. You can also use a skillet. Heat the skillet over medium heat. Place a slice in the pan and cover it. This method warms the bottom and keeps it crispy. Freezing is a great option for meal prep. First, let the pizza cool completely. Then, wrap each slice in plastic wrap. Place the wrapped slices in a freezer bag. Squeeze out as much air as possible. You can freeze pizza for up to two months. To reheat, thaw in the fridge overnight and follow the reheating steps. This way, you'll enjoy your spicy BBQ chicken pizza anytime! For the full recipe, check out the earlier sections. You can easily make your pizza unique. Try adding different toppings. Here are some ideas: - Cheese: Use gouda or pepper jack for extra flavor. - Veggies: Add bell peppers, mushrooms, or spinach for more texture. - Protein: Swap chicken for pulled pork or beef for a twist. - Sauce: Mix BBQ sauce with ranch or hot sauce for a new taste. Mix and match these options to fit your taste! BBQ chicken pizza pairs well with many sides. Consider these options: - Salad: A fresh green salad with vinaigrette is a great choice. - Wings: Serve spicy wings for a fun meal combo. - Dips: Try ranch or blue cheese dip on the side. - Drinks: Pair with iced tea or a light beer for balance. These sides will make your meal more enjoyable. You can keep leftover pizza in the fridge for about 3 to 4 days. To store it: - Place slices in an airtight container or wrap them in foil. - Label the container with the date to track freshness. When you're ready to eat, simply reheat your pizza. Enjoy it warm for the best taste! For the full recipe, check out the details above. In this blog post, we explored the key ingredients for BBQ chicken pizza, including recommended brands and substitutions. I shared step-by-step instructions, tips for perfecting your dough, and ways to enhance flavor. We also looked at tasty variations, options for crusts, and smart storage tips. Now you’re ready to make a delicious BBQ chicken pizza that suits your taste. Enjoy the process and the wonderful flavors you create! Dive in and have fun making your own version at home!

Spicy BBQ Chicken Pizza Flavorful and Easy Recipe

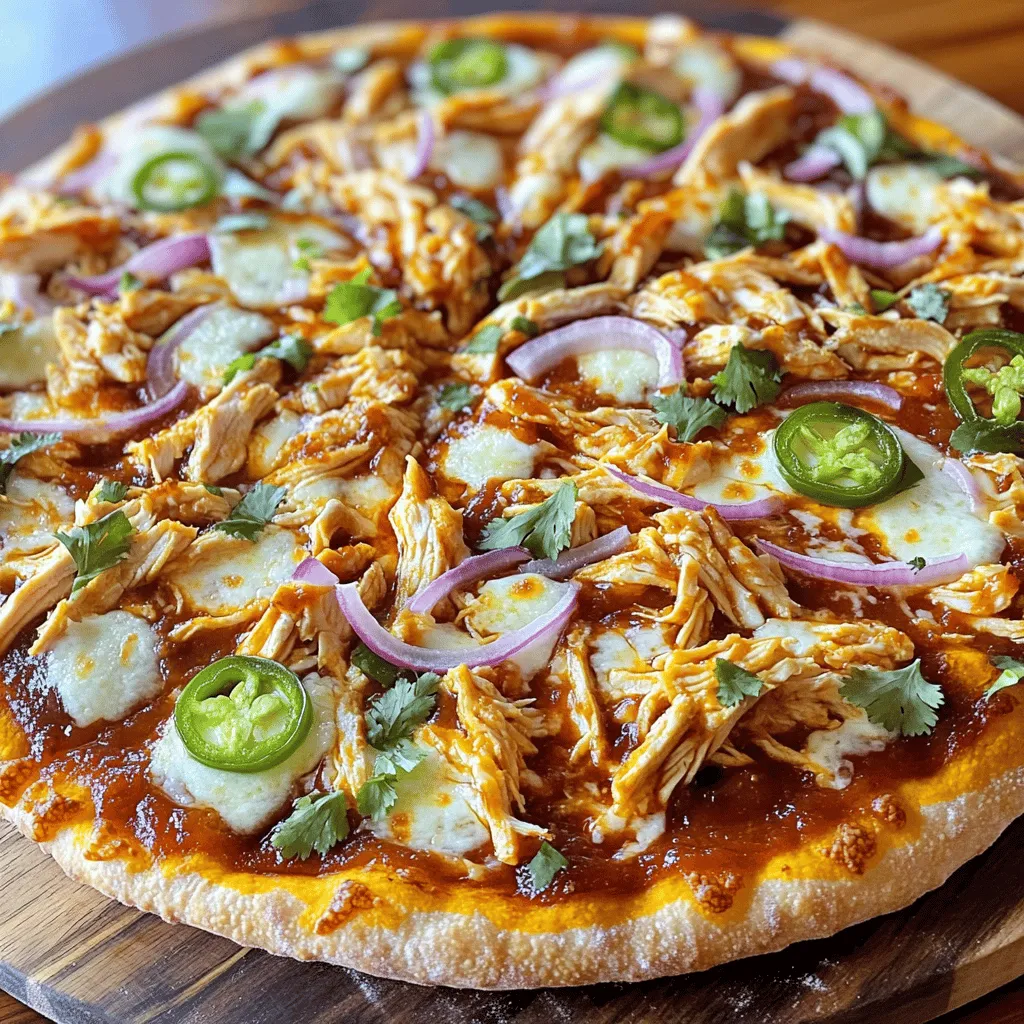
Craving a bold and tasty pizza? Look no further! This Spicy BBQ Chicken Pizza is packed with flavor and is

- 1 pound gnocchi (store-bought or homemade) - 1 pound boneless, skinless chicken breasts, cut into bite-sized pieces - 2 tablespoons olive oil Gnocchi is the star here. You can use store-bought for ease or make your own for fun. I love the texture of homemade, but store-bought saves time. The chicken adds protein and flavor. Cut the chicken into small pieces for quick cooking. Olive oil helps brown the chicken and adds richness. - 1 cup heavy cream - 1/2 cup grated Parmesan cheese - 3 cloves garlic, minced Heavy cream gives this dish its creamy texture. It makes the sauce rich and smooth. Parmesan cheese adds a salty, nutty flavor. Freshly grated cheese melts better than pre-grated. Garlic adds a punch of taste. Mincing it brings out its full flavor. - 1 cup chicken broth - 1 cup fresh spinach, chopped - Salt and pepper to taste Chicken broth adds depth to the sauce. It keeps the dish moist and flavorful. Fresh spinach gives a pop of color and nutrients. Use fresh for the best taste. Season the dish with salt and pepper to enhance all the flavors. To start, fill a large pot with water and add a good amount of salt. Bring the water to a boil. This step is key for flavor. Once the water is boiling, add the gnocchi. Watch for the gnocchi to float, which usually takes about 2-3 minutes. When they rise to the top, they are done. Drain the gnocchi and set them aside. Next, take a large skillet and heat 2 tablespoons of olive oil over medium heat. When the oil is hot, add the bite-sized chicken pieces. Season them with salt and pepper. Cook the chicken for about 5-7 minutes. Look for a golden brown color and ensure the chicken is cooked through. This gives a nice flavor to your dish. Now it’s time to bring everything together. First, stir in 3 minced garlic cloves and cook for one more minute. This will make your kitchen smell amazing! Then, pour in 1 cup of chicken broth and 1 cup of heavy cream. Stir well and bring the mix to a gentle simmer. After that, add the cooked gnocchi and 1 cup of chopped spinach. Let it simmer for 2-3 minutes. You want the spinach to wilt and the sauce to thicken. Finally, stir in 1/2 cup of grated Parmesan cheese. This adds a rich and creamy texture to the dish. Adjust the seasoning with more salt and pepper if needed. Enjoy your Quick Creamy Chicken Gnocchi from the Full Recipe! To ensure your chicken is cooked through, cut it into small pieces. This helps it cook evenly. Use a meat thermometer for best results. The chicken should reach 165°F (75°C). This guarantees it’s safe to eat. To perfect the creamy sauce, add the heavy cream slowly. Stir it in after the chicken cooks. This helps the sauce blend smoothly. If the sauce is too thick, add more chicken broth. A gentle simmer helps the flavors mix well. For the best accompaniments, serve Quick Creamy Chicken Gnocchi with crusty bread. A fresh salad also pairs nicely. This adds a nice crunch and balances the meal. For presentation ideas, use shallow bowls. Garnish your dish with extra Parmesan cheese. A sprig of parsley adds a pop of color. This makes your meal look professional and inviting. If you want alternatives for heavy cream, use half-and-half or coconut milk. Both options still give a creamy texture. For vegetarian options, swap the chicken for mushrooms or tofu. These ingredients provide protein and flavor. You can also use vegetable broth instead of chicken broth in the sauce. For the full recipe, check out the detailed cooking instructions above. {{image_2}} To make your Quick Creamy Chicken Gnocchi even better, try adding herbs and spices. Fresh basil or thyme works well. You can also add a pinch of red pepper flakes for some heat. These small changes can give your dish a new twist. Incorporating vegetables is another great way to enhance flavor. Consider adding mushrooms, bell peppers, or zucchini. These veggies can boost nutrition and add color to your dish. Just sauté them with the chicken for best results. If you need a gluten-free option, look for gluten-free gnocchi. Many brands offer this choice, and it tastes just as good. You can also make your own using gluten-free flour. For a low-calorie version, consider using less cream. You can replace half the cream with chicken broth. This change keeps the dish creamy while reducing calories. Also, use leaner cuts of chicken for an even lighter meal. Try a gnocchi bake for a fun twist. After mixing all ingredients, transfer them to a baking dish. Top with extra cheese and bake until bubbly. This method creates a crispy top that contrasts with the creamy inside. You can also turn this dish into a soup. Simply add more chicken broth to the mix. This way, you get a comforting creamy soup that's perfect for chilly days. For the full recipe, check out the Quick Creamy Chicken Gnocchi section. To store your delicious leftover Quick Creamy Chicken Gnocchi, let it cool first. Place it in an airtight container. This keeps it fresh for up to three days in the fridge. I recommend using glass containers. They do not stain and make reheating easy. When you are ready to enjoy your leftovers, reheat gently. Use a skillet over low heat. Add a splash of chicken broth to help keep the dish creamy. Stir often to avoid burning. You want that rich texture to stay intact. You can freeze this dish if you want to save some for later. Just make sure to freeze it before adding the spinach and cheese. This helps the gnocchi and sauce stay nice when thawed. Use freezer-safe containers for best results. To thaw, place the container in the fridge overnight. Reheat in a skillet, adding the spinach and cheese last. This way, everything heats up evenly and stays creamy. Enjoy your delicious meal again! The best way to cook gnocchi is by boiling it. Start with a large pot of salted water. Once the water boils, add the gnocchi. Cook for about 2-3 minutes until they float. Floating means they are done. Drain them carefully and set aside. This method keeps the gnocchi soft and tender. You can also sauté them later for a crispy touch. Yes, you can use frozen chicken for this dish. However, remember to thaw it first. Defrost in the fridge overnight or use the microwave. Once thawed, cut it into small pieces. This helps it cook evenly. Adjust the cooking time slightly. Cook until the chicken is fully done and golden brown. To lighten this dish, swap heavy cream for half-and-half or milk. You can also reduce the amount of cheese. Adding more fresh spinach or other veggies boosts nutrition. Use less oil when cooking the chicken, or try grilling instead. Serve with a side salad for a refreshing touch. This article covered how to make a tasty chicken and gnocchi dish. We explored key ingredients and simple steps to create a delicious meal. You learned about cooking tips, variations, and storage options. Remember, you can easily adjust flavors and ingredients to suit your needs. Enjoy experimenting with this recipe. Cooking should be fun and delicious. Now, gather your ingredients and get started!

Quick Creamy Chicken Gnocchi Savory and Easy Dish

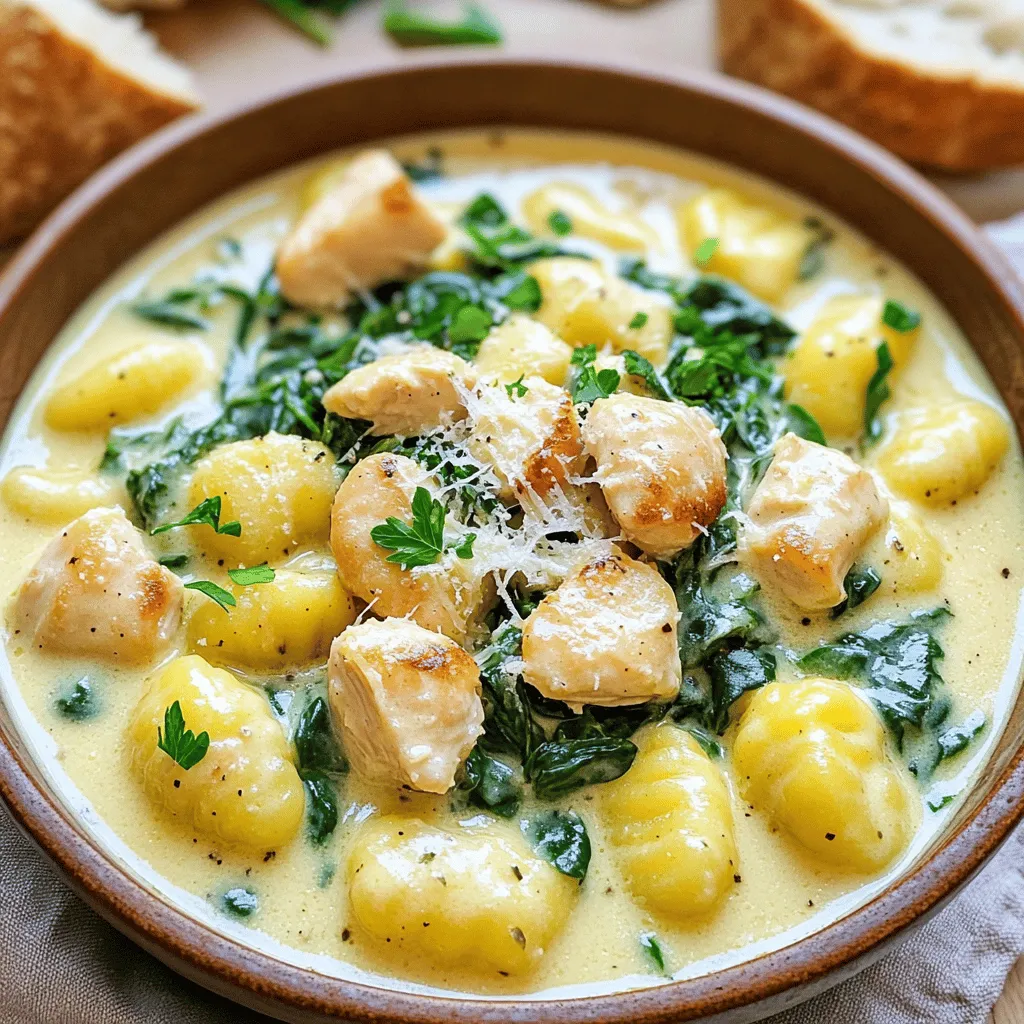
Looking for a tasty and quick meal that impresses? My Quick Creamy Chicken Gnocchi is your answer! This dish combines

To make garlic butter steak quesadillas, gather these simple ingredients: - Flank steak (1 lb, thinly sliced) - Flour tortillas (4 large) - Pepper jack cheese (1 cup, shredded) - Cheddar cheese (1 cup, shredded) - Unsalted butter (4 tablespoons) - Garlic (4 cloves, minced) - Smoked paprika (1 teaspoon) - Ground cumin (1 teaspoon) - Salt and pepper (to taste) - Cilantro (fresh, chopped for garnish) - Sour cream and salsa (for serving) These ingredients blend well together. The flank steak brings a rich flavor, while the cheeses add creaminess. Garlic and spices enhance the taste and aroma. Flour tortillas are perfect for wrapping all these delicious fillings. Don't forget the garnishes for a fresh finish! {{ingredient_image_1}} To start, I mix the flank steak with spices. In a bowl, combine smoked paprika, cumin, salt, and pepper. Toss in the sliced steak. I let it marinate for at least 15 minutes. This time helps the flavors soak in well. In a large skillet, I melt 2 tablespoons of butter over medium-high heat. Once the butter is hot, I add the marinated steak. I cook it for about 3-4 minutes. It should be browned and cooked through. Near the end, I add minced garlic for extra flavor. After cooking, I remove the steak from heat and set it aside. Next, I lower the heat to medium. I place one flour tortilla in the skillet. On top, I layer some of the cooked steak. Then, I add a mix of pepper jack and cheddar cheese. For a crispy quesadilla, I press down gently with a spatula. After that, I place another tortilla on top. I cook it for about 2-3 minutes until the bottom is golden. Flipping the quesadilla is key. I carefully use a spatula to turn it over. I add the remaining 2 tablespoons of butter around the edges. This allows the butter to seep in while it cooks. I let it cook for another 2-3 minutes. The cheese should melt, and the tortilla will turn golden brown. Once done, I remove it from the skillet and let it rest for a minute before slicing. I garnish with chopped cilantro for a fresh touch. To make great quesadillas, start with the right cut. I recommend flank steak. It is tender and full of flavor. When you slice the steak, cut against the grain. This helps keep it juicy. Marinating is key to flavor. I use smoked paprika and cumin. Mix these with salt and pepper, then add the sliced steak. Let it sit for at least 15 minutes. This short time really boosts the taste. You can boost the flavor by adding spices. Try a pinch of chili powder or cayenne for heat. You can also use different cheeses. Gouda or Monterey Jack work well too. If you want a smoky taste, grill the quesadillas instead. Just heat them on a grill pan for a few minutes. Baking is another option. Set your oven to 400°F, and bake until golden. Pair your quesadillas with sides that balance the meal. A fresh salad with lime dressing works well. You can also serve them with chips and guacamole. Don’t forget the dips! Sour cream and salsa are classic choices. They add creaminess and tang. Enjoy your meal with friends or family for a fun gathering! Pro Tips Resting the Steak: Let the cooked steak rest for a few minutes before slicing. This helps the juices redistribute, resulting in a more flavorful and tender meat. Cheese Choices: Feel free to mix and match cheeses. Adding a bit of mozzarella can enhance the meltiness, while a sharp cheddar can add more flavor. Crispier Tortillas: For extra crispy quesadillas, brush the tortillas lightly with olive oil before cooking. This adds flavor and helps achieve that golden, crunchy texture. Make Ahead: You can prepare the steak and cheese filling ahead of time. Just assemble the quesadillas when you're ready to eat for a quick and easy meal. {{image_2}} If you want to mix it up, try using chicken or shrimp. Both options work well in quesadillas. For chicken, grill or sauté it with seasonings like paprika and cumin. Cook it until it’s juicy and tender. Use the same method for shrimp, but cook it for less time. You can also go vegetarian. Use mushrooms, bell peppers, or zucchini as a hearty filling. Just sauté the veggies until soft for great flavor. While pepper jack and cheddar are delicious, feel free to experiment with different cheeses. Monterey Jack adds creaminess, while feta gives a tangy kick. You can even use a mix of mozzarella and gouda for a rich taste. Each cheese brings its own unique flavor, so have fun discovering your favorites! Want to boost the flavor? Add some fresh veggies like spinach or diced tomatoes. They add color and nutrition too. If you like heat, drizzle some hot sauce inside the quesadilla. You could also toss in some jalapeños for an extra spicy kick. These additions make your quesadillas unique and exciting! To keep your quesadillas fresh, you should refrigerate them. Place them in an airtight container. You can also wrap them in plastic wrap. This keeps them from drying out. Reheat them in a skillet over medium heat for a few minutes. You can also use the microwave, but they may get soggy that way. Freezing is a great option if you want to save some quesadillas for later. Let them cool completely before freezing. Wrap each quesadilla in foil or plastic wrap. Then, place them in a freezer-safe bag. When you want to eat them, thaw in the fridge overnight. Reheat in a skillet for best results. In the fridge, your quesadillas will last about 3 to 4 days. If you freeze them, they can last up to 2 months. Be sure to label your containers with the date. This way, you’ll know when to enjoy them again. I prefer flank steak for quesadillas. It has great flavor and cooks fast. You can also use skirt steak or sirloin for a tasty option. When you slice it thin, it becomes tender and easy to eat. Just remember to cut against the grain for the best texture. Yes, you can prepare them ahead of time. Cook the steak and assemble the quesadillas. Just store them in the fridge until you are ready to cook. You can also freeze them. Just make sure to wrap them well in plastic wrap. When you’re ready, heat them in a skillet until crispy and warm. To get extra crispy quesadillas, use a good amount of butter. This helps create a golden crust. Cook them over medium heat, allowing the tortillas to crisp up slowly. Flipping them gently also helps keep the filling inside. You can also use a press or weigh them down with a skillet while they cook. Sour cream and salsa are classic dips for quesadillas. You can also try guacamole for a creamy touch. For a spicy kick, consider a chipotle mayo or a zesty ranch dip. These dips add flavor and make each bite even more enjoyable. In this blog post, we explored how to make delicious garlic butter steak quesadillas. You learned about the key ingredients, step-by-step cooking instructions, and helpful tips for perfecting your dish. Remember to experiment with flavors and variations to make it your own. Quesadillas can be a fun and tasty meal for any occasion. Enjoy cooking, and share your creations with friends and family. Happy cooking!

Garlic Butter Steak Quesadillas Easy and Flavorful Meal

Are you ready for a meal that bursts with flavor? Garlic Butter Steak Quesadillas are your answer! This easy dish

To make a Classic Cobb Salad, you need fresh and tasty ingredients. Here’s what you’ll need: - 2 cups mixed greens (like romaine or spinach) - 1 cup cooked chicken breast, diced - 2 hard-boiled eggs, chopped - 1 ripe avocado, diced - 1 cup cherry tomatoes, halved - 1/2 cup crumbled blue cheese - 1/4 cup cooked bacon bits (optional) - 1/4 cup red onion, thinly sliced These ingredients give the salad its classic taste and texture. For those who want to customize, consider adding: - Grilled shrimp or steak for extra protein - Quinoa for added texture and nutrition - Sliced bell peppers for crunch The dressing can make or break your salad. Here’s a simple yet delicious option: - 3 tablespoons olive oil - 2 tablespoons red wine vinegar (apple cider vinegar works too) - 1 teaspoon Dijon mustard - Salt and black pepper to taste Just whisk these ingredients together. You can drizzle it over the salad or serve it on the side. This allows everyone to choose their amount. For a zesty twist, try adding a squeeze of lemon juice or a dash of hot sauce to the dressing. With these ingredients and tips, you can create a Classic Cobb Salad that is both tasty and full of vibrant flavors. For the full recipe, check out the detailed instructions. To start, you need to cook the hard-boiled eggs. Place them in a pot and cover with water. Bring the water to a boil. Once boiling, turn off the heat. Cover the pot and let the eggs sit for 12 to 15 minutes. This makes them easy to peel later. After that, put the eggs in an ice bath to cool. When they are cool, peel and chop them. Next, prepare the chicken. If you have cooked chicken breast, dice it into small pieces. If not, you can bake or grill a chicken breast until it’s fully cooked. Let it cool before dicing. Now, grab a large bowl and toss the mixed greens. Use romaine and spinach for the best flavor and texture. When assembling, layer your ingredients for a nice look. Start with the mixed greens at the bottom. Then, place the diced chicken on top. Next, arrange the chopped eggs in sections over the greens. This creates a beautiful display. Add the diced avocado and halved cherry tomatoes in separate sections. Sprinkle the crumbled blue cheese evenly over the salad. If you like bacon, scatter the bits on top. Finally, add the thinly sliced red onion. This gives a nice crunch and flavor. To make the dressing, whisk together the olive oil, red wine vinegar, and Dijon mustard in a small bowl. Add salt and pepper to taste. Mix well until it’s smooth. You can drizzle the dressing over the salad right before serving. Or, serve it on the side. This lets each person use their desired amount. Toss the salad gently if you want to mix it. Or, leave it layered for a pretty presentation. For the complete recipe, check the Full Recipe section. To make a great Cobb salad, you need balanced flavors. Each ingredient should shine on its own but also work together. Start with fresh greens like romaine and spinach. They add crunch and nutrition. For protein, use juicy chicken breast. It has a mild taste that pairs well with other flavors. When it comes to vegetables, pick ripe avocados and sweet cherry tomatoes. These add creaminess and freshness. Crumbled blue cheese gives the salad a bold kick. If you like, add cooked bacon bits for a savory touch or skip them for a lighter meal. Lastly, don’t forget the thinly sliced red onion. It adds a nice bite and color. You can make parts of the Cobb salad ahead of time. Cook the chicken and hard-boil the eggs in advance. This makes assembly quick and easy. Store the greens and toppings separately. This keeps them fresh and crisp. For storage, use airtight containers. Keep the dressing in a separate jar. This way, your salad stays fresh longer. When you’re ready to eat, just toss everything together. If you prefer, serve the dressing on the side. It allows everyone to dress their salad to taste. {{image_2}} You can easily change ingredients in your Classic Cobb Salad to fit your needs. If you are avoiding meat, try using chickpeas or tofu instead of chicken. For cheese, you can swap blue cheese with feta or goat cheese for a new flavor. If you cannot eat eggs, skip them or use silken tofu as a creamy substitute. To make the dressing more exciting, try adding minced garlic or a squeeze of lemon juice. If you like heat, mix in some red pepper flakes or hot sauce. You can also play with toppings. Try adding roasted corn, diced bell peppers, or even fruits like apples or pears. These extras will give your salad a delicious twist. For the full recipe, check the Classic Cobb Salad section. To keep your salad fresh, place it in an airtight container. Make sure to store the dressing separately. This will help prevent sogginess. When ready to eat, drizzle the dressing over the salad just before serving. If you have leftover salad, try to eat it within two days for the best taste. Can you freeze Classic Cobb Salad ingredients? I do not recommend freezing the entire salad. Freezing can change the texture of many ingredients. However, you can freeze some components. For instance, you can freeze cooked chicken. Make sure it is well-sealed in a freezer bag. You can also freeze cooked bacon bits if you want. Just remember to thaw these ingredients in the fridge before using them. For the best flavor, keep the salad fresh and avoid freezing. If you want to prepare ahead, store ingredients separately. This way, you can mix them when you are ready to enjoy your salad. What is the origin of Cobb Salad? Cobb Salad comes from a restaurant in Hollywood. It started in the 1930s. The chef, Bob Cobb, made it late one night. The dish has chicken, eggs, and many fresh veggies. It became popular quickly and is a classic now. Can I make it vegetarian? Yes, you can make a vegetarian Cobb Salad. Just leave out the chicken and bacon. You can add more beans or nuts for protein. Tofu or tempeh work well too. What sides pair well with this salad? Cobb Salad pairs well with light sides. You can serve it with crusty bread or a simple fruit salad. A light soup can also be a great match. Are there healthier alternatives to dressing? Yes, there are many options. You can use plain yogurt mixed with herbs. A light vinaigrette with less oil is also a good choice. Just be sure it has good flavor without too many calories. How do I select ripe avocados? Look for avocados that feel slightly soft. Gently press on the skin. If it yields to your touch, it's ripe. A dark green skin often means it’s ready to eat. Avoid any with large dark spots or cracks. Can I serve it in a different style? Absolutely! You can serve it as a wrap or in a bowl. You can also layer it in a jar for a fun meal on the go. Just keep the dressing separate until you are ready to eat. What times of the year is it best enjoyed? Cobb Salad is great year-round. It’s fresh in spring and summer. You can use seasonal veggies for added flavor. In fall and winter, it is still satisfying with hearty toppings like roasted squash. For a complete guide on making this tasty dish, check out the Full Recipe. Classic Cobb Salad is simple yet full of flavor. We explored its key ingredients, from traditional staples to customizable options. Preparation and assembly matter for a great look and taste. Tips for balance and meal prep can enhance your salad game. We also covered variations, storage methods, and answered common questions. Make this salad a go-to for any meal. Enjoy experimenting with flavors and ingredients. You can create a dish that impresses every time you serve it. Now, let’s make your Cobb Salad experience fun and delicious!

Classic Cobb Salad Flavorful Ingredients and Tips

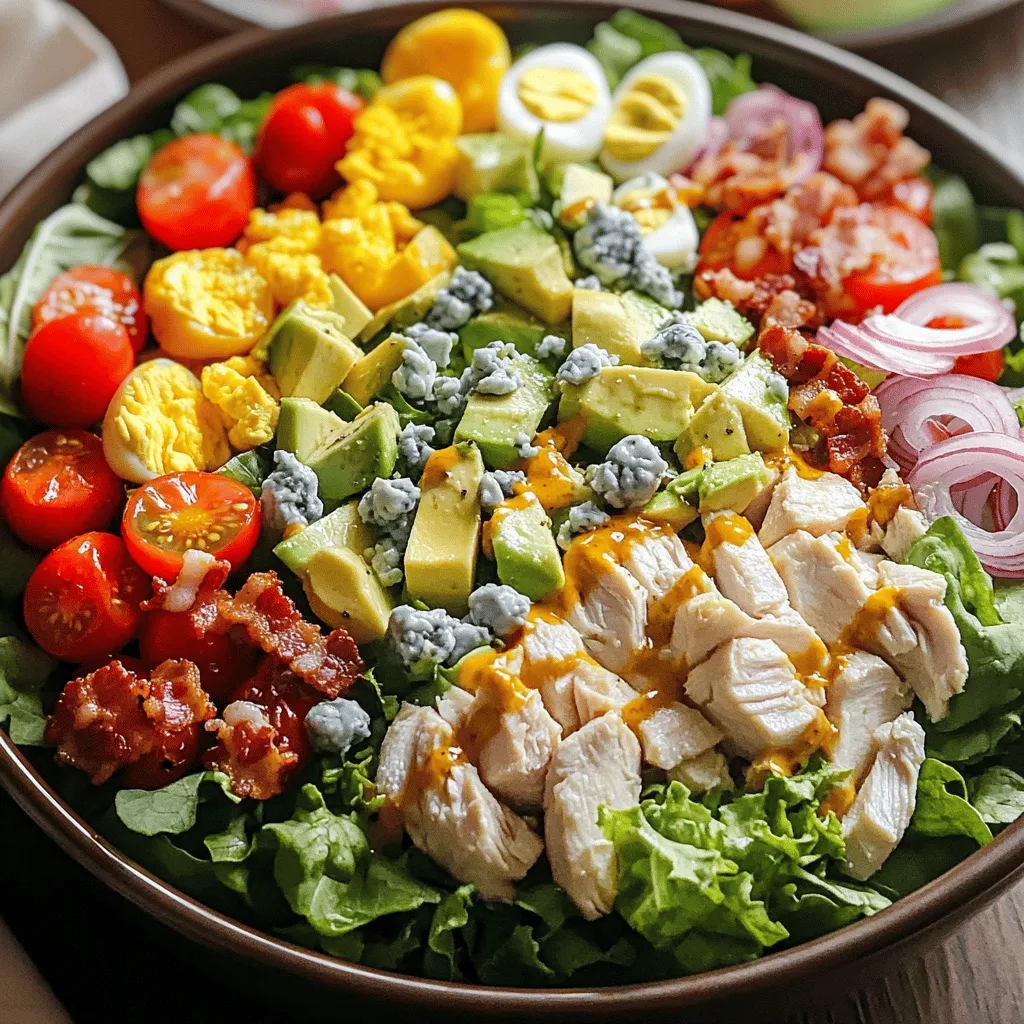
Are you ready to elevate your salad game? The Classic Cobb Salad is a vibrant mix of flavors and textures

- 2 lbs baby potatoes, halved - 4 cloves garlic, minced - 1/4 cup olive oil - 1 tablespoon lemon zest - 1/4 cup fresh lemon juice - 2 teaspoons dried oregano - 1 teaspoon salt - 1/2 teaspoon black pepper - Fresh parsley, chopped (for garnish) - Lemon wedges (for serving) When I make Greek lemon roasted potatoes, I love to use baby potatoes. They stay tender and creamy inside while getting crispy on the outside. The garlic gives a nice punch of flavor, while olive oil adds richness. Fresh lemon juice and zest bring a bright taste, making every bite refreshing. Dried oregano offers an earthy note that pairs well with the lemon. Each ingredient plays a vital role. The salt and pepper enhance the natural flavors of the potatoes. I always like to garnish with fresh parsley for a pop of color and freshness. Lemon wedges on the side add an extra zing when served. - Calories: 210 - Protein: 3g - Fat: 10g - Carbohydrates: 31g - Fiber: 3g Greek lemon roasted potatoes are not just tasty; they are also filling. Each serving gives you energy without too many calories. The fiber helps keep you full, too. This dish fits well into a balanced meal, whether you serve it with grilled chicken or a fresh salad. For the full recipe, check the details above! Start by preheating your oven to 400°F (200°C). This temperature helps the potatoes roast evenly. A hot oven makes the outside crispy while keeping the inside soft. In a large bowl, mix together the halved baby potatoes, minced garlic, and olive oil. Add the lemon zest, fresh lemon juice, oregano, salt, and black pepper. Toss everything well so each potato gets coated with the mix. This step is key for a bright and zesty flavor in every bite. Transfer the coated potatoes into a large baking dish. Spread them out in a single layer. This helps them roast better. Roast the potatoes for 40-45 minutes. They should be golden brown and fork-tender when done. Toss the potatoes halfway through cooking. This ensures they cook evenly and get that perfect golden color. Don’t forget to check for the full recipe to enjoy this tasty dish! Choosing the right potatoes is key. I love using baby potatoes for this dish. They have a creamy texture that adds to the taste. Their small size means they cook evenly and absorb flavors well. You can also try new potatoes for a fresh twist. They bring a slight sweetness that balances the lemon. To boost the taste, consider adding spices or herbs. A pinch of smoked paprika gives a warm kick. Fresh herbs, like rosemary or thyme, add depth to the dish. You can mix in some crushed red pepper for heat. Each addition makes the dish unique. Don’t hesitate to experiment with flavors that you love. While roasting is my favorite method, there are other fun ways to cook these potatoes. You can air fry them for a quicker option. The air fryer gives a nice crisp without using much oil. Grilling is another great method. It adds a smoky flavor that pairs well with the lemon. Each cooking method offers a new taste experience. {{image_2}} You can add a Mediterranean flair to Greek lemon roasted potatoes. Try mixing in olives or feta cheese. The briny olives bring a nice saltiness. Feta adds creaminess and tang. Both ingredients enhance the dish's depth. Simply stir in these ingredients before roasting. This twist makes the potatoes even more exciting. Fresh herbs can change the taste of your potatoes. I love using rosemary or thyme. They add a fragrant aroma and boost flavor. Chop the herbs finely and toss them with the potatoes. You can also mix them with the olive oil. It’s a simple way to elevate your dish. If you love heat, add chili flakes or paprika. These can give your potatoes a nice kick. Just sprinkle some on before roasting. You can control how spicy you want them. It’s an easy addition that changes everything. Try different spices for unique flavors. To keep your Greek lemon roasted potatoes fresh, follow these steps. First, let the potatoes cool down to room temperature. This step helps avoid condensation in the storage container. Next, place the leftovers in an airtight container. You can store them in the fridge for up to three days. If you want to keep them longer, consider freezing. For freezing, pack the cooled potatoes in a freezer-safe bag. Squeeze out as much air as you can before sealing. They can last in the freezer for up to three months. When it's time to enjoy your leftovers, reheating is key. To maintain texture and flavor, I recommend using the oven. Preheat your oven to 350°F (175°C). Spread the potatoes evenly on a baking sheet. Heat them for about 15-20 minutes, or until warmed through. This method helps keep the potatoes crispy. If you’re in a hurry, you can use the microwave. However, microwaving may make them a bit soft. Just keep an eye on them and reheat in short bursts. To get crispy potatoes, start with the right temperature. Preheat your oven to 400°F (200°C). Use baby potatoes, as they have a nice skin that crisps well. Toss the potatoes with olive oil and spices. Make sure they are in a single layer in the baking dish. This allows hot air to circulate around them. Halfway through cooking, toss the potatoes. This helps them brown evenly. You can also try broiling them for the last few minutes. Keep an eye on them to avoid burning. Yes, you can use other types of potatoes. Yukon Gold or Red potatoes work well, too. They have a creamy texture when cooked. Starchy potatoes like Russets might not hold their shape as well. They can become too fluffy. If you use waxy potatoes, like fingerlings, they will also turn out great. Just remember to cut them into even pieces for even cooking. These potatoes pair well with many dishes. For meat lovers, serve with grilled chicken or lamb. The lemon flavor adds brightness to rich meats. If you prefer vegetarian options, try them with grilled veggies or a fresh salad. They also taste great alongside fish, like salmon or sea bass. The potatoes can be a star side dish at any meal. For the complete recipe specifics, check out the Full Recipe. Greek Lemon Roasted Potatoes bring flavor and joy to your table. We explored ingredients, cooking steps, and important tips for the best results. Whether you choose to add herbs or spices, there are many ways to make this dish your own. Proper storage ensures tasty leftovers and easy reheating. Enjoy with your favorite meats or veggies. Now, it’s your turn to create this simple and delicious meal. Happy cooking!

Greek Lemon Roasted Potatoes Flavorful Side Dish

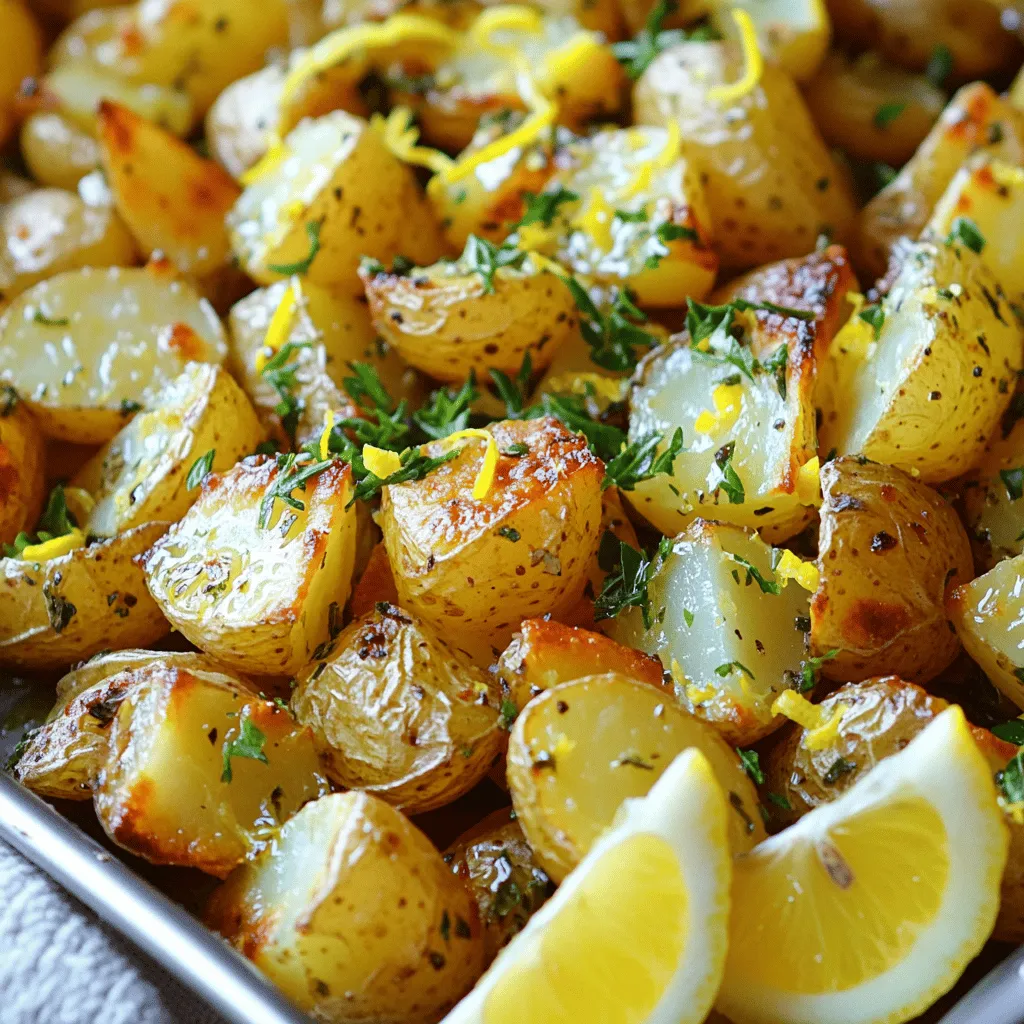
If you’re looking to elevate your meal game, these Greek Lemon Roasted Potatoes are a must-try. With their zesty lemon

For the best One Pot Taco Pasta, gather these simple ingredients: - 12 oz penne pasta (or pasta of choice) - 1 lb ground beef or turkey - 1 packet taco seasoning (or homemade mix) - 1 can (15 oz) black beans, rinsed and drained - 1 can (14.5 oz) diced tomatoes with green chilies - 2 cups chicken or vegetable broth - 1 cup frozen corn - 1 bell pepper, diced (any color) - 1 medium onion, diced - 2 cloves garlic, minced - 1 cup shredded cheddar cheese - 2 tablespoons olive oil - Salt and pepper to taste - Fresh cilantro, chopped (for garnish) If you lack some items, don't worry! Here are easy swaps: - Use any pasta shape you like, such as rotini or macaroni. - Swap ground beef or turkey for ground chicken or plant-based meat. - You can replace black beans with pinto beans or chickpeas. - Try fresh tomatoes instead of canned, if you prefer. - Use vegetable broth if you want a vegetarian dish. - For a cheese alternative, use dairy-free shredded cheese. Toppings make your dish shine! Here are my favorites: - Sliced jalapeños for heat - Avocado slices for creaminess - Sour cream for a cool touch - Chopped green onions for freshness - Extra shredded cheese for melty goodness - Lime wedges for a bright kick These ingredients and swaps help you customize your One Pot Taco Pasta. Cooking is about your taste, so feel free to explore! For the full recipe, check the complete instructions above. Making One Pot Taco Pasta is quick and fun. You start by cooking the meat and veggies together. Then, you add the pasta and other ingredients. Finally, everything cooks in one pot. It’s easy, and clean-up is a breeze! 1. Heat the Olive Oil: In a large pot, heat 2 tablespoons of olive oil over medium heat. 2. Sauté the Veggies: Add 1 medium diced onion and 1 diced bell pepper. Cook for about 3-4 minutes until they’re soft. 3. Add Garlic: Stir in 2 minced garlic cloves for 1 minute. Be careful not to burn the garlic. 4. Cook the Meat: Add 1 pound of ground beef or turkey. Break it up with a spatula. Cook for 5-7 minutes until it’s brown. 5. Season the Meat: Sprinkle 1 packet of taco seasoning over the meat. Mix it well. 6. Combine Ingredients: Pour in 1 can of diced tomatoes, 1 can of black beans, 1 cup of frozen corn, and 2 cups of broth. Stir everything together. 7. Add the Pasta: Add 12 ounces of uncooked penne pasta. Make sure it’s underwater in the liquid. Bring the pot to a boil. 8. Simmer: Once boiling, lower the heat. Cover the pot and simmer for 12-15 minutes. Stir often until the pasta is al dente. 9. Add Cheese: Remove the pot from heat. Stir in 1 cup of shredded cheddar cheese until it melts. 10. Taste and Serve: Season with salt and pepper. Serve hot and top with fresh cilantro. - Use Enough Liquid: Make sure there is enough broth for the pasta to cook well. - Don’t Overcook the Pasta: Keep an eye on the time and stir to avoid sticking. - Test for Doneness: Taste the pasta a minute before the cooking time ends. It should be firm but not hard. For the full recipe, check the detailed steps above. Enjoy the process and the tasty results! When making One Pot Taco Pasta, avoid these common mistakes: - Not cooking the meat fully: Always cook your meat until it turns brown. This adds rich flavor. - Skipping the seasoning: Don't forget to add taco seasoning. It brings all the flavors together. - Overcooking pasta: Stir the pasta often. Check it at the 12-minute mark to keep it al dente. To boost the taste of your One Pot Taco Pasta, try these tips: - Use homemade taco seasoning: This gives a fresher, bolder flavor compared to store-bought options. - Add lime juice: Squeeze fresh lime juice just before serving. It brightens the dish. - Mix in fresh herbs: Cilantro or green onions add freshness and a pop of color. Here are the tools that make cooking easier: - Large pot or Dutch oven: This helps cook everything evenly and holds all the ingredients. - Wooden spoon or spatula: Use this to mix ingredients without scratching your pot. - Measuring cups and spoons: Accurate measurements keep the flavors balanced. These tips will help you create a delicious One Pot Taco Pasta every time. For the full recipe, check out the details above. Enjoy your cooking! {{image_2}} You can easily switch this dish to a vegetarian or vegan option. For a vegetarian taco pasta, replace the meat with extra black beans or lentils. This change adds protein and keeps it hearty. Use vegetable broth instead of chicken broth to keep it vegan. For a vegan cheese option, try nutritional yeast or a plant-based cheese. These swaps will give you a tasty meal without meat. If you need a gluten-free dish, use gluten-free pasta. Many brands offer great options that taste good. Make sure to check the taco seasoning for gluten. Some store-bought mixes can include gluten. You can also make your own seasoning with cumin, chili powder, garlic powder, and paprika. This way, you control the ingredients and flavors. You can choose different proteins for your taco pasta. Ground turkey or chicken works well if you want leaner meat. For a richer flavor, try ground beef. You can also use plant-based crumbles if you prefer a meatless meal. Each option can change the taste, so feel free to mix and match. Storing your One Pot Taco Pasta is easy. First, let it cool down. Then, place it in an airtight container. This keeps the pasta fresh. You can store it in the fridge for up to three days. Make sure to label the container with the date. This helps you keep track of freshness. To reheat your pasta, use a microwave or a stove. If you use a microwave, place a serving in a bowl. Heat it for 1-2 minutes. Stir halfway through to ensure even heating. If you prefer the stove, add the pasta to a pot. Add a splash of broth or water to prevent sticking. Heat over low heat for about 5 minutes. Stir often until warm. You can also freeze One Pot Taco Pasta. After it cools, transfer it to a freezer-safe container. Leave some space at the top. The pasta will expand as it freezes. This dish can last up to three months in the freezer. When you're ready to eat, thaw it in the fridge overnight. Then, reheat using the methods above. Enjoy your meal anytime! For the full recipe, check out the earlier section. To add heat to One Pot Taco Pasta, you can use spicy taco seasoning. You can also add sliced jalapeños or a dash of hot sauce. Fresh chopped chili peppers are another great choice. Adjust the amount based on your heat preference. For a smoky flavor, try adding chipotle powder. It’s fun to experiment with flavors! Yes, you can use any pasta you like! While I prefer penne, rotini or fusilli work well too. Short shapes hold sauce better. If you want a lighter dish, try whole wheat or gluten-free pasta. Just remember to adjust cooking times as needed. Always check the pasta package for guidance on cooking. One Pot Taco Pasta takes about 30 minutes total. You'll spend about 15 minutes prepping and the same for cooking. This makes it perfect for busy nights. Just keep an eye on the pasta as it cooks. Stir occasionally to prevent sticking. Enjoy this quick and tasty meal! You've learned how to make a tasty One Pot Taco Pasta. We covered the important ingredients, cooking steps, and helpful tips. I shared ideas for variations, including vegetarian and gluten-free options. You now know how to store and reheat leftovers too. Remember, cooking should be fun and easy. Experiment with flavors to make the dish your own. Enjoy your meal!

One Pot Taco Pasta Flavorful and Easy Recipe

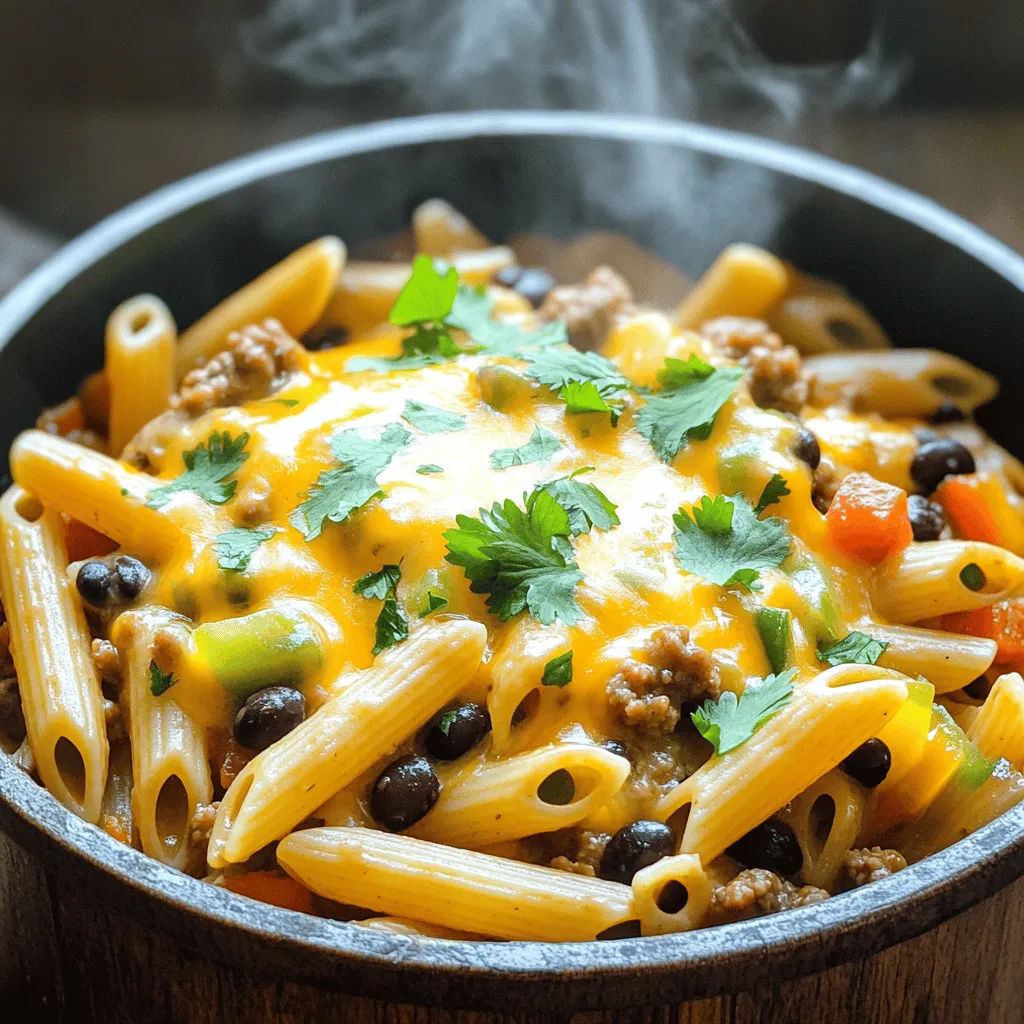
Craving a tasty meal with minimal cleanup? One Pot Taco Pasta is your answer! This simple, flavorful dish combines all

To make easy teriyaki chicken skewers, you need a few key ingredients. These will help you create a tasty and colorful meal. Here’s what you will need: - Chicken and Marinade Components - 1 lb (450g) boneless, skinless chicken thighs, cut into 1-inch pieces - 1/4 cup soy sauce - 1/4 cup honey - 2 tablespoons rice vinegar - 1 tablespoon sesame oil - 2 cloves garlic, minced - 1 teaspoon fresh ginger, grated - 1 tablespoon cornstarch mixed with 2 tablespoons water (to thicken the sauce) - Vegetables for Skewers - 1 red bell pepper, cut into 1-inch pieces - 1 green bell pepper, cut into 1-inch pieces - 1 small zucchini, sliced into thick rounds - Bamboo or metal skewers (if using bamboo, soak in water for 30 minutes) - Garnish Essentials - Sesame seeds - Chopped green onions These ingredients will bring out great flavors in your skewers. The chicken pairs perfectly with the sweet and salty marinade. The veggies add color and crunch. You can find the full recipe for easy teriyaki chicken skewers further along in this article. Enjoy cooking! Marinating the Chicken Start by making the marinade. In a bowl, whisk together soy sauce, honey, rice vinegar, sesame oil, minced garlic, and grated ginger. This mix gives the chicken a sweet and savory taste. Divide the marinade in half. Place the chicken pieces in one half and marinate for at least 30 minutes. If you have time, let them sit for up to 2 hours. This makes the flavors stronger. Preparing the Skewers While the chicken marinates, prepare your vegetables. Cut the bell peppers and zucchini into 1-inch pieces. Thread the vegetables onto skewers, alternating colors. This adds visual appeal and flavor. If you use bamboo skewers, soak them in water for 30 minutes. This helps prevent burning. Cooking Process After marinating, remove the chicken from the fridge. Thread the chicken onto the other half of the skewers, mixing with the vegetables. Heat your grill or grill pan on medium-high. Lightly oil the grill grates. Grill the skewers for about 5-7 minutes on each side. The chicken should be cooked through and have nice grill marks. In the last few minutes, baste with the thickened teriyaki sauce. Once done, let the skewers rest for a few minutes. Drizzle any remaining sauce over them. Garnish with sesame seeds and chopped green onions for a lovely finish. For the full recipe, check the details above. Enjoy your delicious teriyaki chicken skewers! Timing for Marination Marinate your chicken for at least 30 minutes. This lets the flavors soak in. Longer is better. If you can, let it sit for up to 2 hours. This will really boost the taste. Adjusting Flavor Profiles Feel free to tweak the marinade. Want it sweeter? Add more honey. Prefer a saltier taste? Increase the soy sauce. Experiment until it suits your palate. Alternative Marinade Ingredients You can switch up the marinade ingredients too. Try adding orange juice for a citrus touch. Or use lime juice for a zesty kick. Different oils, like olive oil, can also change the flavor. Optimal Grill Settings Set your grill to medium-high heat. This gives nice grill marks and helps cook the chicken quickly. If it’s too hot, the outside cooks too fast, leaving the inside raw. Tips for Avoiding Sticking Oil your grill grates before cooking. You can use a paper towel dipped in oil on tongs. This will help keep your skewers from sticking. Checking Chicken Doneness Check if the chicken is done by cutting a piece. It should be white inside with no pink. The internal temperature should reach 165°F (75°C). If you have a meat thermometer, use it for best results. These tips will help you make the best teriyaki chicken skewers. For the complete cooking guide, check the Full Recipe. {{image_2}} Other Meat Options You can swap chicken for other meats. Pork or beef works great. Use boneless cuts for best results. Just adjust cooking times. Try marinating them the same way as chicken. You’ll get a tasty twist on the classic dish. Vegetarian Choices If you prefer a meatless meal, use tofu or tempeh. They soak up flavors well. Cut them into bite-sized pieces. You can also try mushrooms or eggplant. These veggies add a nice texture and flavor. Recommended Seasonings Boost the taste with spices. Try adding crushed red pepper for heat. Garlic powder or onion powder can deepen the flavor. A sprinkle of black sesame seeds adds a nutty crunch. Substitute Veggies Don’t limit yourself to bell peppers and zucchini. Use cherry tomatoes or mushrooms for a fun twist. Carrots or asparagus work well too. Just remember, cut them to similar sizes for even cooking. This keeps your skewers colorful and tasty. For the complete recipe, check out the Full Recipe. To keep your teriyaki chicken skewers fresh, follow these easy steps. First, let the skewers cool to room temperature. Next, place them in an airtight container. You can store leftovers in the fridge for up to three days. Make sure to cover them well to prevent moisture loss. If you want to keep them longer, consider freezing. Wrap the skewers tightly in plastic wrap, then place them in a freezer bag. This helps avoid freezer burn. You can freeze them for up to three months. Label your bags with the date for easy tracking. When it's time to enjoy your leftovers, reheating is key. The best way is to use a grill or a stovetop pan. Heat the grill to medium-low and place the skewers on it. Grill for about five minutes, turning occasionally until they are hot. This method keeps the chicken juicy and gives it a nice char. If you're using a pan, add a splash of water to help steam the chicken. Cover the pan with a lid to trap heat. Heat for about five to seven minutes, checking often. Avoid reheating in the microwave if you can. It can make the chicken tough and rubbery. Keeping the texture is important for the best taste experience. How long do I marinate the chicken? You should marinate the chicken for at least 30 minutes. If you have time, let it sit for up to 2 hours. This extra time makes the chicken taste great. Can I use chicken breast instead of thighs? Yes, you can use chicken breast. Chicken thighs add more flavor and juiciness. However, breast works well too. What dipping sauces pair well with teriyaki chicken skewers? Some great options are sweet chili sauce or soy sauce. You can also try a spicy mayo for a kick. How do I know when the skewers are done? The chicken should reach an internal temperature of 165°F. You can also cut a piece to check if it’s no longer pink inside. Can I cook these skewers in the oven? Yes, you can cook them in the oven. Place the skewers on a baking sheet and broil them for about 10-15 minutes, turning halfway. What to serve with teriyaki chicken skewers? Serve the skewers with rice or a fresh salad. You can also add some steamed veggies for a complete meal. Check out the Full Recipe for more ideas! You learned about the key ingredients for tasty teriyaki chicken skewers. We explored marinating techniques, cooking steps, and handy tips. I also shared ways to switch up flavors and store leftovers. This dish is easy and fun to make. You can impress friends and family with your cooking skills. Enjoy experimenting with different proteins and vegetables. Try new marinades and sauces to find your favorites. Cooking can be simple and joyful when you have the right steps!

Easy Teriyaki Chicken Skewers Flavorful and Quick Meal

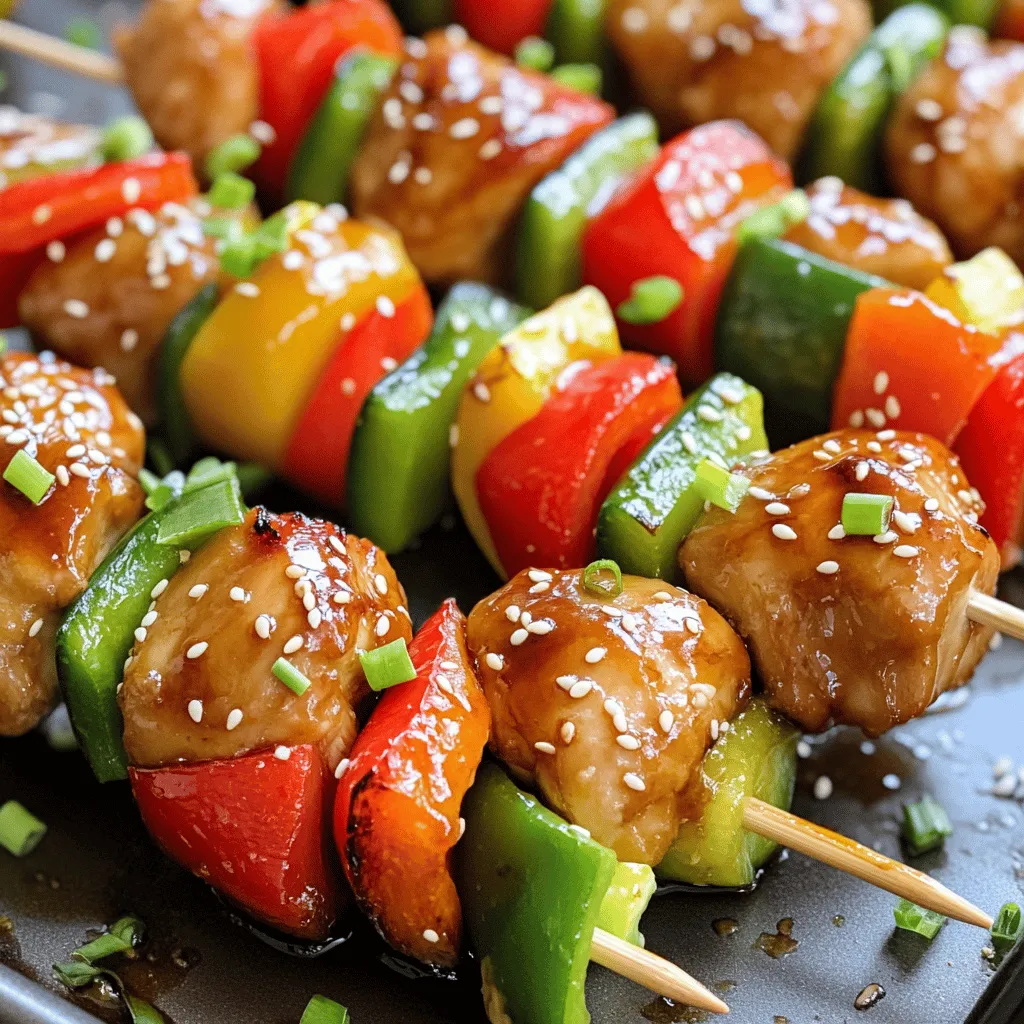
If you’re looking for a quick, tasty meal, I have just the thing: Easy Teriyaki Chicken Skewers! These flavorful bites

- 1 cup water - 1/2 cup unsalted butter - 2 tablespoons granulated sugar - 1/4 teaspoon salt - 1 cup all-purpose flour - 2 large eggs - 1 teaspoon vanilla extract - Oil for frying - 1/2 cup granulated sugar (for coating) - 2 teaspoons ground cinnamon You need simple ingredients to make these churro bites. The water and butter create a rich dough. Sugar adds a sweet touch, while salt enhances the flavor. Flour gives the dough structure, and eggs add moisture. Vanilla makes everything taste better. You will also need oil for frying and sugar with cinnamon for coating. - Medium saucepan - Wooden spoon - Piping bag with star tip - Deep pot or fryer Using the right tools is key. A medium saucepan helps you boil the mixture. A wooden spoon ensures you mix well without scratching your pan. A piping bag with a star tip shapes the churros nicely. A deep pot or fryer keeps the oil hot for perfect frying. - Chocolate or caramel sauce for dipping - Parchment paper for presentation Adding a sauce for dipping makes these churro bites even better. Chocolate or caramel adds a sweet touch. Using parchment paper for serving looks nice and keeps things clean. You can serve your churro bites in a fun way, too. For the complete process, check the Full Recipe. 1. In a medium saucepan, bring water, butter, sugar, and salt to a boil. 2. Once it boils, add flour and stir until a dough forms. Mixing the dough is fun! The heat helps the butter melt, and the flour combines with the water. This step is key for a smooth churro. 1. Heat oil to 350°F (175°C) in a deep pot or fryer. 2. Pipe the dough into the hot oil, cutting it into small bites. Fry until golden brown, about 2-3 minutes on each side. Watch the churros puff up! This is when they get their lovely shape. The hot oil cooks them quickly. 1. In a shallow bowl, combine sugar and cinnamon for the coating. 2. Roll the warm churro bites in the mixture until fully coated. This sweet coating is what makes churros irresistible. Serve them warm for the best taste. You can find the full recipe to guide you through the whole process. To avoid greasy churros, make sure the oil is hot enough. Heat your oil to 350°F (175°C). If the oil is too cold, the churros will soak up oil and become soggy. Use a deep pot or fryer to hold the heat well. For a smooth dough, mix the flour in quickly after boiling. Stir until you see the dough pull away from the pan. Let the dough cool for five minutes before adding eggs. This helps keep the churros light and fluffy. For a fun presentation, serve churro bites in a small basket lined with parchment paper. This adds a nice touch and keeps them warm. You can also use a cone for a cute look. Pair these bites with chocolate or caramel sauce for dipping. This makes the treat even more enjoyable! One common mistake is overcooking churros. Fry them for 2-3 minutes on each side. Watch closely, so they turn golden brown, not dark brown. Under-cooking is another issue. If they're too pale, they might be doughy inside. Improper dough consistency can also ruin the bites. If the dough is too runny, it won’t hold its shape. Make sure to follow the recipe closely for the right texture. If the dough seems too thick, add a teaspoon of water. This can help smooth things out. For the full recipe, check the detailed instructions provided. {{image_2}} You can mix up the flavors of your churro bites. Here are two tasty ideas: - Chocolate churro bites: Add cocoa powder to the dough. Use about 1/4 cup of cocoa along with the flour. This gives a rich chocolate taste. Roll them in a mix of sugar and cocoa for a sweet finish. - Pumpkin spice churro bites: Add pumpkin puree and spices. Use 1/2 cup of pumpkin and add 1 teaspoon of pumpkin pie spice to the dough. This brings a warm, fall flavor that everyone loves. If you need gluten-free churro bites, switch the flour. Use gluten-free all-purpose flour instead. This works well in the dough and keeps the taste great. Just make sure to check the package for a good brand. Some flours may need extra liquid, so watch the dough's texture. You can also play with different coatings for your churro bites. Here are some fun options: - Using powdered sugar: Instead of the cinnamon sugar mix, roll your churros in powdered sugar. This gives a sweet and soft finish. - Adding sprinkles or nut toppings: After rolling in sugar, add colorful sprinkles or chopped nuts. This makes your churro bites look fun and adds a nice crunch. For the full recipe, you can refer to the [Full Recipe]. To keep your churro bites fresh, place them in an airtight container. This helps retain their crispy texture. Layer them with parchment paper to avoid sticking. Keep the container in a cool, dry spot. Ideally, consume them within two days for the best taste. When you want to enjoy leftover churro bites, reheat them for the best texture. Preheat your oven to 350°F (175°C). Spread the churro bites on a baking sheet. Heat for about 5-7 minutes. This method keeps them crispy and warm. Avoid using the microwave, as it can make them soggy. Yes, you can freeze churro bites! Allow them to cool completely before freezing. Place them in a single layer on a baking sheet. Once frozen, transfer them to a freezer-safe bag. They stay fresh for up to three months. To thaw, remove them from the freezer and let them sit at room temperature for about 30 minutes. To re-crisp, follow the reheating instructions mentioned earlier. Enjoy a warm treat anytime! For the full recipe, check the instructions above. Cinnamon sugar churro bites taste best fresh. However, they can last for about 1-2 days. Store them in an airtight container at room temperature. They may become less crispy over time. To keep them crunchy, reheat them in an oven for a few minutes. Yes, you can make the dough ahead of time. Store it in the fridge for up to 24 hours. Just make sure to cover it well to prevent it from drying out. When ready to fry, let the dough sit at room temperature for about 15 minutes. This will help it pipe smoothly. The best oils for frying churros are vegetable oil and canola oil. Both oils have a high smoke point, which is great for frying. They also have a mild flavor that won’t overpower the churros. Avoid using olive oil as it has a lower smoke point and strong taste. Churro bites are simple and fun to make. We covered the key ingredients, tools, and steps to fry these treats. Remember to avoid common mistakes for the best results. Feel free to explore flavor variations, try optional coatings, and learn how to store and reheat leftovers. Enjoying churros brings joy, and with this guide, you can share that happiness. Making churro bites at home is a sweet adventure worth taking. Try it soon!

Cinnamon Sugar Churro Bites Quick and Tasty Treat

Craving something sweet and easy? I’ve got just the treat for you—Cinnamon Sugar Churro Bites! These crispy bites are quick

To make hot honey fried chicken, you need these main ingredients: - 4 chicken thighs (bone-in, skin-on) - 1 cup buttermilk - 1 tablespoon hot sauce (adjust to taste) - 1 cup all-purpose flour - 1 teaspoon garlic powder - 1 teaspoon onion powder - 1 teaspoon smoked paprika - ½ teaspoon cayenne pepper (optional, for extra heat) - Salt and pepper to taste - Vegetable oil for frying - ¼ cup honey - 1-2 teaspoons red pepper flakes (to taste) These ingredients will create a juicy chicken with a spicy-sweet glaze. The buttermilk makes the chicken tender. The spices add depth to the flavor. You will need some key tools to make this dish: - A large bowl for marinating - A deep skillet or frying pan - A thermometer for checking oil temperature - A slotted spoon or tongs for frying - A plate lined with paper towels for draining These tools help you cook safely and effectively. A thermometer ensures your oil is hot enough for frying. Pair your hot honey fried chicken with these tasty sides: - Creamy coleslaw - Cornbread - Mashed potatoes - Green beans These sides balance the meal. They add texture and flavor to your plate. For the full recipe, check out the details above. Enjoy your cooking! To start, I mix buttermilk and hot sauce in a big bowl. This mix makes the chicken juicy and flavorful. Next, I add the chicken thighs, making sure they soak well. I cover the bowl and pop it in the fridge. I let it marinate for at least two hours. If I can wait overnight, it’s even better! This step is key for tender and tasty chicken. Now, I prepare the coating. In a separate bowl, I combine flour, garlic powder, onion powder, smoked paprika, cayenne pepper, salt, and pepper. I mix it well so all the spices blend together. This mix gives the chicken a crispy and tasty outside. It’s important to coat the chicken well for the best crunch! Next, I heat vegetable oil in a skillet to about 350°F. This is the perfect temperature for frying. I carefully take the marinated chicken out of the buttermilk. I let any excess drip off before dredging each piece in the flour mixture. I press the flour onto the chicken to ensure it sticks. I place the chicken in the hot oil, skin-side down. I fry each piece for about 7 to 10 minutes. I flip the chicken halfway through to get it golden brown all over. Once the chicken reaches 165°F inside, it’s ready! I use a meat thermometer for accuracy. After frying, I drain the chicken on paper towels. This keeps it crispy and not greasy. Now, it’s time to drizzle on the hot honey for that sweet and spicy kick! For the full recipe, you can refer to the detailed instructions above. To get that perfect crispy skin, start with the right chicken. I recommend using bone-in, skin-on thighs. The skin keeps the meat juicy and adds great flavor. Marinate the chicken in buttermilk and hot sauce for at least 2 hours. This step tenderizes the meat and adds moisture. When ready to fry, coat the chicken well in the flour mixture. Press down firmly to ensure the coating sticks. Fry in hot oil, and don’t overcrowd the pan. This keeps the temperature steady and helps the chicken cook evenly. You can customize the heat to suit your taste. The recipe includes cayenne pepper, but you can skip it for less heat. If you like it spicy, add more hot sauce to the buttermilk. For the hot honey, adjust the red pepper flakes to your liking. If you want a mild flavor, use less. Taste as you go! Cooking should be fun, so feel free to experiment until it’s just right for you. Maintaining the right oil temperature is crucial. Heat the oil to 350°F (175°C) before adding the chicken. This temperature ensures a crispy crust while cooking the inside properly. Use a deep-frying thermometer for accuracy. If the oil gets too hot, the chicken can burn. If it’s too cool, the chicken absorbs excess oil and becomes greasy. Fry in small batches to keep the temperature steady. This way, you’ll end up with perfectly fried chicken every time! {{image_2}} You can change the hot honey sauce to fit your taste. Try using maple syrup instead of honey for a different flavor. If you want more heat, add more red pepper flakes or even a splash of your favorite hot sauce. You can also mix in some lime juice for a tangy twist. This adds brightness and balances out the sweetness. Always taste your sauce as you mix, so you get it just right. If you want to switch things up, you have options for the coating. Instead of all-purpose flour, try using cornmeal for a crunchier texture. You can also use a gluten-free flour blend if needed. Some people like to add crushed cornflakes or panko breadcrumbs for extra crunch. Spices can change too; try adding your favorites, like Italian seasoning or chili powder, to give it a unique flair. You don't have to stick with chicken thighs. Drumsticks or chicken wings are great alternatives. Both offer juicy meat and crispy skin. If you prefer white meat, chicken breasts work too, but they may need a shorter cooking time. Just make sure to check that the internal temperature hits 165°F (74°C) for safety. Each cut brings its own flavor and texture, so feel free to experiment and find your favorite! To keep your hot honey fried chicken fresh, place it in an airtight container. Make sure it cools to room temperature first. You can store it in the fridge for up to four days. If you want to save it longer, consider freezing it. Reheat your fried chicken in the oven for the best results. Preheat your oven to 375°F (190°C). Place the chicken on a baking sheet and cover it with foil. Heat for about 20-25 minutes or until it is warm. You can also use an air fryer for a crispier option. Heat at 350°F (175°C) for about 10 minutes. Freezing is a great way to save hot honey fried chicken for later. Wrap each piece tightly in plastic wrap, then place them in a freezer bag. Make sure to squeeze out all the air. You can freeze it for up to three months. When ready to eat, let it thaw in the fridge overnight before reheating. The best type of chicken for frying is bone-in, skin-on chicken. I love using chicken thighs because they stay juicy and tender. The skin also gets crispy, adding great texture. You can use drumsticks or wings, too, but thighs offer the best flavor. Yes, you can use other sweeteners like maple syrup or agave. These options give you a different taste but still pair well with heat. If you want a sugar-free option, try using a sugar substitute. Just adjust the amount to your taste. If you don’t have buttermilk, you can make a quick substitute. Mix one cup of milk with one tablespoon of vinegar or lemon juice. Let it sit for five minutes. This will give you a similar tangy flavor, perfect for marinating the chicken. To prevent greasy chicken, make sure your oil is hot enough. Heat it to 350°F (175°C) before frying. Don’t overcrowd the pan; cook in batches if needed. After frying, place the chicken on paper towels to absorb excess oil. Marinating takes at least two hours. For the best flavor, marinate overnight. This allows the chicken to soak up all the buttermilk and hot sauce. It makes the chicken super tender and flavorful, perfect for frying. For the full recipe, check out the complete guide on Hot Honey Fried Chicken! In this article, we explored how to make hot honey fried chicken. You learned about key ingredients, cooking tools, and side dish ideas. I shared step-by-step instructions for marinating, coating, and frying. We covered tips to get crispy skin and adjust spice levels. I also gave variations for the sauce and coating options. Remember, practice makes perfect. Keep trying different methods to find your favorite. Enjoy your cooking adventure with this tasty dish!

Hot Honey Fried Chicken Flavorful and Simple Recipe

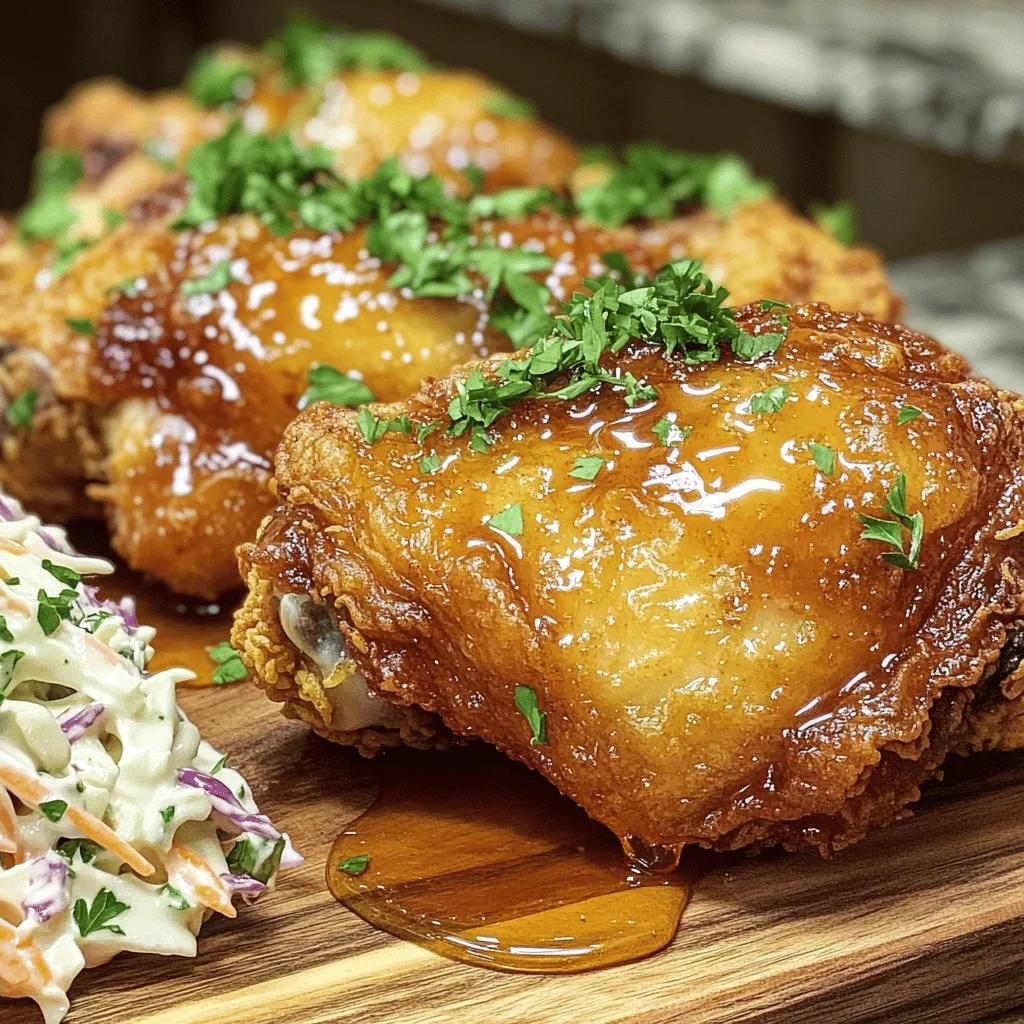
Are you ready to spice up your dinner routine? Hot Honey Fried Chicken is deliciously crispy and full of flavor.

Older posts
Newer posts
← Previous Page1 … Page80 Page81 Page82 … Page86 Next →

dsad

© 2026 Cooking Wells • Built with GeneratePress

Our Policies

  • Copyright Policy
  • Cookie Policy
  • GDPR Policy
  • Privacy Policy
  • Disclaimer
  • Terms Of Use

More Information

  • Home
  • About
  • Contact
  • Appetizers
  • Dessert
  • Dinner
  • Drinks
©2026, Cooking Wells About Back To Top