Skip to content
DisclaimerTerms Of UseGDPR PolicyCookie Policy

Cooking Wells

  • Home
  • Drinks
  • Appetizers
  • Dinner
  • Dessert
  • About
  • Contact
  • Privacy Policy
DisclaimerTerms Of UseGDPR PolicyCookie Policy

NO-ING-IMG

Here’s what you need for your Lemon Cream Cheese Danish. Gather these items before you start: - 1 sheet of puff pastry (thawed) - 8 oz cream cheese, softened - 1/2 cup powdered sugar - 1 tablespoon lemon zest - 2 tablespoons lemon juice - 1 egg (for egg wash) - 1 tablespoon vanilla extract - Fresh blueberries or raspberries for garnish (optional) - 1 tablespoon heavy cream (for cream cheese mixture, optional) These ingredients bring together a delightful blend of flavors. The cream cheese gives a rich base, while lemon zest and juice add freshness. You can adjust the sweetness with powdered sugar. The egg wash helps the pastry turn golden and shiny. Fresh berries make a lovely garnish and add a pop of color. You will love how easy it is to make this treat with the Full Recipe! 1. Preheat the oven: Start by setting your oven to 400°F (200°C). This step is key for a nice, crisp pastry. 2. Roll out the puff pastry: On a floured surface, take your thawed puff pastry. Gently roll it out to smooth any creases. Then, cut it into four equal squares. 3. Prepare the cream cheese mixture: In a bowl, mix the softened cream cheese with an electric mixer. Add the powdered sugar, lemon zest, lemon juice, and vanilla extract. If you want a creamier filling, add the heavy cream. Mix until it’s smooth. 1. Fill and fold the pastry squares: Place about a tablespoon of the lemon cream cheese mixture in the center of each pastry square. Fold the corners towards the center, pinching to seal. You can also leave the center open for a cute look. 2. Egg wash application: Beat the egg in a small bowl. Brush it over the top of the pastries. This gives them a beautiful golden finish. 3. Baking instructions and timing: Place the pastries on a lined baking sheet. Bake in the preheated oven for 15 to 20 minutes. Look for them to be puffed and golden brown. Each step is simple and ensures that your Lemon Cream Cheese Danish turns out delightful. Check out the Full Recipe for more details! - Ideal puff pastry handling: To get the best puff pastry, handle it gently. When you roll it out, use a light touch. Don’t press too hard. Dust your work surface with flour to prevent sticking. If the dough gets too warm, chill it briefly. This keeps the layers intact for a nice puff. - Achieving a golden finish: For a beautiful golden color, use an egg wash. Beat one egg and brush it over the tops of the pastries. This gives them a nice shine and helps with browning. Bake the pastries until they are puffed and golden, about 15-20 minutes at 400°F (200°C). - Adjusting sweetness: If you want a sweeter treat, add more powdered sugar to the cream cheese mixture. Start with a tablespoon at a time until you reach your desired taste. Remember, the lemon juice will add some tang. - Adding spices or extracts: You can elevate the flavor by adding spices. A pinch of cinnamon or nutmeg can add warmth. You might also add a few drops of almond extract for a unique twist. Experiment and find what you love! For the complete guide on making these delights, check out the Full Recipe. {{image_2}} You can play with flavors in your Lemon Cream Cheese Danish. Here are two fun ideas: - Berry Lemon Cream Cheese Danish: Add fresh berries like blueberries or raspberries to the cream cheese mix. This adds color and a burst of flavor. The sweet-tart taste of the berries pairs well with lemon. You can also top the finished pastries with more berries for a bright look. - Chocolate Lemon Cream Cheese Danish: If you love chocolate, try adding cocoa powder to the cream cheese filling. Start with 2 tablespoons and mix well. This will give you a rich and creamy chocolate flavor that contrasts nicely with the lemon. You can also drizzle melted chocolate on top after baking for a sweet treat. You can still enjoy this treat if you have dietary needs. Here are some great swaps: - Gluten-free puff pastry options: Many brands now offer gluten-free puff pastry. Check the frozen section of your local store. Just follow the same steps in the Full Recipe. The texture may be slightly different, but it will still taste great. - Vegan alternatives for cream cheese: You can replace cream cheese with a vegan option. Look for brands made from nuts or tofu. These can give you a creamy texture while keeping it plant-based. Just make sure to check for a good flavor that complements the lemon. For short-term storage, keep your Lemon Cream Cheese Danish in the fridge. Place them in an airtight container to keep them fresh. They will last about 2 to 3 days. If you have leftovers, let them cool completely before storing. This helps prevent sogginess. To store these danishes long-term, you can freeze them. Wrap each danish tightly in plastic wrap. Then, place them in a freezer-safe bag or container. They will keep well for up to 2 months in the freezer. When you want to eat them, thaw them in the fridge overnight. Then, reheat them in the oven for a few minutes at 350°F (175°C). This will help restore their flaky texture. Enjoy your delicious Lemon Cream Cheese Danish later with ease! For the complete recipe, check out the Full Recipe. Can I use homemade puff pastry? Yes, you can use homemade puff pastry. It can give your Danish a personal touch. Make sure it is cold before using. This will help it puff up nicely. How can I make the cream cheese filling smoother? To make your cream cheese filling smoother, beat it longer. Use an electric mixer for the best results. Adding a touch of heavy cream can also help. This makes it creamy and dreamy. What can I serve with Lemon Cream Cheese Danish? You can serve this Danish with fresh fruit or a scoop of ice cream. A dollop of whipped cream also works well. Pair it with coffee or tea for a perfect treat. Why are my pastries not puffing? If your pastries are not puffing, the oven may be too cold. Ensure it is preheated to 400°F (200°C). Also, check the puff pastry. It should be cold before baking. What to do if the filling is too runny? If the filling is too runny, you can add more cream cheese. Mix in a bit of powdered sugar to thicken it. Let it chill in the fridge for a while before using. Where did Lemon Cream Cheese Danish originate? The Lemon Cream Cheese Danish has roots in Danish baking traditions. These pastries spread across Europe. Now they are loved worldwide, especially in cafes. How to pair this pastry with drinks? Pair your Lemon Cream Cheese Danish with a light tea or coffee. A glass of lemonade enhances the lemon flavor. Sparkling water is refreshing too. Enjoy these drinks with your tasty treat! You’ve learned about making a delicious Lemon Cream Cheese Danish. We covered the key ingredients, simple steps, and helpful tips. Don't forget the fun variations and storage methods to make these treats last. Baking can be simple yet rewarding. Remember to personalize your danishes with your favorite flavors. Enjoy your baking journey and share your tasty results!

Lemon Cream Cheese Danish Delightful and Simple Treat

If you’re looking for a treat that bursts with flavor, you’ve come to the right place! This Lemon Cream Cheese

To make tasty eggplant lasagna roll ups, you need some key ingredients. Here’s what you’ll need: - 2 large eggplants, sliced lengthwise into 1/4-inch thick strips - 2 cups marinara sauce (homemade or store-bought) - 1 cup fresh spinach, chopped These ingredients form the base of your dish. The eggplants give a rich flavor, while marinara adds a nice touch of sweetness. Fresh spinach adds color and nutrition. The cheese mixture plays a big role in the flavor. For this, gather these items: - 1 cup ricotta cheese - 1 cup shredded mozzarella cheese - 1/2 cup grated Parmesan cheese These cheeses blend well together. Ricotta is creamy, mozzarella melts beautifully, and Parmesan gives a sharp taste. This mix makes your roll ups creamy and satisfying. Spices and extras help enhance the dish. Here’s what to add: - 1 teaspoon garlic powder - 1 teaspoon dried basil - Salt and pepper to taste - Olive oil for brushing These seasonings add depth to your roll ups. You can also add other veggies or herbs. Feel free to get creative! For the full recipe, check the complete guide. To start, I slice the eggplants into long strips, about 1/4 inch thick. This size helps them roll easily. I place the strips on a baking sheet with parchment paper. Then, I brush both sides lightly with olive oil, and sprinkle salt and pepper on top. I bake the eggplant at 375°F for 15 to 20 minutes. Flipping them halfway ensures even cooking. The goal is to soften the eggplant, making it pliable for rolling. In a bowl, I mix the ricotta cheese, half of the mozzarella, and the grated Parmesan cheese. Next, I add the chopped spinach, garlic powder, dried basil, and a pinch of salt and pepper. This mixture creates a creamy, flavorful filling. I stir it well until all the ingredients combine into a smooth blend. Once the eggplant is ready, I take each strip and spread about 2 tablespoons of the cheese mixture on it. I roll the strip tightly, placing it seam-side down in a greased baking dish. I repeat this for all the eggplant strips. Arranging them snugly helps them stay together while baking. After filling the baking dish, I pour marinara sauce evenly over the roll-ups. Then, I sprinkle the remaining mozzarella cheese on top. I cover the dish with aluminum foil and bake it for 25 minutes. After that, I remove the foil and bake for an extra 10 to 15 minutes. The cheese should be bubbly and slightly golden. Finally, I let the dish cool for about 5 minutes before serving. When picking eggplant, look for firm, smooth skin. The color should be vibrant and shiny. Avoid any with wrinkles or soft spots. Choose smaller eggplants for a sweeter taste. If you can, try to buy organic. This helps support local farmers and the environment. For the cheese mix, make sure your ricotta is creamy and smooth. If it’s too thick, add a splash of milk. Mix it with mozzarella and Parmesan for great flavor. This blend should spread easily on the eggplant. If the cheese is too runny, it may not hold the roll-up shape. One common mistake is skipping the pre-baking of the eggplant. This step makes the slices soft and easy to roll. Another error is overstuffing the eggplant strips. Too much filling can cause them to burst. Lastly, don’t forget to let the dish cool before serving. This helps the flavors settle. For a full recipe, check the Eggplant Lasagna Roll Ups. {{image_2}} You can make eggplant lasagna roll ups even better by adding other vegetables. Try spinach, mushrooms, or bell peppers. Slice them thin and layer them with the cheese mixture. Zucchini is a great choice too. It adds a nice crunch and flavor. Mix and match based on what you like or what’s in season. This makes each bite exciting and full of surprises. If you need a gluten-free option, don’t worry! You can replace the marinara sauce with a homemade tomato sauce that uses no flour. Also, check the cheese labels to ensure they are gluten-free. Some brands have gluten-free options that work well in this recipe. You can enjoy the same great taste without any gluten worries. Mixing different cheeses can change the flavor of your roll ups. Try adding feta or goat cheese to the ricotta for a tangy twist. You can also use smoked mozzarella for a unique smoky taste. Experiment with different cheese blends to find your perfect combo. Each variation can give you a new favorite dish! For more details on making these delicious roll ups, check out the Full Recipe. To keep your eggplant lasagna roll-ups fresh, first let them cool. Place them in an airtight container. You can store them in the fridge for up to three days. If you want to keep them longer, consider freezing them. When you are ready to enjoy leftovers, preheat your oven to 350°F (175°C). Place the roll-ups in a baking dish and cover them with foil. Bake for about 20 minutes, or until heated through. You can also microwave them for a quick meal, but the oven gives the best results. To freeze your eggplant roll-ups, wrap each one tightly in plastic wrap. Then, place them in a freezer-safe bag. They can last in the freezer for up to three months. When you want to eat them, thaw them overnight in the fridge before reheating. This keeps their taste and texture nice. For best results, eat them within a month for optimal flavor. Enjoy your meal anytime! Yes, you can use other types of cheese. Try using goat cheese or feta for a tangy taste. You might also like using provolone or gouda for a smokier flavor. Mixing cheeses can create a fun twist. Just keep the cheese balance in mind for the best texture. To reduce bitterness, sprinkle salt on the eggplant slices before cooking. Let them sit for about 30 minutes. This draws out moisture and bitterness. Rinse the slices and pat them dry with a paper towel. This way, you get rich flavor without the bitterness. Absolutely! Eggplant lasagna roll ups are perfect for meal prep. You can make them ahead and store them in the fridge for a few days. Just pop them in the oven when you're ready to eat. They also freeze well, so you can enjoy them later. Yes, zucchini makes a great substitute for eggplant. It has a mild flavor and a similar texture when baked. Slice the zucchini into strips like the eggplant. Follow the same steps in the recipe for delicious roll-ups. Each veggie adds its own twist to your dish. For the full recipe on how to make these tasty roll-ups, check the [Full Recipe]. In this article, we explored how to make delicious eggplant lasagna roll ups. We discussed main ingredients, like eggplant and cheese, along with seasoning options. The step-by-step guide helped you prepare, assemble, and bake these tasty rolls. Tips offered ways to pick the best eggplant and avoid common mistakes. Variations shared creative ideas to change the recipe. Finally, storage tips ensure your leftovers stay fresh. Try these roll ups for a satisfying meal that’s easy to enjoy anytime. Enjoy your cooking journey!

Eggplant Lasagna Roll Ups Flavorful and Easy Recipe

Looking for a tasty twist on a classic Italian dish? You’ll love my Eggplant Lasagna Roll Ups! This easy recipe

To make Coconut Mango Overnight Oats, you need these ingredients: - 1 cup rolled oats - 1 cup coconut milk (canned or carton) - 1 ripe mango, diced - 1 tablespoon chia seeds - 1 tablespoon honey or maple syrup - 1 teaspoon vanilla extract - A pinch of salt You can add some tasty toppings to make your oats even better: - Toasted coconut flakes - Fresh mint leaves for garnish If you don't have some ingredients, here are some swaps: - Use almond milk or oat milk instead of coconut milk. - Try other fruits like pineapple or banana instead of mango. - Replace honey with agave syrup for a vegan option. These easy swaps help you create yummy oats no matter what you have on hand! {{ingredient_image_1}} To make coconut mango overnight oats, you need just a few steps. This recipe takes only about 10 minutes to prep. You mix the ingredients, let them soak overnight, and enjoy a tasty breakfast the next morning. 1. Grab a mixing bowl. Add 1 cup of rolled oats, 1 cup of coconut milk, and 1 tablespoon of chia seeds. 2. Pour in 1 tablespoon of honey or maple syrup. Add 1 teaspoon of vanilla extract and a pinch of salt. 3. Mix everything well until it looks smooth and blended. 4. Now, take half of the diced mango and fold it into the oat mixture. 5. Set aside the other half for topping later. 6. Divide the mixture into two jars or containers. Seal them tightly and place them in your fridge. Let them soak overnight or for at least 4 hours. In the morning, take the jars from the fridge. Give the oats a good stir. If they are too thick, add a splash of coconut milk to make them just right. Top each jar with the remaining diced mango. Add some toasted coconut flakes and fresh mint leaves for extra flair. Enjoy your coconut mango overnight oats! To get the right texture, use rolled oats. They soak well and stay chewy. If you want creamier oats, add a bit more coconut milk. A splash will help. Make sure to mix well so all oats get the milk. Soak them overnight for the best results. The sweetness is key for flavor. You can add honey or maple syrup. Start with one tablespoon. Taste the mixture and see if it needs more. If you like it sweeter, add a little more. You can also skip sweeteners if your mango is ripe. It adds natural sweetness. Presentation makes your oats look yummy. Use clear jars or bowls. This way, you can show off the layers. Top with the reserved mango first. Add toasted coconut flakes for crunch. Finish with fresh mint leaves for color. It looks nice and tastes great. Pro Tips Use Ripe Mangoes: Choose mangoes that are soft to the touch for the best sweetness and flavor in your overnight oats. Experiment with Sweeteners: Adjust the sweetness by trying different natural sweeteners like agave syrup or stevia, based on your taste preference. Customize with Toppings: Add nuts, seeds, or different fruits for added texture and nutrition, making your oats even more satisfying. Batch Prep for Convenience: Prepare multiple jars at once for a quick breakfast option throughout the week; they last well in the refrigerator. {{image_2}} You can swap out mango for many fruits. Try bananas, berries, or peaches. Each fruit adds a unique taste. Sliced strawberries create a sweet and tangy flavor. Blueberries add a burst of juice and color. Peaches give a nice, soft texture. Mix and match fruits for fun! Coconut milk works great, but you have choices. Almond milk gives a light, nutty flavor. Soy milk adds creaminess without dairy. Oat milk is also a good pick. Try yogurt for a thicker texture. You can use Greek yogurt or dairy-free options too. Choose what you love! Add spices for new flavors! Cinnamon gives warmth and a cozy feel. Nutmeg adds a hint of sweetness. You can also mix in extracts. Almond extract or coconut extract boosts the taste. A dash of lemon zest brightens up the dish. Get creative and find your favorite flavors! Store your coconut mango overnight oats in airtight containers. This keeps them fresh and tasty. Glass jars or plastic containers work well. If you use jars, make sure they seal tightly. Always label the containers with the date. This helps you track how long they’ve been stored. Coconut mango overnight oats last about four to five days in the fridge. After that, they may lose flavor and texture. Always check for any signs of spoilage before eating. If they smell off or look strange, it’s best to toss them out. Freshness matters for great taste! You can freeze coconut mango overnight oats if you want to keep them longer. Use freezer-safe containers or jars. Leave some space at the top, as the mixture will expand. When you want to eat them, thaw them in the fridge overnight. They may be a bit thicker after freezing. Just add a splash of coconut milk to bring them back to life! Yes, you can. Many liquids work well. You can use almond milk, oat milk, or regular milk. Each liquid changes the taste slightly. For a creamier texture, try using yogurt. If you want to add more flavor, use flavored milk. Just remember to adjust the sweetness based on the liquid you choose. You can store them for up to five days in the fridge. Make sure to keep them in a sealed jar or container. The oats will stay fresh and tasty. If you notice any change in smell or texture, it’s best to toss them out. They are best when enjoyed within a few days. Yes, they are very healthy! Overnight oats are full of fiber. They help keep you full and satisfied. The chia seeds add healthy fats and protein. Coconut milk gives flavor and creaminess. Plus, the mango adds vitamins and natural sweetness. This meal is easy to make and good for you! This blog post explored making coconut mango overnight oats. We covered key ingredients, helpful tips, and tasty variations. You learned how to prepare and store your oats for the best flavor and texture. In my view, overnight oats are easy, fun, and healthy. With simple swaps, you can match your taste. Try different fruits or spices to make it your own. Enjoy your delicious creation!

Coconut Mango Overnight Oats Easy and Tasty Recipe

Are you ready to start your day with a taste of the tropics? Coconut Mango Overnight Oats are a fast,

- 1 cup sushi rice - 8 oz sushi-grade tuna, diced - 1 avocado, sliced - 1/2 cucumber, julienned - 1 small carrot, julienned - 1 radish, thinly sliced - 2 green onions, sliced - 1 tablespoon rice vinegar - 2 tablespoons mayonnaise (preferably Kewpie) - 1 tablespoon sriracha (adjust for heat preference) - Nori sheets, cut into strips - Sesame seeds, for garnish - Soy sauce or tamari, for drizzling When you gather these ingredients, think about how fresh and colorful they will look on your plate. Sushi rice forms the base, giving you that perfect sticky texture. Sushi-grade tuna is key for taste and safety, so make sure you get it from a trusted source. The avocado adds creaminess, while colorful veggies bring crunch and flavor. Rice vinegar, mayonnaise, and sriracha mix together to create that spicy tuna flavor. Don’t forget the optional toppings! Nori sheets add a fun crunch, sesame seeds give a nutty touch, and a drizzle of soy sauce enhances the umami. For the full recipe and step-by-step instructions, check out the [Full Recipe]. - Rinse the Rice Start by rinsing 1 cup of sushi rice under cold water. This washes away extra starch. Keep rinsing until the water runs clear. This step is key to fluffy rice. - Combine and Cook In a medium saucepan, add the rinsed rice and 1 ½ cups of water. Bring it to a boil over medium-high heat. Once it boils, lower the heat, cover the pot, and let it simmer for about 18 minutes. The water should be absorbed, and the rice should be soft. - Seasoning the Rice Mix 1 tablespoon of rice vinegar, 1 teaspoon of sugar, and ½ teaspoon of salt in a small bowl. Once the rice is cooked, remove it from heat and let it sit, covered, for 10 minutes. Then, fold in the vinegar mix. This gives the rice a nice flavor. - Mix Tuna with Mayonnaise In a separate bowl, take 8 ounces of sushi-grade tuna, diced into small pieces. Add 2 tablespoons of mayonnaise and 1 tablespoon of sriracha. Stir this mix well until everything combines nicely. - Adjusting Spice Levels You can adjust the spice based on your taste. If you want it hotter, add more sriracha. If you prefer it milder, use less. This way, you control the heat to fit your liking. - Layering the Ingredients Take a scoop of the seasoned sushi rice and place it at the bottom of each bowl. This will be the base for your delicious meal. - Adding Toppings Next, add a good amount of the spicy tuna mix on top of the rice. Then, layer in sliced avocado, julienned cucumber, julienned carrot, thinly sliced radish, and sliced green onions. Layering makes it colorful and fun! - Presentation Tips Finish with a sprinkle of sesame seeds. You can also add nori strips for extra texture. Drizzle some soy sauce or tamari on top for added flavor. Serve in deep bowls for a beautiful look. Don't forget to place chopsticks next to each bowl for an authentic touch. Now you have a quick and flavorful meal! For the complete recipe, check the Full Recipe section. Rinsing the sushi rice is key. It removes excess starch. This helps keep the rice fluffy. You want the grains to stay separate. Rinse the rice until the water runs clear. This usually takes a few minutes. Cooling the rice properly is also important. After cooking, let it sit covered for 10 minutes. This allows the steam to finish cooking it. Then, transfer it to a large bowl. Gently fold in the vinegar mixture. Let it cool slightly. This gives the rice the perfect texture. Adjusting sriracha is easy. Start with one tablespoon in your tuna mix. If you want more heat, add a bit more. Taste as you go to find your perfect level. For those who don’t like spice, there are alternatives. You can use a sweet mayo instead. Mixing in a little honey can also add sweetness. This way, everyone can enjoy the meal. Bowl presentation is vital for a great look. Use deep bowls or plates for a nice effect. Start with a scoop of sushi rice at the bottom. Layer the spicy tuna on top. Add the sliced avocado, cucumber, and carrot next. Finish with radish and green onions for color. For an authentic touch, place chopsticks next to each bowl. You can also sprinkle sesame seeds on top. If you want extra flavor, drizzle some soy sauce or tamari over everything. This adds a nice finish to your dish. {{image_2}} Variations for Tuna You can swap sushi-grade tuna for other fish. Salmon or yellowtail work well, too. If you want a plant-based option, try marinated tofu. It adds a nice texture and flavor. You can even use canned tuna in a pinch, but the taste changes. Alternative Vegetables Feel free to mix up the veggies in your bowl. Bell peppers, radishes, or even edamame make great choices. You can use anything you like! Just keep it fresh and colorful. This adds more crunch and nutrients to your meal. Adding Spices or Sauces Want more kick? Add chili oil or extra sriracha to your tuna mix. You can also try wasabi for a spicy twist. For a creamy touch, add more mayonnaise or avocado. Each choice will change the flavor in fun ways. Incorporating Different Oils Drizzle sesame oil or avocado oil over the top for added richness. These oils bring extra flavor to the bowl. You can also use olive oil for a different taste. Just remember, a little goes a long way! Bento Box Arrangement Try serving your spicy tuna sushi bowls in a bento box. It keeps everything neat and fun to eat. Each section can hold a different topping. The colors and textures will look amazing together. Sushi Roll Twist Feeling adventurous? Turn your bowl into sushi rolls! Use a nori sheet to wrap the sushi rice and spicy tuna. Then add your favorite veggies inside. This twist makes for a fun, handheld meal. You can also cut them into bite-sized pieces for easy sharing. These variations let you customize your spicy tuna sushi bowls. Each choice adds a unique touch to your meal. For the full recipe, check out the recipe section. To keep your spicy tuna sushi bowls fresh, store them in the fridge. Place the rice and toppings in separate airtight containers. This helps prevent the rice from getting soggy. Eat the leftovers within two days for the best taste. If you want to freeze the fish, wrap it tightly in plastic wrap. Use a freezer bag to keep out air. This way, the tuna stays fresh for up to three months. However, I recommend eating it fresh for the best flavor. When reheating rice, use the microwave. Add a few drops of water. Cover the bowl with a damp paper towel. Heat it in short bursts, stirring in between, until warm. This keeps the rice moist and fluffy. For the tuna, avoid reheating it. Raw fish tastes best fresh. If you must, mix it with a bit of mayo and sriracha. This can help mask any changes in texture. Your spicy tuna sushi bowls are best when fresh. The rice stays good for about four days in the fridge. Tuna should be eaten within one to two days. Watch for signs of spoilage. If the rice smells sour or changes color, it's time to toss it. Tuna that looks dull or has a fishy smell should not be eaten. Always trust your senses to keep your meal safe. For spicy tuna sushi bowls, always choose sushi-grade tuna. This type is safe to eat raw. Sushi-grade tuna comes from the highest quality fish. It has a bright color and a firm texture. Regular tuna is not suitable for sushi. It may not be fresh enough and can pose health risks. When you shop, look for tuna labeled "sushi-grade" at your fish market or grocery store. Yes, you can easily make these bowls vegan! Substitute the tuna with diced avocado or marinated tofu. Use vegan mayo instead of regular mayo. You can also add extra veggies for taste. Try using ingredients like mango or bell peppers for a sweet touch. The rice and toppings remain the same, making it a tasty vegan meal. To keep sushi rice from getting gummy, rinsing is key! Wash the rice under cold water until the water runs clear. This removes excess starch that makes rice sticky. Cooking it properly is also important. Use the right water-to-rice ratio and let it rest after cooking. Allowing it to cool before adding seasoning helps too. With these tips, you’ll have perfect sushi rice every time! In this blog, we explored how to make delicious sushi bowls. We covered key ingredients like sushi rice, sushi-grade tuna, and veggies. I shared step-by-step instructions for cooking the rice, preparing spicy tuna, and assembling your bowl. We also discussed tips to perfect your sushi rice and storage guidelines for leftovers. By following these steps, you can create tasty sushi bowls at home. Experiment with ingredients and enjoy your unique creations. Happy cooking!

Spicy Tuna Sushi Bowls Quick and Flavorful Meal

If you’re craving a quick and tasty meal, look no further than Spicy Tuna Sushi Bowls. This dish brings together

- Shredded chicken - Broccoli florets - Creamy sauce components: - 1 cup mayonnaise - 1 cup sour cream - Seasoning essentials: - 1 tablespoon Dijon mustard - 1 teaspoon garlic powder - 1 teaspoon onion powder - ½ teaspoon black pepper - Topping ingredients: - 1 cup shredded cheddar cheese - 1 cup breadcrumbs (panko preferred) - 2 tablespoons olive oil - ½ teaspoon paprika (for garnish) To make Easy Chicken Divan, you need some key ingredients. Start with shredded chicken. You can use leftover chicken or rotisserie chicken for ease. Broccoli florets add a bright color and nutrition. The creamy sauce is made from mayonnaise and sour cream. This combination gives the dish richness and flavor. Next, seasoning is vital. Dijon mustard adds a tangy note, while garlic powder and onion powder bring depth. Black pepper adds just the right kick. Finally, for that crunchy topping, use shredded cheddar cheese and breadcrumbs. Panko breadcrumbs are best for a crunchy texture. Drizzle them with olive oil to help them brown nicely. A touch of paprika on top adds a pop of color. When you gather these ingredients, you set the stage for a simple yet flavorful dish. Follow the Full Recipe to create your own delicious Chicken Divan. First, take your cooked chicken and shred it into bite-sized pieces. You can use leftover chicken or rotisserie chicken for ease. Next, steam the broccoli florets until they are bright green and tender but still crisp. This usually takes about 3–5 minutes. Make sure not to overcook them; we want them to keep their shape and flavor. In a large bowl, combine the mayonnaise, sour cream, Dijon mustard, garlic powder, onion powder, and black pepper. Stir until the mixture is smooth and well-blended. This creamy sauce adds richness to the dish. You can taste it and adjust the seasoning if needed. If you like it tangier, add a bit more mustard. Gently fold the shredded chicken and steamed broccoli into the creamy mixture. Make sure each piece is well coated. Once combined, transfer the mixture into a greased 9x13-inch baking dish. Spread it evenly across the dish. This ensures every bite will be tasty and creamy. In a small bowl, mix the breadcrumbs with olive oil until they are well coated. This step helps achieve a golden, crunchy topping. Evenly sprinkle the breadcrumb mixture over the chicken and broccoli. The breadcrumbs will add a nice texture contrast to the creamy filling. Now it’s time to bake! Preheat your oven to 350°F (175°C). Place your baking dish in the oven and bake for 25-30 minutes. Look for a golden, bubbly top. If you want a little extra color, add a sprinkle of paprika before serving. Once done, let it cool for a few minutes. Enjoy your creamy Chicken Divan! For the full recipe, you can refer to the earlier sections. 1. Overcooking the broccoli Broccoli should stay bright green and crisp. If you cook it too long, it will turn mushy. Aim to steam it just until tender. This will keep the flavor fresh and vibrant. 2. Skipping the breadcrumb coating Breadcrumbs add a nice crunch. If you skip this step, your dish may feel flat. Mix the breadcrumbs with olive oil to enhance their flavor and texture. 3. Using unseasoned chicken Chicken needs flavor to shine. Use seasoned chicken or add spices to the mixture. This way, every bite is full of taste. - Substitutions for ingredients You can change up the ingredients based on what you have. Try Greek yogurt instead of sour cream for a tangy twist. You can swap chicken for turkey or even a plant-based option. - Adding more vegetables or spices Feel free to toss in other veggies like bell peppers or carrots. Adding different spices can also elevate your dish. A pinch of cayenne pepper will add a nice kick. {{image_2}} You can make Chicken Divan in fun ways. One classic way is to serve it with rice. This adds a nice base to soak up the creamy sauce. Just cook your rice as the Chicken Divan bakes. The flavors mix well together. Another idea is to add different cheeses. You can try mozzarella for a stretchy texture. Or use Swiss cheese for a nutty taste. Mixing cheeses can make your dish even more special. If you need a gluten-free option, you can use gluten-free breadcrumbs. These will give you that same crunchy topping. Just check the label to ensure they are certified gluten-free. You can also use other thickening agents for the sauce. Cornstarch or arrowroot powder can work well. Mix them with a little water before adding to your sauce. This will help it thicken nicely without any flour. For the full recipe, check out the Creamy Chicken Divan Delight. To keep your Easy Chicken Divan fresh, you should refrigerate it right away. Place it in an airtight container. This helps prevent it from drying out. It’s best to eat it within three days for the best taste. For freezing, let the dish cool first. Then, wrap it tightly in plastic wrap or foil. You can also use a freezer-safe container. Properly stored, it can last up to three months in the freezer. When reheating, I recommend using the oven for the best results. Preheat it to 350°F (175°C). Place your Chicken Divan in a baking dish. Cover it with aluminum foil to keep it moist. Heat for about 20-25 minutes, or until warm. If you use the microwave, place a single portion on a microwave-safe plate. Cover it with a damp paper towel to keep it from drying out. Heat in intervals, checking every minute to ensure even heating. This way, you enjoy a warm, tasty meal every time! If you don't have mayonnaise, you can use Greek yogurt or cottage cheese. Both options give a creamy texture. They also add a nice tang to your dish. You might want to adjust the seasoning a bit. If you like a lighter taste, sour cream is another good choice. You can store Chicken Divan in the fridge for about three to four days. Make sure to put it in an airtight container. This helps keep it fresh and tasty. To enjoy it later, simply reheat it in the oven or microwave. Yes, you can prepare Chicken Divan ahead of time. Just follow these tips for the best results: - Prepare in advance: Assemble the dish but don’t bake it. Cover it tightly and keep it in the fridge. Bake it later when you're ready to eat. - Freezing instructions: To freeze, wrap the dish tightly in plastic wrap and then in foil. It can stay in the freezer for about two months. When ready to eat, thaw it in the fridge overnight before baking. This way, you will have a quick and tasty meal ready to go! For the full recipe, check out the Creamy Chicken Divan Delight. This blog post covered all you need for a tasty Chicken Divan. We went over essential ingredients like chicken, broccoli, and creamy sauce components. I shared step-by-step instructions to guide you in the kitchen. You learned tips to avoid common mistakes and ways to customize your dish. Don’t forget about variations, storage, and reheating methods to enjoy later. In summary, you can make this meal your own. Enjoy experimenting with flavors and sharing it with others!

Easy Chicken Divan Flavorful and Simple Recipe

If you’re looking for a simple yet tasty dish, you’ve found it! My Easy Chicken Divan recipe combines tender chicken,

- 4 boneless, skinless chicken breasts - 1 cup grated Parmesan cheese - 1 cup panko breadcrumbs - 1 teaspoon garlic powder - 1 teaspoon onion powder - 1 teaspoon Italian seasoning - Salt and pepper to taste - 2 large eggs - 1/4 cup all-purpose flour - Olive oil spray For this baked Parmesan crusted chicken recipe, you need fresh, high-quality ingredients. The chicken breasts serve as a great base. They stay juicy and tender while baking. The grated Parmesan cheese brings a lovely, rich flavor. It adds that cheesy goodness we all love. Panko breadcrumbs provide the crunch that makes every bite exciting. You will also need some seasonings. Garlic powder, onion powder, and Italian seasoning add depth to the taste. Don’t forget salt and pepper! They help bring out all the flavors in the dish. You will need eggs and flour for the coating. The eggs help the crumbs stick to the chicken. The flour creates a thin layer that keeps everything together. Finally, a light spray of olive oil helps achieve that golden, crispy finish. For the full recipe, check the details above. Enjoy cooking! To start, preheat your oven to 400°F (200°C). This heat will help create a crispy outside. Next, line a baking sheet with parchment paper. This makes cleanup easy and prevents sticking. Now, set up your breading station. You will need three shallow bowls. In the first bowl, add 1/4 cup of all-purpose flour, seasoned with salt and pepper. In the second bowl, beat two large eggs. In the third bowl, mix one cup of grated Parmesan cheese, one cup of panko breadcrumbs, chopped parsley, garlic powder, onion powder, Italian seasoning, and more salt and pepper. Now it’s time to coat the chicken. Take each boneless, skinless chicken breast and dip it in the flour first. Shake off any extra flour. Next, dip it into the beaten eggs, letting any excess egg drip off. Finally, coat the chicken with the Parmesan and breadcrumb mixture. Press gently to help it stick well. Once coated, place the chicken breasts on the prepared baking sheet. Lightly spray the tops with olive oil spray to help them crisp up. Bake in your preheated oven for about 25-30 minutes. The chicken is done when it turns golden brown and reaches an internal temperature of 165°F (75°C). Let it rest for a few minutes before slicing. This keeps the chicken juicy and tasty. For the full recipe, check out the detailed instructions. Enjoy creating this crispy delight! To get that perfect crispy crust, use panko breadcrumbs. Panko is lighter and airier than regular breadcrumbs. This means more crunch when baked. To make sure the coating sticks, follow these steps: 1. Dry the Chicken: Pat the chicken breasts dry with paper towels. This helps the coating stick well. 2. Coat in Flour First: Dip each chicken piece in flour before the egg wash. This helps create a base for the crumbs. 3. Press Down: When you coat the chicken in the Parmesan breadcrumb mix, press down gently. This helps the crumbs stick better. The best internal temperature for chicken is 165°F (75°C). Use a meat thermometer to check this. If you do not have one, slice into the chicken. The juices should run clear, not pink. After baking, let the chicken rest for a few minutes. This keeps it juicy and flavorful. For a beautiful presentation, serve the chicken on a wooden cutting board. Slice it into strips for easy serving. Garnish with fresh parsley for color. A lemon wedge adds a fresh touch. This makes your dish look more appealing and ready to enjoy. For more details, check the Full Recipe. {{image_2}} You can easily switch up the cheese in your dish. Romano or Asiago gives a good twist. These cheeses add a unique flavor that enhances the chicken. If you need a gluten-free option for breadcrumbs, try crushed rice or cornflakes. They work great and still provide a lovely crunch. Want to jazz up your chicken? Add fresh herbs like thyme or rosemary to the breadcrumb mix. These herbs add depth and aroma. For a spicy kick, toss in some chili flakes. This will make your dish exciting and flavorful. When it comes to side dishes, you have many choices. Pair your chicken with roasted veggies or a fresh salad. You can also serve it with sauces or dips. A tangy lemon sauce or creamy ranch dip works well. This adds extra taste and makes the meal fun. For the full recipe, check out the detailed instructions and tips above! To keep your baked Parmesan crusted chicken fresh, place it in an airtight container. You can refrigerate it for up to three days. If you want to store it longer, you can freeze it. Wrap each piece in plastic wrap, then put them in a freezer bag. This helps prevent freezer burn. When you reheat the chicken, you want to keep it crispy. The best way to do this is in an oven. Preheat your oven to 375°F (190°C). Place the chicken on a baking sheet lined with foil. Heat for about 15-20 minutes. This keeps the crust crunchy and the inside juicy. Avoid using the microwave as it can make the chicken soggy. In the fridge, your baked Parmesan crusted chicken lasts about three days. If you freeze it, it can last up to three months. Just remember, the longer you store it, the more the flavor may change. Enjoy your delicious chicken within that time for the best taste! Yes, you can use chicken thighs. They are darker meat and can be juicier. However, chicken thighs cook a bit longer than breasts. Aim for an internal temperature of 175°F (80°C) for thighs. You might need to adjust your baking time by about 5 to 10 minutes. The texture will be softer, and the flavor is richer. To enhance the crust's crispiness, consider these tips: - Use panko breadcrumbs instead of regular ones. They add extra crunch. - Add more Parmesan cheese to the breadcrumb mixture for a cheesy kick. - Lightly spray the chicken with olive oil before baking. This helps it brown better. - Try broiling the chicken for a few minutes at the end. Just watch it closely to avoid burning. Yes, you can prep this dish ahead of time. Here’s how: - Coat the chicken as directed in the recipe. - Place the coated chicken on a baking sheet and cover it with plastic wrap. - Store it in the fridge overnight. - When ready, bake it straight from the fridge. Just add a few extra minutes to the baking time. This way, you have a tasty meal ready to go! For the full recipe, check out the details above. This blog post covered how to make a tasty chicken dish. You learned about key ingredients, including chicken, Parmesan, and panko breadcrumbs. I shared the steps for preparation, coating, and baking. We also discussed tips for a crispy crust and variations to keep it exciting. With these ideas, you can impress your friends and family. Enjoy experimenting with flavors and styles in your kitchen. Happy cooking!

Baked Parmesan Crusted Chicken Crispy Delight Today

Get ready to enjoy a crunchy, cheesy treat with my Baked Parmesan Crusted Chicken. This dish features juicy chicken breasts

To make a warm and tasty vegan pumpkin soup, gather these essential ingredients: - 1 medium pumpkin (about 3-4 pounds), peeled, seeded, and cubed - 1 large onion, chopped - 3 cloves garlic, minced - 2 carrots, diced - 1 celery stalk, diced - 4 cups vegetable broth - 1 can (400ml) coconut milk - 1 teaspoon ground cumin - 1/2 teaspoon ground nutmeg - 1 teaspoon smoked paprika - 2 tablespoons olive oil - Salt and pepper to taste Each of these ingredients plays a key role. The pumpkin gives the soup its creamy base. The onion and garlic add depth. Carrots and celery provide sweetness and texture. Coconut milk makes it rich and smooth. You can make your soup even better with some optional garnishes: - Fresh parsley or cilantro for a pop of color - A drizzle of extra coconut milk for creaminess - A sprinkle of smoked paprika for added flavor These garnishes not only enhance the look but also boost taste. Choosing the right pumpkin is crucial. Look for these signs: - A firm skin without soft spots or bruises - A deep, rich color, often orange - Heavy for its size, which indicates good flesh If you can, pick a sugar pumpkin. They are sweeter and work best for soups. Always check your local farmer's market for the freshest options. For the full recipe, refer to the Cozy Autumn Vegan Pumpkin Soup. Start by peeling and seeding your pumpkin. Cut it into small cubes. This makes the pumpkin cook faster and blend better. Next, chop your onion and dice the carrots and celery. These veggies add sweetness and depth to the soup. In a large pot, heat the olive oil over medium heat. Add the chopped onion, carrots, and celery. Sauté for about 5-7 minutes. You want the veggies soft and the onion clear. Then, add the minced garlic, cumin, nutmeg, and smoked paprika. This mix will fill your kitchen with a warm, inviting scent. Cook for one more minute. Now, add the cubed pumpkin to the pot. Pour in the vegetable broth and bring everything to a boil. Lower the heat and let it simmer for 20-25 minutes. You want the pumpkin to be soft. After that, use an immersion blender to purée the soup until it’s smooth. If you don’t have one, carefully transfer the soup to a blender in small batches. Stir in the coconut milk. Then, season with salt and pepper to taste. Heat the soup for 5 more minutes. This step lets all the flavors mix well. Serve hot, garnished with fresh parsley or cilantro. For a special touch, drizzle extra coconut milk on top. For the full recipe, check out the Cozy Autumn Vegan Pumpkin Soup. To make your vegan pumpkin soup stand out, you can add extra spices. Try adding fresh ginger for a zing. You can also use fresh herbs like thyme or sage. These herbs pair well with pumpkin and add depth. Don’t forget to taste as you go. This way, you can adjust the seasoning to your liking. If you want a bit of heat, add a dash of cayenne pepper or red pepper flakes. A squeeze of lime juice just before serving can brighten the flavors. One common mistake is not cooking the vegetables long enough. Make sure your onion is soft and translucent. This step builds a great base flavor. Another mistake is blending the soup too soon. Ensure the pumpkin is fully tender for a smooth texture. Also, avoid adding coconut milk too early. Add it at the end to keep its creamy quality. Lastly, don’t skip the seasoning. Salt and pepper are key to enhancing the taste of your soup. For a cozy meal, serve the soup with crusty bread or a fresh salad. A simple green salad with lemon vinaigrette complements the soup well. You can also add roasted seeds on top for crunch. They add flavor and texture, making the dish more satisfying. If you want to impress, drizzle extra coconut milk on top before serving. This not only looks nice but adds creaminess. You can find the full recipe to guide you through the process. {{image_2}} You can make your vegan pumpkin soup smooth or chunky. For a creamy soup, blend all the ingredients until they are velvety. This gives you a rich texture that feels cozy. If you prefer some bite, reserve a cup of pumpkin cubes. Add them back after blending for a nice contrast. Feel free to switch ingredients to match your taste. You can use sweet potatoes or butternut squash instead of pumpkin. Both give a sweet flavor. Try adding red lentils for protein and a thicker base. If you want a spicy kick, add cayenne pepper or chili flakes. Coconut milk can be swapped for almond or cashew milk if you prefer a nutty taste. This soup is great for any season. In fall, add roasted apples for sweetness. In winter, stir in kale or spinach for color and nutrients. Spring brings fresh herbs like basil or mint. Summer is perfect for adding grilled corn for a smoky flavor. Each variation makes the soup feel new and exciting. For the full recipe, check the details above! After you enjoy your vegan pumpkin soup, let it cool down. Pour the soup into an airtight container. Make sure the lid seals tightly. Store it in the fridge for up to 4 days. This keeps the soup fresh and tasty. When it’s time to eat again, you have a few choices. You can reheat the soup in a pot on the stove. Just heat it over medium heat, stirring often. This warms the soup evenly. You can also use a microwave. Pour the soup into a microwave-safe bowl. Heat it in short bursts, stirring between each. This helps avoid hot spots. If you want to save the soup for later, freezing works well. Use freezer-safe containers or bags. Leave some space at the top for expansion. Label your containers with the date. The soup can last for up to 3 months in the freezer. To thaw, move the soup to the fridge overnight before reheating. For the full recipe, check out the Cozy Autumn Vegan Pumpkin Soup! Yes, you can use canned pumpkin. It saves time and is still tasty. Canned pumpkin is smooth and ready to use. Just replace fresh pumpkin with an equal amount of canned. This makes your soup quick and easy to prepare. This vegan pumpkin soup is packed with nutrients. Pumpkins are high in vitamin A, which helps your eyes. They also have fiber, which aids digestion. Coconut milk adds healthy fats that keep you full. Onions and garlic boost your immune system too. Enjoying this soup can help you stay healthy! To spice up your soup, add more smoked paprika or cumin. You can also stir in cayenne pepper for heat. If you like, add fresh chili peppers. Start with a small amount, then taste and adjust as needed. This way, you control the spice level. Yes, this vegan pumpkin soup is gluten-free. All the ingredients are naturally free from gluten. Using vegetable broth ensures it stays gluten-free. So, you can enjoy this soup safely if you are gluten-sensitive. In this blog post, I covered how to make vegan pumpkin soup from scratch. We explored essential ingredients, step-by-step instructions, and tips to boost flavor. I shared ways to customize the soup and how to store leftovers properly. Remember, choosing fresh pumpkin can make a big difference in taste. Use these recipes and tips to create a soup that warms your heart. Enjoy your cooking journey and share your favorite versions with friends!

Vegan Pumpkin Soup Comforting and Cozy Recipe

Looking for a warm, hearty dish to enjoy this fall? My Vegan Pumpkin Soup is your answer! This cozy recipe

To make a tasty spinach artichoke dip, you need some simple ingredients. Here is the list: - 2 cups fresh spinach, chopped - 1 cup artichoke hearts, drained and chopped - 1 cup cream cheese, softened - 1/2 cup sour cream - 1/2 cup mayonnaise - 1 cup shredded mozzarella cheese - 1/2 cup grated Parmesan cheese - 2 cloves garlic, minced - 1 teaspoon garlic powder - 1 teaspoon onion powder - Salt and pepper to taste - 1 tablespoon olive oil - Tortilla chips or bread, for serving Each ingredient adds its own flavor. The fresh spinach gives a nice, green touch. Artichoke hearts add a unique taste. Cream cheese makes it creamy and smooth. Sour cream and mayonnaise keep it rich. Mozzarella cheese melts well, and Parmesan gives a sharp flavor. Garlic, garlic powder, and onion powder make it fragrant and tasty. Don’t forget the salt and pepper to bring out all the flavors. For serving, tortilla chips or bread are perfect. They let you scoop up this yummy dip. You can find the full recipe for more details on how to prepare this dish. 1. Preheating the oven Start by preheating your oven to 350°F (175°C). This step is key for even cooking. 2. Sautéing the garlic and spinach In a large skillet, heat 1 tablespoon of olive oil over medium heat. Add 2 minced cloves of garlic. Sauté for about 1 minute until it smells great. Then, stir in 2 cups of chopped spinach. Cook until it wilts, which takes about 2-3 minutes. Remove from heat and let it cool a bit. 3. Mixing the main ingredients In a big mixing bowl, combine 1 cup of softened cream cheese, 1/2 cup sour cream, and 1/2 cup mayonnaise. Add 1 cup of shredded mozzarella and 1/2 cup of grated Parmesan cheese. Now, include your cooked spinach mix and 1 cup of chopped artichoke hearts. Don’t forget to add 1 teaspoon of garlic powder, 1 teaspoon of onion powder, salt, and pepper. Mix it all until it's nice and smooth. 4. Transferring to a baking dish Grab a baking dish and transfer your creamy mixture into it. Spread it out evenly. For some extra flavor, sprinkle the remaining 1/2 cup of Parmesan cheese on top. 5. Baking the dip Place your dish in the preheated oven. Bake for 25-30 minutes. You want it hot, bubbly, and golden on top. 6. Cooling and serving tips Once out of the oven, let the dip cool for a few minutes. This makes it easier to serve. Use tortilla chips or toasted bread for dipping. You can even garnish it with fresh herbs or more cheese for an extra touch. With these steps, you’ll make a delicious spinach artichoke dip that everyone will love. For the full details, check the Full Recipe. Enjoy your cooking! To make your spinach artichoke dip the best, focus on cheese. Try mixing different cheeses for creaminess. Use cream cheese for a base, then add in mozzarella for stretch. Parmesan gives a nice sharpness. You can even use cheddar for a twist. Want some heat? Add red pepper flakes or jalapeños. This spice will wake up the flavor. Start with a little, and taste as you mix in. You can always add more! Worried about a watery dip? Drain your artichokes well before mixing. Use fresh spinach and cook it just until wilted. Let it cool down before adding to the mix. These steps help keep your dip thick and creamy. For dippers, tortilla chips are a favorite. They add a nice crunch. You can also use toasted bread or fresh veggies like carrots and celery. These options create a fun platter for sharing. Presentation matters, too! Serve the dip hot in a stylish dish. Garnish with herbs or extra cheese on top. This makes it look inviting and fresh. When it comes to drinks, pair this dip with light beers or crisp white wines. They balance the dip's creaminess well. Sparkling water with a slice of lemon is a great non-alcoholic choice. For the full recipe, you can check the [Full Recipe]. {{image_2}} You can make this dip lighter. Use low-fat cream cheese and sour cream. These swaps cut calories without losing flavor. You can also try Greek yogurt instead of sour cream. It adds protein and tang. For a dairy-free option, use cashew cream or a dairy-free cream cheese. These options keep the dip creamy, while being friendly for those avoiding dairy. Always check labels to ensure your products are completely dairy-free. To add new flavors, try different cheeses. Blend in sharp cheddar or feta for a kick. You can also sprinkle in some smoked paprika or cayenne pepper. These spices add heat and depth to your dip. Want to sneak in more veggies? Dice bell peppers or add cooked mushrooms. These ingredients boost nutrition and taste. If you want protein, mix in cooked chicken or bacon bits for a heartier dip. Get creative and make this recipe your own! For the full recipe, check out the main article. To keep your spinach artichoke dip fresh, use these storage tips. - Refrigeration: Place the dip in an airtight container. It can stay in the fridge for about 3 to 4 days. Always let it cool before sealing. This prevents moisture buildup. - Freezing Tips: You can freeze the dip too! Use a freezer-safe container. It keeps well for up to 2 months. When ready to eat, thaw it in the fridge overnight. Reheating your dip properly helps keep it tasty and creamy. - Best Methods for Reheating: The oven is great for reheating. Preheat it to 350°F (175°C). Place the dip in a baking dish. Heat for about 20 minutes. You can also use a microwave. Heat in short bursts, stirring often. - Maintaining Texture and Flavor: Cover the dip with foil during oven reheating. This helps keep moisture in. Stirring while microwaving also helps it heat evenly. How long can I store spinach artichoke dip? You can store spinach artichoke dip in the fridge for about 3 to 5 days. Can I make this dip ahead of time? Yes, you can prepare the dip and keep it in the fridge for up to 24 hours before baking. Is spinach artichoke dip gluten-free? Yes, the ingredients in this dip are gluten-free. Just check your dippers to be sure. What can I use instead of cream cheese? You can use Greek yogurt or cashew cream for a lighter option that still tastes great. Can I serve this dip cold? While it is best served warm, you can enjoy it cold too. Just chill it before serving. For the full recipe, check out the Creamy Spinach & Artichoke Delight section. This blog post covered everything you need to know about spinach artichoke dip. We discussed key ingredients, easy steps to make it, and tips to enhance flavor. You learned about variations and storage tips. You can now make this dish creamy and flavorful. Remember, feel free to adapt it based on your taste. Enjoy sharing this dip at your next gathering. It’s perfect for any occasion!

Spinach Artichoke Dip Flavorful and Easy Recipe

Spinach artichoke dip is a crowd-pleaser, and I’m here to share my easy recipe. This creamy dip combines fresh spinach,

- 300g whole wheat pasta - 200g broccoli florets - 1 cup heavy cream or dairy-free alternative - 1 cup grated Parmesan cheese - 2 cloves garlic, minced - 2 tablespoons olive oil - Salt and pepper to taste - 1 teaspoon lemon zest - 1/4 teaspoon red pepper flakes - Fresh basil leaves for garnish In this recipe, we use simple yet fresh ingredients to bring out the best taste. Whole wheat pasta adds fiber and a nutty flavor. Broccoli is packed with vitamins, making this dish healthy. For the creamy texture, you can choose either heavy cream or a dairy-free cream. Parmesan cheese gives a savory kick. The garlic adds depth. Olive oil is essential for sautéing and adds richness. Don’t forget the salt and pepper to enhance all the flavors. A touch of lemon zest brightens the dish. If you want some heat, add red pepper flakes. Feel free to top it off with fresh basil. It adds a nice touch and aroma. For the full recipe, check the details above. Enjoy cooking! First, grab a large pot and fill it with water. Add a good amount of salt to the water. Bring it to a boil. Once boiling, add 300g of whole wheat pasta. Cook it according to the package instructions until it is al dente. This usually takes around 8 to 10 minutes. Now, here’s a key step: during the last 3 minutes of cooking, toss in 200g of broccoli florets. This way, the broccoli cooks perfectly and stays bright green. When done, reserve 1 cup of pasta water before draining everything. While the pasta and broccoli cook, let’s make the creamy sauce. In a large skillet, heat 2 tablespoons of olive oil over medium heat. Next, add 2 cloves of minced garlic. If you like some heat, add 1/4 teaspoon of red pepper flakes. Sauté the garlic for about 1 minute. You want it fragrant but not browned. Now, lower the heat and pour in 1 cup of heavy cream. Stir in 1 cup of grated Parmesan cheese. Mix until it melts and becomes a smooth sauce. If the sauce looks too thick, use some of that reserved pasta water. Add a little at a time until you reach the right consistency. Once the pasta and broccoli are done, drain them well. Add them to the skillet with the creamy sauce. Toss everything together gently. Make sure the pasta and broccoli are well-coated with the sauce. Now, taste it! You might want to adjust the seasoning with salt, pepper, and even some lemon zest for extra brightness. Serve your creamy broccoli pasta in bowls. If you like, garnish with fresh basil leaves and an extra sprinkle of Parmesan. Enjoy your meal! For the full recipe, check the link above. To make great pasta, start with plenty of salted water. Bring it to a rolling boil. Add your pasta and cook it until it's al dente. This means it should be firm when you bite it. For our creamy broccoli pasta, add broccoli florets in the last 3 minutes of cooking. This keeps them bright and tender. To avoid a lumpy sauce, keep the heat low when adding cream. Stir gently while mixing in the grated Parmesan cheese. If the sauce gets too thick, add a splash of the reserved pasta water. This will help to create a smooth finish. You can add extra flavor with herbs and spices. Consider thyme or oregano for an Italian touch. Fresh basil also works great for a fresh taste. A pinch of nutmeg can add warmth to your sauce. Balancing creaminess with acidity is key. A teaspoon of lemon juice can lift the flavors. This adds brightness without overpowering the dish. Just taste as you go to find the right balance. For a beautiful presentation, serve the pasta in deep bowls. Top it with fresh basil leaves and a sprinkle of Parmesan. This makes the dish look inviting and fresh. Pair creamy broccoli pasta with a simple salad or garlic bread. A light white wine, like Pinot Grigio, complements the flavors well. Enjoy your meal with friends or family for a lovely dinner experience. For the full recipe, check the previous section. {{image_2}} To make your creamy broccoli pasta fit various diets, consider these options: - Gluten-free pasta options: You can use gluten-free pasta made from rice or corn. These alternatives cook well and taste great. - Dairy-free cream substitutes: Use coconut cream or cashew cream. Both give a rich texture without dairy. Enhance your dish by adding proteins or veggies: - Adding proteins: Chicken, shrimp, or tofu work well. Cook them separately and mix them in later. This adds heartiness to your dish. - Incorporating other vegetables: Spinach or peas add color and nutrition. Toss them in during the last few minutes of cooking. Make your pasta special by adding global flavors: - Italian-inspired additions: Stir in pesto for a fresh taste. It adds a burst of flavor and pairs perfectly with broccoli. - A spicy version: Try different chili varieties for heat. You can use jalapeños or red pepper flakes to spice things up. These variations keep your creamy broccoli pasta exciting and delicious. For the full recipe, check out the recipe above! To store leftover creamy broccoli pasta, let it cool first. Place it in an airtight container. Make sure to seal it tightly. Store it in the fridge for up to three days. When reheating, use a skillet over low heat. Add a splash of water or cream to keep it moist. Stir often to warm it evenly. You can also use a microwave. Heat in short bursts, stirring in between. Yes, you can freeze creamy broccoli pasta! To do this, let it cool completely. Then, place it in a freezer-safe container. Use a container that seals well to avoid freezer burn. It will last for about two months. When you are ready to eat, thaw it in the fridge overnight. Reheat it gently on the stove or in the microwave. In the fridge, creamy broccoli pasta lasts for about three days. If you notice any off smells, or if it looks slimy, it’s time to toss it. It’s best to enjoy your pasta fresh for the best taste and texture. Always trust your senses when checking for freshness. To make creamy broccoli pasta vegan, swap some ingredients. Use plant-based pasta instead of regular pasta. Choose a dairy-free cream, like coconut cream or cashew cream. Replace Parmesan cheese with nutritional yeast for a cheesy flavor. You can also try vegan cheese that melts well. This keeps your dish tasty and plant-based. Yes, you can use frozen broccoli. Just make sure to thaw it first. Cook the frozen broccoli in boiling water for about 2 minutes. This helps keep its bright green color and crunch. Add it to the pasta during the last few minutes of cooking. This way, it stays tender yet firm. If you want a lighter sauce, try using vegetable broth. Combine it with a bit of cashew cream or almond milk. You can also use a mix of olive oil and lemon juice for a fresh taste. Another option is to blend cooked cauliflower with garlic for a creamy texture without the heavy cream. This creamy broccoli pasta combines whole wheat pasta, fresh veggies, and a rich sauce. We explored the main ingredients, cooking steps, and ways to enhance flavor. You can customize the dish with proteins and other veggies. For variations, think about gluten-free or vegan options. Lastly, I shared tips on storage to keep your leftovers tasty. With these ideas, you can make a delicious meal every time. Enjoy making this comforting dish at home!

Creamy Broccoli Pasta Flavorful and Simple Recipe

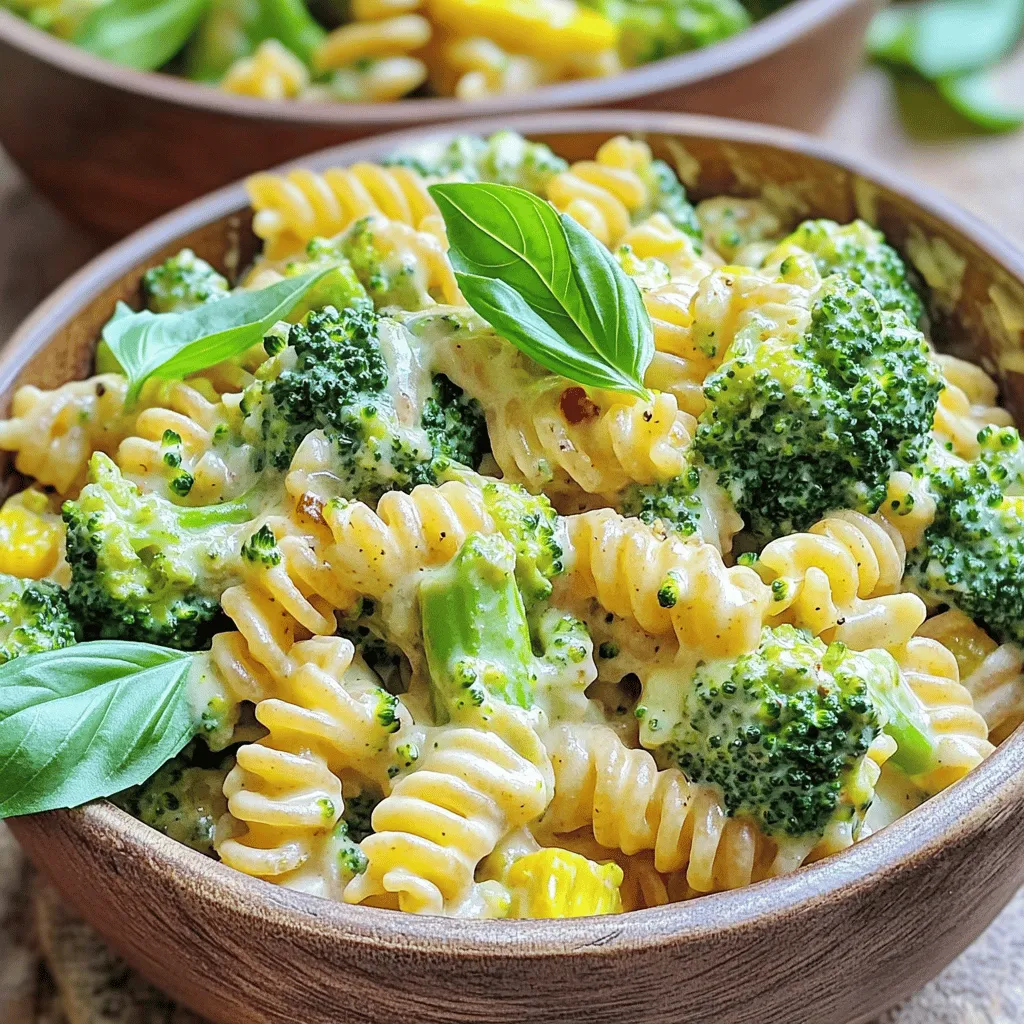
Looking for a quick, tasty meal that impresses? My Creamy Broccoli Pasta is the perfect answer! This dish pairs whole

To make this tasty treat, you need the following simple ingredients: - 1 cup coconut milk (canned or carton) - 1 cup diced fresh mango (plus extra for topping) - 1/4 cup chia seeds - 2 tablespoons honey or maple syrup (to taste) - 1 teaspoon vanilla extract - A pinch of salt - Toasted coconut flakes for garnish - Fresh mint leaves for garnish (optional) You can swap some ingredients to fit your taste or needs. Here are a few ideas: - Use almond milk or oat milk instead of coconut milk for a nutty flavor. - If you don’t have fresh mango, try using peaches or pineapple. - For a sugar-free option, replace honey with stevia or erythritol. - Add a dash of cinnamon or nutmeg for extra warmth. - Mix in berries for a fun twist on the classic flavor. The ingredients in this pudding offer many health benefits: - Chia seeds are rich in fiber, protein, and omega-3 fatty acids. They help with digestion and keep you full. - Coconut milk contains healthy fats that can boost energy and support heart health. - Mango is loaded with vitamins A and C, which are good for your skin and immune system. - Honey has natural antioxidants and can soothe your throat. These ingredients not only taste great but also help keep you healthy. Enjoying this pudding can be a delicious way to nourish your body! Start by gathering all your ingredients. You will need coconut milk, chia seeds, honey, vanilla, salt, and fresh mango. It’s best to use ripe mango for more flavor. Dice the mango into small pieces for easy mixing later. Next, take a medium bowl. Pour in the coconut milk, honey, vanilla extract, and a pinch of salt. Use a whisk to mix these well. This step is key for blending the flavors. Now, it’s time to add the chia seeds. Stir them into the coconut milk mixture. Make sure to mix thoroughly to avoid clumps. Chia seeds need space to expand. Cover the bowl with plastic wrap or a lid. Place it in the fridge for at least four hours. For the best results, let it sit overnight. This allows the chia seeds to absorb the liquid and thicken. Once the pudding is set, gently fold in the diced mango. Mix slowly to keep some chunks of mango. This gives the pudding a nice texture. To serve, use individual glasses or bowls. Spoon the chia pudding into each one. Top with extra diced mango for color. Add a sprinkle of toasted coconut flakes for a crunchy touch. If you want, you can add mint leaves for a fresh pop. This not only looks great but also adds a nice aroma. Enjoy your tasty and nutritious treat! For the full recipe, refer back to the ingredients section. To get the best pudding, balance is key. Use a mix of chia seeds and liquid. For every 1/4 cup of chia seeds, use 1 cup of liquid. This ratio gives you a thick, creamy texture. Stir the mixture well right after adding the chia seeds. This helps prevent clumps. After you mix, let it sit for about 10 minutes, then stir again. This extra step helps it thicken evenly. Chill the pudding for at least 4 hours. Overnight is even better for a smooth finish. One common mistake is not mixing the chia seeds well. If you skip this, you will get clumpy pudding. Another issue is using too much liquid. Too much liquid makes the pudding runny. Always measure your ingredients carefully. Don’t skip the chilling time either. If you eat it right after mixing, it won’t be thick. Lastly, avoid using overly ripe mangoes. They can turn mushy in your pudding. You can make your pudding even better with add-ins. Try adding a pinch of cinnamon or nutmeg for warmth. You can also mix in some lime or lemon juice for a zesty kick. For chocolate lovers, add cocoa powder or dark chocolate shavings. If you like nuts, toss in some almonds or walnuts. You can find the full recipe to explore more ideas. {{image_2}} You can switch out the mango for other fruits. Pineapple, kiwi, or passion fruit work well. Each fruit adds a unique flavor. For a berry twist, try strawberries or blueberries. These fruits will keep the pudding fresh and exciting. Simply replace mango with your chosen fruit in the recipe. This recipe is already dairy-free. Use coconut milk, which is creamy and rich. If you want a different taste, try almond or oat milk. Both options are great for vegan diets. They add their own flavors, making the pudding even better. Be sure to check the labels for added sugars if you want to keep it healthy. Honey is a classic sweetener, but it’s not vegan. Maple syrup is a great alternative for everyone. You can also use agave syrup or stevia for a low-calorie choice. Taste your pudding mixture as you go. Adjust the sweetness to your liking for the best flavor. If you prefer less sugar, go light on the sweetener. For the full recipe, check out the details above. To keep your mango coconut chia pudding fresh, store it in airtight containers. Glass jars work great because they do not hold odors. Always place the lid on tightly. This prevents the pudding from drying out. Avoid storing it in metal containers, as they can affect the taste. When stored properly, mango coconut chia pudding lasts about 4 to 5 days in the fridge. Always check for any off smells or changes in texture before eating. If you notice any, it’s best to toss it out. Fresh is always best for flavor and quality. You can freeze mango coconut chia pudding, but be mindful of texture changes. Freeze it in individual portions for easy use. Use freezer-safe containers or bags to avoid freezer burn. When ready to eat, thaw it in the fridge overnight. Give it a good stir before serving to revive its creamy texture. Enjoy your delicious treat! For the full recipe, check out the earlier section. Making Mango Coconut Chia Pudding takes about 10 minutes to prep. However, you need to chill it for at least 4 hours. For best results, let it sit overnight. This time helps the chia seeds soak up the liquid and create a nice pudding texture. Yes, you can use frozen mango for this recipe. Just make sure to thaw it first. This will help it mix well into the pudding. The taste will still be great, but fresh mango gives a better texture. You can also use frozen mango as a topping for a cool twist. Mango Coconut Chia Pudding is packed with nutrients. Each serving offers about: - Calories: 200 - Protein: 4g - Carbs: 30g - Fiber: 10g - Fat: 8g Chia seeds add fiber and protein, while mango offers vitamins A and C. Coconut milk provides healthy fats, making this dish both tasty and good for you. Check out the Full Recipe for more details. Mango Coconut Chia Pudding offers great taste and health benefits. We covered ingredients, steps, and tips for the perfect dish. Now you have ideas for variations and storage too. Remember, you can customize it to suit your taste. Don’t hesitate to experiment with flavors or substitutes. This dish is easy and fun to make. Enjoy your creamy, healthy pudding!

Mango Coconut Chia Pudding Tasty and Nutritious Treat

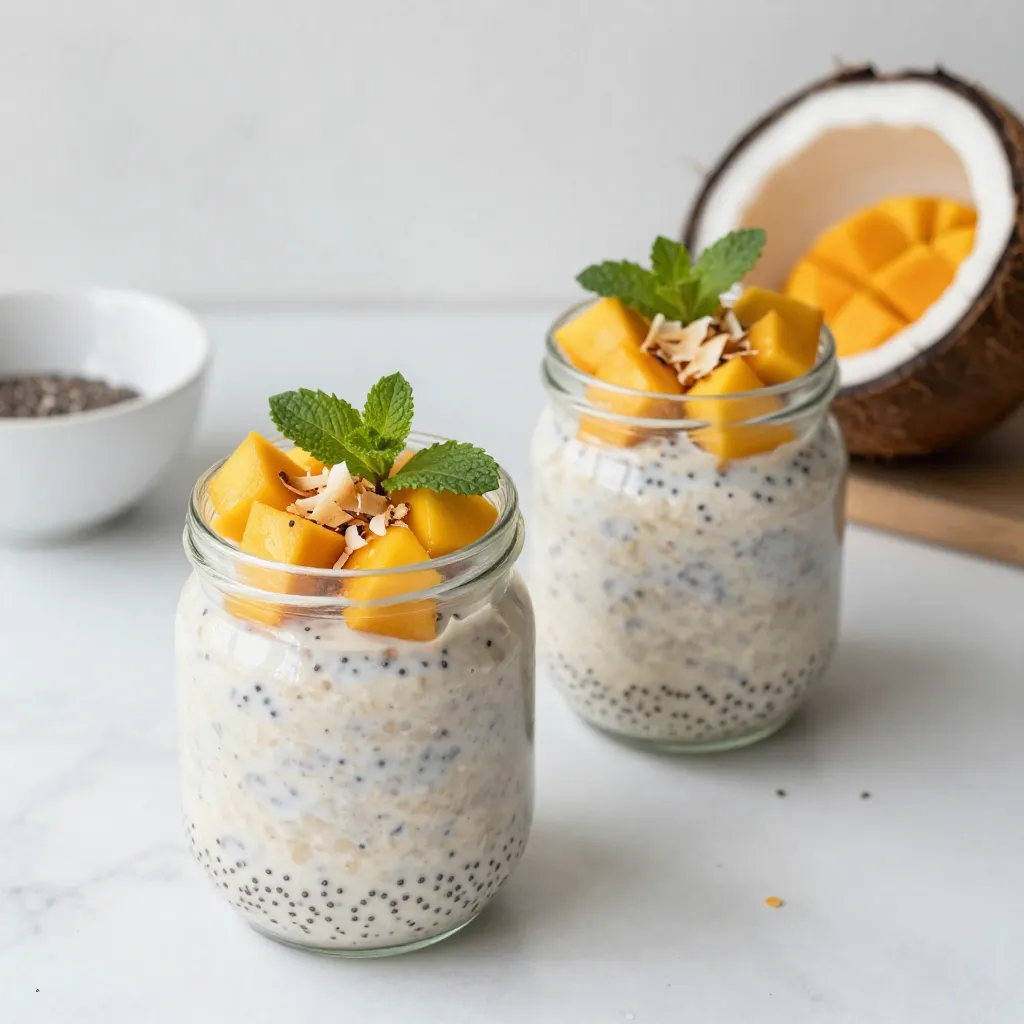
Looking for a tasty and nutritious treat? Mango Coconut Chia Pudding checks all the boxes! This simple recipe packs a

Older posts
Newer posts
← Previous Page1 … Page81 Page82 Page83 … Page86 Next →

dsad

© 2026 Cooking Wells • Built with GeneratePress

Our Policies

  • Copyright Policy
  • Cookie Policy
  • GDPR Policy
  • Privacy Policy
  • Disclaimer
  • Terms Of Use

More Information

  • Home
  • About
  • Contact
  • Appetizers
  • Dessert
  • Dinner
  • Drinks
©2026, Cooking Wells About Back To Top