Skip to content
DisclaimerTerms Of UseGDPR PolicyCookie Policy

Cooking Wells

  • Home
  • Drinks
  • Appetizers
  • Dinner
  • Dessert
  • About
  • Contact
  • Privacy Policy
DisclaimerTerms Of UseGDPR PolicyCookie Policy

NO-ING-IMG

To make a tasty cauliflower fried rice, gather these key items: - 1 medium head of cauliflower, riced (about 4 cups) - 2 tablespoons sesame oil - 1 small onion, finely chopped - 2 garlic cloves, minced - 1 cup mixed vegetables (carrots, peas, and corn) - 2 green onions, chopped - 2 eggs, lightly beaten - 3 tablespoons low-sodium soy sauce - 1 teaspoon freshly grated ginger - Salt and pepper to taste These ingredients create a base that is both flavorful and healthy. The riced cauliflower acts as a great substitute for regular rice, making this dish low in carbs while still delicious. You can also add these optional ingredients to make your dish unique: - Cooked chicken or shrimp for added protein - Tofu for a vegetarian option - Sesame seeds for garnish - Additional spices, like chili flakes, for heat Feel free to mix and match based on your taste. The beauty of this recipe is its flexibility. You can use what you have on hand to create many different flavors. Cauliflower fried rice is not only low in calories but also packed with nutrients. Here's a rough breakdown per serving: - Calories: 120 - Protein: 7g - Carbohydrates: 10g - Fiber: 4g - Fat: 6g This dish is a great way to enjoy a meal that is both filling and nutritious. You can enjoy it guilt-free while getting plenty of vitamins and minerals. For the full recipe, check out the complete guide! To start, rinse the cauliflower well. Remove the leaves and cut it into small florets. You can use a food processor to rice the cauliflower. Pulse it until it looks like small grains of rice. If you're busy, you can buy pre-riced cauliflower at the store. This step makes it easy and quick. Next, grab a large skillet or wok. Heat two tablespoons of sesame oil over medium heat. Once hot, add one finely chopped onion and two minced garlic cloves. Sauté these for about two to three minutes. You want the onion to turn clear and smell great. Then, toss in one cup of mixed vegetables like carrots, peas, and corn. Cook them for three to four minutes, stirring often, until they become tender. Move the cooked veggies to one side of the skillet. Pour two lightly beaten eggs into the empty space. Scramble the eggs until they are fully cooked. Then mix them back with the veggies. Now, add the riced cauliflower to the skillet. Stir everything together and pour in three tablespoons of low-sodium soy sauce. Add one teaspoon of freshly grated ginger next. Stir-fry the mixture for five to seven minutes. You want the cauliflower to be tender but still firm. Season with salt and pepper to taste. Lastly, stir in two chopped green onions and take it off the heat. For a finishing touch, sprinkle sesame seeds on top for extra crunch. You can find the full recipe in the previous section. To rice cauliflower, start with a fresh head. Rinse it under cold water. Remove the leaves and cut it into smaller florets. Use a food processor to pulse the florets until they look like rice grains. You can also buy pre-riced cauliflower to save time. Just make sure it’s fresh. If you rice it yourself, do not over-process. You want small, even pieces. This way, it cooks evenly. When cooking cauliflower fried rice, use a large skillet or wok. Heat your skillet before adding oil. Sesame oil adds great flavor. Sauté onions and garlic until soft. This takes about 2-3 minutes. Add your mixed vegetables next. Stir regularly so they cook evenly. Push the veggies to one side when adding eggs. Scramble them well before mixing everything together. This keeps the eggs fluffy and prevents them from sticking. Stir-fry everything for about 5-7 minutes. You want the cauliflower tender but not mushy. Seasonings can take your cauliflower fried rice to the next level. Low-sodium soy sauce gives it a savory taste. Fresh ginger adds a nice zing. Don’t forget salt and pepper for balance. You can also add sesame seeds for extra crunch. Green onions are a great garnish too. They add freshness and color. Experiment with different spices to find your favorite blend. For a kick, consider adding a splash of hot sauce or chili flakes. {{image_2}} You can add protein to make your cauliflower fried rice heartier. Chicken is a great option. Use cooked, diced chicken breast for a lean touch. Shrimp adds a nice seafood flavor. Just sauté them until they turn pink. For a plant-based choice, tofu works well. Press and cube firm tofu, then fry it until golden. This keeps your meal filling and nutritious. Cauliflower fried rice easily caters to vegetarians and vegans. Just skip the eggs for a vegan meal. You can add chickpeas or black beans for extra protein. Both add texture and flavor. Consider using nutritional yeast for a cheesy taste without dairy. This also boosts your meal's nutrition. You can switch up your veggies based on what’s in season. In spring, add fresh peas or asparagus. Summer is perfect for zucchini or bell peppers. In fall, try butternut squash or kale. Winter brings options like Brussels sprouts or carrots. This keeps your dish fresh and exciting throughout the year. For the full recipe, check out the details above! To keep your cauliflower fried rice fresh, let it cool first. Once cool, place it in an airtight container. This helps prevent moisture loss and keeps the flavors intact. Store it in the fridge for up to four days. Make sure to label the container with the date. This way, you’ll know when to use it. When you're ready to eat your leftover cauliflower fried rice, reheat it gently. You can use a skillet or a microwave. If using a skillet, add a splash of water. This helps steam the rice and keeps it from drying out. Heat on medium until warm, stirring often. If using a microwave, cover the bowl with a lid or a damp paper towel. Heat in 30-second intervals until warm. This method helps retain moisture. You can freeze cauliflower fried rice for later meals. Let it cool completely and portion it into freezer bags. Remove as much air as you can before sealing. Label the bags with the date. You can freeze it for up to three months. When you're ready to enjoy it, thaw it in the fridge overnight. Reheat using the tips mentioned above for the best texture. With these simple steps, your meal prep becomes easy and effective! For the full recipe, check out the section above. Yes, you can use frozen cauliflower rice. It saves time and is easy to find. Just thaw it before cooking. It cooks quickly, so stir-fry it for a few minutes. This will keep the texture nice. Cauliflower fried rice is low in carbs and calories. It is rich in vitamins and fiber. You get lots of nutrients from the cauliflower and veggies. This dish can help with weight loss and digestion. Plus, it is a great way to eat more vegetables. To make it spicy, add chili sauce or crushed red pepper. You can also use fresh jalapeños for heat. Just mix them in with the veggies. Start with a little, then taste and add more if needed. Enjoy the kick! For the full experience, check out the Full Recipe for Cauliflower Fried Rice! Cauliflower fried rice is a simple, healthy dish that you can make at home. We covered essential and optional ingredients, cooking steps, and tasty tips to get it right. You can add protein or swap in seasonal veggies for extra flavor. Plus, storing leftovers and reheating them is easy. Overall, this dish is a great way to enjoy a low-carb meal packed with nutrition. Give it a try and make it your own!

Flavorful Cauliflower Fried Rice Easy and Healthy Meal

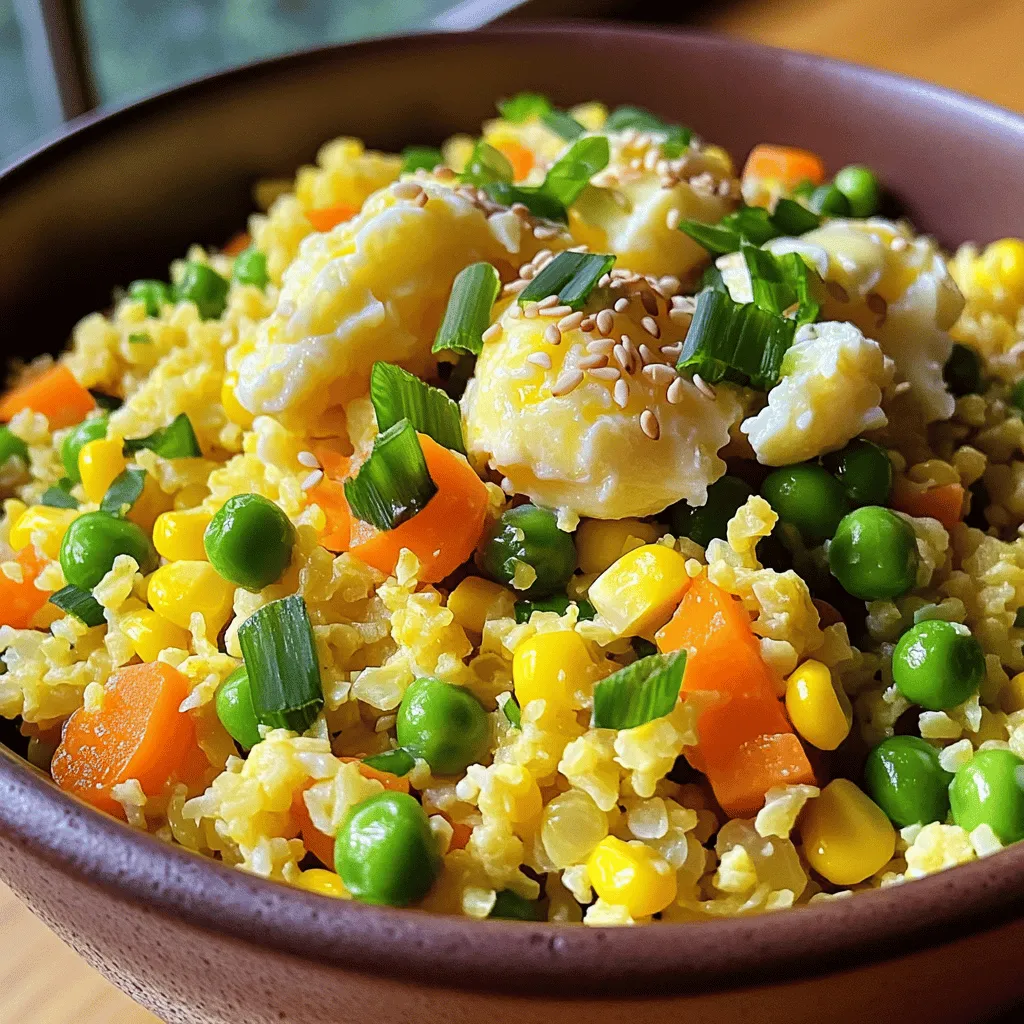
Looking for a healthy meal that’s quick and tasty? You’ve found it! My flavorful cauliflower fried rice recipe swaps out

To make a refreshing chilled avocado soup, you'll need these simple ingredients: - 3 ripe avocados, peeled and pitted - 2 cups vegetable broth (preferably low-sodium) - 1 cup plain Greek yogurt - 1 clove garlic, minced - 1 tablespoon lime juice - 1 jalapeño, seeded and finely chopped - 1 teaspoon ground cumin - Salt and pepper to taste - Fresh cilantro leaves for garnish - Lime wedges for serving These ingredients blend perfectly to create a creamy and smooth texture. The avocados provide a rich flavor, while the Greek yogurt adds creaminess. The lime juice gives it a bright zing, and the jalapeño adds a hint of spice. When choosing avocados, look for ones that yield slightly when you press them. This means they are ripe and ready for your soup. The vegetable broth keeps the dish light and flavorful. Using low-sodium broth allows you to control the saltiness. You can also play with the ingredients. If you want a thicker soup, use less broth. For more spice, add more jalapeño or try a different pepper. Each ingredient adds something special, making this soup a delight. - Step 1: Blend the ingredients Start by adding the avocados, vegetable broth, Greek yogurt, minced garlic, lime juice, jalapeño, and ground cumin to a blender. Blend on high speed until smooth and creamy. This process takes just a few minutes. - Step 2: Adjust consistency and seasoning Check the soup’s thickness. If it feels too thick, add a bit more vegetable broth. After that, taste the soup. Add salt and pepper to enhance the flavor to your liking. - Step 3: Chill the soup Pour the blended soup into a bowl or container. Cover it well and place it in the fridge. Let it chill for at least 1 hour. This time allows the flavors to blend nicely. - Step 4: Serve and garnish When ready to serve, stir the soup well. Pour it into chilled bowls. Garnish with fresh cilantro leaves and add a lime wedge on the side. This step adds a nice touch and a burst of flavor. You can find the complete method in the Full Recipe. Enjoy this refreshing dish! - Pair this soup with tortilla chips for crunch. - Add shrimp or crab for a protein boost. - Serve in chilled bowls to keep it cold. - Garnish each bowl with cilantro and lime wedges. - To ensure a smooth texture, blend the soup well. - If the soup is too thick, add more broth slowly. - Use fresh lime juice for a brighter taste. - Try roasting the garlic for a sweeter flavor. - If you can’t find avocados, use ripe bananas for a creamy base. - For a dairy-free option, swap Greek yogurt with coconut cream. - You can also use nut milk instead of yogurt for creaminess. - Explore using silken tofu for a protein-packed alternative. For the full recipe, check out Chilled Avocado Delight. {{image_2}} To make a spicy avocado soup, you can add different peppers. Use jalapeños, serranos, or even habaneros for heat. Start with a small amount, then taste. You can adjust the spice level to fit your taste. If you want less heat, remove the seeds and membranes. This will help tone down the spice and keep the soup flavorful. For a refreshing twist, try adding cucumbers. They add crunch and a cool taste. Peel and chop one medium cucumber. Blend it with the other ingredients in the Full Recipe. The cucumber balances the creaminess of the avocado. You may want to add a bit more lime juice for brightness. Using fresh herbs can elevate your chilled avocado soup. Cilantro is a classic choice, but try basil or mint for a different flavor. Make sure to chop the herbs finely before blending. Pairing herbs with avocado creates a fresh and vibrant taste. Experiment to find your favorite herb combination! For storing chilled avocado soup, choose glass or BPA-free plastic containers. These materials help keep the soup fresh. Make sure the container has a tight lid. This prevents air from spoiling the soup. You want to seal it well to keep flavors strong. You can store this soup in the fridge for up to three days. Just make sure to keep it sealed. If you want to freeze it, pour the soup into ice cube trays or freezer-safe bags. This way, you can take out only what you need. When ready to eat, thaw it in the fridge overnight. Avoid refreezing once it has been thawed. To thicken chilled avocado soup, consider using these options: - Add more Greek yogurt for creaminess. - Blend in a small potato for extra body. - Include a bit of avocado oil for richness. - Use less vegetable broth to keep it dense. Each of these options enhances the texture while keeping the flavor intact. Just remember to blend well after adding any thickening agents. Yes, you can make this soup ahead of time. Here are some best practices: - Prepare the soup up to a day in advance. - Store it in an airtight container to keep it fresh. - Chill it in the refrigerator for at least one hour before serving. - Give it a stir before serving to mix the flavors. Making it in advance allows the flavors to meld beautifully. Chilled avocado soup is very healthy. Here are some nutritional benefits: - Avocados are rich in healthy fats. - Greek yogurt adds protein and probiotics. - Vegetables provide vitamins and fiber. - Lime juice offers vitamin C and boosts flavor. This soup not only tastes great but also supports a balanced diet. Yes, you can serve this soup warm. To enjoy it hot: - Heat the soup gently on the stove. - Avoid boiling to keep the creamy texture. - Taste and adjust seasoning before serving. Serving it warm gives a new twist to this delightful dish. Chilled avocado soup is easy to make with just a few simple steps. First, blend your fresh ingredients, then chill and serve with garnishes. This soup is not only delicious but also healthy and versatile. You can change flavors or use different herbs based on your taste. Remember to store leftovers properly to enjoy later. Experimenting with new ingredients can make each bowl unique. Enjoy your cooking, and feel proud of the vibrant soup you create!

Chilled Avocado Soup Refreshing and Flavorful Recipe

Looking for a light and refreshing dish that screams summer? Try this Chilled Avocado Soup! It’s creamy, flavorful, and takes

To make honey glazed carrots, you need simple and fresh ingredients. Here’s what you need: - 1 pound baby carrots (or regular carrots, peeled and cut into sticks) - 3 tablespoons honey - 2 tablespoons butter - 1 teaspoon fresh thyme leaves (or ½ teaspoon dried thyme) - Salt and pepper to taste - 1 tablespoon lemon juice - 1 tablespoon chopped fresh parsley (for garnish) These ingredients work together to create a sweet and savory dish. Should you use fresh or frozen carrots? I always prefer fresh carrots for this recipe. They have a better texture and flavor. Fresh carrots are crisp and sweet. They can soak up the honey glaze well. If you only have frozen carrots, you can still use them. Just make sure to thaw them first. They may not be as crunchy, but they’ll still taste good. What if you want to change the sweetness? You can try different sweeteners. Maple syrup is a great choice. It has a rich flavor that pairs well with carrots. Agave nectar is another option. It’s light and sweet. You can also use brown sugar if you want a caramel-like taste. Just keep in mind that each sweetener will change the flavor a bit. Try them to see what you like best. You can find the full recipe [here](#). Start by washing your baby carrots well. If you use regular carrots, peel them first. Then cut them into sticks. This helps them cook evenly. You want pieces that are about the same size. It makes sure they all get tender at the same time. Keep them ready for cooking. Heat a large skillet over medium heat. Add the butter and let it melt. Once melted, add your carrots to the skillet. Stir them every few minutes. Cook for about 5 minutes. You want them to soften a bit. Then drizzle the honey over the carrots. Stir well to coat them evenly. Add fresh thyme, salt, and pepper. Cook for another 5 to 7 minutes. This allows the honey to turn sticky and caramelize. Make sure to stir often to prevent burning. When the carrots are tender, remove the skillet from the heat. Squeeze in some lemon juice for a bright taste. Mix it all well. Now, transfer the honey-glazed carrots to a serving dish. Sprinkle fresh parsley on top for a nice color. Your dish is ready to enjoy. For the full recipe, check out the details above. To get the best glaze on your carrots, follow these steps. First, use fresh carrots for great flavor. Cut them evenly to ensure they cook at the same rate. Start with melted butter in your skillet and let it coat the carrots well. Add honey after the carrots soften a bit. This timing helps the honey stick and caramelize nicely. Stir often to prevent burning and get that beautiful, shiny glaze. You can tweak the sweetness to fit your taste. If you find the dish too sweet, add a bit more lemon juice. This will brighten the flavor and balance the sweetness. For extra depth, try adding a pinch of salt or a dash of pepper. Fresh herbs like thyme add a savory note, while honey provides sweetness. Experiment to find your perfect mix! Avoid overcooking the carrots. They should be tender yet crisp when done. If you cook them too long, they'll become mushy. Also, watch the heat closely. Cooking on high can burn the honey, making it bitter. Lastly, don’t skip the lemon juice. It lifts the dish and makes the flavors pop. Follow these tips, and you'll create a dish everyone loves. For the full recipe, check the section above. {{image_2}} You can change the flavor of honey glazed carrots by adding spices and herbs. For a warm taste, try cinnamon or ginger. Just a pinch can make a big difference. If you like a bit of heat, add a dash of cayenne pepper. Fresh herbs like rosemary or dill can also enhance the flavor. Mix and match to find your favorite blend! Honey glazed carrots pair well with other veggies. You can add baby potatoes for heartiness. Roasted parsnips also work great with the glaze. Try mixing in some green beans or snap peas for a colorful dish. Each vegetable brings its own unique taste to the mix. This adds depth and makes the dish more exciting. If you want a vegan version, it’s easy to swap out the butter. Use coconut oil or olive oil instead. The honey can be replaced with maple syrup or agave nectar for sweetness. The taste will still be rich and delicious. You’ll still enjoy that lovely glaze without any animal products. After enjoying your honey glazed carrots, let them cool. Place them in an airtight container. This keeps them fresh for up to three days. Make sure to store them in the fridge. For best taste, eat them within two days. To reheat, use the stove or a microwave. In a skillet, add a splash of water. Heat on low until warm. Stir often to avoid burning. In the microwave, place in a bowl. Cover it with a damp paper towel. Heat in short bursts until warm. This keeps the carrots tender. You can freeze honey glazed carrots, but they may lose some texture. Let them cool completely. Place them in a freezer-safe bag. Squeeze out the air before sealing. They can last up to three months in the freezer. When ready to eat, thaw in the fridge overnight. Reheat as mentioned above for the best results. For a full recipe, check out the earlier sections. I recommend using baby carrots for their sweetness and tenderness. They cook quickly and add nice color to your dish. If you prefer regular carrots, choose firm ones. Peel and cut them into sticks for even cooking. Both options work well for honey glazed carrots. Yes, you can make honey glazed carrots ahead of time. Cook them as stated in the recipe, then let them cool. Store them in an airtight container in the fridge for up to three days. When ready to serve, reheat them on the stove or in the microwave. To reduce the sweetness, use less honey. You can also add more lemon juice for a tangy flavor. Mixing in some garlic or onion can balance the sweetness too. Adjust the flavors in small steps to find your perfect mix. Enjoy your honey glazed carrots just the way you like! In this blog post, we covered how to make perfect honey-glazed carrots. We looked at key ingredients, like fresh versus frozen carrots and alternative sweeteners. I shared simple steps for preparation, cooking, and serving. You learned tips for achieving the right glaze and avoiding common mistakes. We also explored variations, such as adding spices or making it vegan. Finally, I discussed the best ways to store and reheat leftovers. Enjoy making this dish your own, and remember, small changes can lead to big flavors.

Honey Glazed Carrots Simple and Flavorful Side Dish

Looking for a simple side dish that packs a punch? Honey Glazed Carrots are a must-try! These sweet, tender veggies

- 1 cup quinoa, rinsed - 2 cups vegetable broth - 1 red bell pepper, diced - 1 yellow bell pepper, diced - 1 zucchini, diced - 1 red onion, chopped - 1 cup cherry tomatoes, halved - 2 tablespoons olive oil - 1 teaspoon garlic powder - 1 teaspoon paprika - Salt and pepper to taste - 1/4 cup fresh parsley, chopped - Juice of 1 lemon - 1/4 cup feta cheese (optional) The heart of this salad is quinoa. It's a superfood packed with protein. Quinoa is gluten-free and easy to digest. Next, we have fresh vegetables. I love using bell peppers, zucchini, and cherry tomatoes. They add color and a sweet taste. The red onion gives a nice crunch and flavor. We coat our veggies in olive oil and seasonings. Olive oil adds richness. Garlic powder and paprika kick up the taste. You can adjust the salt and pepper to your liking. For a fresh touch, we add parsley and lemon juice. The parsley brightens the dish. Feta cheese is optional but adds a creamy texture. You can find the full recipe above to guide you through this tasty creation. - Calories per serving: About 250 calories - Key nutrients: High in protein, fiber, vitamins, and minerals This salad is not just tasty; it’s also healthy. Each serving gives you good protein and fiber. You will feel full and satisfied. The vitamins from the vegetables help keep you healthy. This dish is a great choice for lunch or dinner. Preheating the oven Start by preheating your oven to 400°F (200°C). This heat helps to roast the veggies perfectly. Chopping and seasoning the vegetables Next, chop your vegetables. Dice the bell peppers, zucchini, and red onion. Halve the cherry tomatoes. In a big bowl, toss these chopped veggies with two tablespoons of olive oil. Add one teaspoon of garlic powder, one teaspoon of paprika, and a pinch of salt and pepper. Make sure everything is well mixed to coat the vegetables evenly. Boiling vegetable broth In a medium pot, bring two cups of vegetable broth to a boil. This broth adds great flavor to the quinoa. Simmering instructions Once the broth is boiling, add one cup of rinsed quinoa. Lower the heat to a simmer and cover the pot. Let it cook for about 15 minutes. The quinoa will absorb all the broth and become fluffy. After cooking, remove it from heat and let it cool for a bit. Mixing roasted vegetables with quinoa After the vegetables are roasted and the quinoa is cooked, it’s time to mix them. In a large bowl, combine the roasted veggies with the fluffy quinoa. Adding finishing touches Squeeze the juice of one lemon over the mixture for a fresh taste. Toss everything together gently. Fold in a quarter cup of chopped parsley. If you like cheese, sprinkle some feta on top. Adjust the seasonings with more salt and pepper if needed. This dish is colorful and full of flavor. For the full recipe, check above! To make your roasted vegetable quinoa salad shine, focus on spices and herbs. I recommend using: - 1 teaspoon garlic powder - 1 teaspoon paprika - Salt and pepper to taste These add depth and warmth. You can also try fresh herbs like parsley or basil for a burst of flavor. Marinating your veggies can also enhance taste. Toss the chopped vegetables in olive oil, garlic, and spices. Let them sit for at least 30 minutes. This helps them soak up all those delicious flavors before roasting. Roasting vegetables right is key for a great salad. Start by cutting them into uniform pieces. This ensures they cook evenly. Spread them on a baking sheet in a single layer. If they are crowded, they will steam instead of roast. For quinoa, rinse it under cold water first. This removes bitterness and gives it a clean taste. Then, cook it in vegetable broth, not water. This adds extra flavor. Bring the broth to a boil, then lower the heat. Cover and let it simmer for about 15 minutes. Fluff it with a fork once done. By following these tips, you will create a salad that is not only healthy but also full of flavor and texture. For the full recipe, check out the section above. {{image_2}} You can change the vegetables based on the season. In spring, use asparagus and peas. For summer, try eggplant and corn. Autumn works well with squash and carrots. In winter, consider root vegetables like sweet potatoes and beets. Each season brings new flavors. Roasting is key to bringing out the taste. You can grill veggies instead. This method adds a smoky flavor. You can also steam them for a softer texture. Experiment with different methods to find what you love. Adding protein makes your salad even better. You can toss in black beans or chickpeas. These options boost fiber and keep you full. If you like meat, consider grilled chicken or shrimp. For a vegan option, use tofu or tempeh. These add protein and soak up flavors well. You can marinate them before cooking for even more taste. Enjoy the Full Recipe to discover all the ways you can mix it up! To store leftover salad, place it in an airtight container. This keeps it fresh for up to four days. You can also layer a paper towel in the container to absorb excess moisture. This helps prevent sogginess. For longer freshness, use glass containers. They seal tightly and do not retain odors. If your salad has feta, store it separately to keep flavors bright. The best way to reheat quinoa salad is to warm it gently in a skillet. Use low heat to prevent burning. Stir often to heat evenly. You can also enjoy this salad cold. Cold salads are crisp and refreshing. They are perfect for hot days or as a quick meal. I often serve it both ways for variety. For the Full Recipe, check back at the beginning of the article! Roasted Vegetable Quinoa Salad lasts about 4 to 5 days in the fridge. Store it in an airtight container. This keeps it fresh and safe to eat. If you notice any odd smells or changes in texture, it’s best to toss it. Always check before eating leftovers. Yes, you can make this salad ahead of time. I recommend prepping it a day in advance. Just roast the veggies and cook the quinoa. Then, mix them together right before serving. This keeps the flavors fresh and bright. You can also store the dressing separately to avoid sogginess. If you need a substitute for quinoa, try rice or couscous. Both options work well. For a gluten-free choice, use cauliflower rice or millet. These alternatives still provide a nice base and texture. You can add your favorite grains to suit your taste. Yes, this salad is gluten-free! Quinoa is naturally gluten-free, making it a great choice. If you use gluten-free broth and check other ingredients, you can enjoy it worry-free. This makes the salad perfect for those with gluten sensitivities. Roasted Vegetable Quinoa Salad is easy to make and packed with nutrients. We covered vital ingredients, cooking steps, and flavorful tips. You learned about storage and variations to keep the dish fresh and tasty. In summary, this salad is versatile and nutritious. It fits many diets and tastes. Try different veggies or proteins to make it your own. Enjoy the simple joy this dish brings to your table.

Roasted Vegetable Quinoa Salad Healthy and Flavorful Dish

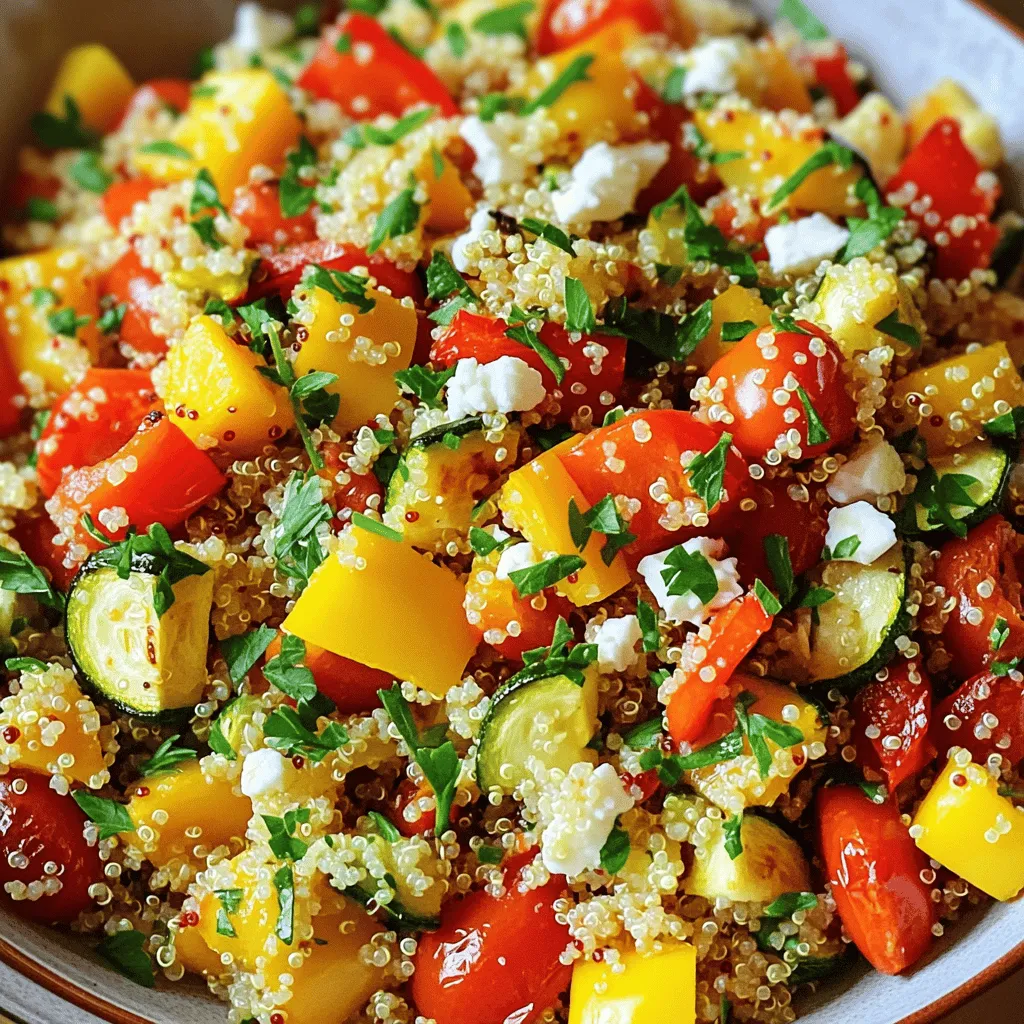
Looking for a dish that’s both healthy and full of flavor? Try my Roasted Vegetable Quinoa Salad! Packed with colorful

- 2 ripe mangoes, peeled and diced - 1 small red onion, finely chopped - 1 jalapeño, deseeded and minced - 1 red bell pepper, diced - 1/2 cup fresh cilantro, chopped - Juice of 2 limes - 1 teaspoon honey (optional) - Salt and pepper to taste - 1/2 teaspoon cumin To make a spicy mango salsa, you need fresh ingredients. Ripe mangoes bring sweetness, while jalapeños add heat. Always look for firm mangoes that give slightly when pressed. This texture ensures a juicy bite. Red onion gives a nice crunch and sharp taste. If you want less bite, soak it in water. This step can tame the flavor a bit. The red bell pepper adds color and sweetness. Fresh cilantro is key for a bright taste. If you're not a fan, you can skip it or use parsley. Lime juice adds tanginess and keeps the mangoes vibrant. Honey is optional, but it can balance the spice if you desire. Cumin gives a smoky note that enhances the salsa. Gather your ingredients before starting. This keeps the process smooth and fun. For the full recipe, check the section below. To make spicy mango salsa, follow these simple steps. This salsa is easy and fun to prepare. - Step 1: Combine diced mangoes, red onion, jalapeño, and bell pepper in a bowl. This mix gives a bright and fresh look. - Step 2: Add chopped cilantro and lime juice. The lime juice adds a zesty kick. - Step 3: Include optional honey for sweetness. Honey balances the heat from the jalapeño. - Step 4: Season with salt, pepper, and cumin. Cumin adds a smoky flavor that enhances the salsa. - Step 5: Fold ingredients gently, avoiding mashing. This keeps the mangoes intact and juicy. - Step 6: Refrigerate for 30 minutes. Chilling helps the flavors blend well. - Step 7: Adjust seasoning before serving. Taste and add more salt, lime, or honey if needed. For the complete recipe, check out the Full Recipe section above. Enjoy this salsa with chips or on your favorite dishes! - Use ripe mangoes for the best sweetness. Ripe mangoes have a natural sweetness that makes the salsa shine. Look for mangoes that yield slightly to pressure and have a sweet aroma. - Adjust jalapeño amount for desired heat level. If you like it spicy, add more jalapeño. For a mild flavor, use less. Remember, you can always add more spice later, but it's hard to tone it down. - Letting sit allows flavors to meld. After mixing, cover the salsa and chill it for at least 30 minutes. This resting time lets the flavors combine, making each bite taste better. - Serve in a colorful bowl with cilantro and lime wedges. A bright bowl makes the vibrant colors pop. Top it with fresh cilantro and lime wedges for a fun touch. - Pair with tortilla chips or as a topping for grilled meats. This salsa is perfect with crispy chips. You can also spoon it over grilled chicken or fish. It adds freshness and zing! {{image_2}} You can change the base fruit in your salsa. Try using pineapple or peaches instead of mangoes. These fruits add their own sweet twist. If you want more protein, add black beans. They give you a hearty bite and make the salsa filling. For a creamy texture, mix in diced avocado. This step not only enhances the flavor but also adds richness. To freshen up the salsa, include diced tomatoes. They add a burst of color and taste. If you crave more heat, just add a splash of hot sauce. This small change can take your salsa to a new level. Experimenting with these swaps and additions helps to find your perfect mix. You can check the full recipe for more tips and flavors! To keep your spicy mango salsa fresh, store leftovers in an airtight container in the fridge. It tastes best when eaten within 2-3 days. This helps keep the flavors bright and vibrant. If you want to save some for later, you can freeze it! The salsa can be frozen for up to 1 month. Just make sure to thaw it in the fridge before serving. This way, it stays tasty and ready for your next gathering. Enjoy your delicious mango salsa anytime! The best mango for salsa is the Ataulfo mango. This mango is sweet and creamy. It has fewer fibers, making it perfect for salsa. You can also use Haden or Tommy Atkins mangoes if Ataulfo is not available. Yes, you can make this salsa ahead of time. It tastes better after sitting for a while. The flavors blend well when you let it chill in the fridge for at least 30 minutes. Just cover it tightly to keep it fresh. To adjust the spice, change the amount of jalapeño. For less heat, use half or remove the seeds. If you want it spicier, add more jalapeño or even a pinch of cayenne pepper. Always taste as you go. Yes, mango salsa is healthy! It is low in calories and full of vitamins. Mangoes provide vitamin C and fiber. The fresh veggies add more nutrients. This salsa can be a great choice for a light snack or side. Mango salsa pairs well with many dishes. It is great with grilled chicken or fish. You can serve it with tacos or nachos too. It also makes a colorful topping for salads or wraps. Check out the Full Recipe for more serving ideas! Fiery Mango Salsa is a bright, fresh dip. It bursts with flavor and is easy to make. This salsa is perfect for summer gatherings or a tasty snack. Here’s a quick look at what you need and how to prepare it. Key Ingredients: - 2 ripe mangoes, peeled and diced - 1 small red onion, finely chopped - 1 jalapeño, deseeded and minced - 1 red bell pepper, diced - 1/2 cup fresh cilantro, chopped - Juice of 2 limes - 1 teaspoon honey (optional for extra sweetness) - Salt and pepper to taste - 1/2 teaspoon cumin (for a smoky flavor) Quick Steps: 1. Mix the diced mangoes, red onion, jalapeño, and red bell pepper in a bowl. 2. Add the chopped cilantro and fresh lime juice. 3. If you like it sweeter, add honey. 4. Season with salt, pepper, and cumin. 5. Fold the mixture gently, avoiding mashing the mangoes. 6. Cover the bowl and chill in the fridge for at least 30 minutes. 7. Taste and adjust seasoning before you serve. This salsa is great with chips or as a topping for grilled chicken or fish. Enjoy the vibrant colors and flavors of summer! This blog post showed you how to make a tasty mango salsa. We covered all the key ingredients, step-by-step instructions, and helpful tips. You learned about fun variations and storage ideas to keep your salsa fresh. Incorporating ripe mangoes and adjusting heat can elevate the flavor. This dish pairs well with many meals. Enjoy your vibrant and delicious mango salsa at your next gathering!

Spicy Mango Salsa Flavorful and Easy Summer Dip

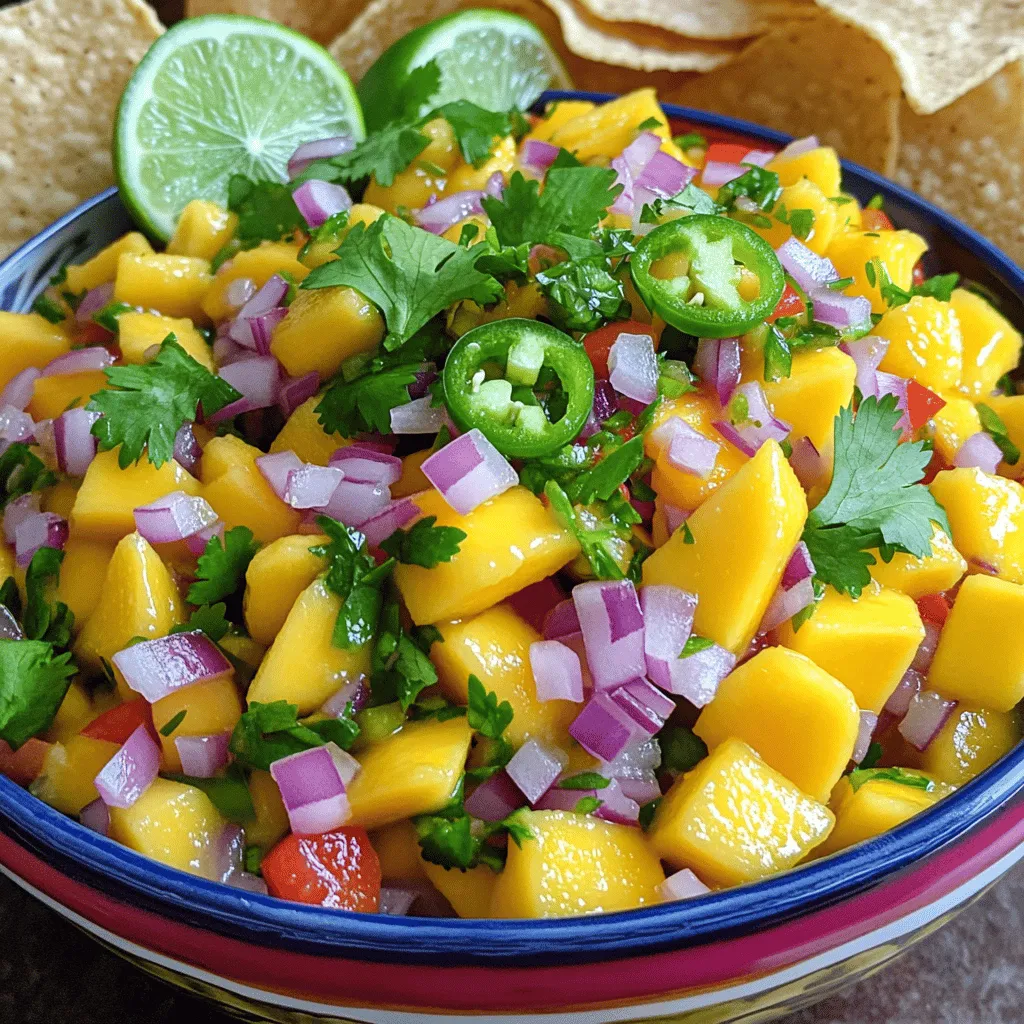
Welcome to the vibrant world of Spicy Mango Salsa! If you crave a fresh and zesty dip for summer, you’ve

To create a rich vegan chocolate cake, you’ll need these key ingredients: - 1 ½ cups all-purpose flour - 1 cup granulated sugar - 1/3 cup unsweetened cocoa powder - 1 tsp baking soda - ½ tsp salt - 1/3 cup unsweetened applesauce - 1 cup non-dairy milk (almond, soy, or oat) - 1/3 cup vegetable oil (or melted coconut oil) - 1 tsp vanilla extract - 1 tbsp apple cider vinegar - ½ cup vegan chocolate chips (optional) These ingredients come together to form a moist and flavorful cake. Each plays a vital role in achieving the perfect texture and taste. Sometimes, you might not have all the ingredients. Here are some easy swaps: - All-purpose flour: Use whole wheat flour for added fiber or gluten-free flour for a gluten-free version. - Granulated sugar: Coconut sugar or maple syrup can work well here. Just adjust the liquid in your recipe. - Unsweetened applesauce: Mashed banana or silken tofu can provide similar moisture. - Non-dairy milk: Any plant milk will work, but coconut milk adds richness. - Vegetable oil: Use melted vegan butter or applesauce for less fat. These substitutions keep the cake vegan while allowing for flexibility based on what you have on hand. When making your vegan chocolate cake, select the best ingredients for a delightful outcome: - Flour: Choose unbleached, organic flour for better taste and texture. - Cocoa powder: Opt for high-quality, unsweetened cocoa to enhance the chocolate flavor. - Sugar: Make sure the sugar is vegan, as some brands use bone char in processing. - Non-dairy milk: Select brands without added sugars or preservatives for a cleaner flavor. - Vegan chocolate chips: Look for brands that use fair trade chocolate for ethical choices. These tips help improve the overall quality of your cake, making it a truly decadent treat. For the complete recipe, check out the Full Recipe section. 1. Preheat your oven to 350°F (175°C). This warms the oven for baking. 2. Grease and flour a 9-inch round cake pan. You can also line it with parchment paper. This helps the cake come out easily. 3. Sift together the dry ingredients. In a large bowl, mix 1 ½ cups all-purpose flour, 1 cup sugar, 1/3 cup cocoa powder, 1 tsp baking soda, and ½ tsp salt. Whisk until they blend. 4. Combine the wet ingredients in another bowl. Mix 1/3 cup applesauce, 1 cup non-dairy milk, 1/3 cup vegetable oil, 1 tsp vanilla extract, and 1 tbsp apple cider vinegar. Whisk until smooth. 5. Mix wet and dry ingredients together. Pour the wet mix into the dry mix. Stir gently until just combined. Don’t over-mix! If you like, fold in ½ cup vegan chocolate chips for more chocolate flavor. 6. Pour the batter into the prepared cake pan. Use a spatula to smooth the top. 7. Bake for 30-35 minutes. Check if it’s done by inserting a toothpick into the center. If it comes out clean, it’s ready. 8. Cool the cake in the pan for 10 minutes. Then, transfer it to a wire rack to cool completely. 9. Frost or serve the cake. You can add your favorite vegan chocolate frosting or dust it with powdered sugar. For a nice touch, serve slices on plates with fresh berries and mint. Drizzle with chocolate sauce for an extra treat. Try this full recipe for a rich, vegan chocolate cake that everyone will enjoy! To keep your vegan chocolate cake moist and fluffy, use fresh ingredients. Check the expiration dates on your baking soda and non-dairy milk. Applesauce adds moisture and helps with the cake's texture. Mix the wet and dry ingredients until just combined. Over-mixing can lead to a dense cake. Adding a bit of extra non-dairy milk can also help if your batter looks too thick. One common mistake is not preheating the oven. Always ensure your oven is ready before baking. Use the right size pan; a 9-inch round pan works best for this recipe. If you use a different size, adjust the baking time. Remember to check the cake a few minutes before the timer goes off. Each oven is unique. Lastly, let the cake cool in the pan for ten minutes. This helps it stay intact when you transfer it. To enhance the flavor of your cake, try adding a splash of coffee. It deepens the chocolate taste without making it taste like coffee. You can also use flavored extracts, like almond or orange. For a fun twist, fold in some nuts or dried fruit. If you love chocolate, add vegan chocolate chips for extra richness. Use high-quality cocoa powder; it makes a big difference in taste. For the full recipe, check the sections above. {{image_2}} You can make this cake gluten-free. Just swap all-purpose flour for gluten-free flour. Use a blend that contains xanthan gum for best results. This will help the cake rise nicely. Follow the same steps in the full recipe. You’ll still enjoy a moist and rich cake. Want to jazz up the flavor? Add mint extract or coffee. For mint, use about 1 teaspoon in the wet mix. For coffee, brew a strong cup and replace some non-dairy milk with it. Both options give your cake a unique twist. Experiment to find your favorite! You can easily turn this cake into a layered dessert. Bake two or three rounds instead of one. Stack them with vegan frosting between each layer. This makes for a stunning presentation. You can also fill the layers with fruit or a chocolate ganache. The choices are endless! To keep your vegan chocolate cake fresh, store it in an airtight container. This helps keep moisture in and prevents the cake from drying out. If you have leftover slices, place parchment paper between them. This prevents sticking and keeps each piece intact. You can freeze your vegan chocolate cake for later enjoyment. First, let the cake cool completely. Wrap it tightly in plastic wrap. Then, place it in a freezer-safe bag. This protects it from freezer burn and keeps it fresh. When you’re ready to eat, thaw it in the fridge overnight before serving. The cake stays fresh at room temperature for about 3 days. If you store it in the fridge, it can last up to a week. To check for freshness, look for any changes in texture or smell. Always trust your senses. If it seems off, it’s best to discard it. Yes, you can! If you don't have applesauce, try using mashed bananas. They add moisture and sweetness. You can also use pureed silken tofu or a vegan yogurt. Both options work well. Just keep the same amount as the recipe calls for. This way, your cake stays moist and delicious. To make your cake richer, add more chocolate! You can mix in vegan chocolate chips or chunks into the batter. A sprinkle of espresso powder in the dry mix can boost the chocolate flavor. For an extra layer of decadence, drizzle melted vegan chocolate on top after frosting. Each bite will be heavenly! A creamy vegan chocolate frosting is perfect for this cake. You can make it by blending vegan butter, cocoa powder, and powdered sugar. Add a splash of non-dairy milk for creaminess. Another great option is a rich coconut cream frosting. Just chill a can of coconut milk, scoop out the cream, and whip it. Both frostings will make your cake shine. For the full recipe, check out the Decadent Vegan Chocolate Dream Cake! In this post, we explored key ingredients for a vegan chocolate cake and their substitutes. I shared step-by-step instructions for preparation and baking. You learned tips to ensure fluffiness and flavor, along with fun variations like gluten-free options. I also discussed best storage methods and answered common questions. Baking a cake can be fun and easy. Use quality ingredients and enjoy the process. Happy baking!

Vegan Chocolate Cake Rich and Decadent Delight

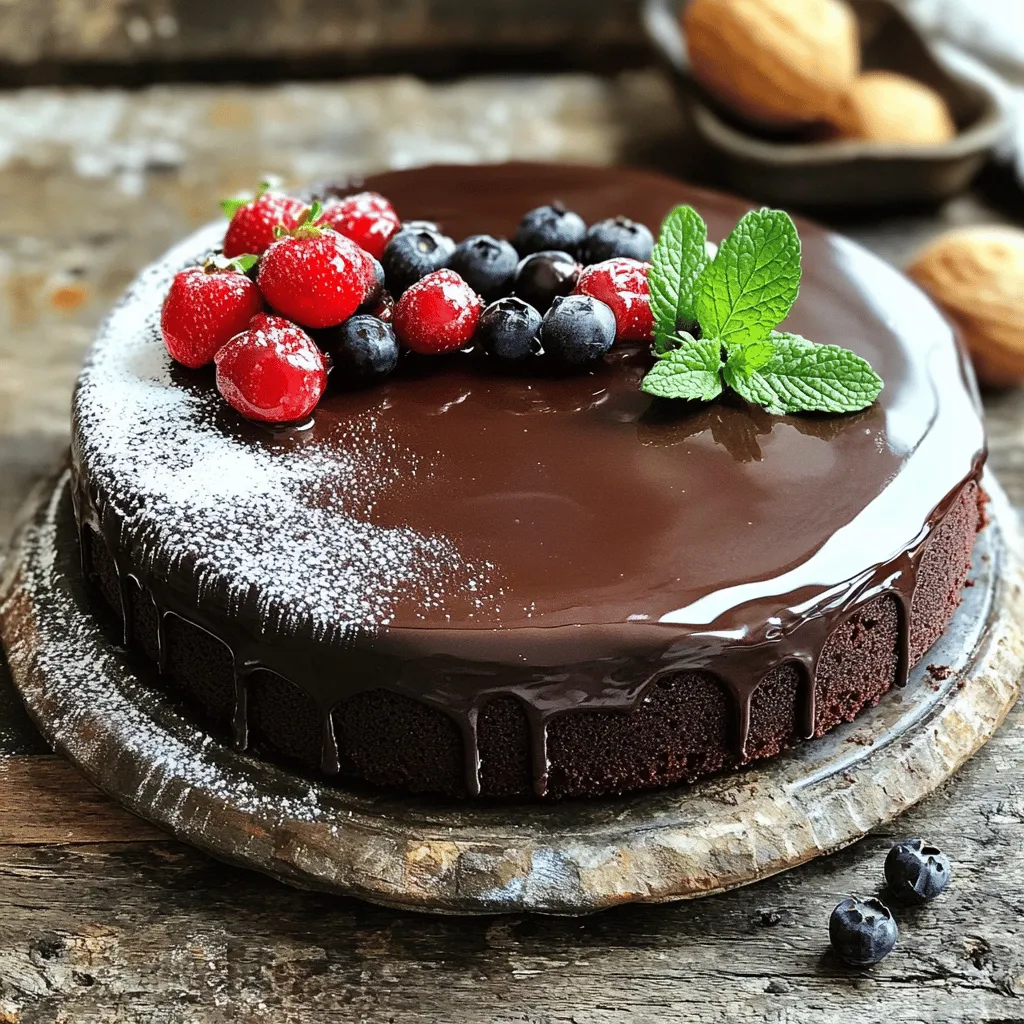
Indulging in a rich, vegan chocolate cake doesn’t have to be hard! In this article, I’ll guide you through a

- 1 pound large shrimp, peeled and deveined - 1/4 cup fresh orange juice - 1/4 cup fresh lime juice - 2 tablespoons olive oil - 2 tablespoons honey - 2 cloves garlic, minced - 1 teaspoon ground cumin - 1/2 teaspoon smoked paprika - Salt and pepper to taste - Fresh cilantro for garnish To make delicious citrus marinated grilled shrimp, you need fresh shrimp. I prefer large shrimp for a satisfying bite. The citrus juices are key to bright flavors. You will use orange juice and lime juice. Both add a nice zing to the dish. Olive oil helps the marinade stick to the shrimp. Honey adds a touch of sweetness. Minced garlic gives a great savory taste. Ground cumin and smoked paprika add depth and warmth. Don’t forget salt and pepper to taste. Finally, fresh cilantro makes a lovely garnish. - Lime wedges - Avocado slices - Additional herbs like parsley or chives For extra flair, consider garnishing with lime wedges. They add a fresh burst of flavor. You can also slice up avocado for creaminess. Adding herbs like parsley or chives can brighten the dish even more. Feel free to mix and match based on what you love. These optional ingredients can elevate your meal. Enjoy the process of making this dish your own! For the full recipe, check it out [here](#). Marinating the shrimp Start by making your marinade. In a large bowl, mix together: - 1/4 cup fresh orange juice - 1/4 cup fresh lime juice - 2 tablespoons olive oil - 2 tablespoons honey - 2 cloves garlic, minced - 1 teaspoon ground cumin - 1/2 teaspoon smoked paprika - Salt and pepper to taste Whisk these ingredients well. Next, add 1 pound of peeled and deveined shrimp. Make sure every shrimp gets coated. Cover the bowl with plastic wrap. Let it chill in the fridge for 30 to 60 minutes. This step helps the shrimp soak up all the tasty flavors. Preparing the grill While the shrimp marinates, get your grill ready. Preheat your grill to medium-high heat. If you choose to use wooden skewers, soak them in water for 15 minutes. This will stop them from burning while grilling. Cooking times and tips Once the shrimp has marinated, it's grilling time! If you used skewers, thread the shrimp onto them. Discard any leftover marinade. Place the shrimp on the grill. Grill each side for about 2 to 3 minutes. You want them to turn pink and opaque. Watch closely; overcooked shrimp can become tough. Testing for doneness To check if your shrimp is done, look for a firm texture. They should be pink and not translucent. If you're unsure, cut one in half. It should be opaque all the way through. Once done, take them off the grill and let them rest for a minute. This makes them juicy and tasty. For the full recipe, check out the detailed instructions provided. To make a great marinade, balance the flavors. Use sweet, sour, and salty notes. The honey adds sweetness and the citrus juices bring brightness. If you want more spice, add a pinch of cayenne or red pepper flakes. This will give your shrimp a nice kick. Taste the marinade before adding shrimp. Adjust as needed to suit your taste. Grilling shrimp can be tricky, but it’s easy with a few tips. First, avoid overcooking. Shrimp cook fast and can turn rubbery. Grill them for 2-3 minutes on each side. Look for a pink color and a firm texture. To get those beautiful grill marks, preheat your grill well. Place the shrimp on the grill and don’t flip them too soon. Let them sear for a minute before turning. This gives you that nice char and flavor. For the full recipe, check the details provided earlier. Enjoy your cooking! {{image_2}} You can change the flavor of your citrus marinated grilled shrimp in fun ways. - Tropical citrus twist: Add pineapple juice for a fruity kick. Mix in some grated ginger for warmth. This gives a fresh taste that is lively and bright. - Spicy citrus variation: Want some heat? Add chopped jalapeños or a dash of hot sauce. This adds a kick that pairs well with the sweet and sour flavors. The right sides and sauces make your meal even better. - Pairing with sides: Serve your shrimp with rice or a fresh salad. Grilled veggies also work great. They add color and crunch to your meal. - Best sauces or dips: Try a zesty avocado dip or a tangy cilantro sauce. These complement the shrimp's flavors and add creaminess. Don't forget to serve some lime wedges for an extra zing! For the full recipe, check out the detailed instructions above. To keep shrimp fresh, start by cooling it down. Place the grilled shrimp in a shallow dish. Cover it tightly with plastic wrap or use an airtight container. This helps to keep the shrimp moist and flavorful. Store the shrimp in the fridge. It will last for up to three days. If you want to store it longer, freeze it. Wrap it well in plastic wrap and foil. Frozen shrimp can last up to three months. When you are ready to use it, thaw it safely in the fridge overnight. Reheating shrimp can be tricky. You want to avoid overcooking it. The best way to reheat grilled shrimp is on the stove. Heat a pan over low heat and add a bit of oil. Place the shrimp in the pan for a few minutes. Stir gently until warm. You can also use the microwave. Place the shrimp on a microwave-safe plate. Cover it with a damp paper towel to keep it moist. Heat in short bursts, about 30 seconds at a time. Check often to make sure it does not get tough. These methods keep the shrimp tender and tasty. Enjoy your Citrus Marinated Grilled Shrimp from the Full Recipe! How long to marinate shrimp? You should marinate shrimp for 30 to 60 minutes. This time allows the flavors to soak in well. If you marinate for too long, the shrimp can become tough. Can I use frozen shrimp? Yes, you can use frozen shrimp. Just make sure to thaw them first. Place frozen shrimp in cold water for about 15 minutes. This helps them thaw evenly before marinating. What is the best way to season shrimp? The best way to season shrimp is to use a marinade. Citrus juices, like orange and lime, work great. They add fresh flavor and help tenderize the shrimp as well. Is it possible to grill shrimp without skewers? Yes, you can grill shrimp without skewers. Just place them directly on the grill. Use a grill basket or aluminum foil to keep them from falling through. This way, you still get that nice grilled flavor. For more details, check out the Full Recipe. In this article, we explored the key steps to grilling shrimp perfectly. We covered the essential ingredients and the options you can add for more flavor. You learned how to marinate and grill shrimp while avoiding common mistakes. Remember, testing for doneness is important to achieve great taste. Use any leftovers wisely by storing them well. With various marinade options and serving ideas, you can impress anyone at your next meal. Enjoy your delicious, grilled shrimp experience!

Citrus Marinated Grilled Shrimp Simple and Tasty Meal

Looking for a quick, easy meal that’s bursting with flavor? You’ve come to the right place! My Citrus Marinated Grilled

To make roasted vegetable couscous, gather these ingredients: - 1 cup couscous - 1 1/2 cups vegetable broth - 1 small zucchini, diced - 1 bell pepper (red or yellow), diced - 1 medium carrot, sliced - 1 red onion, chopped - 1 cup cherry tomatoes, halved - 2 tablespoons olive oil - 1 teaspoon dried thyme - 1 teaspoon smoked paprika - Salt and pepper to taste - Fresh parsley, chopped for garnish - Feta cheese (optional, for topping) Choosing the right vegetable broth is key. A good broth adds depth to the dish. Fresh vegetables make a big difference too. They add color and flavor. Always pick firm, bright veggies for the best taste. Olive oil is your friend here. It helps the vegetables roast nicely. Smoked paprika gives a lovely, warm flavor. Use fresh parsley for a burst of freshness at the end. You can skip the feta if you want a dairy-free dish. You can swap couscous for quinoa or farro if you need gluten-free options. For a vegan version, just skip the feta cheese. If you want more protein, add chickpeas or cooked chicken. You can also mix in different veggies, like broccoli or sweet potatoes. Adjust the spices based on your taste. Curry powder or Italian herbs can change the flavor profile nicely. For more ideas, check the Full Recipe. Start by washing your vegetables. I like to use zucchini, bell peppers, carrots, red onions, and cherry tomatoes. Dice the zucchini and bell peppers. Slice the carrot and chop the red onion. Cut the cherry tomatoes in half. Make sure all pieces are about the same size. This helps them cook evenly. Place the chopped veggies on a large baking sheet. Preheat your oven to 400°F (200°C). Once the oven is hot, drizzle the vegetables with olive oil. Sprinkle dried thyme, smoked paprika, salt, and pepper over them. Toss everything well to coat. This adds great flavor. Roast the vegetables for 25 to 30 minutes. Stir them halfway through. You want them tender and slightly caramelized. The smell will make your mouth water! While the veggies roast, cook the couscous. In a saucepan, bring 1 ½ cups of vegetable broth to a boil. Once boiling, remove it from heat. Stir in 1 cup of couscous. Cover the pan and let it sit for about 5 minutes. The couscous will soak up the broth. After it rests, fluff it with a fork. Mix the couscous with the roasted vegetables. Adjust the seasoning if you like. Serve this warm as a tasty meal. For more details, check the Full Recipe. Roasting vegetables brings out their natural sweetness. To do it right, cut the veggies into even sizes. This helps them cook evenly. Use a large baking sheet to avoid crowding. Crowded veggies steam instead of roast. Toss them with olive oil and spices for better flavor. Always preheat your oven to 400°F (200°C) for perfect roasting. Check on them halfway through and stir for even cooking. Fluffing couscous is key to a light texture. After cooking, let it sit covered for five minutes. This step helps it absorb moisture. Then, take a fork and gently stir it. This breaks up any clumps. Avoid using a spoon, as it can mash the grains. Fluffed couscous mixes well with roasted vegetables, making every bite delightful. Herbs and spices can transform your couscous. Use dried thyme and smoked paprika for a warm taste. Fresh herbs like parsley add brightness. Consider adding a squeeze of lemon juice for acidity. It wakes up all the flavors in the dish. If you want a kick, try a pinch of red pepper flakes. You can also swap spices based on your taste. Experiment with cumin or coriander for a different twist. For extra richness, sprinkle some feta cheese on top. This adds creaminess and pairs well with the veggies. {{image_2}} You can add protein to make your roasted vegetable couscous even heartier. Chickpeas are a great choice. They are easy to use and full of flavor. Just rinse and drain a can before mixing them in with the roasted vegetables. For chicken lovers, grilled or baked chicken works well. Cut it into bite-sized pieces and fold it into the couscous. This step boosts the meal's protein and makes it more filling. Feel free to switch up the vegetables based on what you have. Broccoli, asparagus, or eggplant can add a nice touch. Sweet potatoes or butternut squash give a sweet flavor. Just remember to cut them into small pieces for even cooking. Mixing different colors makes the dish more appealing. The varied textures and tastes keep each bite interesting. You can change the flavor of your couscous easily. For a Mediterranean twist, add olives and capers. A sprinkle of lemon zest brightens the dish too. If you want an Asian flavor, try sesame oil and soy sauce. Add green onions and sesame seeds for crunch. For a Mexican taste, use cumin and lime juice. Top with avocado for creaminess. Each of these options opens up a new world of flavors! After you enjoy your roasted vegetable couscous, store any leftovers in an airtight container. Make sure to cool it to room temperature first. Place the container in the fridge. It will stay fresh for about 3 to 4 days. When storing, try to keep the couscous and vegetables together. This way, they keep their flavors. You can freeze roasted vegetable couscous if you want to save it longer. First, let it cool completely. Then, scoop the couscous into freezer-safe bags. Remove as much air as possible before sealing. Label the bags with the date. It will last in the freezer for up to 2 months. When you're ready to eat it, you can take out what you need. To reheat your couscous, you have a few options. The microwave is the quickest method. Place the couscous in a bowl and cover it with a damp paper towel. Heat it for 1-2 minutes, stirring halfway through. You can also reheat it in a pan on the stove. Just add a splash of vegetable broth or water to prevent it from drying out. Stir often until it's warm. Enjoy your dish just like the first time! Roasted vegetable couscous is often vegetarian. To make it vegan, skip the feta cheese. Use vegetable broth instead of chicken broth. This recipe is already plant-based, which makes it easy. You can also add more veggies or legumes for protein. Chickpeas work well and add great texture. Yes, you can use other grains. Quinoa, bulgur, or farro are great choices. Each grain has a unique flavor and texture. Adjust cooking times based on the grain you choose. For quinoa, rinse it before cooking. This will help remove the bitter taste. You can serve roasted vegetable couscous with many dishes. Grilled meats or fish pair well. A simple green salad adds freshness. For a vegetarian option, serve it with falafel. You can also enjoy it as a main dish. It is filling and full of flavor. For a special touch, add a squeeze of lemon juice before serving. For the complete recipe, refer to the Full Recipe section. This article covered the key ingredients and step-by-step process for making roasted vegetable couscous. You learned helpful tips and tricks to enhance flavor and texture. I shared great variations for adding protein and changing up veggies. You also picked up useful storage and reheating methods. Experiment with the recipe based on your taste. Have fun with it, and enjoy your meal!

Roasted Vegetable Couscous Flavorful and Easy Meal

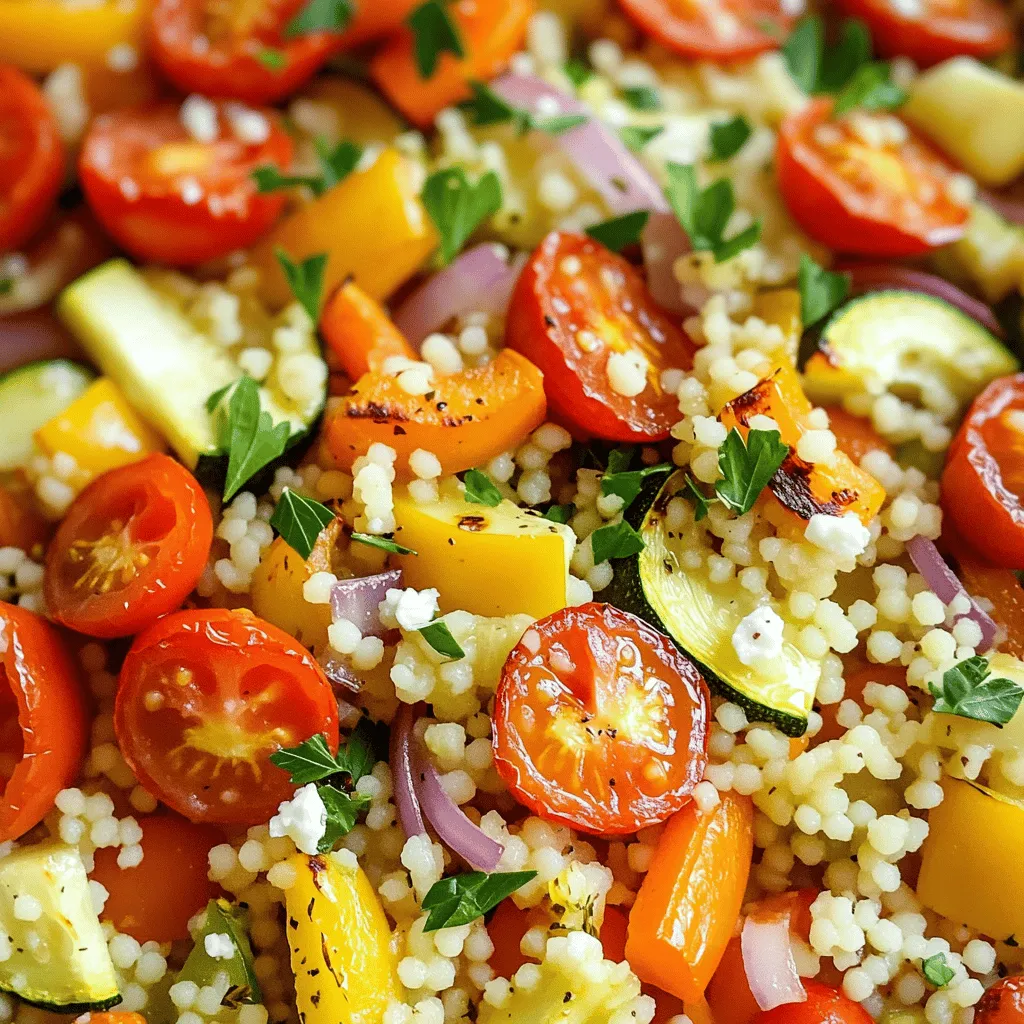
Looking for an easy meal that packs a punch of flavor? This Roasted Vegetable Couscous is your answer! With simple

- 2 large eggplants - 1 cup ricotta cheese - 1 cup shredded mozzarella cheese - 1/2 cup grated Parmesan cheese - 1 cup fresh spinach, chopped - 2 cloves garlic, minced - 1 jar (24 oz) marinara sauce For my Baked Eggplant Rollatini, the eggplants are key. I use large ones, as they create perfect rolls. The cheeses bring richness and creaminess. Ricotta gives a soft texture, while mozzarella melts beautifully. Parmesan adds a nice, salty kick. Spinach and garlic are my favorite flavor pair. I sauté them together for a tasty filling. The marinara sauce ties everything together. It adds moisture and a depth of flavor. - 1 teaspoon dried oregano - 1 teaspoon salt - 1/2 teaspoon black pepper I love using dried herbs like oregano. They enhance the taste without overpowering it. Salt and pepper are simple but essential. They bring out the best in the other ingredients. This blend creates a simple yet flavorful dish. You can find the full recipe for Baked Eggplant Rollatini and enjoy this delightful meal. Preheating the Oven Start by preheating your oven to 375°F (190°C). This step is key for even cooking. Preparing the Eggplants Slice the eggplants lengthwise into 1/4-inch thick slices. Sprinkle salt on both sides. Let them sit for about 15 minutes. This draws out moisture. After 15 minutes, pat them dry with paper towels. This helps reduce bitterness. Sautéing Spinach and Garlic In a skillet, drizzle olive oil and heat it over medium. Add minced garlic and sauté until it smells amazing, about 1 minute. Toss in chopped spinach and cook until it wilts. Once done, remove it from heat and let it cool a bit. Mixing the Cheese Filling In a mixing bowl, add ricotta cheese, half of the mozzarella, grated Parmesan, sautéed spinach, dried oregano, salt, and pepper. Stir until everything is well mixed. This creamy filling brings flavor and texture. Rolling the Eggplants On a baking sheet lined with parchment, lightly coat your eggplant slices in olive oil. Roast them in the oven for about 15 minutes. Flip them halfway through. They should be slightly soft when done. Spread a layer of marinara sauce in the bottom of a baking dish. Take one eggplant slice and add a spoonful of the cheese mixture at one end. Roll the eggplant around the filling and place it seam-side down in the dish. Repeat this until all slices and filling are used. Layering in the Baking Dish Once all the rollatini are in the dish, pour the remaining marinara sauce over the top. Then, sprinkle the rest of the mozzarella cheese on top. This gives a wonderful cheesy crust. Covering and Baking Time Cover the dish with aluminum foil and bake for 25 minutes. This keeps moisture in, making the rollatini tender. Achieving Perfect Cheese Melting After 25 minutes, remove the foil and bake for an extra 10 minutes. This step lets the cheese bubble and turn golden. Let the dish cool for 5 minutes before serving. Garnish with fresh basil leaves for a pop of color and flavor. You can find the full recipe if you want all the details! How to Cut Eggplants To create the best rollatini, slice the eggplants carefully. Cut them lengthwise into 1/4-inch thick slices. This size helps them cook evenly. Use a sharp knife to ensure clean cuts. Clean cuts make rolling easier and prevent tearing. Importance of Salting Eggplants Salting eggplants is key. Sprinkle salt on both sides of the slices and let them sit for 15 minutes. This step draws out excess moisture and bitterness. After 15 minutes, pat the slices dry with paper towels. This makes your rollatini taste better and have a nice texture. Vegan Cheese Options If you want a vegan version, use plant-based cheese. Look for vegan ricotta made from nuts or tofu. Nutritional yeast adds a cheesy flavor too. Many brands offer vegan mozzarella that melts well. These options keep the dish creamy and delicious. Low-Fat Cheese Suggestions For a lighter dish, choose low-fat cheeses. Part-skim ricotta works well and reduces calories. You can also use low-fat mozzarella for topping. These cheeses still provide great flavor and texture without too much fat. Adding Extra Ingredients To boost flavor, consider adding extra ingredients. Chopped sun-dried tomatoes or olives add a nice touch. You can also mix in fresh herbs like parsley or thyme. Experiment with what you love to create your perfect rollatini. What to Pair with Rollatini Baked eggplant rollatini pairs well with many sides. A fresh salad with a simple vinaigrette complements it nicely. Garlic bread also makes a great side. These pairings enhance the meal and make it feel complete. For the complete recipe, check out the Full Recipe section. {{image_2}} Adding Ground Meat You can add ground meat to the filling for a hearty twist. Use beef, turkey, or chicken. Brown the meat first in a skillet. Mix it with the cheese blend for a tasty filling. This variation adds protein and richness. Using Sausage in the Filling Sausage brings a burst of flavor. Choose sweet or spicy sausage based on your taste. Remove the casing and cook it until browned. Mix it into the cheese filling. This option adds a delightful kick to each bite. Incorporating Other Vegetables You can swap in other veggies for a fresh take. Zucchini, mushrooms, or bell peppers work great. Roast or sauté them, then mix into the cheese filling. This adds color and flavor to your rollatini. Gluten-Free Options For a gluten-free meal, simply skip the flour. The eggplant serves as the main ingredient. Enjoy the same great taste without any gluten. This makes the dish accessible to more diners. Using Different Types of Sauces Switch up the sauce for a new flavor profile. Try pesto, Alfredo, or a spicy arrabbiata. Each sauce transforms the dish in a unique way. Experiment to see what you love best! Specialty Cheese Combinations Explore different cheeses for the filling. Goat cheese, feta, or a blend of Italian cheeses can elevate the taste. Mixing cheeses adds depth and a creamy texture. You’ll love the new flavors! For the full recipe, check out the section above! Refrigeration Tips To keep your leftover rollatini fresh, let it cool first. Place it in an airtight container. It stays good for about 3 to 4 days in the fridge. Make sure to cover it well to avoid drying out. Freezing Instructions You can freeze rollatini for longer storage. Wrap each roll tightly in plastic wrap. Then, place them in a freezer-safe bag or container. They can last up to 3 months in the freezer. When ready to eat, thaw in the fridge overnight. Best Methods for Reheating For the best taste, reheat rollatini in the oven. Preheat your oven to 350°F (175°C). Place the rollatini in a baking dish and cover it with foil. Bake for about 20 minutes, or until heated through. You can also use a microwave for quick reheating, but the oven keeps it crispier. Tips to Maintain Flavor and Texture To keep the flavors fresh, add a splash of marinara sauce on top before reheating. This adds moisture and boosts the taste. Avoid overheating in the microwave to prevent sogginess. Aim for even heating to enjoy each bite. Yes, you can prepare Baked Eggplant Rollatini ahead of time. After you assemble the rollatini, cover the dish with foil. Store it in the fridge for up to 24 hours. When you're ready to bake, remove the foil and follow the baking instructions from the Full Recipe. This makes meal prep easier and saves time on busy nights. To adjust the recipe, consider these options: - Dairy-free: Use vegan cheese or tofu instead of ricotta and mozzarella. - Gluten-free: Ensure your marinara sauce is gluten-free. - Low-carb: Substitute eggplant with zucchini or other low-carb vegetables. These changes can help everyone enjoy this dish without worry. Baked Eggplant Rollatini pairs well with many sides: - A simple green salad with vinaigrette. - Garlic bread for a crunchy side. - Steamed veggies like broccoli or green beans. These options balance the meal and add more flavors and textures. You can store leftover rollatini in the fridge for up to 3 days. Place the leftovers in an airtight container. This keeps them fresh and ready to enjoy again. Just reheat in the oven or microwave before serving. Baked Eggplant Rollatini blends rich flavors and easy steps. This meal shines with eggplants, cheeses, and spinach. Remember to salt eggplants for best texture. You can switch cheeses or add proteins for more taste. Store leftovers well and reheat them quickly. With this guide, you can create a delicious dish that suits your needs. Enjoy your cooking adventure and share your creations!

Baked Eggplant Rollatini Simple and Flavorful Recipe

Ready for a delicious dinner? Baked Eggplant Rollatini is a simple and flavorful dish that everyone will love. I’ll guide

- 1 medium head of cauliflower - 1 cup shredded mozzarella cheese - 1/4 cup grated Parmesan cheese - 1 large egg - 1 teaspoon dried oregano - 1 teaspoon garlic powder - Salt and pepper to taste - Olive oil for drizzling To start making a cauliflower pizza crust, you’ll need some basic ingredients. The main star is the cauliflower. I like to use one medium head. Ricing the cauliflower helps create a nice texture. You will also need mozzarella and Parmesan cheese. These give great flavor and help bind everything. Next, you’ll need a large egg. This helps hold the crust together. Dried oregano and garlic powder add delicious taste. Don’t forget a pinch of salt and pepper to enhance the flavors. A drizzle of olive oil adds richness to the final dish. This simple list of ingredients makes a healthy twist on pizza. For the full recipe, check back for step-by-step instructions. - Preheat the oven and prepare the baking sheet: Start by preheating your oven to 425°F (220°C). Line a baking sheet with parchment paper. This will prevent the crust from sticking and make cleanup easier. - Rice the cauliflower in a food processor: Take a medium head of cauliflower and chop it into small florets. Add these to a food processor. Pulse the florets until they look like rice or fine crumbs. This usually takes about 10-15 seconds. - Steam the cauliflower until tender: Next, transfer the riced cauliflower to a microwave-safe bowl. Cover the bowl with a lid or a plate. Microwave it on high for 4-5 minutes. This step softens the cauliflower, making it easier to work with. - Squeeze out excess moisture from the cauliflower: Once the cauliflower is cool, place it in a clean kitchen towel. Twist the towel to squeeze out as much moisture as you can. This step is key to getting a crispy crust. - Combine all ingredients into a dough: In a large mixing bowl, combine the drained cauliflower, 1 cup of shredded mozzarella cheese, 1/4 cup of grated Parmesan cheese, 1 large egg, 1 teaspoon of dried oregano, 1 teaspoon of garlic powder, and salt and pepper. Stir well until a dough forms. - Shape the dough into a pizza crust: Transfer the dough onto your prepared baking sheet. With your hands, shape it into a round pizza crust about 1/4-inch thick. Make sure the edges are slightly raised to hold your toppings. - Bake the crust until golden brown: Place the crust in the preheated oven. Bake for 15-20 minutes until it turns golden brown and feels firm to the touch. - Add toppings and return to the oven: Take the crust out and add your favorite pizza toppings and cheese. Put it back in the oven for another 10 minutes, or until the cheese is bubbly and golden. - Slice and serve the cauliflower pizza: Let the pizza cool for a few minutes before slicing. A drizzle of olive oil adds great flavor. Enjoy this simple and healthy treat with family and friends! For the full recipe, check out the Cauliflower Dream Pizza Crust section. To get a crispy crust, you must squeeze out the moisture from the cauliflower. When you steam the cauliflower, it holds a lot of water. Use a clean kitchen towel. After steaming, transfer the cauliflower to the towel and twist it tightly. Squeeze hard to remove as much water as possible. This step is key for a crust that holds up and does not get soggy. Also, always use a parchment-lined baking sheet. This helps prevent sticking and makes cleanup easy. The parchment allows hot air to circulate, which helps the crust become crispy all around. Seasoning the crust can make a big difference. I like to add dried oregano and garlic powder for a classic taste. You can also experiment with other herbs. Try adding basil or crushed red pepper for a kick. A sprinkle of smoked paprika adds a nice depth of flavor. As for toppings, the options are endless. You can use fresh vegetables like bell peppers, mushrooms, or spinach. For proteins, consider grilled chicken or pepperoni. Don't forget the cheese! A mix of mozzarella and feta gives a nice flavor twist. When you get creative, each pizza can have its own unique taste. {{image_2}} You can use different cheeses to change the flavor of your cauliflower pizza crust. While mozzarella gives a classic taste, you might try gouda or cheddar for a twist. Each cheese brings its own unique flavor. If you need a dairy-free option, almond or coconut-based cheese works well. These cheeses melt nicely and add creaminess. Just make sure they are dairy-free and taste good to you! When it comes to toppings, think Italian! Try adding fresh basil, tomatoes, and a splash of balsamic. This gives your pizza a fresh and vibrant taste. For vegetarian or vegan options, load your pizza with veggies like bell peppers, mushrooms, and spinach. You can also top it with vegan cheese or a drizzle of olive oil. These options keep it light and healthy. This cauliflower pizza crust is naturally gluten-free. It works great for those who cannot eat gluten. Always check your cheese labels to ensure they are gluten-free too. If you’re watching carbs, this crust is a fantastic low-carb choice. It offers a great alternative to traditional dough without sacrificing flavor. You can enjoy your pizza guilt-free! For the full recipe, check out [Full Recipe]. To store your cauliflower pizza, allow it to cool first. Place it in an airtight container. This keeps it fresh. You can refrigerate leftovers for up to three days. It's best to reheat in the oven for a crispy crust. You can freeze both unbaked and baked crusts. For unbaked crusts, shape them and place on a baking sheet. Freeze until firm, then wrap tightly in plastic wrap. For baked crusts, let them cool, then wrap as well. To reheat, bake from frozen at 425°F (220°C) for about 10-15 minutes. Enjoy your cauliflower pizza at any time! You can find the full recipe for this delicious crust above. To make your cauliflower pizza crust crispy, moisture control is key. After steaming the cauliflower, let it cool, then squeeze out as much water as possible using a clean towel. This step ensures a firm, crispy crust. Baking at a high temperature, like 425°F (220°C), also helps achieve that golden color. Lastly, don’t forget to shape the crust thinly, about 1/4-inch thick, to promote even cooking. Yes, frozen cauliflower works well for this recipe. Just make sure to thaw it completely and drain any excess water before ricing it. If you can, steam it in the microwave while still in the bag. This makes it easy to handle. Remember to squeeze out moisture after cooking, just like with fresh cauliflower. You can get creative with toppings! Here are some great options: - Tomato sauce - Fresh mozzarella - Sliced bell peppers - Mushrooms - Spinach - Pepperoni - Fresh basil Feel free to mix and match to suit your taste! Cauliflower pizza crust has fewer carbs and calories than traditional crust. It is also gluten-free, making it a great choice for those with gluten sensitivities. A slice of cauliflower crust typically has more fiber and vitamins, too. This makes it a healthier option for those looking to reduce carbs while still enjoying pizza. You can find pre-made cauliflower pizza crust at many grocery stores. Look in the freezer aisle or the gluten-free section. Brands like Caulipower and Trader Joe's offer tasty options. You can also check local health food stores. If you're short on time, these pre-made crusts are a quick way to enjoy pizza without the work. For a homemade option, check out the Full Recipe for making your own! We explored making a tasty cauliflower pizza crust using simple ingredients. You learned how to prep, shape, and bake the crust to perfection. Remember to squeeze out moisture for that nice crisp. You can get creative with toppings and try many flavors. This crust also fits different diets, like gluten-free or low-carb. Making and storing it is easy, and leftovers are delightful. Cauliflower pizza crust is a fun twist on pizza that everyone can enjoy!

Cauliflower Pizza Crust Simple and Healthy Recipe

If you’re on the hunt for a tasty, healthy alternative to traditional pizza, you’ve come to the right place. Cauliflower

Older posts
Newer posts
← Previous Page1 … Page83 Page84 Page85 Page86 Next →

dsad

© 2026 Cooking Wells • Built with GeneratePress

Our Policies

  • Copyright Policy
  • Cookie Policy
  • GDPR Policy
  • Privacy Policy
  • Disclaimer
  • Terms Of Use

More Information

  • Home
  • About
  • Contact
  • Appetizers
  • Dessert
  • Dinner
  • Drinks
©2026, Cooking Wells About Back To Top