Skip to content
DisclaimerTerms Of UseGDPR PolicyCookie Policy

Cooking Wells

  • Home
  • Drinks
  • Appetizers
  • Dinner
  • Dessert
  • About
  • Contact
  • Privacy Policy
DisclaimerTerms Of UseGDPR PolicyCookie Policy

NO-ING-IMG

- Butter, sugars, and eggs: - You need 1 cup of unsalted butter. It should be soft, so it mixes well. - Use 1 cup of brown sugar, packed tight for a rich flavor. - Add 1/2 cup of granulated sugar to balance the sweetness. - Include 2 large eggs for moisture and structure. - A teaspoon of vanilla extract gives a lovely aroma. - Dry ingredients including flour and cocoa powder: - Measure out 2 cups of all-purpose flour. This is the base of your cookies. - Use 1/2 cup of unsweetened cocoa powder for that deep chocolate taste. - Add 1 teaspoon of baking soda to help the cookies rise. - A pinch of salt (1/2 teaspoon) brings out the flavors. - Chocolate types and espresso: - Fold in 1 cup of semi-sweet chocolate chips for gooey bites. - Use 1/2 cup of dark chocolate chunks for extra richness. - Mix in 1 tablespoon of instant espresso powder. It enhances the chocolate flavor and adds a nice coffee kick. - Finish with sea salt flakes on top for a touch of savory. This ingredient list ensures your cookies are rich, chocolatey, and utterly delicious. Each component plays a role in creating that perfect bakery-style double chocolate espresso cookie. 1. Start by preheating your oven to 350°F (175°C). This makes sure your cookies bake evenly. Line two baking sheets with parchment paper. This helps prevent sticking. 2. In a large mixing bowl, cream together 1 cup of softened unsalted butter, 1 cup of packed brown sugar, and 1/2 cup of granulated sugar. Mix until it becomes smooth and fluffy. This step adds air to your dough. 3. Beat in 2 large eggs, one at a time. Then add in 1 teaspoon of vanilla extract. Make sure to mix well after adding each egg. This helps bind the ingredients. 1. In a separate bowl, whisk together 2 cups of all-purpose flour, 1/2 cup of unsweetened cocoa powder, 1 teaspoon of baking soda, 1/2 teaspoon of salt, and 1 tablespoon of instant espresso powder. Mixing these dry ingredients well ensures even flavor. 2. Gradually add the dry mixture to the wet mixture. Mix until just combined. Be careful not to overmix, as this can make your cookies tough. 1. Using a cookie scoop or tablespoon, drop generous portions of dough onto the prepared baking sheets. Leave space between each cookie to allow for spreading. 2. Sprinkle a pinch of sea salt flakes on top of each cookie. This adds a nice touch of flavor. 3. Bake for 10-12 minutes. The edges should be set, but the centers can stay slightly soft. They will firm up as they cool. 4. Allow the cookies to cool on the baking sheets for about 5 minutes. After that, transfer them to a wire rack to cool completely. This helps maintain their soft, chewy texture. Getting the right cookie texture is key. Start with butter at room temperature. Cold butter makes dough dense. Softened butter mixes better with sugars, creating air pockets. This makes cookies light and chewy. Mixing is just as important. Use a mixer on low speed. Beat the butter and sugars until fluffy, then add eggs slowly. When you add dry ingredients, mix until just combined. Overmixing makes cookies tough. You want a soft dough with some lumps. If you need to adjust the recipe, you can swap ingredients. For gluten-free cookies, use a gluten-free flour. For a dairy-free option, use coconut oil instead of butter. These swaps can work well and taste great. Storing cookie dough is easy. After mixing, shape the dough into balls. Place them on a tray and freeze until solid. Then, transfer them to a bag. You can bake them fresh later. Just add a few extra minutes to the baking time. {{image_2}} You can make these cookies even more fun! Here are some great ideas: - Nuts: Add 1/2 cup of chopped walnuts or pecans for a crunchy bite. - Dried Fruit: Add 1/2 cup of dried cherries or cranberries for a sweet twist. - Mint Flavor: Mix in 1/2 teaspoon of mint extract for a refreshing taste. - Orange Zest: Add the zest of one orange to brighten the cookie's flavor. Want to make these cookies fit your diet? Here’s how: - Gluten-Free: Swap all-purpose flour with a gluten-free flour blend. This makes the cookies safe for those who can't eat gluten. - Vegan Adaptations: Use 1/4 cup of unsweetened applesauce instead of eggs. Replace the butter with coconut oil or a vegan butter alternative. These adjustments let you enjoy the rich flavors while meeting your dietary needs! To keep your bakery-style double chocolate espresso cookies fresh, store them in an airtight container. This helps prevent moisture loss and keeps them soft. You can layer them with parchment paper to avoid sticking. If you want to save some for later, freeze the unbaked cookie dough. Scoop the dough into balls and place them on a baking sheet. Freeze them until firm, then transfer the balls to a zip-top bag. This way, you can bake fresh cookies anytime! These cookies last about a week at room temperature. Make sure to keep them in a cool, dry place away from sunlight. To maintain freshness, check for any signs of hardening. If they start to feel dry, consider using a slice of bread in the container to help retain moisture. For frozen dough, it can last up to three months. Make sure to label the bag with the date. When you're ready to bake, just pull out the dough and bake from frozen. Enjoy warm cookies with a rich chocolate flavor! Can I use a different type of flour? Yes, you can use different flours. Common choices are whole wheat or gluten-free flour. Just remember, the texture might change a bit. Whole wheat flour will make cookies denser. Gluten-free options require special adjustments, so check for a suitable blend. How to fix dry or crumbly cookie dough? If your dough is dry, try adding a tablespoon of milk or water. Mix it in slowly. If it’s still crumbly, you might need more fat. Add a little melted butter and mix well. To avoid this issue, measure your flour correctly. Use a spoon to scoop and level it. What can I do with leftover ingredients? Leftover chocolate chips or cocoa powder can be used in other recipes. You can add chocolate chips to pancakes or muffins. Cocoa powder works well in smoothies or hot cocoa. Get creative! You can even use the butter in other baked goods. Can these cookies be made ahead of time? Absolutely! You can make the dough and chill it in the fridge for up to three days. If you want to store it longer, freeze the dough. Just scoop the dough onto baking sheets, freeze them, then store in a bag. When ready, bake them straight from the freezer. In this post, we covered the key steps to bake amazing cookies. We discussed essential ingredients like butter, sugars, and chocolate. You learned how to prepare, mix, and bake your dough for perfect results. I shared tips for texture and storage for fresh cookies. Finally, we explored fun variations and dietary options. Now, you have all you need to create delicious treats with ease. Happy baking!

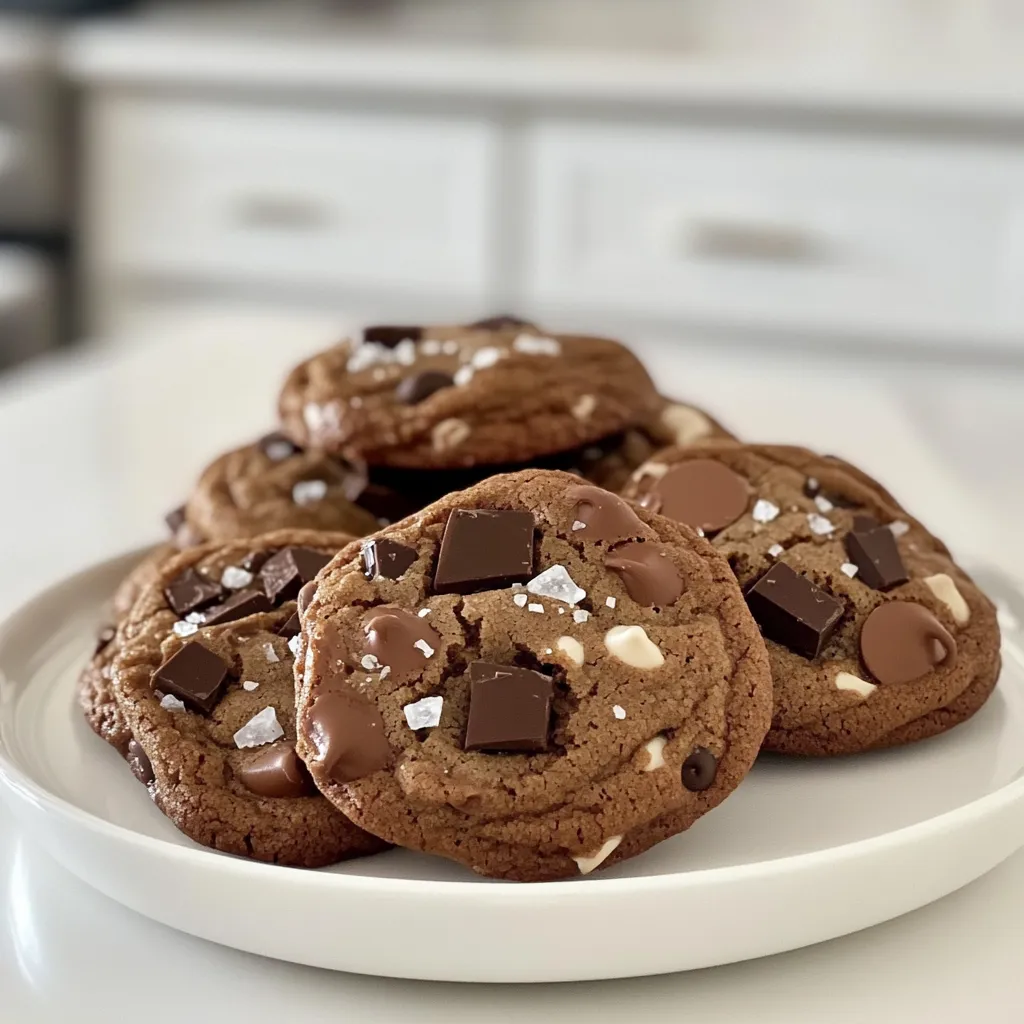
Bakery-Style Double Chocolate Espresso Cookies Delight

Craving a treat that satisfies your sweet tooth and coffee fix? Let’s dive into making Bakery-Style Double Chocolate Espresso Cookies!

- 1 pound Brussels sprouts, trimmed and halved - 2 tablespoons olive oil - Salt and pepper to taste These are the key ingredients for the dish. Fresh Brussels sprouts are the star. Choose sprouts that are firm and bright green. The olive oil adds richness. Salt and pepper bring out the sprouts' natural flavors. - 3 tablespoons honey - 1 teaspoon red pepper flakes (adjust to taste) - 1 tablespoon apple cider vinegar The honey glaze gives the dish its sweet kick. Honey adds a nice, sticky texture. Red pepper flakes bring heat, so adjust based on your taste. Apple cider vinegar adds a tangy touch, balancing the sweetness of honey. - 2 tablespoons chopped fresh parsley Fresh parsley adds color and brightness. It makes the dish look stunning. You can sprinkle it on right before serving. This small touch makes your Brussels sprouts pop! Start by trimming one pound of Brussels sprouts. Cut off the stem ends and slice each sprout in half. This helps them cook evenly. Place them in a large bowl. Add two tablespoons of olive oil, salt, and pepper. Toss everything together. Make sure each sprout gets coated well. This step adds flavor right from the start. Now, preheat your oven to 400°F (200°C). Line a baking sheet with parchment paper. This makes cleanup easy. Spread the halved Brussels sprouts on the sheet. Place them cut side down in a single layer. Roast them for 20 to 25 minutes. Flip them halfway through for even cooking. You want them tender with a nice caramelized look. While the sprouts roast, let’s make the hot honey glaze. In a small saucepan, combine three tablespoons of honey, one teaspoon of red pepper flakes, and one tablespoon of apple cider vinegar. Place this over low heat. Stir until it heats through and blends well. Remove it from heat when it’s ready. The glaze adds a sweet and spicy kick. When the Brussels sprouts are done, transfer them to a mixing bowl. Pour the hot honey glaze over them. Toss gently to coat every sprout. Then, put them back on the baking sheet. Roast for five more minutes to let the glaze set. Once finished, take them out and garnish with two tablespoons of chopped fresh parsley. Serve warm for a cozy and delightful dish. To get the best roasted Brussels sprouts, start with fresh ones. Look for firm sprouts with tight leaves. Trim off the ends and cut them in half. Use olive oil to coat them well. This helps them roast nicely. Spread them out on the baking sheet. Make sure they are not crowded. Crowded sprouts will steam instead of roast. Roast them at 400°F (200°C) for 20-25 minutes. Flip them halfway to ensure even cooking. They should be golden brown and tender when done. Caramelization gives them a sweet flavor that pairs well with the glaze. The hot honey glaze can be adjusted to your taste. Use red pepper flakes for heat. Start with one teaspoon. You can add more if you like it spicy. Mix the honey with apple cider vinegar in a pan. Warm it up on low heat until blended. This makes the glaze smooth and easy to pour. Taste the glaze before using. If it’s too spicy, you can add more honey. This will balance out the heat. You want a sweet and spicy flavor that enhances the sprouts. For the best flavor, serve the Brussels sprouts warm. Garnish them with chopped fresh parsley. This adds color and a fresh taste. You can serve these sprouts as a side dish or even as a snack. Pair them with roasted meats or grain bowls. They add a nice crunch and sweetness to any meal. You can also drizzle extra hot honey on top for more flavor. Don’t be afraid to get creative with your serving ideas! {{image_2}} You can mix in other veggies with the Brussels sprouts. Carrots, sweet potatoes, or cauliflower work well. Cut them into similar sizes to the sprouts. This way, they all cook evenly. Toss them with olive oil and seasoning just like the sprouts. Roast them together for a colorful and tasty dish. If you want to switch up the honey, consider maple syrup or agave nectar. Both add sweetness and flavor. You can also try brown sugar mixed with water for a different twist. Just remember to adjust the amount based on how sweet you want it. Each option brings a unique taste to the glaze. Playing with spices can change the whole dish. Try adding garlic powder, smoked paprika, or even cumin. Each spice adds a new layer of flavor. If you like heat, increase the red pepper flakes or add cayenne pepper. Experiment with what you have at home. Personalize it to your taste! To keep your cozy hot honey glazed Brussels sprouts fresh, store them in an airtight container. Let the sprouts cool before sealing them. This helps prevent moisture buildup, which can make them soggy. Keep the container in the fridge. When it's time to enjoy your leftovers, reheat them in the oven. Preheat your oven to 350°F (175°C). Spread the sprouts on a baking sheet. Heat for about 10-15 minutes or until warm. This helps them stay crispy. You can also use a microwave. Heat in short bursts of 30 seconds, stirring in between. These tasty Brussels sprouts last for about 3-4 days in the fridge. After that, they may lose their texture and flavor. If you want them to last longer, consider freezing them. Thaw in the fridge before reheating for the best taste. Yes, you can use frozen Brussels sprouts. However, fresh sprouts taste better. If you use frozen, thaw them first. Make sure to dry them well before cooking. This helps them roast nicely. Adjust the cooking time since frozen sprouts might need a bit longer. You can use maple syrup as a great substitute for honey. It has a similar sweetness. Agave nectar works too, but it tastes different. You might also try brown sugar mixed with water. This gives a nice flavor without honey. To make this dish ahead of time, roast the Brussels sprouts first. Let them cool and store in the fridge. You can prepare the hot honey glaze too. When you're ready to eat, reheat the sprouts. Drizzle the glaze on top and roast for a few minutes. This keeps them tasty and warm. In this article, we explored how to make tasty roasted Brussels sprouts with hot honey glaze. We discussed the main ingredients, roasting steps, and tips for perfect results. You learned about variations, storage methods, and answers to common questions. Now, you have all the tools to enjoy this dish. With practice, you’ll impress yourself and others at the table. Happy cooking!

Cozy Hot Honey Glazed Brussels Sprouts Delightful Recipe

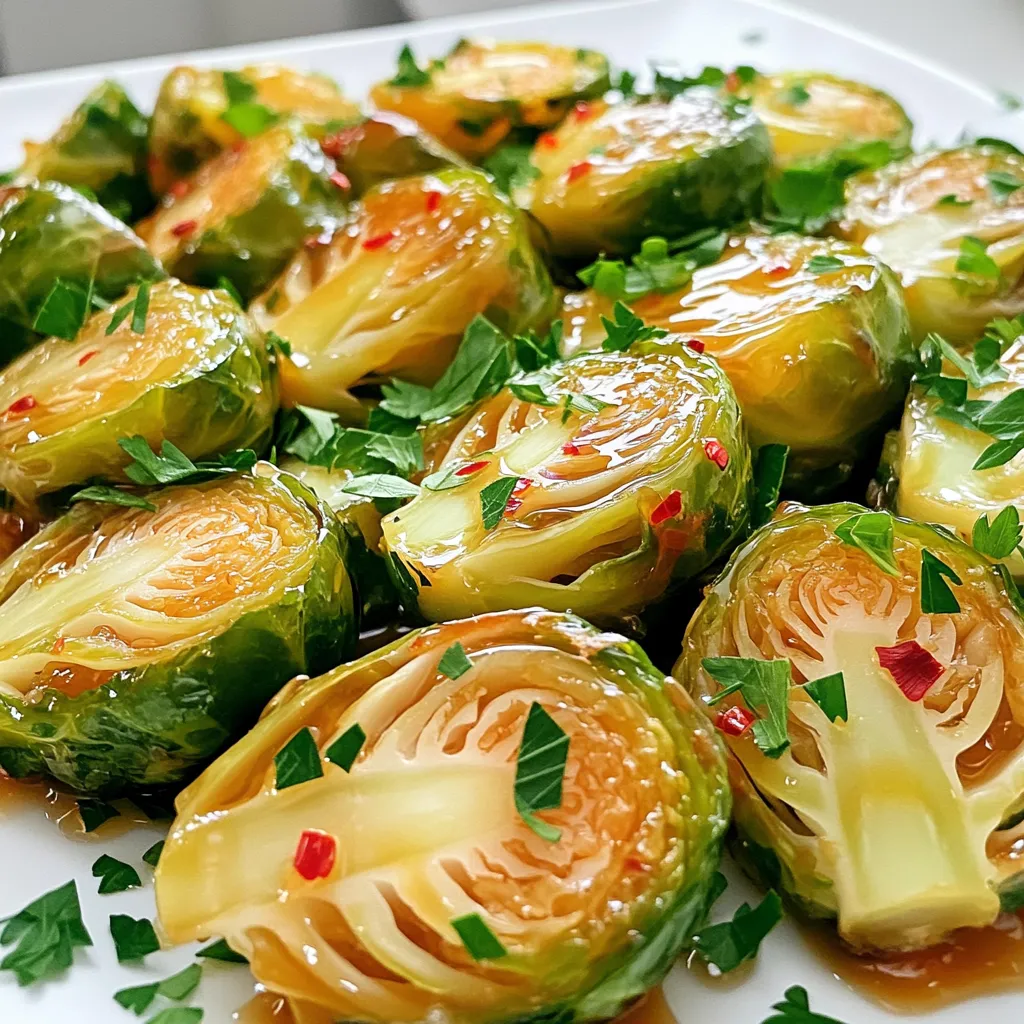
Looking for a new way to enjoy Brussels sprouts? Let me introduce you to my Cozy Hot Honey Glazed Brussels

To make No-Bake Pumpkin Spice Latte Bites, you will need: - 1 cup rolled oats - 1/2 cup almond butter (or any nut butter) - 1/4 cup pure maple syrup - 1/2 cup pumpkin puree - 2 teaspoons pumpkin spice seasoning - 1 teaspoon instant coffee granules - 1/4 cup shredded coconut (optional) - 1/4 cup mini chocolate chips (optional) You can easily swap ingredients based on what you have or prefer. Here are some ideas: - Nut Butter: Use peanut butter or sunflower seed butter as a substitute. - Maple Syrup: Honey or agave syrup can work well instead. - Pumpkin Puree: If you don’t have pumpkin, try sweet potato puree. - Instant Coffee: For a caffeine-free option, use decaf coffee granules or leave it out. Want to mix it up? Here are some optional add-ins to make your bites unique: - Shredded Coconut: This adds a tropical twist and chewy texture. - Mini Chocolate Chips: They provide a sweet surprise in each bite. - Chopped Nuts: Walnuts or pecans can add crunch and flavor. - Dried Fruits: Raisins or cranberries can bring a fruity note. With these ingredients and substitutions, you can tailor your No-Bake Pumpkin Spice Latte Bites to fit your taste. Enjoy experimenting! Start by gathering all your ingredients. You will need rolled oats, almond butter, maple syrup, pumpkin puree, pumpkin spice, and instant coffee granules. It’s best to use a large mixing bowl for this. Add each ingredient into the bowl. This makes it easy to mix everything together. Now, stir the mixture well. You want all the ingredients to blend into a thick, sticky dough. Use a strong spoon or spatula to combine. If you love coconut or chocolate, add them in now. Fold them gently into the mix. This step adds extra flavor and texture. After mixing, it's time to chill the dough. Place the bowl in the fridge for about 15 minutes. This makes the mixture easier to handle. Once chilled, scoop out about one tablespoon of dough. Roll it into a ball using your hands. Place each ball on a parchment-lined baking sheet. After shaping all the bites, return them to the fridge for 30 more minutes. This helps them firm up nicely. Enjoy these tasty bites once they’re ready! To get the perfect texture in your No-Bake Pumpkin Spice Latte Bites, start with fresh oats. Old oats may not bind well. Use creamy almond butter for a smooth mix. If your mix seems too dry, add a splash of maple syrup or pumpkin puree. This will help it stick together. After mixing, chill the dough for 15 minutes. Chilling makes it easier to shape. Once chilled, roll the bites tightly for a firm texture. Store any leftover bites in an airtight container. They will stay fresh in the fridge for up to a week. If you have more than you can eat, freeze the bites. Just place them in a freezer-safe bag. They can last for about 3 months in the freezer. When you want to enjoy them, let them thaw in the fridge overnight. You can also eat them straight from the freezer for a cold treat! For a festive touch at parties, arrange the bites on a pretty plate. Dust them with extra pumpkin spice for a special look. Pair them with warm coffee or a latte to make a cozy snack. These bites also work well as a sweet treat during fall gatherings. You could even wrap them in cute bags as party favors. Everyone will love this tasty, no-bake delight! {{image_2}} You can mix up flavors in your No-Bake Pumpkin Spice Latte Bites. How about adding some peanut butter for a nutty twist? You could also swap the pumpkin puree for sweet potato puree. This gives a nice change while keeping the bites creamy. If you enjoy chocolate, try adding cocoa powder for a chocolate pumpkin flavor. You can also use chai spice instead of pumpkin spice for a new taste. To make these bites vegan, just check your nut butter. Most are vegan, but some might have added honey. Use maple syrup as your sweetener, as it is already vegan. For gluten-free bites, use certified gluten-free oats. This ensures you avoid any gluten contamination. These small changes make the bites friendly for everyone! Toppings can elevate your bites and add fun textures. Try rolling them in crushed nuts or shredded coconut for a crunchy bite. You can also drizzle melted dark chocolate on top for sweetness. A sprinkle of extra pumpkin spice adds a festive touch. Serve them on a pretty plate with a side of warm coffee for a cozy treat! To keep your No-Bake Pumpkin Spice Latte Bites fresh, use an airtight container. This method prevents them from drying out or absorbing odors. Place a piece of parchment paper between layers if you stack them. It helps keep them from sticking together. Store your bites in the fridge for the best taste and texture. You can freeze these bites if you want to save some for later. To do this, first, let them chill in the fridge. Once firm, place them in a freezer-safe bag. Make sure to label the bag with the date. You can enjoy these bites for up to three months in the freezer. When you're ready to eat, let them thaw in the fridge overnight. In the fridge, these bites last about one week. The flavors may deepen over time, making them even tastier. Just remember to check for any signs of spoilage before you enjoy them. If they look or smell off, it’s best to toss them. Yes, you can use other nut butters. Peanut butter, cashew butter, or sunflower seed butter work well. Each nut butter gives a unique taste. Just pick one you enjoy. The texture will remain similar, so feel free to experiment. You can use applesauce or mashed banana as a substitute. Both options keep the bites moist. They also add a hint of sweetness. If you want a similar taste, use butternut squash puree. It gives a nice flavor and texture too. To make these bites caffeine-free, skip the instant coffee granules. You can replace them with a little extra pumpkin spice. This keeps the flavors bright and tasty. You can also use carob powder for a chocolatey flavor without caffeine. In this post, I discussed how to create delicious no-bake bites. We covered the full ingredient list, common substitutions, and different add-ins. I shared step-by-step instructions for mixing and chilling the bites for the best results. You also learned tips for great texture and how to store leftovers. Finally, don’t forget the fun variations you can try. With these ideas, you can enjoy tasty treats anytime. Now it's your turn to make these bites and share your favorites with family and friends!

No-Bake Pumpkin Spice Latte Bites Tasty and Easy Treat

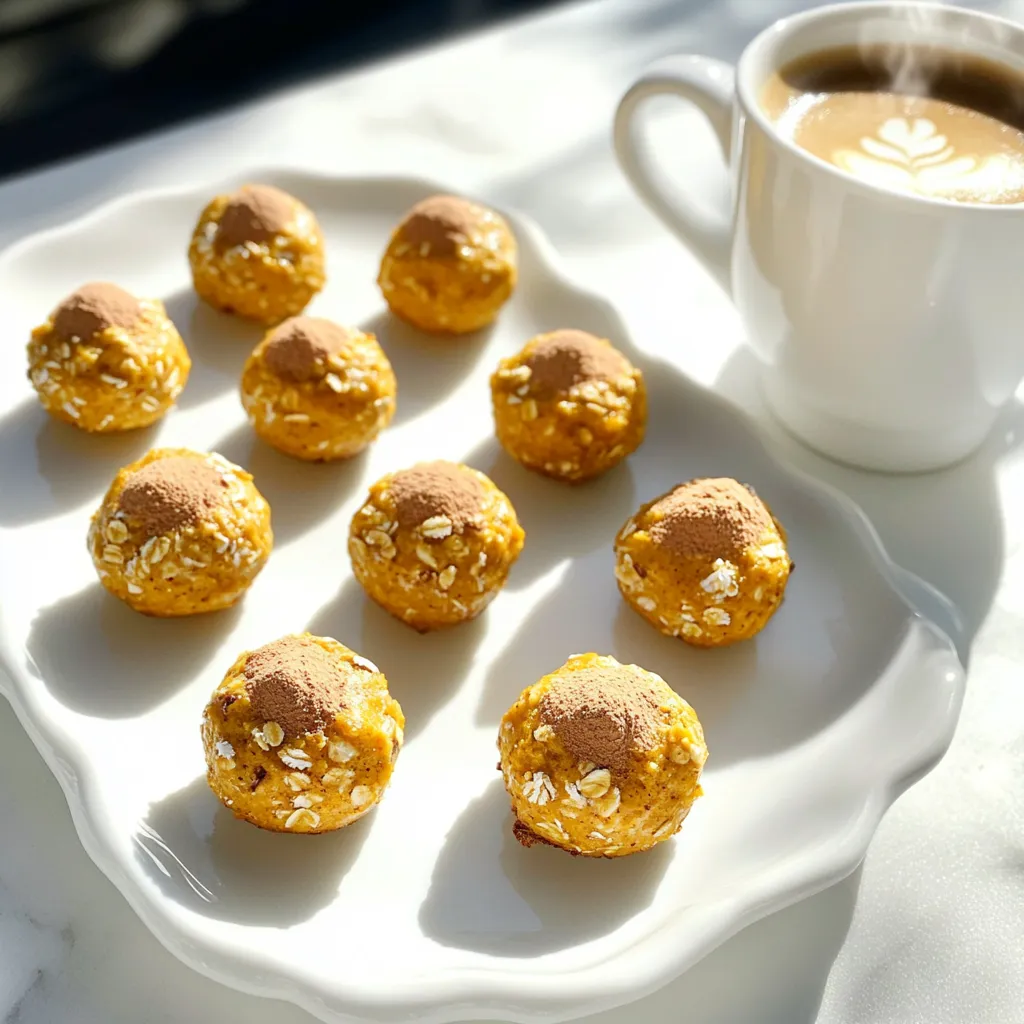
Get ready to satisfy your pumpkin spice cravings with my No-Bake Pumpkin Spice Latte Bites! These tasty treats are easy

- 2 tablespoons olive oil - 1 pound chicken breast, sliced into thin strips - 1 red bell pepper, sliced - 1 yellow bell pepper, sliced - 1 small red onion, sliced - 3 cloves garlic, minced - 1 tablespoon fajita seasoning (store-bought or homemade) - 8 ounces penne pasta - 3 cups chicken broth - 1 cup heavy cream - Salt and pepper to taste - Fresh cilantro, chopped (for garnish) - Lime wedges (for serving) This dish shines with colorful veggies. The olive oil gives a nice flavor. Chicken breast adds protein and makes it filling. The red and yellow bell peppers bring sweetness and crunch. Onion adds depth, and garlic gives a great aroma. Fajita seasoning ties it all together. You can use store-bought or make your own mix. Penne pasta cooks perfectly in this creamy dish. It soaks up all the flavors. For the liquid, chicken broth keeps it savory. Heavy cream makes it rich and smooth. Salt and pepper balance the flavors, while fresh cilantro adds a pop of color. Lime wedges brighten the plate and give a zesty kick. Each bite is a fiesta! Start by heating 2 tablespoons of olive oil in a large pot. Use medium heat for this step. Once the oil is hot, add 1 pound of sliced chicken breast. Season the chicken with salt, pepper, and 1 tablespoon of fajita seasoning. Sauté the chicken for about 5-7 minutes. Cook it until it turns golden brown and is no longer pink inside. Remove the chicken from the pot and set it aside on a plate. In the same pot, add the sliced red and yellow bell peppers, along with the sliced red onion. Make sure to also add 3 cloves of minced garlic. Cook these vegetables for about 3-4 minutes. You want them to soften but still have a little crunch. Stir them often to prevent burning. Next, add 8 ounces of penne pasta and 3 cups of chicken broth to the pot. Stir everything together to mix well. Bring the mixture to a boil. Once it starts boiling, reduce the heat to low. Cover the pot and let it cook for about 10 minutes. Stir occasionally to keep the pasta from sticking. Cook until the pasta is al dente and has absorbed most of the broth. Now it’s time to add 1 cup of heavy cream to the pot. This will make the dish creamy and rich. Return the cooked chicken to the pot as well. Stir gently to combine everything together. Cook for an extra 2-3 minutes. This final step allows the pasta to soak up the creamy sauce. Taste your dish and adjust the seasoning with more salt or pepper if needed. Serve it hot, garnished with fresh cilantro and lime wedges on the side. To make your One Pot Creamy Chicken Fajita Pasta truly shine, focus on the seasoning. Start with the right amount of salt and pepper. Taste as you go. You can always add more, but you can't take it away. If it feels flat, a little more salt can help. Choosing a fajita seasoning is also key. You can use store-bought or make your own. If you want to make your own, mix chili powder, cumin, paprika, and garlic powder. This way, you control the spice level and flavor. Stirring often is essential when cooking pasta. It prevents the pasta from sticking to the pot. When you add the penne, stir it right away. This keeps it from clumping together. Make sure to check the pasta's texture. You want it al dente, or slightly firm. When you add the heavy cream, it will soften a bit more. If the pasta seems too dry, add a splash of chicken broth to moisten it. For a great presentation, serve directly from the pot. It creates a homey feel. If you want a more polished look, plate individual servings. Sprinkle fresh cilantro on top and add a squeeze of lime. Pair this dish with a simple side salad or garlic bread. A refreshing beverage like iced tea or a light beer works well too. These sides balance the meal and enhance the flavors. {{image_2}} You can easily change the protein in this dish. If you love seafood, try using shrimp. Shrimp cooks fast and adds a nice flavor. Just sauté it until pink and tender. If you prefer beef, use thin strips of flank steak. Cook it the same way as chicken. For a vegetarian option, try using black beans or chickpeas. They add protein and a great texture. Feel free to swap out the pasta. You can use any pasta shape you like. Bowtie or fusilli pasta work well too. If you want a healthier option, try whole wheat pasta. You can also change the veggies. Add zucchini or corn for extra taste. Spinach can be mixed in near the end for some greens. The more colors, the better! If you need a gluten-free meal, choose gluten-free pasta. Many brands offer pasta that tastes great. For a dairy-free version, use coconut milk instead of heavy cream. It adds a subtle sweetness and creamy texture. You can also find dairy-free cream options at the store. Just check the labels for best results. To keep your One Pot Creamy Chicken Fajita Pasta fresh, store it in an airtight container. This method keeps air out and moisture in. Place the container in the fridge. It will last about three to four days. For longer storage, you can freeze it. Divide the pasta into portions. Use freezer-safe bags or containers. Make sure to remove as much air as possible. This way, it can last for up to three months. When you're ready to enjoy your leftovers, reheating is easy. For the microwave, place a portion in a bowl. Cover it with a microwave-safe lid or wrap. Heat in short bursts, about one to two minutes. Stir after each burst to heat evenly. If you prefer the stovetop, heat a non-stick skillet over medium heat. Add a splash of chicken broth or water to prevent sticking. Add the pasta and stir often. Heat until it's warm throughout, about five to seven minutes. Enjoy your creamy pasta just as much as the first time! To prep this dish ahead of time, start by cooking the chicken and veggies as directed. Once cooked, let them cool. Store them in an airtight container. You can cook the pasta separately and mix it later. Combine the pasta with the chicken and veggies when you’re ready to eat. Reheat gently on the stove or in the microwave, adding a splash of chicken broth if needed. This helps keep the pasta creamy and fresh. Yes! You can swap penne for other types of pasta. Good substitutes include fusilli, rotini, or even spaghetti. Just remember that cooking times may vary. Check the package directions to get it just right. You want the pasta to be al dente, so it holds up well in the creamy sauce. Absolutely! To add some heat, consider these tips: - Use spicy fajita seasoning instead of mild. - Add sliced jalapeños or diced green chilies when cooking the chicken. - Stir in a dash of cayenne pepper for an extra kick. Adjust to your taste and enjoy your spicy twist on this creamy dish! You now have all the steps to make One Pot Creamy Chicken Fajita Pasta. We covered the main ingredients, cooking methods, and helpful tips. Remember to adjust flavors to find your best taste. You can swap proteins or vegetables if you want variety. Store your leftovers well to enjoy later. Cooking this dish can be a fun and tasty experience. Dive in and make it your own! Enjoy your meal!

One Pot Creamy Chicken Fajita Pasta Delightful Meal

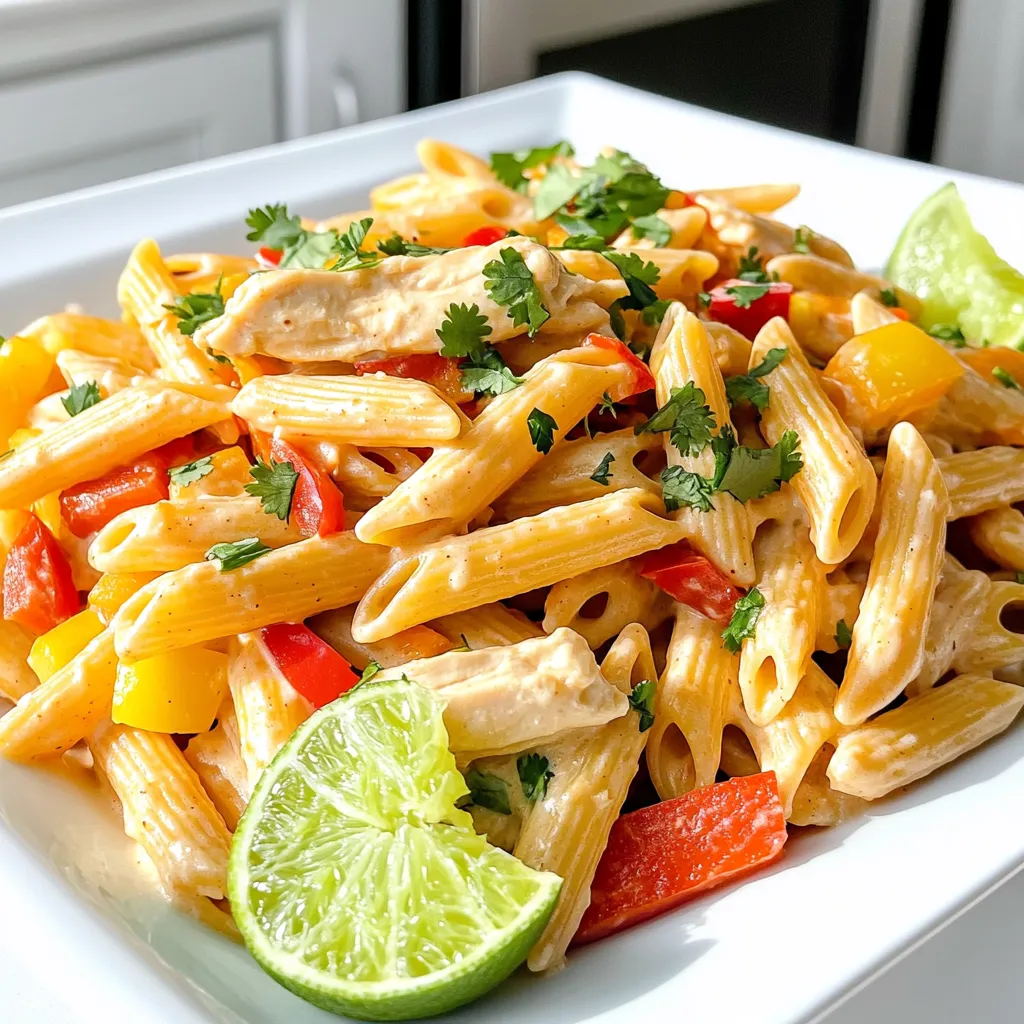
Looking for a quick and tasty meal? You’ve found it! My One Pot Creamy Chicken Fajita Pasta is perfect for

- 1 lb Brussels sprouts, halved - 2 tablespoons olive oil - 3 tablespoons pure maple syrup - 1 teaspoon garlic powder - 1/2 teaspoon salt - 1/4 teaspoon black pepper - 1/4 teaspoon crushed red pepper flakes (optional) - 1 tablespoon balsamic vinegar - 1/4 cup chopped walnuts (for garnish) The recipe calls for 1 pound of Brussels sprouts. This amount serves about four people. You can adjust the amount based on how many servings you need. Each ingredient plays a key role in making the dish tasty. - Olive oil helps the sprouts crisp up. - Maple syrup adds sweetness and a lovely glaze. - Garlic powder gives a delicious kick. - Salt and pepper bring out the flavors. - Red pepper flakes add a bit of heat, but they are optional. - Balsamic vinegar adds a tangy finish. - Walnuts provide crunch and flavor. If you want to mix things up, you can try different add-ins. Here are a few ideas: - Use honey instead of maple syrup for a different sweet flavor. - Try smoked paprika instead of garlic powder for a smoky taste. - Add chopped pecans if you prefer them over walnuts. - For a vegan option, ensure the maple syrup is pure and check your balsamic vinegar for additives. These simple swaps can make your dish unique while keeping the base flavors intact. Start with fresh Brussels sprouts. Rinse them under cool water. Trim the ends and cut each sprout in half. This helps them cook evenly. Next, grab a large bowl. Add the halved sprouts to the bowl. Now, pour in the olive oil and maple syrup. Sprinkle in the garlic powder, salt, black pepper, and crushed red pepper flakes if you like some heat. Mix everything well. You want each sprout to be coated nicely. Preheat your air fryer to 375°F (190°C). Let it heat for about 5 minutes. This step is key for crispiness. Now, place the seasoned Brussels sprouts in the air fryer basket. Make sure they lie flat in a single layer. If you have a lot, you might need to cook them in batches. Air fry for 12 to 15 minutes. Halfway through, shake the basket. This helps them cook evenly. When they are done, the sprouts should be crispy outside and tender inside. After air frying, take the sprouts out. Drizzle balsamic vinegar over them. Gently toss to mix. This adds a nice tangy flavor. To finish, serve them hot. Sprinkle chopped walnuts on top for crunch. If you want, add a little extra maple syrup for sweetness. Enjoy your tasty side dish! For crispy Brussels sprouts, start with fresh ones. Choose firm sprouts, free of blemishes. Halve them for even cooking. The olive oil helps create a great crunch. Air fry at 375°F for 12-15 minutes. Shake the basket halfway through. This step ensures they cook evenly. To boost flavor, use pure maple syrup. It gives a sweet touch that pairs well with sprouts. Garlic powder adds depth without overpowering. For a kick, add crushed red pepper flakes. A splash of balsamic vinegar at the end brightens the dish. Finish with walnuts for crunch and taste. Air fryers can vary in size and power. If your sprouts cook too fast, lower the temperature to 350°F. For larger batches, cook in waves. Keep the first batch warm in the oven. Always check for doneness by piercing with a fork. They should be tender inside and crispy outside. {{image_2}} You can make this dish even better by adding some sweet and savory flavors. Try mixing in some cooked bacon or pancetta. Their salty crunch pairs well with the sweetness of the maple glaze. You can also add dried cranberries or raisins for a pop of sweetness. These fruits will add color and a chewy texture that makes each bite exciting. If you're looking for something different, switch up the glaze. You can use honey instead of maple syrup for a floral sweetness. A soy sauce-based glaze adds a savory depth. Just mix soy sauce with a bit of honey or brown sugar. You can also try a spicy sriracha glaze. Just mix sriracha with olive oil and a bit of maple syrup. Brussels sprouts are great, but you can use other veggies too. Cauliflower florets work well and have a mild flavor. Broccoli is another good choice and adds a nice green color. Even green beans can be air-fried with the same glaze. Just remember to adjust the cooking time based on the vegetable you choose. Store any leftovers in an airtight container. Keep them in the fridge for up to 3 days. Make sure they cool down first. This helps keep them crispy. If you use a glass container, it helps avoid stains from the maple syrup. To reheat, use your air fryer at 350°F (175°C). Air fry for about 5 minutes. This method keeps them crisp. You can also use a microwave, but they may get a bit soggy. If using a microwave, place a damp paper towel over them. This helps retain some moisture. You can freeze Brussels sprouts if needed. Place them in a freezer-safe bag. Be sure to remove as much air as possible. They can last for up to 2 months in the freezer. When ready to eat, thaw them in the fridge overnight. Then, reheat them in your air fryer for the best texture. Yes, you can use frozen Brussels sprouts. They work well in the air fryer. However, you may need to adjust the cooking time. Frozen sprouts may take a few extra minutes to cook through. Check for tenderness and crispiness before serving. Air Fryer Maple Glazed Brussels Sprouts pair well with many dishes. Here are a few ideas: - Grilled chicken or steak - Roasted pork tenderloin - Quinoa or rice bowls - A fresh green salad The sweetness of the glaze complements savory dishes nicely. To make the glaze thicker, try these tips: - Cook the maple syrup longer on low heat. This will reduce it and thicken the syrup. - Add a small amount of cornstarch mixed with water. This will help thicken the glaze when added. - Use less olive oil in your mix. This will create a more concentrated glaze. These methods help you achieve the desired consistency for your Brussels sprouts. In this blog post, we covered how to make Air Fryer Maple Glazed Brussels Sprouts. We started with essential ingredients and measurements, then moved to easy step-by-step instructions. I shared tips for perfect texture and flavor upgrades, along with tasty variations. Lastly, I discussed how to store and reheat your dish. Remember, the right ingredients and methods can transform your cooking. Enjoy experimenting and making this dish your own!

Air Fryer Maple Glazed Brussels Sprouts Tasty Side Dish

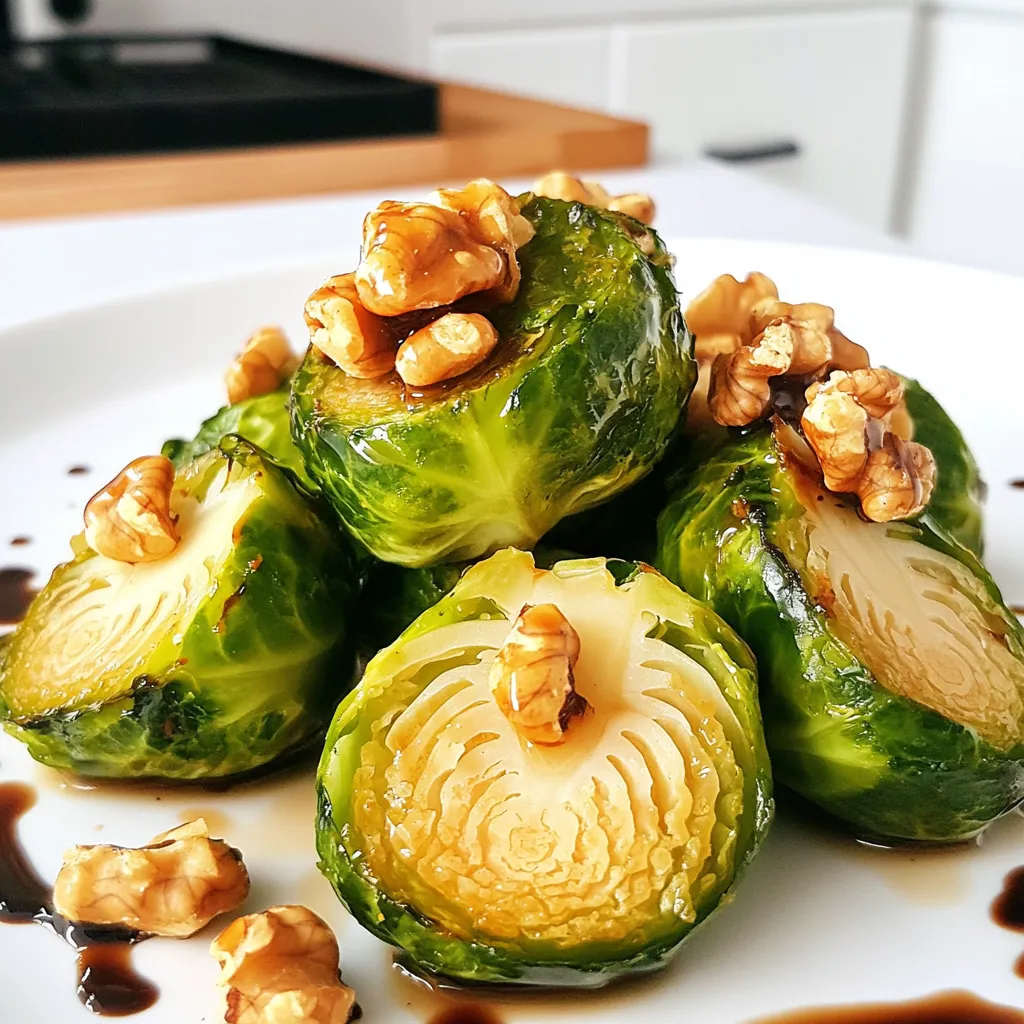
Looking for a tasty side dish that will wow your guests? Try my Air Fryer Maple Glazed Brussels Sprouts! This

To make this delightful raspberry lemon bread, gather these fresh ingredients: - 1 cup fresh raspberries - 1 tablespoon lemon zest - 2 tablespoons fresh lemon juice These ingredients add bright flavors and a burst of color to your bread. The raspberries bring sweetness, while the lemon zest and juice add a tangy kick. You will also need some key baking essentials to create the perfect loaf: - 1 cup all-purpose flour - 1/2 cup sugar - 1/2 teaspoon baking powder - 1/4 teaspoon baking soda - 1/4 teaspoon salt - 1/2 cup unsalted butter, softened - 2 large eggs - 1/2 cup Greek yogurt - 1 teaspoon vanilla extract These ingredients work together to give the bread its structure and flavor. Make sure to use fresh baking powder and baking soda for the best rise. For an extra touch, consider these optional toppings and garnishes: - Powdered sugar for dusting Dusting with powdered sugar adds sweetness and makes the bread look pretty. You can also garnish with extra raspberries or lemon slices for a lovely presentation. 1. Start by preheating your oven to 350°F (175°C). Grease a 9x5-inch loaf pan with butter or non-stick spray. 2. In a small bowl, toss the fresh raspberries with a teaspoon of flour. This helps keep them from sinking in the batter. Set them aside. 3. In a large bowl, whisk together the all-purpose flour, sugar, baking powder, baking soda, and salt. Mix well to combine. 4. In another bowl, cream the softened butter until it is light and fluffy. Add the eggs one at a time, mixing well after each addition. 5. Next, add the Greek yogurt, lemon zest, vanilla extract, and fresh lemon juice to the butter mixture. Stir until everything is well combined. 6. Gradually add the dry ingredients to the wet mixture. Stir gently until just combined. Be sure not to overmix. 7. Carefully fold in the floured raspberries. Distribute them evenly throughout the batter. 8. Pour the batter into your prepared loaf pan. Smooth the top with a spatula for an even bake. 9. Bake in the preheated oven for 50-60 minutes. Check for doneness by inserting a toothpick into the center. It should come out clean. 10. When done, take the bread out of the oven. Let it cool in the pan for about 10 minutes. Then, transfer it to a wire rack to cool completely. 11. For serving, dust the top of the loaf with powdered sugar if you like. This adds a sweet touch. Slice and serve on a decorative platter. Garnish with fresh raspberries and lemon slices for a lovely look. To get that soft and moist texture, use room temperature ingredients. This helps the butter mix well. Cream the butter until it is light and fluffy. This adds air, making the bread rise better. Avoid overmixing the batter. Stir just until the dry and wet ingredients blend. If you mix too much, the bread can turn out dense. Raspberries are a joy in this bread, but they can sink. To keep them floating, toss them in a bit of flour before adding them to the batter. This light coating helps them stay suspended. Gently fold the floured raspberries into the batter. Be careful not to break them apart. This way, each slice will have sweet bursts of raspberry. To keep your Raspberry Lemon Bread fresh, wrap it tightly in plastic wrap. This prevents air from drying it out. Store it at room temperature for up to three days. If you want to keep it longer, freeze it. Slice the bread before freezing for easy thawing. When ready to eat, let it thaw in the fridge overnight. You can also warm it in the oven for a few minutes. This brings back its fresh-baked feel. {{image_2}} To make gluten-free raspberry lemon bread, swap the all-purpose flour for a gluten-free blend. Look for a mix that contains xanthan gum. This helps mimic the texture of regular flour. Follow the same steps in the recipe. The end result will be just as tasty and fluffy. For a crunchy twist, add nuts or seeds to your batter. Chopped walnuts or sliced almonds work well. You can also try sunflower seeds or chia seeds. Mix in about half a cup to the batter. This not only adds flavor but also boosts nutrition. If you want to switch things up, try using other fruits. Blueberries or diced strawberries can replace raspberries. Each fruit brings a unique taste. You can also mix fruits for a fun flavor combo. Adjust the lemon zest based on the fruit you choose. This keeps the lemon flavor bright and fresh. To keep your Raspberry Lemon Bread fresh, place it in an airtight container. You can also wrap it tightly in plastic wrap. This will help lock in moisture and flavor. Store it at room temperature for up to three days. If you live in a warm area, store it in the fridge. This will help prevent mold. If you want to save your bread for longer, freezing is a great option. First, let the bread cool completely. Then, wrap it tightly in plastic wrap. After that, place it in a freezer bag. Be sure to squeeze out any air before sealing. This will help prevent freezer burn. You can freeze it for up to three months. To reheat your Raspberry Lemon Bread, remove it from the fridge or freezer. If it's frozen, let it thaw in the fridge overnight. For best results, preheat your oven to 350°F (175°C). Place the bread on a baking sheet and cover it loosely with foil. Heat for about 10-15 minutes. If you want, you can also slice and microwave it for 20-30 seconds. Enjoy your warm and delightful bread! Yes, you can use frozen raspberries. They work well in this recipe. Just remember to thaw them first. Drain any extra liquid before adding them to the batter. This helps keep your bread from getting soggy. If you don't have Greek yogurt, try using sour cream or plain yogurt. You can also use applesauce for a lighter option. These substitutes keep the bread moist and tasty. Check your bread after 50 minutes. Insert a toothpick into the center. If it comes out clean, your bread is ready. If not, bake for another 5-10 minutes. The top should be golden brown. Yes, you can make this bread vegan. Replace the eggs with flaxseed meal mixed with water. Use a plant-based yogurt instead of Greek yogurt. Substitute the butter with coconut oil or a vegan butter. Serve this bread warm or at room temperature. Dust the top with powdered sugar for a sweet touch. You can slice it and serve with whipped cream or a scoop of vanilla ice cream. Pair it with tea or lemonade for a perfect afternoon snack. This blog post covered all you need for delicious raspberry lemon bread. We explored fresh ingredients, essential baking supplies, and tips for amazing results. I shared steps from prep to serving and suggested variations to try. Remember, you can store and freeze your bread for later. If you have questions, our FAQ section has answers. Enjoy making your bread and experimenting with flavors. Your kitchen will smell fantastic, and your taste buds will thank you!

Raspberry Lemon Bread Bakery Style Delight Recipe

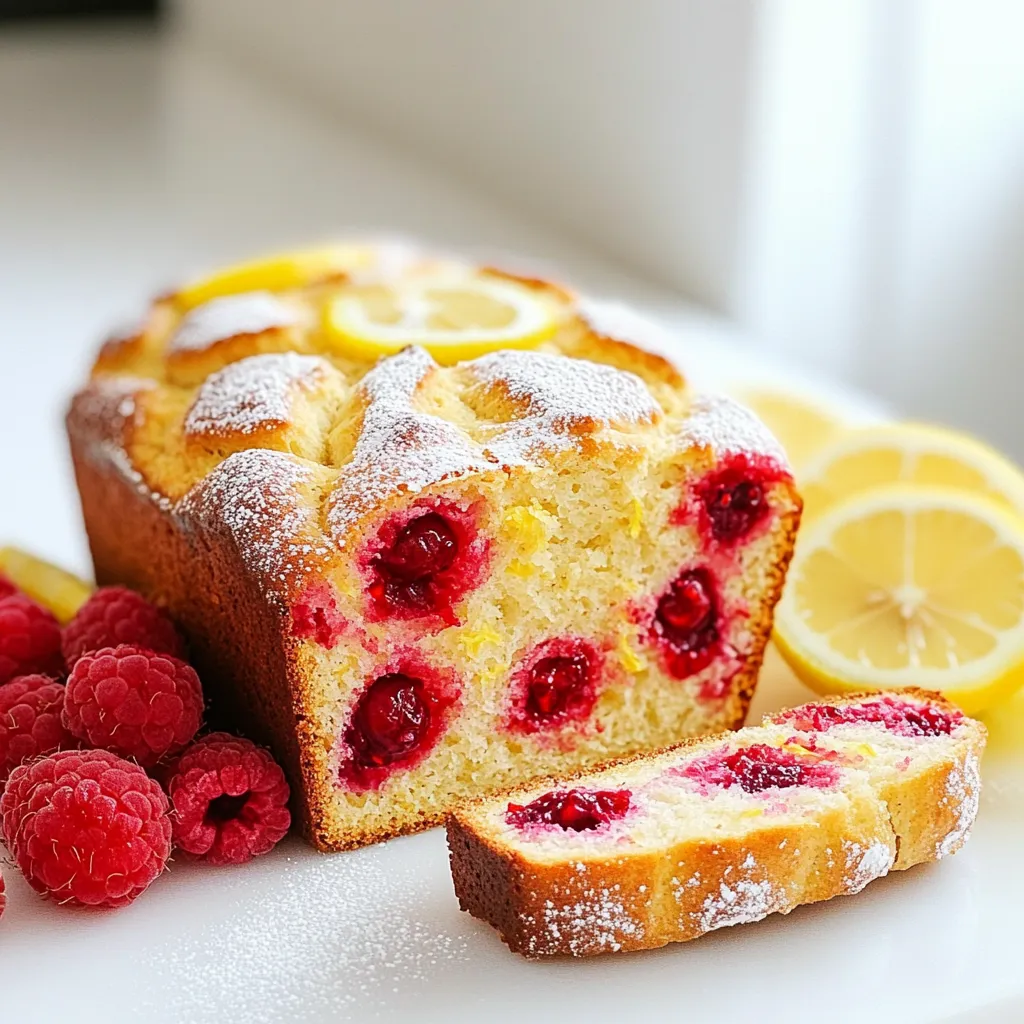
Looking to impress your friends with an easy yet delicious treat? This Raspberry Lemon Bread Bakery Style Delight Recipe is

To make Caramel Coconut Magic Bars, you need the following ingredients: - 1 ½ cups graham cracker crumbs - ½ cup unsalted butter, melted - 1 cup sweetened shredded coconut - 1 cup semi-sweet chocolate chips - 1 cup caramel sauce (store-bought or homemade) - 1 can (14oz) sweetened condensed milk - 1 cup chopped nuts (walnuts or pecans, optional) - ½ teaspoon sea salt Each ingredient plays a key role in creating these delicious bars. The graham cracker crumbs form a sturdy base. The melted butter helps bind them together. Sweetened shredded coconut adds a chewy texture and sweet flavor. Semi-sweet chocolate chips bring rich chocolate taste. Caramel sauce adds sweetness and gooeyness. Sweetened condensed milk helps hold everything together. If you like, you can add nuts for crunch. A sprinkle of sea salt balances the sweetness and enhances the flavors. Gathering these ingredients makes the cooking process fun and easy. You might even find some of these in your pantry already! Enjoy the blend of flavors and textures in these bars. 1. Preheating the oven Set your oven to 350°F (175°C). This step is key for even baking. 2. Preparing the baking pan Grab an 8x8-inch baking pan. Line it with parchment paper. Let some paper hang over the edges. This makes it easy to lift your bars out later. 3. Making the graham cracker crust In a bowl, mix 1 ½ cups of graham cracker crumbs with ½ cup of melted unsalted butter. Stir it until it looks like wet sand. Press this mixture firmly into the bottom of your pan. Make sure it is even across the bottom. 4. Layering the ingredients First, sprinkle 1 cup of sweetened shredded coconut over the crust. Next, add 1 cup of semi-sweet chocolate chips on top of the coconut. Now, drizzle 1 cup of caramel sauce over the chocolate chips for that sweet touch. 5. Baking process and cooling Pour 1 can (14oz) of sweetened condensed milk over the layers. Spread it out gently. If you want some crunch, add 1 cup of chopped nuts on top. Finish with a sprinkle of ½ teaspoon sea salt. Bake this for 25 to 30 minutes. Look for golden edges and a bubbly top. Let the bars cool completely in the pan. Use the parchment paper to lift them out and cut into squares. Enjoy your tasty treat! - Ensuring even layering: Start with a solid graham cracker crust. Press it down firmly. This helps hold the layers together. Spread each topping evenly. Use a spatula to cover the crust fully. - Choosing the right type of nuts: Walnuts and pecans work well. They add a nice crunch. Chopped nuts can enhance flavor. Toast them lightly for a richer taste. If you prefer no nuts, skip this step. - Storing leftover bars effectively: Let the bars cool completely. Cut them into squares. Place them in an airtight container. They can stay at room temperature for a few days. For longer storage, refrigerate them. - Adjusting sweetness levels: You can modify the sweetness. Use dark chocolate chips for less sugar. If you want it sweeter, add more caramel sauce. Taste as you go to find your perfect balance. {{image_2}} You can make caramel coconut magic bars even more fun with some unique twists. Here are a few ideas: - Different types of chocolate: Instead of semi-sweet chocolate chips, try using dark chocolate or white chocolate. Each type gives a new flavor and look. Dark chocolate adds a rich touch, while white chocolate adds a sweet creaminess. - Flavored caramel sauce: Use flavored caramel sauces like sea salt or vanilla. This small change can really make the bars pop with extra flavor. You can also try homemade caramel for a special touch. - Tropical variations: Add some tropical flair by including dried pineapple or mango. These fruits add a bright, fruity taste that pairs well with the coconut. You might love the burst of flavor they bring to each bite. These variations can help you create a fresh take on a classic treat. Experiment and find your favorite mix! To keep your Caramel Coconut Magic Bars fresh, follow these tips: - Storing at room temperature: You can store the bars at room temperature for up to 3 days. Place them in an airtight container. This keeps them soft and chewy. - Refrigeration guidelines: If you want them to last longer, store them in the fridge. They can stay fresh for up to a week. Just make sure to keep them in a sealed container to avoid drying out. - Freezing instructions and thawing tips: For longer storage, freeze the bars. Cut them into squares and wrap each piece tightly in plastic wrap. Then, place them in a freezer-safe bag. They can last for up to 3 months. To enjoy, thaw them in the fridge overnight. You can also let them sit at room temperature for a couple of hours. This way, they regain their soft texture. Can I use low-fat ingredients? Yes, you can use low-fat ingredients. Swap unsalted butter for a low-fat spread. This change may alter the texture slightly. The bars will still taste great. How do I know when the bars are done baking? You will know the bars are done when the edges turn golden. The top should look bubbly. This usually takes about 25 to 30 minutes in the oven. Can I make these bars ahead of time? Absolutely! These bars keep well. You can make them a day ahead. Just store them in an airtight container at room temperature. What can I substitute for sweetened condensed milk? If you need a substitute, try using coconut milk and sugar. Mix one cup of coconut milk with a third cup of sugar. This will create a similar sweetness and texture. Caramel Coconut Magic Bars are easy to make and so tasty. We covered how to gather ingredients, prepare, bake, and store them. I shared tips for perfecting your bars and variations to keep it fun. No matter how you make them, these bars can bring joy to any gathering. Enjoy your baking adventure and share these delights with others.

Caramel Coconut Magic Bars Tasty and Simple Recipe

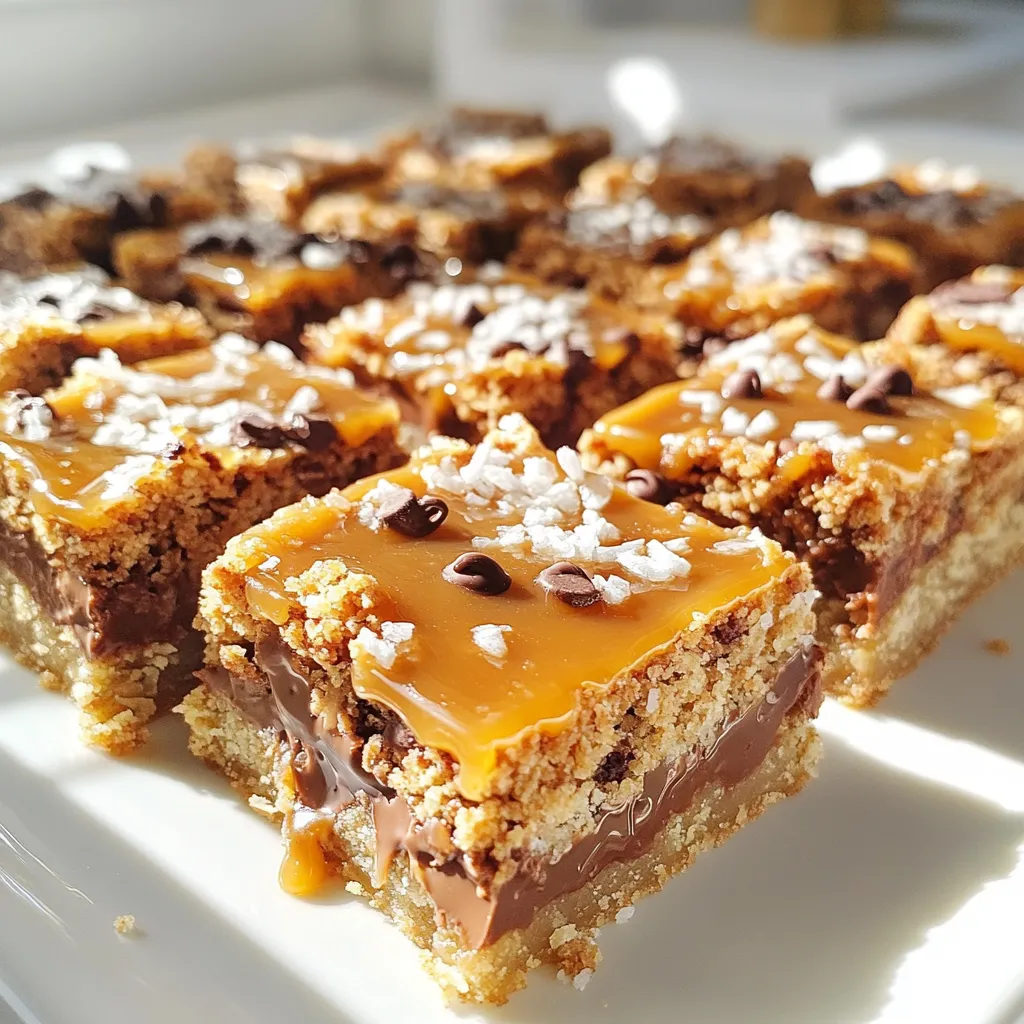
Are you ready to make your taste buds dance? My Caramel Coconut Magic Bars are a quick and tasty treat

- 1 lb large shrimp, peeled and deveined - 1/2 cup Thai sweet chili sauce - 2 tablespoons soy sauce (low sodium) - 1 tablespoon lime juice - 2 cloves garlic, minced - 1 tablespoon fresh ginger, grated - 1 red bell pepper, sliced - 1 cup snap peas or snow peas - 2 green onions, chopped - 1 tablespoon sesame seeds (for garnish) - Cooked jasmine rice (for serving) Using these ingredients, you can create a dish that tastes better than takeout. Fresh shrimp gives a sweet, tender bite. The Thai sweet chili sauce adds a lovely kick. Low-sodium soy sauce brings a pleasant saltiness. The lime juice adds brightness. Minced garlic and grated ginger give depth to the flavor. Sliced red bell pepper gives crunch. Snap peas or snow peas add a fresh pop. Chopped green onions provide a nice color and bite. For garnishing, sprinkle sesame seeds over the dish. Serve it on a bed of warm jasmine rice. This meal looks stunning and tastes even better. - In a medium bowl, mix the Thai sweet chili sauce, soy sauce, lime juice, sesame oil, minced garlic, and grated ginger. Stir well until combined. - Once mixed, set the sauce aside. This will be the flavor base for our shrimp. - Heat a large skillet or wok on medium-high heat. Add a drizzle of oil to coat the pan. - Add the sliced red bell pepper and snap peas to the skillet. Stir-fry for 2 to 3 minutes until they are tender but still crisp. When done, remove the veggies from the skillet and set them aside. - In the same skillet, add the large shrimp. Cook for about 2 to 3 minutes on each side. The shrimp should turn pink and opaque when they are done. - After the shrimp are cooked, pour the prepared sauce over them. Add the sautéed vegetables back to the skillet. Stir everything to coat it well with the sauce. - Allow the mixture to cook for an additional 2 minutes. This helps heat everything through and melds the flavors. - Remove from heat. Before serving, sprinkle chopped green onions and sesame seeds on top for a nice finish. This adds color and a bit of crunch. Serve your dish over cooked jasmine rice for a complete meal. Using fresh ingredients is key. Fresh shrimp, crisp veggies, and bright herbs make a big difference. They add life and taste to your dish. To perfect the sauce, mix it gently. Blend the sweet chili sauce, soy sauce, lime juice, sesame oil, minced garlic, and grated ginger well. This ensures every bite bursts with flavor. I recommend using a large skillet or wok. A good skillet helps keep the heat even. This way, your shrimp cook nicely without burning. Control the heat carefully. Start with medium-high heat to sear the shrimp quickly. Then, lower it for the veggies. This helps keep them tender-crisp. For serving, arrange the shrimp and veggies over a bed of jasmine rice. This adds a nice touch and makes the dish pop. Garnishing is simple but effective. Sprinkle chopped green onions and sesame seeds on top. They add color and a little crunch, making your dish look great. {{image_2}} You can swap shrimp for other proteins like chicken or tofu. Both options work well and bring unique flavors. Chicken needs longer cooking time, while tofu cooks quickly. For veggies, feel free to mix and match. You might try broccoli, carrots, or bell peppers. Each adds color and crunch. Customize your dish to fit your taste. You can tweak the sauce for your taste. If you want it sweeter, add more Thai sweet chili sauce. For more heat, toss in some red pepper flakes or sriracha. To add extra flavor, think about herbs or spices. Fresh basil or cilantro can brighten the dish. A sprinkle of chili powder adds depth. Adjust the sauce to make it your own! To keep your Thai sweet chili shrimp fresh, use an airtight container. Glass or BPA-free plastic works well. Let the shrimp cool down first. This helps prevent steam buildup, keeping your leftovers tasty. The best way to reheat shrimp is in a skillet. Heat on medium-low to avoid overcooking. You can also use a microwave, but do it in short bursts. Stir often to keep the texture nice. Avoid high heat to keep the shrimp tender. You can freeze both shrimp and sauce. Place them in a freezer-safe bag. Remove as much air as possible to avoid freezer burn. For thawing, place the shrimp in the fridge overnight. This keeps them juicy and flavorful. Yes, you can use frozen shrimp. Just make sure to thaw them before cooking. To thaw, place the shrimp in the fridge overnight. If you're short on time, put the shrimp in a bowl of cold water for about 30 minutes. Change the water every 10 minutes until they are soft. This keeps the shrimp fresh and tasty. This dish pairs well with many sides. Here are some great options: - Cooked jasmine rice - Steamed broccoli - Fried rice - Cucumber salad - Thai spring rolls These sides add color and flavor. They also balance the sweetness of the shrimp. To boost the heat, try these tips: - Add sliced red chili peppers to the skillet. - Mix in chili flakes with the sauce. - Use spicy Thai chili sauce instead of regular sweet sauce. For extra spice, jalapeños or sriracha are great choices. Adjust the amount based on your heat level preference. This dish combines shrimp with key flavors like Thai sweet chili sauce and fresh veggies. You learned simple steps to stir-fry shrimp and vegetables, making a delicious meal. Remember, fresh ingredients boost taste, and you can customize it based on your preference. Store leftovers properly and reheat carefully for a great meal later. Enjoy exploring different flavors and make this dish your own—it’s versatile and tasty!

Better Than Takeout Thai Sweet Chili Shrimp Delight

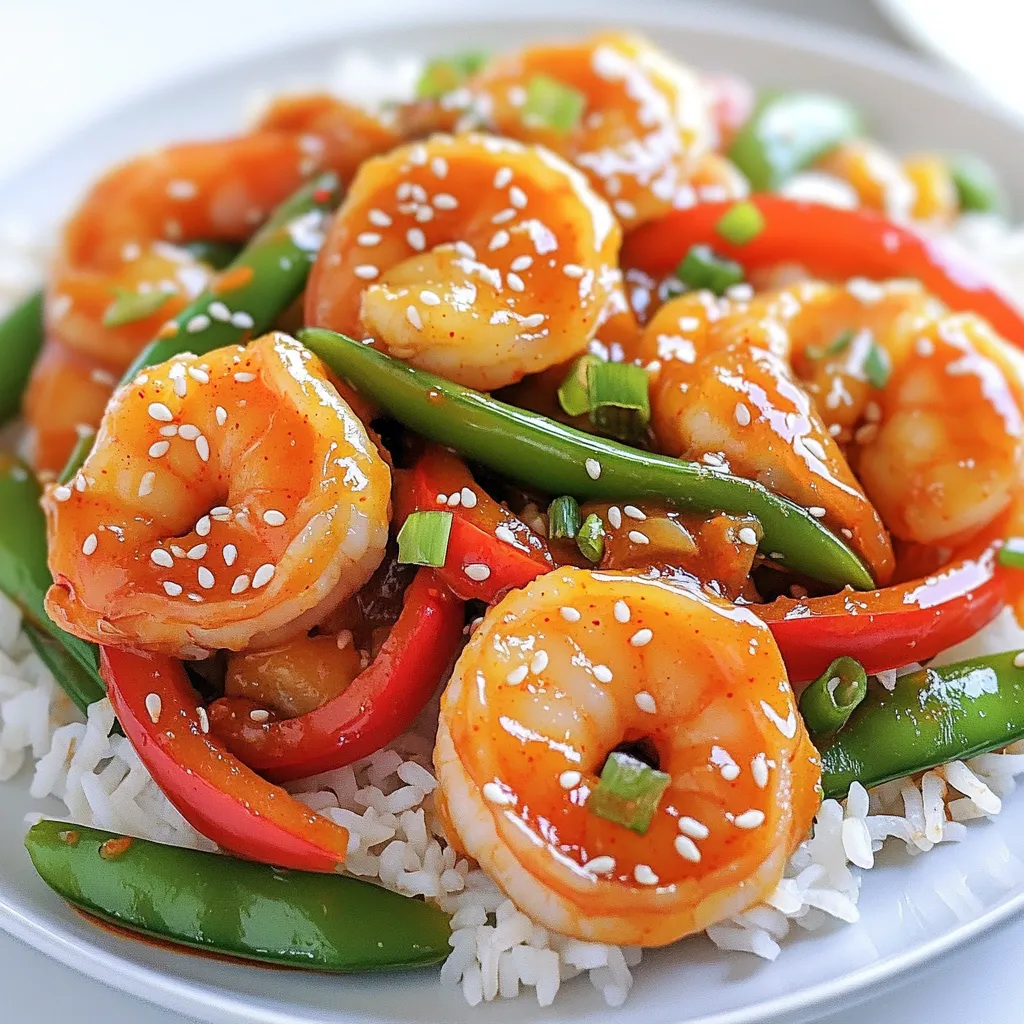
Craving takeout but want something better? Let’s whip up a dish that’s quick, easy, and bursting with flavor! In this

- 2 cups of cheese tortellini (fresh or frozen) - 1 can (28 oz) of crushed tomatoes - 1 can (15 oz) of coconut milk or heavy cream Cheese tortellini serves as the heart of this dish. You can use fresh or frozen tortellini. Both options work well, giving you a rich, cheesy bite. Crushed tomatoes add a deep, tangy flavor. This forms the base of our creamy sauce. You can choose between coconut milk for a hint of sweetness or heavy cream for a rich texture. - 1 medium onion, diced - 3 cloves of garlic, minced - 1 teaspoon dried basil - 1 teaspoon dried oregano - 1/2 teaspoon red pepper flakes (optional) - Salt and pepper to taste Diced onion and minced garlic bring warmth and depth to the dish. They sauté nicely and fill your kitchen with a lovely aroma. Dried basil and oregano add classic Italian flavors. Red pepper flakes can give a nice kick, but you can skip them if you prefer a milder taste. Be sure to adjust salt and pepper to enhance the dish's overall flavor. - 1 cup fresh spinach, roughly chopped - Grated Parmesan cheese for serving Chopped spinach adds a pop of color and nutrition. It wilts beautifully into the dish, creating contrast with the creamy sauce. Finally, grated Parmesan cheese on top adds an extra layer of flavor. It melts into the dish, making each bite even more delightful. Start by combining the crushed tomatoes, coconut milk, and vegetable broth in your slow cooker. Use a large spoon to mix them well. This creamy base gives the dish a rich flavor. The crushed tomatoes add sweetness, while coconut milk brings creaminess. The vegetable broth adds depth, making this dish taste amazing. Next, add the diced onion and minced garlic to the slow cooker. Stir in the dried basil, oregano, red pepper flakes, salt, and pepper. The onion and garlic will infuse the dish with great flavor as it cooks. The herbs add warmth and aroma. If you like some heat, the red pepper flakes are a nice touch. Cook the mixture on low for 4 hours or on high for 2 hours. You want the onion to become soft and translucent. After this time, stir in the cheese tortellini and chopped spinach. Cover and cook for an additional 30 minutes on high. This will cook the tortellini perfectly. Once done, give it a gentle stir and taste. Adjust the salt and pepper as needed. Serve with freshly grated Parmesan cheese on top for extra flavor. Adjust the seasoning to fit your taste. After cooking, taste the dish. If it lacks flavor, add salt and black pepper. Fresh herbs like basil or parsley can also boost the taste. You could sprinkle them over the top when serving. This simple step can make a big difference. Slow cookers vary in heat levels. For some models, 4 hours on low may be too much. Check the dish at 3 hours to see if the onion is soft. If you’re in a hurry, use the high setting for 2 hours. Always keep an eye on it to avoid overcooking. Want to switch it up? Add cooked chicken, sausage, or beans for protein. You can also toss in other veggies like bell peppers or zucchini. If you prefer a richer taste, use heavy cream instead of coconut milk. These changes can create a new twist on your creamy tomato tortellini. {{image_2}} You can add protein to your creamy tomato tortellini. Chicken and sausage work well. Cook the chicken first, then shred it into the dish. If you use sausage, slice it and brown it before adding. For a meatless option, try canned beans. Black beans or cannellini beans add protein and fiber. Simply stir them in with the tortellini. To make this dish vegetarian or vegan, swap the coconut milk or heavy cream for plant-based milk. Almond or oat milk can work, but coconut milk adds a nice creaminess. For cheese lovers, use vegan cheese or nutritional yeast for a cheesy taste. This way, you keep the meal rich and satisfying without dairy. Experimenting with herbs and sauces can change your dish's flavor. Fresh basil or parsley can brighten the meal. Add a splash of balsamic vinegar for tang. You can also try adding a tablespoon of pesto for a fresh twist. Don't hesitate to mix in different spices, like thyme or rosemary, for depth. Each change gives you a new taste adventure. To enjoy your Slow Cooker Creamy Tomato Tortellini, you need to reheat it well. The best method is to use the stove. Pour the leftovers into a pot. Heat on low, stirring often. This helps keep the tortellini from sticking. You can also use the microwave. Place it in a microwave-safe bowl. Heat for 1-2 minutes, stirring halfway. Check if it’s warm throughout before serving. If you want to save some for later, freezing is a great option. First, let the dish cool completely. Then, transfer it to an airtight container. Leave some space at the top for expansion. You can also use freezer bags. Squeeze out the air to prevent freezer burn. Label the container with the date. Store in the freezer for up to 3 months. Leftovers of this dish last about 3-4 days in the fridge. Make sure to store it in an airtight container. If you freeze it, it stays good for about 3 months. Always check for signs of spoilage before eating. If it smells off or looks strange, it's best to throw it out. Yes, you can use frozen tortellini in this recipe. There’s no need to thaw it first. Just toss it into the slow cooker with the other ingredients at the end of cooking. It will cook perfectly in the sauce, absorbing all the flavors. If you want to swap out coconut milk, heavy cream is a great option. You can also use any plant-based milk, like almond or oat milk. Just keep in mind that these alternatives may change the flavor a bit. Choose what fits your taste best. To make this dish gluten-free, look for gluten-free tortellini available in stores. You can also use gluten-free pasta. For the broth, ensure you select a gluten-free vegetable broth. With these swaps, you can enjoy your creamy tomato tortellini without worry! This blog post covers a delicious slow cooker recipe featuring cheese tortellini, crushed tomatoes, and coconut milk. You learned how to prepare the base, add aromatics, and cook it to perfection. Tips for texture, serving ideas, and variations like protein additions were shared. Storing and reheating leftovers was also discussed. Embrace this tasty dish and enjoy trying the various options. Cooking should be fun and easy!

Slow Cooker Creamy Tomato Tortellini Ideal Comfort Meal

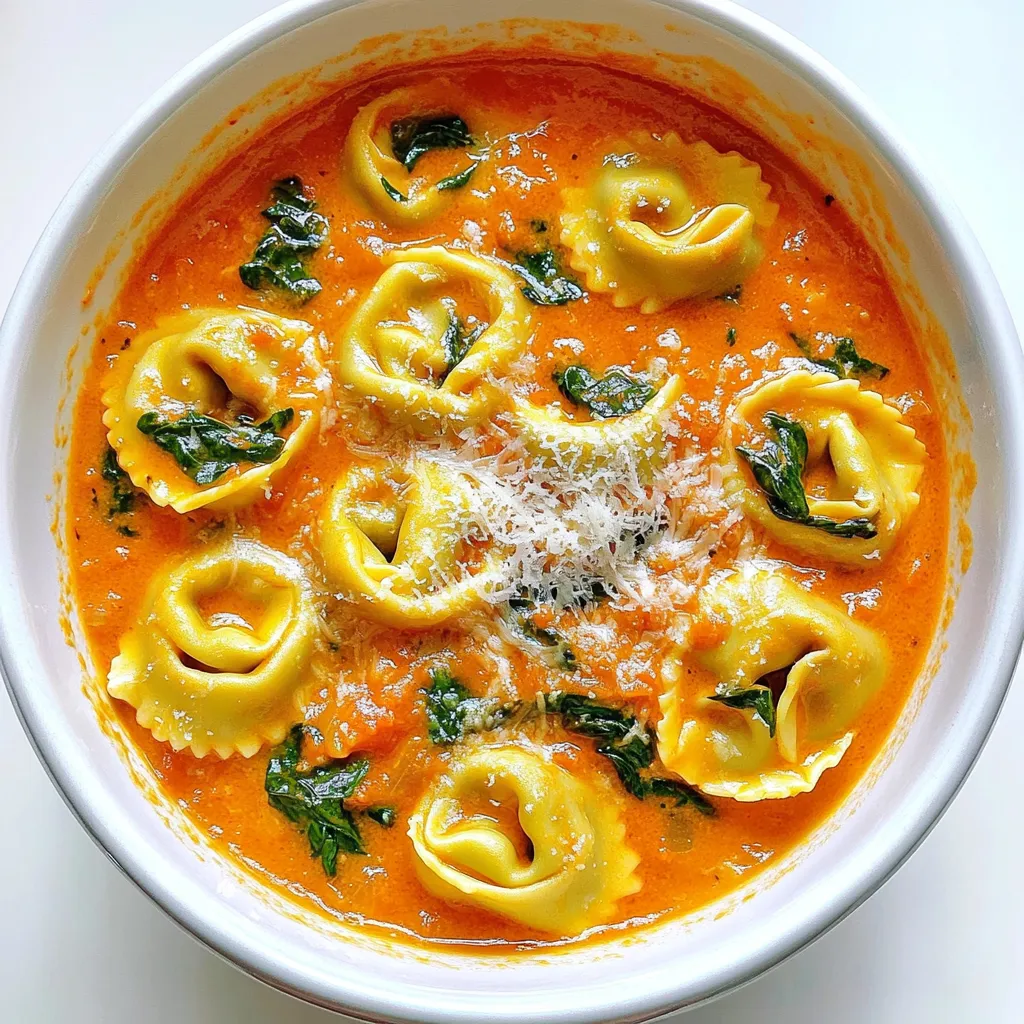
Looking for a warm, comforting meal that’s easy to make? You’re in the right place! My Slow Cooker Creamy Tomato

- 4 salmon fillets (around 6 oz each) - 1 cup cherry tomatoes, halved - 1 zucchini, sliced into half-moons - 1 bell pepper (red or yellow), sliced - 1 red onion, sliced into wedges - 1 cup cooked quinoa The main stars here are the salmon and fresh vegetables. Salmon brings healthy fats and protein. The colorful veggies add crunch and nutrients. Quinoa acts as a great base, full of fiber and protein. - 2 tablespoons olive oil - 2 teaspoons dried oregano - 1 teaspoon garlic powder - Salt and pepper to taste - 1/4 cup Kalamata olives, pitted and halved - 1/4 cup feta cheese, crumbled - 1 lemon, cut into wedges (for serving) - Fresh parsley, chopped (for garnish) Seasoning is key to flavor. Olive oil adds richness. Dried oregano and garlic powder bring a nice Mediterranean touch. Feta cheese and olives add a salty kick. Lemon wedges brighten up the dish. - For extra flavor, try adding capers or artichokes. - If you don’t have quinoa, use rice or couscous. - Swap salmon with chicken or tofu for variety. These suggestions can help you customize your meal. Feel free to get creative with what you have! First, you need to preheat your oven to 400°F (200°C). This temperature helps cook everything evenly. While the oven heats, line a large baking sheet with parchment paper. This makes clean-up easy and prevents sticking. Next, grab a mixing bowl. Combine 1 cup of halved cherry tomatoes, 1 sliced zucchini, 1 sliced bell pepper, and 1 sliced red onion. Drizzle with 1 tablespoon of olive oil. Sprinkle in salt, pepper, and 1 teaspoon of dried oregano. Toss everything together so the veggies get well coated. Now, spread the seasoned vegetables on one side of the baking sheet. Make sure they are in a single layer. This helps them roast nicely. In the same bowl, place 4 salmon fillets. Drizzle with 1 tablespoon of olive oil. Then, add 1 teaspoon of garlic powder, the remaining oregano, and season with salt and pepper. Mix gently to coat the salmon. Now, place the salmon fillets skin-side down on the other side of the baking sheet. This layout allows the salmon and veggies to roast together. Roast everything in your preheated oven for 15-20 minutes. The salmon is done when it flakes easily with a fork. The veggies should be tender and slightly charred. Keep an eye on them to avoid overcooking. While the salmon and vegetables roast, prepare your quinoa according to the package instructions. This usually takes about 15 minutes. Timing it with the roasting process makes sure everything is ready at the same time. Once everything is cooked, it’s time to assemble your bowls. Start by adding a scoop of quinoa at the bottom of each bowl. Then, place a salmon fillet on top, followed by the roasted vegetables. Add 1/4 cup of Kalamata olives and some crumbled feta cheese to each bowl. For the final touch, garnish with fresh chopped parsley and serve with lemon wedges on the side. Enjoy your tasty creation! To avoid overcooking salmon, use a timer. Salmon cooks fast! Check it after 15 minutes. It is done when it flakes easily with a fork. If you overcook it, it can become dry. For crispy vegetables, spread them out on the pan. Don’t crowd them! This lets hot air circulate. Use a high oven temperature of 400°F. This helps them char and become tender. You can add extra herbs and spices to boost flavor. Consider fresh dill or basil for a fresh taste. Lemon zest also brightens the dish. Try different combinations to find what you like best. Customizing with sauces or dressings is easy. A drizzle of tahini or a squeeze of lemon adds zest. You can also try a yogurt-based sauce for creaminess. These small changes can really elevate your meal. Pair your salmon bowls with a simple side salad. A light Greek salad works well. You can also serve a glass of white wine or sparkling water. These drinks complement the salmon nicely. For presentation, use large, shallow bowls. Start with quinoa, then layer salmon and veggies on top. Sprinkle with feta and olives for color. A lemon wedge on the side adds a nice touch. Garnish with fresh parsley for a pop of green. {{image_2}} You can switch up the protein in your Mediterranean salmon bowls. Here are a few ideas: - Alternative fish choices: Try using trout or cod instead of salmon. They cook similarly. Both have a mild taste and pair well with Mediterranean flavors. - Vegetarian alternatives: If you want a plant-based option, use marinated tofu or chickpeas. Both add protein and work well with the other ingredients. Changing the vegetables keeps your meal fresh and tasty. Here’s how to make it seasonal: - Best vegetables for different seasons: In spring, use asparagus and snap peas. Summer brings zucchini and bell peppers. In fall, try Brussels sprouts and butternut squash. Winter is great for root veggies like carrots and parsnips. - Using frozen or fresh vegetables: Frozen veggies are quick and easy. They cook well and save time. Fresh veggies add great flavor. Choose based on what you have. You can change the flavors to suit your taste. Here are some fun ideas: - Mediterranean-inspired twists: Add spices like cumin or paprika for a different kick. You could also try a sprinkle of sumac for a unique tang. - Incorporating different cheeses or olives: Swap feta for goat cheese or use mozzarella for a creamier texture. For olives, consider green olives or even capers for a salty bite. To store leftovers, place your salmon bowl in an airtight container. Keep it in the fridge for up to three days. Always let the food cool before sealing. This helps prevent moisture buildup. I recommend using glass containers. They are safe, easy to clean, and do not absorb odors. They also let you see the food inside! If you want to freeze the bowls, assemble them without the feta and lemon. Wrap each bowl tightly in plastic wrap, then in aluminum foil. This keeps them fresh. You can freeze them for up to three months. To thaw, move the bowl to the fridge overnight. For reheating, use the microwave or oven. If you use the oven, cover the bowl with foil. Heat it at 350°F until warm. Eat your salmon bowls within three days if refrigerated. If frozen, try to eat them within three months for the best taste. Look for any off smells or changes in color. If the food smells sour or looks slimy, it’s best to toss it. Always trust your senses! Yes, you can use other fish. Good options include trout, tilapia, or cod. Each fish has a different cooking time. For trout, cook for 15-18 minutes. For tilapia, aim for 12-15 minutes. Cod usually takes about 15-20 minutes. Always check for flakiness! The salmon is done when it reaches an internal temperature of 145°F (63°C). It should flake easily with a fork. If the fish is still translucent in the center, give it a few more minutes. The texture should be moist but not mushy. Yes, you can prepare this dish ahead of time. Cook the salmon and veggies, then store them in airtight containers. Keep the quinoa separate. When ready to eat, reheat the salmon and veggies in the oven or microwave. This makes it great for meal prep! If you want a substitute, try brown rice, couscous, or farro. Each gives a different texture. For a low-carb option, you can also use cauliflower rice. Adjust cooking times based on the substitute you choose. Yes, this recipe is gluten-free. All the ingredients are safe for a gluten-free diet. Just double-check the labels on the quinoa and feta cheese to ensure they are certified gluten-free. Enjoy without worry! This blog post covered how to make a tasty salmon bowl. We explored key ingredients like salmon, fresh veggies, and quinoa. I shared step-by-step instructions for roasting and assembling your meal. We also discussed tips to enhance flavors and variations for different diets. As you try this recipe, remember to enjoy the process. Customize it to your taste and have fun! Your kitchen is a place for creativity and delicious meals.

Sheet Pan Mediterranean Salmon Bowls Simplified Meal

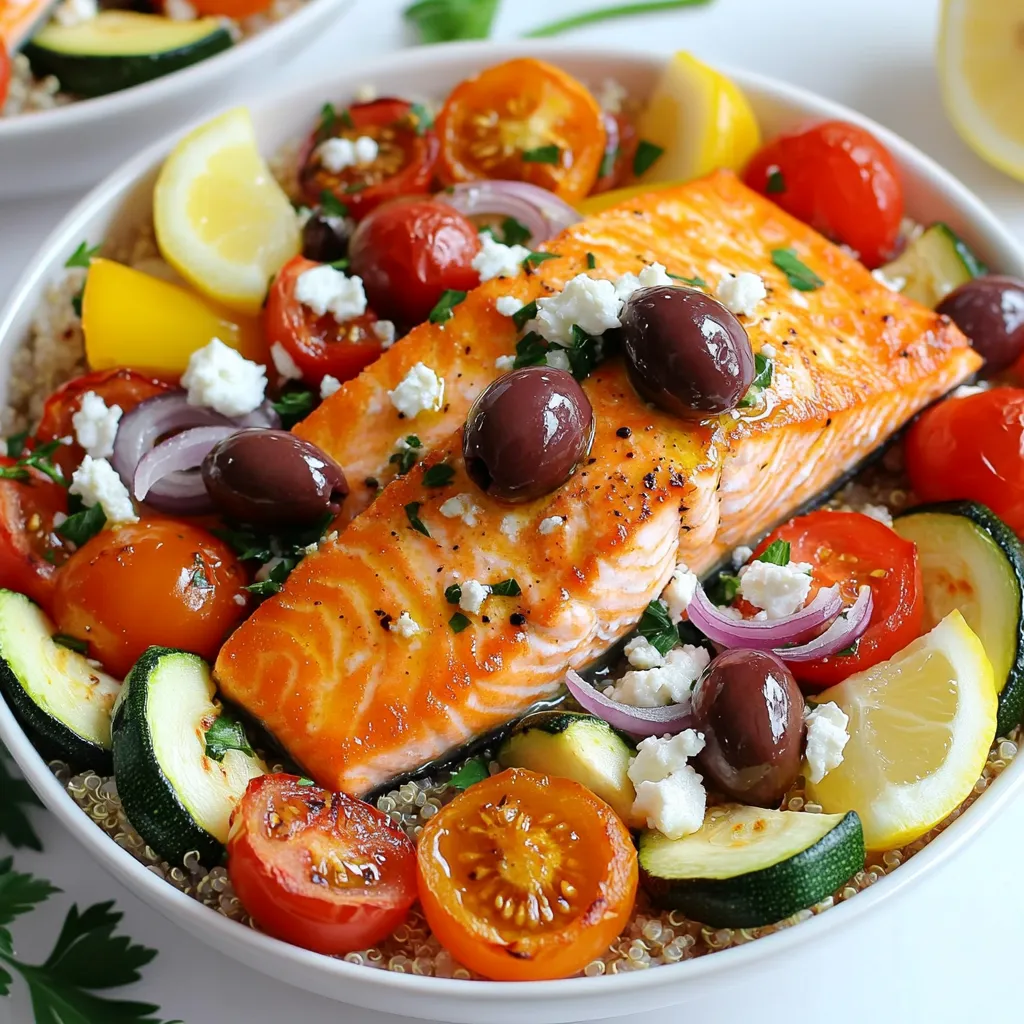
Looking for a quick, healthy meal? Let me introduce you to Sheet Pan Mediterranean Salmon Bowls! This easy recipe pairs

Older posts
Newer posts
← Previous Page1 … Page8 Page9 Page10 … Page86 Next →

dsad

© 2026 Cooking Wells • Built with GeneratePress

Our Policies

  • Copyright Policy
  • Cookie Policy
  • GDPR Policy
  • Privacy Policy
  • Disclaimer
  • Terms Of Use

More Information

  • Home
  • About
  • Contact
  • Appetizers
  • Dessert
  • Dinner
  • Drinks
©2026, Cooking Wells About Back To Top