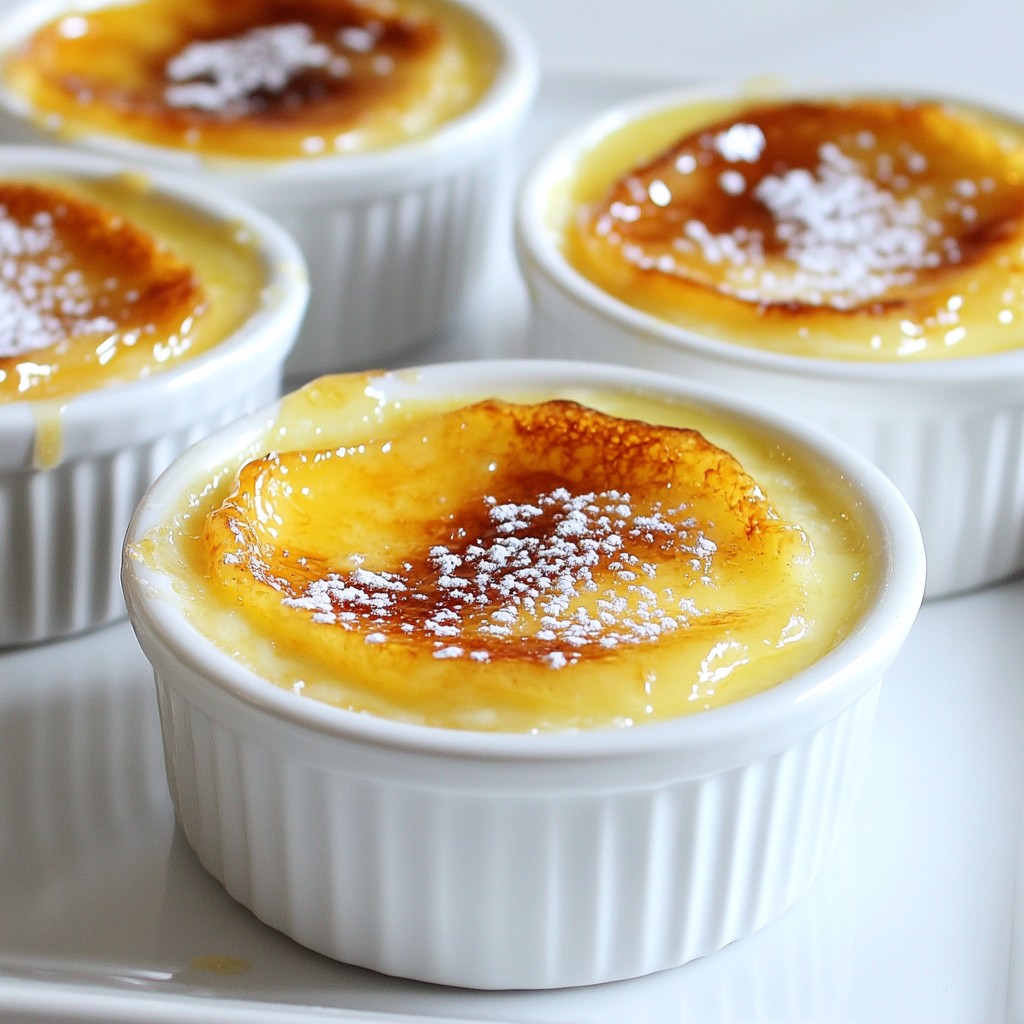
Indulge yourself in the creamy elegance of Vanilla Bean Crème Brûlée with this delightful recipe. This classic dessert combines rich flavors with a crisp caramel top, perfect for impressing guests or treating yourself. I’ll guide you through every step, from selecting the best vanilla to achieving that perfect, silky texture. Ready to create a delicious masterpiece? Let’s dive into the world of this sweet delight!
Why I Love This Recipe
- Decadent Flavor: This crème brûlée is the epitome of indulgence with its rich vanilla flavor and creamy texture.
- Elegant Presentation: The caramelized sugar on top creates a beautiful contrast with the smooth custard, making it perfect for special occasions.
- Simple to Make: Despite its fancy appearance, the recipe is straightforward and requires minimal ingredients.
- Customizable: You can easily add your favorite flavors, like chocolate or fruit, to tailor it to your taste.
Ingredients
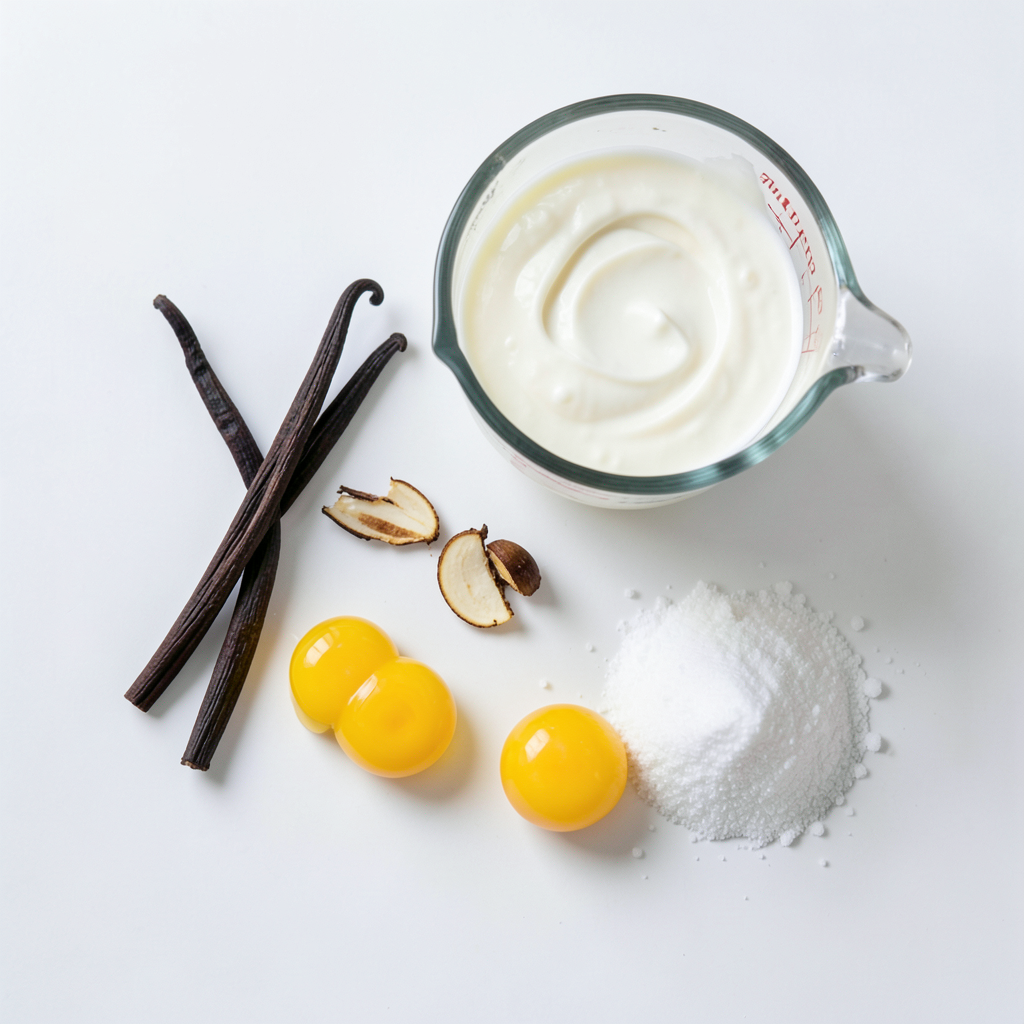
Main Ingredients
- 2 cups heavy cream
- 1 vanilla bean, split and scraped (or 1 tablespoon vanilla extract)
- 4 large egg yolks
- 1/2 cup granulated sugar, plus extra for topping
- A pinch of salt
The main ingredients create a rich and creamy custard. Heavy cream gives a smooth texture. Vanilla bean adds a deep flavor, while the egg yolks provide richness. Granulated sugar sweetens the mix, and salt enhances the taste.
Optional Toppings
- Additional granulated sugar for caramelizing
- Fresh berries for garnish
- Mint leaves
Optional toppings can make your crème brûlée shine. A sprinkle of granulated sugar helps create a crispy top. Fresh berries add color and flavor. Mint leaves bring a refreshing touch. These toppings make your dessert even more delightful.
Step-by-Step Instructions
Preparation Steps
- Preheat your oven to 325°F (160°C).
- Gather all ingredients. You need heavy cream, a vanilla bean, egg yolks, and sugar.
- In a medium saucepan, combine the cream, split vanilla bean, and a pinch of salt.
- Heat this mixture over medium heat until it just begins to simmer.
- Once it simmers, remove it from heat. Let it cool slightly to infuse the vanilla flavor.
Mixing and Baking
- In a large bowl, whisk together the egg yolks and 1/2 cup of sugar.
- Whisk until the mixture is pale and slightly thickened.
- Slowly pour the warm cream into the egg yolk mixture while whisking constantly.
- This helps prevent the eggs from scrambling.
- Strain the mixture through a fine-mesh sieve into a large measuring cup or bowl.
- This step removes bits of egg and the vanilla pod.
- Place four ramekins in a baking dish. Fill them with the custard mixture, leaving about 1/4 inch from the top.
- Carefully pour hot water into the baking dish around the ramekins. This creates a water bath for even cooking.
- Bake for 30-35 minutes. The edges should set, and the centers should jiggle slightly.
Finishing Touches
- Remove the ramekins from the water bath. Let them cool to room temperature.
- Refrigerate the custards for at least 2 hours or until chilled.
- Once chilled, sprinkle a thin layer of granulated sugar over the tops.
- Using a kitchen torch, caramelize the sugar until it melts and turns golden brown.
- If you don’t have a torch, broil the ramekins in the oven for a few minutes.
- Keep a close eye to avoid burning.
- Allow the caramelized topping to cool for a minute until it hardens.
- Serve immediately for the best texture!
Tips & Tricks
Achieving the Perfect Texture
Using a water bath is key for smooth custard. It helps the custard cook evenly. Without it, the heat may cook the edges too fast. This causes curdled eggs. To avoid scrambled eggs, mix slowly. Always whisk the warm cream into the yolks gently. This reduces the chance of cooking the eggs too much.
Flavor Enhancements
You can swap the vanilla bean for vanilla extract. Use one tablespoon of extract instead. You can also try other flavors like chocolate or citrus. For chocolate, add melted dark chocolate to the cream. For citrus, add lemon zest or orange zest. These flavors give a twist to the classic recipe.
Common Mistakes to Avoid
Be careful not to overbake the custards. They should jiggle in the middle when you take them out. Too much sugar on top can burn easily. A thin, even layer works best for caramelizing. Always watch closely when using a torch or broiling to avoid burning.
Pro Tips
- Use Fresh Vanilla: Fresh vanilla beans will give your crème brûlée a richer and more complex flavor than vanilla extract.
- Don't Overcook: The custard should be set around the edges but still slightly jiggly in the center; this ensures a creamy texture.
- Cool Gradually: Allow the ramekins to cool to room temperature before refrigerating to prevent condensation from forming on the custard surface.
- Caramelizing Sugar: For best results, sprinkle a thin, even layer of sugar and use a torch to caramelize; watch closely to avoid burning.
Variations
Flavor Variations
You can make your vanilla bean crème brûlée even more exciting with some fun flavors.
- Chocolate Vanilla Bean Crème Brûlée: Add 4 ounces of chopped dark chocolate to the cream mixture. Heat until the chocolate melts. This creates a rich, chocolatey twist on the classic.
- Espresso Crème Brûlée: Mix in 2 tablespoons of finely ground espresso with the cream. This gives your dessert a bold coffee flavor. It's perfect for coffee lovers!
These flavor variations keep the dish fresh and fun. Experimenting with different tastes can surprise your guests.
Dietary Adjustments
You can still enjoy crème brûlée even with dietary needs. Here are some easy swaps.
- Dairy-free options using coconut milk: Replace the heavy cream with full-fat coconut milk. This gives a creamy texture and a hint of coconut flavor. Your dessert stays rich and satisfying.
- Sugar substitutes for lower-sugar recipes: Use stevia or monk fruit sweetener instead of granulated sugar. This keeps the sweetness without the added calories. Just adjust the amount to taste.
With these adjustments, everyone can enjoy this delightful dessert. Try these variations to make it your own!
Storage Info
Refrigeration Guidelines
How long can crème brûlée last in the fridge? Crème brûlée can last about 2 to 3 days in the fridge if stored well. Place the ramekins in an airtight container to keep them fresh. Storing un-baked custard vs. baked: You can store un-baked custard for about 24 hours before baking. Just cover the bowl tightly and keep it in the fridge.
Freezing Crème Brûlée
How to properly freeze and thaw: To freeze, cover the cooled custards tightly with plastic wrap. Place them in a freezer-safe container. When ready to eat, thaw them in the fridge for several hours or overnight. Effects on texture: Freezing can change the texture slightly. The custard may not be as smooth after thawing. It's best to enjoy crème brûlée fresh for the best taste.
FAQs
How do you fix a watery crème brûlée?
If your crème brûlée turns out watery, the issue is likely undercooking. Make sure the edges are set and the center jiggles slightly. If it is still runny, you can bake it a bit longer. Keep an eye on it to avoid overbaking. A water bath helps keep the heat gentle, so use it every time.
Can you make crème brûlée ahead of time?
Yes, you can easily make crème brûlée ahead of time. After baking, cool the ramekins to room temperature. Then, cover and refrigerate them for up to three days. Just remember to caramelize the sugar topping right before serving. This keeps the topping crispy and fresh.
Is it necessary to use a kitchen torch?
While a kitchen torch is great for caramelizing sugar, it is not required. If you don’t have one, you can use the oven’s broiler. Just sprinkle sugar on top and broil the ramekins for a few minutes. Watch closely to prevent burning.
What can I use if I don't have ramekins?
If you lack ramekins, you can use small oven-safe dishes. Options include custard cups or even muffin tins. Just ensure they are the right size for the custard. Keep the water bath method to help cook them evenly.
In this blog post, you explored making crème brûlée with its rich ingredients and simple steps. You learned how to prepare, mix, and bake the custard. We discussed tips for the perfect texture and flavor, plus ways to store or freeze your dessert. Don't forget to try different toppings and variations. With each recipe, you can impress your guests or indulge yourself. Enjoy making this classic treat with confidence and creativity!