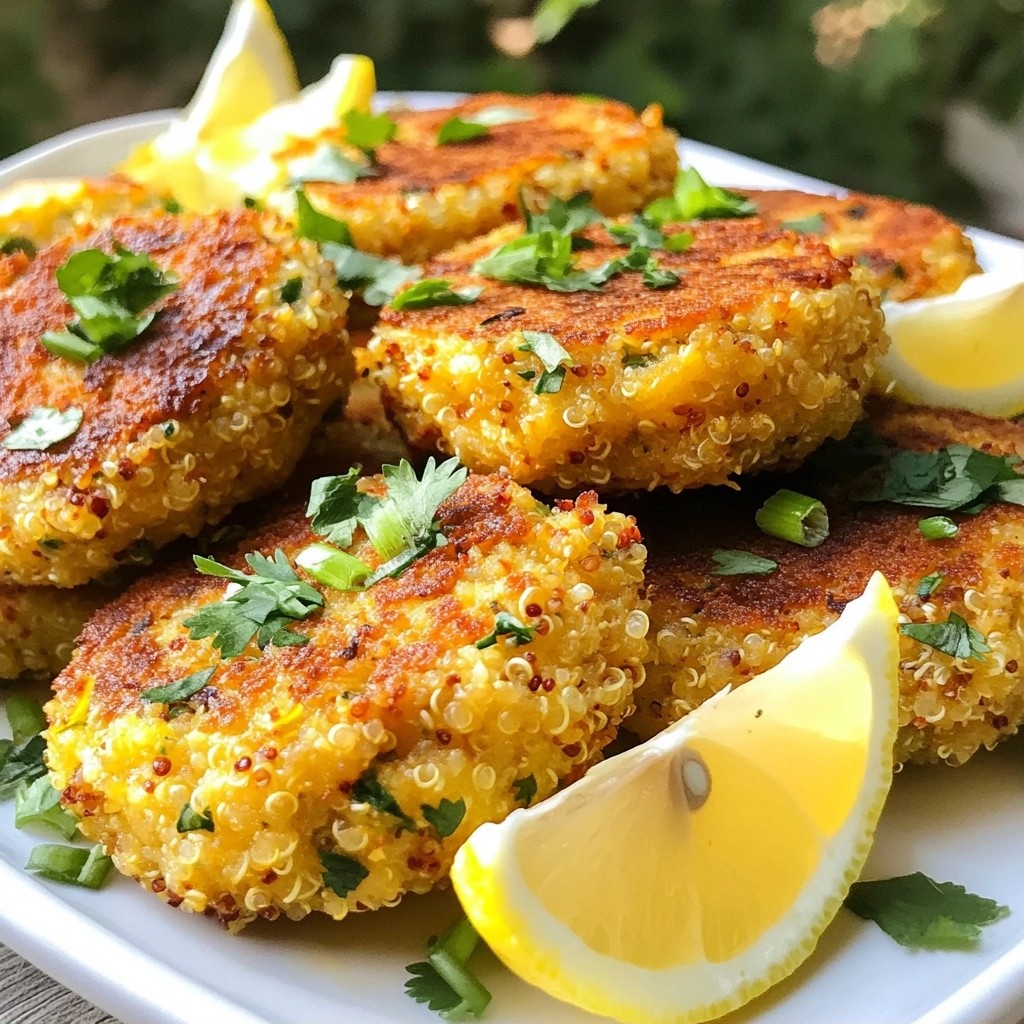
Looking for a fresh and tangy dish to spice up your meal prep? Try my Zesty Lemon Herb Quinoa Cakes! Packed with wholesome ingredients and bursting with flavor, these cakes are simple to make and perfect for any meal. Whether you want a quick lunch or a tasty dinner, these cakes are sure to impress. Read on to discover how to whip up this delightful dish in no time!
Why I Love This Recipe
- Healthy and Wholesome: These quinoa cakes are packed with protein and fiber, making them a nutritious meal prep option that fuels your day.
- Bright and Zesty Flavor: The combination of fresh herbs and zesty lemon gives these cakes a refreshing taste that elevates any meal.
- Easy to Make: With simple ingredients and straightforward instructions, these quinoa cakes are quick to whip up for meal prep or a weeknight dinner.
- Versatile and Customizable: Feel free to add your favorite veggies or spices to the mix, making these cakes a perfect canvas for your culinary creativity.
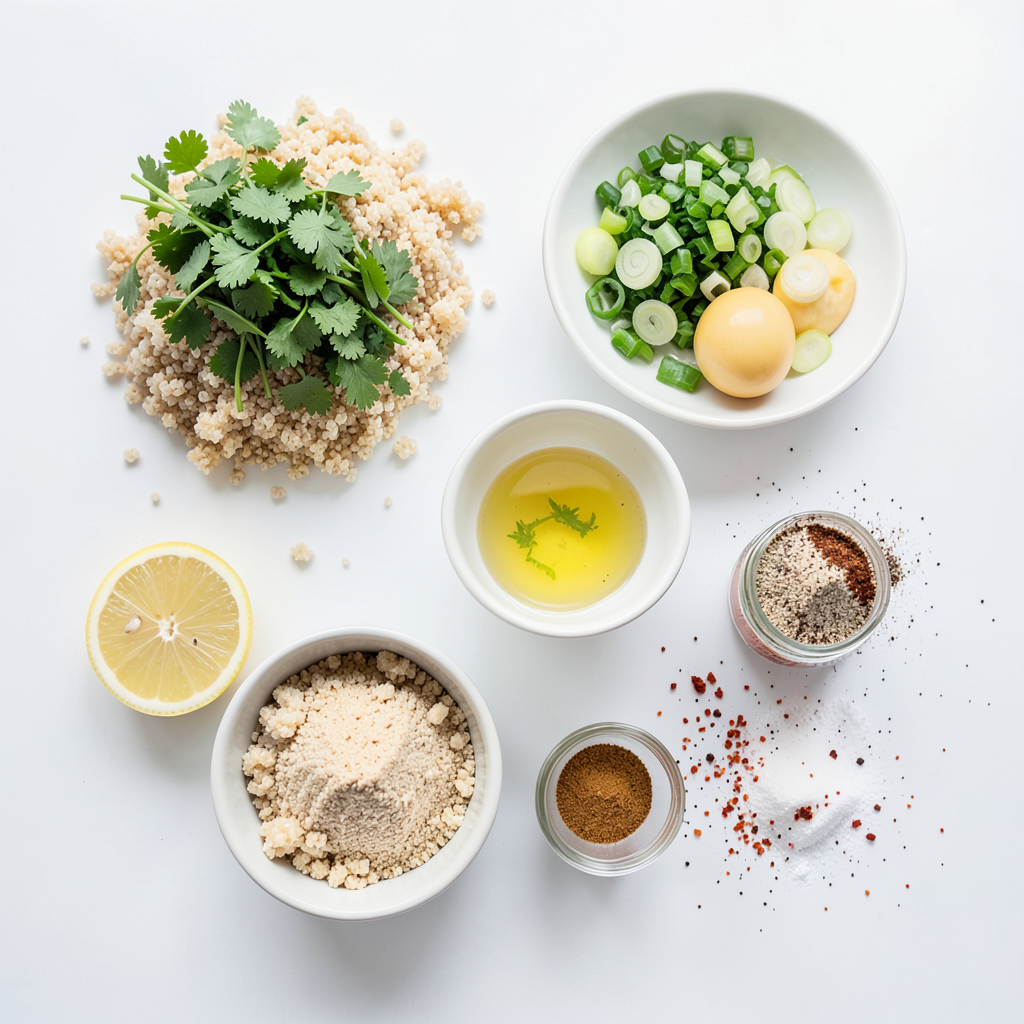
Ingredients
Main Ingredients
- 1 cup cooked quinoa
- 1/2 cup breadcrumbs or almond flour
- 1/4 cup fresh parsley, chopped
- 1/4 cup fresh cilantro, chopped
Adding Flavor
- 1 tablespoon lemon zest
- 2 tablespoons lemon juice
- 1 teaspoon garlic powder
- 1 teaspoon onion powder
Optional Seasoning
- 1/4 teaspoon black pepper
- 1/4 teaspoon red chili flakes
- Olive oil or cooking spray for frying
These ingredients come together to create a fresh and zesty flavor in your quinoa cakes. First, cooked quinoa serves as a great base. It is high in protein and has a nice texture. Breadcrumbs or almond flour help bind the cakes and give them a crisp outside.
Next, fresh parsley and cilantro add bright, herbal notes. The lemon zest and lemon juice provide that zesty kick. Garlic powder and onion powder deepen the flavor, making each bite tasty. The optional black pepper and red chili flakes can add a gentle heat if you like spice.
You can easily customize this recipe. For example, if you need a gluten-free option, choose almond flour. This way, everyone can enjoy these delicious cakes. Keep these ingredients in mind, and you will create a meal that shines on your table.
Step-by-Step Instructions
Preparing the Mixture
In a large bowl, combine the cooked quinoa, breadcrumbs, parsley, cilantro, green onions, garlic powder, onion powder, salt, black pepper, and red chili flakes if desired. Mix well to blend all the flavors. In another bowl, whisk the eggs, lemon zest, and lemon juice together. Pour this egg mix into the dry ingredients and stir until everything is well combined.
Forming the Cakes
Using your hands or a tablespoon, shape the mixture into small patties. Each patty should be about 2 inches in diameter. You can expect to make around 10 to 12 quinoa cakes, depending on how big you make them. Keep them uniform for even cooking.
Cooking the Cakes
Heat a non-stick frying pan over medium heat. Add a drizzle of olive oil or spray it with cooking spray. Once the pan is hot, carefully place the quinoa cakes in the pan. Make sure not to overcrowd them. Cook each side for about 4 to 5 minutes until they turn golden brown and crispy. Once done, remove them from the pan and let them cool slightly on a paper towel to soak up any extra oil. Repeat with the remaining mixture until all cakes are cooked.
Tips & Tricks
Perfecting Your Quinoa Cakes
To get the best texture in your quinoa cakes, it’s key to mix well. The right balance of ingredients makes all the difference. I recommend using chilled mixture. This makes it much easier to form the cakes without them falling apart.
Cooking Techniques
When deciding between frying and baking, think about your goals. Frying gives a nice, crispy crust. Baking is healthier and easier, but they may not be as crispy. If you fry, use a non-stick pan. To prevent sticking, make sure your pan is hot before adding the cakes. A drizzle of olive oil helps too.
Serving Suggestions
For a colorful meal, arrange your quinoa cakes on a bright platter. Add lemon wedges and fresh herbs for a fresh look. Pair these cakes with dips like tzatziki or lemon-garlic yogurt. These dips add extra flavor and make the dish pop!
Pro Tips
- Chill the Mixture: For easier handling, refrigerate the quinoa mixture for about 30 minutes before forming patties. This helps them hold their shape better when cooking.
- Use Fresh Herbs: Fresh herbs make a significant difference in flavor. Always opt for fresh parsley and cilantro for the best taste in your quinoa cakes.
- Perfect Cooking Temperature: Ensure your pan is at medium heat before adding the patties. This helps achieve a golden-brown crust without burning the outside.
- Versatile Serving Options: These quinoa cakes can be served as appetizers, on a salad, or as a main dish. Pair with different dips like hummus or avocado sauce for varied flavors!
Variations
Substitutions for Ingredients
You can swap breadcrumbs for almond flour for a gluten-free option. This change works well and keeps the cakes tasty. If you need a vegan recipe, replace the eggs with flaxseed meal. Use one tablespoon of flaxseed mixed with three tablespoons of water for each egg. Let it sit for five minutes before using. This gives a nice binding effect.
Flavor Enhancements
To make these cakes even more exciting, add spices like cumin or smoked paprika. These spices add warmth and depth. You can also mix in grated vegetables like zucchini or carrots. This boosts nutrition and adds extra texture. Plus, it’s a great way to sneak in more veggies.
Serving Variants
These quinoa cakes are versatile. You can turn them into sliders by using small patties. Serve them on mini buns with your favorite toppings. They also work as appetizers at parties. Pair them with different sides like fresh salads or grains. A light salad with lemon vinaigrette complements the cakes perfectly.
Storage Info
How to Store Leftover Quinoa Cakes
To keep your quinoa cakes fresh, use airtight containers. Glass or plastic containers work well. Before you store them, let the cakes cool down. This step helps prevent moisture buildup. Place a paper towel at the bottom of the container to absorb extra moisture. This keeps your cakes crispy.
Freezing Instructions
Freezing quinoa cakes is simple and great for meal prep. First, let the cakes cool fully. Then, place them on a baking sheet in a single layer. Freeze for about an hour until firm. After that, transfer them to a freezer-safe bag. Label the bag with the date. To thaw, leave them in the fridge overnight. For reheating, you can use an oven or a skillet. Heat until warm and crispy.
Shelf Life
In the fridge, quinoa cakes last about 4 to 5 days. Always check for signs of spoilage. If they smell bad or look off, it's best to discard them. Fresh cakes should have a bright, zesty aroma. Keep an eye on any mold or unusual textures. Proper storage helps maintain their quality and taste.
FAQs
How do I make quinoa cakes without eggs?
You can bind the mixture without eggs. Use flaxseed meal or chia seeds. Mix one tablespoon of either with three tablespoons of water. Let it sit for five minutes to thicken. This creates a gel-like texture that helps hold the cakes together. You can also use mashed bananas or applesauce. These options add flavor and moisture while keeping your cakes together.
Can I bake these lemon herb quinoa cakes instead of frying?
Yes, you can bake them! Preheat your oven to 400°F (200°C). Line a baking sheet with parchment paper. Shape your quinoa cakes and place them on the sheet. Brush the tops lightly with olive oil. Bake for about 20-25 minutes. Flip them halfway to get a nice crisp. Baking makes them lighter and still full of flavor.
What can I serve with lemon herb quinoa cakes?
Pair these cakes with a fresh salad or roasted veggies. They also taste great with tzatziki or a lemon-garlic yogurt dip. Try adding a side of hummus for extra creaminess. For a heartier meal, serve them with quinoa or brown rice. A slice of lemon on the side adds extra zing!
Quinoa cakes are easy to make and packed with flavor. You saw how to mix and form the cakes, cook them perfectly, and store leftovers. Remember, you can switch ingredients and try new flavors. These cakes can fit any meal, from lunch to dinner. With simple tips, you can create a dish everyone will enjoy. Enjoy your cooking journey and feel free to experiment!