Skip to content
DisclaimerTerms Of UseGDPR PolicyCookie Policy

Cooking Wells

  • Home
  • Drinks
  • Appetizers
  • Dinner
  • Dessert
  • About
  • Contact
  • Privacy Policy
DisclaimerTerms Of UseGDPR PolicyCookie Policy

Mia

To make these muffins, you need a few key items. Here’s what you’ll gather: - 1 cup pumpkin puree - 1/2 cup brown sugar - 1/2 cup granulated sugar - 1/2 cup vegetable oil - 2 large eggs - 1 teaspoon vanilla extract - 1 1/2 cups all-purpose flour - 1 teaspoon baking soda - 1/2 teaspoon baking powder - 1/2 teaspoon salt - 1 teaspoon ground cinnamon - 1/2 teaspoon ground nutmeg - 1/4 teaspoon ground ginger - 1 cup chocolate chips (semi-sweet or dark) These ingredients blend perfectly. The pumpkin gives moisture, while the sugars add sweetness. You can customize your muffins with some fun extras. Here are a few ideas: - 1/2 cup chopped nuts (like walnuts or pecans) - 1/2 cup dried fruit (like cranberries or raisins) - 1/2 teaspoon ground cloves for extra spice - 1/4 cup coconut flakes for a tropical twist These additions can make your muffins even more special. They add texture and flavor. If you’re missing something, don’t worry! Here are some swaps you can use: - Use applesauce instead of oil for a lighter muffin. - Substitute honey or maple syrup for brown sugar. - Try gluten-free flour if you need a gluten-free option. - Replace chocolate chips with carob chips for a different taste. These substitutes keep the muffins tasty while meeting your needs. You can still enjoy that pumpkin chocolate chip bliss! Start by preheating your oven to 350°F (175°C). This step is key. A hot oven helps the muffins rise well. Next, take a 12-cup muffin tin. Line it with paper liners or spray it with cooking spray. This helps the muffins come out easily. In a large bowl, mix together the pumpkin puree, brown sugar, and granulated sugar. Add vegetable oil, eggs, and vanilla extract. Use a whisk to blend them until smooth. This mix will give your muffins a moist texture and sweet flavor. In another bowl, combine the all-purpose flour, baking soda, baking powder, salt, cinnamon, nutmeg, and ginger. Whisk them together well. This step is important for even rising and flavor. Gradually add the dry mix to the wet mix. Stir gently until just combined. Be careful not to overmix; this keeps the muffins light. Now, fold in the chocolate chips, saving some for the top. The chocolate adds a tasty surprise in every bite. Spoon the batter into the muffin tin. Fill each cup about two-thirds full. This allows space for the muffins to rise. If you saved chocolate chips, sprinkle them on top now. They look nice and taste great. Place the muffin tin in the oven and bake for 18-20 minutes. Check with a toothpick; it should come out clean. Once done, let the muffins cool in the tin for 5 minutes. Then, move them to a wire rack to cool completely. Enjoy your delicious creation! For the complete guide, check the Full Recipe. To get the best muffin texture, measure ingredients carefully. Use a kitchen scale for precision. Mix wet and dry ingredients separately first. Combine them gently. Overmixing can lead to tough muffins. Aim for a few lumps in the batter. This keeps them soft and fluffy. Let the batter rest for a few minutes before baking. This helps the gluten relax and improves texture. One common mistake is not preheating the oven. Always preheat to 350°F (175°C) before baking. This step ensures even cooking. Another error is overfilling the muffin cups. Fill them only two-thirds full to prevent overflow. Lastly, check for doneness with a toothpick. Insert it in the center; it should come out clean. Spices can elevate your pumpkin chocolate chip muffins. Add cinnamon for warmth and sweetness. Nutmeg offers a cozy, festive touch. A bit of ginger adds zing. You can also experiment with cloves or allspice. Adjust the amounts to match your taste. For the best flavor, use fresh spices. They make a big difference. Try adding a pinch of salt to balance sweetness. This enhances the overall flavor profile. {{image_2}} You can easily change the flavor of your muffins. Adding nuts like walnuts or pecans gives a nice crunch. You can also mix in dried fruits like cranberries or raisins. These add sweetness and chewiness. I love using a half cup of nuts or fruits. Just remember to chop them into small pieces. This way, they blend well with the batter. If you want more spice, you can focus on pumpkin spice. Increase the cinnamon, or add cloves for warmth. You can also use pumpkin spice mix instead of individual spices. This gives a strong, cozy flavor. On the other hand, if you want to highlight chocolate, use dark chocolate chips. They add a rich depth to your muffins. Both options are tasty and fun to try. You can make these muffins gluten-free. Just swap the all-purpose flour for almond or coconut flour. You may need to adjust the liquid, so keep that in mind. For a vegan version, replace the eggs with flax eggs. Mix one tablespoon of flaxseed meal with three tablespoons of water for each egg. This way, you keep the texture right. These alternatives let everyone enjoy your muffins. For the full recipe, click here. After enjoying your pumpkin chocolate chip muffins, you might have some left. To keep them fresh, place them in an airtight container. This will stop air from making them dry. You can store them at room temperature for up to three days. If you want to keep them longer, consider freezing them. Freezing muffins is a great way to save them for later. First, let the muffins cool completely. Then, wrap each muffin tightly in plastic wrap. After wrapping, put them in a freezer-safe bag or container. This helps keep the muffins fresh for up to three months. When you're ready to enjoy one, just take it out and thaw it. To reheat muffins, you have a few easy options. You can use a microwave or an oven. For the microwave, place the muffin on a plate and heat for about 10 to 15 seconds. If you prefer the oven, preheat it to 350°F (175°C). Place the muffin on a baking sheet and heat for about 5 to 10 minutes. This will make your muffin warm and soft again. Enjoy your treat! To make pumpkin chocolate chip muffins from scratch, you need simple ingredients. Start by mixing the wet ingredients: pumpkin puree, sugars, oil, eggs, and vanilla. In another bowl, combine the dry ones: flour, baking soda, baking powder, salt, and spices. Combine both mixtures and fold in chocolate chips. Fill the muffin cups and bake at 350°F (175°C) for 18-20 minutes. You can find the full recipe for more details. Yes, you can use fresh pumpkin. First, cook the pumpkin until soft. Then, scoop out the flesh and mash it into a smooth puree. This fresh puree can replace canned pumpkin directly. Just make sure to drain any excess water for the best texture in your muffins. For baking, semi-sweet chocolate chips are a popular choice. They melt well and balance sweetness with rich chocolate flavor. Dark chocolate chips work too if you prefer a more intense taste. You can also use milk chocolate for a sweeter muffin. Choose what you love! These muffins stay fresh for about 2-3 days when stored at room temperature. Keep them in an airtight container to maintain moisture. If you want them to last longer, store them in the fridge for up to a week. Yes, you can make mini muffins using this recipe. Just adjust the baking time. Bake them for about 10-12 minutes, or until a toothpick comes out clean. Mini muffins are perfect for snacks or parties! You learned about making tasty pumpkin chocolate chip muffins from scratch. We covered key ingredients, step-by-step baking instructions, and storage tips. Plus, I shared ways to customize your muffins. Remember, baking is fun! Don’t worry if you make a mistake—just try again. Enjoy every bite of your muffins and share them with friends and family. Happy baking!

Pumpkin Chocolate Chip Muffins Irresistible Delight

If you love the taste of fall, you need to try these Pumpkin Chocolate Chip Muffins. They blend the warm,

To make this tasty dish, you need the following ingredients: - 8 chicken drumsticks - 1/2 cup soy sauce - 1/4 cup honey - 2 tablespoons rice vinegar - 2 cloves garlic, minced - 1 tablespoon fresh ginger, grated - 1 tablespoon sesame oil - 1 tablespoon cornstarch - 2 tablespoons water These ingredients create a rich and sweet teriyaki flavor that sticks to the chicken. The soy sauce adds saltiness, while honey brings sweetness. Fresh garlic and ginger give the dish a nice kick. To make your meal look great and taste even better, consider these garnishes: - 1 tablespoon sesame seeds (for garnish) - 2 green onions, finely chopped (for garnish) These garnishes add color and texture. They also enhance the flavor and make the dish more appealing. When picking ingredients, aim for the best quality. Fresh chicken drumsticks will taste better than frozen ones. Look for organic soy sauce, as it often has a deeper flavor. Always choose raw honey instead of processed honey. Fresh garlic and ginger will give you the most flavor. Using high-quality ingredients can elevate your dish. It shows in the taste and makes a big difference. To make the teriyaki marinade, start with a mixing bowl. Add 1/2 cup soy sauce, 1/4 cup honey, and 2 tablespoons rice vinegar. Next, include 2 cloves minced garlic and 1 tablespoon grated ginger. Finally, pour in 1 tablespoon sesame oil. Whisk all the ingredients together until they blend well. This marinade gives your chicken a sweet and savory flavor. Take 8 chicken drumsticks and place them in a large resealable bag or a shallow dish. Pour half of the teriyaki marinade over the chicken. Seal the bag or cover the dish tightly. Let the chicken marinate in the fridge for at least 1 hour. For best results, let it sit overnight. This step helps the flavors soak into the meat. Preheat your oven to 400°F (200°C). While it heats, remove the drumsticks from the marinade and place them on a lined baking sheet. Save the leftover marinade for later. Bake the drumsticks for 25 minutes. Flip them halfway to get even browning. While they bake, take the reserved marinade and bring it to a boil in a small saucepan. Mix 1 tablespoon cornstarch with 2 tablespoons water to make a slurry. Slowly whisk this into the boiling marinade. Cook for 2-3 minutes until the sauce thickens. After 25 minutes, brush the thickened glaze over each drumstick. Return them to the oven for another 10-15 minutes until they reach 165°F (74°C). Let them rest briefly, then garnish with sesame seeds and chopped green onions before serving. Enjoy your tasty teriyaki glazed chicken drumsticks! You can find the full recipe for more details. To get rich flavor in your teriyaki glazed chicken drumsticks, marinate them well. Use half of the marinade for at least one hour. If you can, let them sit overnight. This extra time lets the flavors soak in deeply. Always whisk the marinade well. Mix the soy sauce, honey, and other ingredients until smooth. This ensures even flavor across all drumsticks. Bake your drumsticks at 400°F (200°C) for the best results. This high heat helps the skin crisp up nicely. Turn the drumsticks halfway through the cooking time. This promotes even browning and prevents sogginess. For a shiny glaze, brush the thickened teriyaki sauce on the drumsticks right before the end of cooking. One common mistake is not using enough marinade. Ensure you have enough sauce to coat all drumsticks. Another mistake is skipping the marinating step. This can lead to bland chicken. Also, don’t forget to let the drumsticks rest after cooking. This step helps keep them juicy and flavorful. For a full recipe, check out the detailed steps in the previous sections. {{image_2}} You can adjust the teriyaki glaze to fit your taste. Try adding orange juice for a citrus twist. Pineapple juice also works well for a fruity flavor. For a richer taste, mix in some hoisin sauce. You can even use miso paste for added depth. Each option brings something unique to the dish. Experiment and see what you love! If you need a gluten-free version, swap soy sauce for tamari. Tamari tastes similar and works great in this recipe. You can also use coconut aminos as a soy sauce alternative. Both options keep the flavor bold while being gluten-free. Be sure to check all other ingredients for hidden gluten. This way, you can enjoy teriyaki chicken without worry. Want to add some heat? Mix in sriracha or chili paste with the marinade. Start with a teaspoon and add more to your liking. You can also toss in red pepper flakes for a spicy kick. This twist elevates the dish and makes it exciting. Pair this spicy version with cooling sides like cucumber salad. It’s a perfect balance of flavors! For the full recipe, check out the detailed instructions earlier in this article. Enjoy creating your own version of teriyaki glazed chicken drumsticks! After you enjoy your teriyaki glazed chicken drumsticks, store any leftovers right away. Place the drumsticks in an airtight container. Make sure the lid is tight to keep them fresh. You can store them in the fridge for up to four days. If you want to keep them longer, freezing is a great option. When you’re ready to eat your leftovers, reheating is easy. You can use the oven for the best taste. Preheat your oven to 350°F (175°C). Place the drumsticks on a baking sheet and cover them with foil. Heat for about 15-20 minutes until warm. You can also use a microwave if you're in a hurry. Just heat them for 1-2 minutes, but the oven gives a better glaze. To freeze your teriyaki glazed drumsticks, make sure they cool to room temperature first. Wrap each drumstick tightly in plastic wrap. Then, place them in a freezer bag or airtight container. Write the date on the bag so you remember when you froze them. They can last in the freezer for up to three months. When you’re ready to eat them, thaw in the fridge overnight before reheating. You should marinate chicken drumsticks for at least 1 hour. For deeper flavor, marinate them overnight. This time allows the chicken to absorb the teriyaki sauce well. The longer you marinate, the tastier the drumsticks will be. Yes, you can grill teriyaki glazed chicken drumsticks. Grilling adds a smoky flavor. Just preheat your grill to medium heat. Cook the drumsticks for about 25-30 minutes. Turn them often for even cooking. Brush with the teriyaki glaze during the last few minutes for a delicious finish. Teriyaki chicken goes well with many side dishes. Here are some ideas: - Steamed rice - Fried rice - Stir-fried vegetables - Asian slaw - Cucumber salad These sides balance the sweet and savory taste of the chicken. Yes, chicken thighs work well too. They are juicier and more flavorful. Just adjust the cooking time slightly, as thighs may take longer. Make sure they reach 165°F (74°C) for safety. To thicken the glaze, use cornstarch. Mix a tablespoon of cornstarch with two tablespoons of water. Add this mixture to your marinade while it simmers. Cook until it thickens to your liking. Absolutely! You can easily make teriyaki sauce at home. Combine soy sauce, honey, rice vinegar, garlic, and ginger in a pot. Simmer until combined. This makes a great base for your chicken. If you don’t have sesame oil, use vegetable oil instead. You can also use olive oil for a different flavor. It will still taste good but may lack that nutty taste from sesame oil. Use a meat thermometer to check the chicken. It should reach 165°F (74°C) in the thickest part. This ensures it is safe to eat. If you don't have a thermometer, cut into the chicken. The juices should run clear, not pink. For the full recipe on how to make teriyaki glazed chicken drumsticks, check out the [Full Recipe]. Teriyaki glazed chicken drumsticks are easy to make and delicious. You need quality ingredients and a good marinade. Remember to marinate the chicken well and cook it correctly for the best flavor. Use the tips to avoid common mistakes. You can even try different marinades to mix things up. Store leftovers properly to enjoy them later. With all these ideas, you'll impress everyone at your next meal. Get ready to enjoy some tasty drumsticks!

Teriyaki Glazed Chicken Drumsticks Simple and Tasty

Are you ready to savor the sweet and savory goodness of Teriyaki Glazed Chicken Drumsticks? This simple and tasty dish

- 1 ½ cups graham cracker crumbs - ½ cup unsalted butter, melted - 2 cups cream cheese, softened - 1 cup sugar - 2 large eggs - 1 tablespoon lemon zest - ½ cup fresh lemon juice - 1 teaspoon vanilla extract - 1 cup fresh blueberries (plus extra for garnish) - 1 tablespoon cornstarch When making Lemon Blueberry Cheesecake Squares, each ingredient plays a key role. The graham cracker crumbs form the crust, giving it a sweet crunch. Unsalted butter helps bind the crumbs together, creating a solid base. Cream cheese provides the creamy texture and rich flavor we love in cheesecake. Sugar sweetens the filling, balancing the tartness of lemon juice and zest. Eggs add structure, making the cheesecake firm yet creamy. Fresh lemon juice and zest bring a bright, zesty flavor that shines through. Vanilla extract adds warmth, enhancing the overall taste. The blueberries are the stars of this recipe, bursting with flavor and color. They add sweetness and a bit of tang. Cornstarch helps thicken the filling, ensuring it sets nicely. - For graham cracker crumbs, you can use crushed cookies or digestive biscuits. - For a dairy-free option, use dairy-free cream cheese or cashew cream. - If you want a lower sugar option, try honey or a sugar substitute like stevia. - 1 cup of graham cracker crumbs is about 120 grams. - If you want to make a smaller batch, you can cut the recipe in half. Adjust baking time if you make larger squares. First, preheat your oven to 325°F (165°C). Grease a 9x9-inch baking dish. You can also line it with parchment paper. This makes it easy to lift the cheesecake out later. Next, in a medium bowl, combine 1 ½ cups of graham cracker crumbs with ½ cup of melted unsalted butter. Mix well until the crumbs feel moist. Press this mixture firmly into the bottom of your baking dish. This forms a solid crust for your cheesecake. In a large bowl, beat 2 cups of softened cream cheese with 1 cup of sugar. Do this until it's smooth and creamy. This usually takes about 2-3 minutes on medium speed. Then, add in 2 large eggs, one at a time. Mix well after each egg. Next, mix in 1 tablespoon of lemon zest, ½ cup of fresh lemon juice, and 1 teaspoon of vanilla extract. Make sure everything is well blended. Carefully fold in 1 cup of fresh blueberries and 1 tablespoon of cornstarch. Be gentle so you don’t break the berries. Pour the cheesecake filling over the prepared crust. Spread it evenly with a spatula. Bake in the oven for 30-35 minutes. You want the edges set, but the center should still jiggle slightly. This means it’s not overcooked. Once baked, remove it from the oven. Let it cool at room temperature for a while. After that, refrigerate for at least 4 hours, or overnight if you can. This helps the cheesecake set completely. When ready, lift the cheesecake squares out of the dish using the parchment paper if you used it. Cut into squares and enjoy! For the full recipe, check out the details above. - Overmixing the cheesecake batter: When you mix, do it gently. Overmixing can add air and cause cracks. You want a smooth mix, but keep it simple. Just blend until combined. - Not allowing proper cooling time: After baking, let the cheesecake cool at room temp. Chilling it in the fridge is key. If you cut it too soon, it may fall apart. - Best toppings and garnishes: Fresh blueberries are a great choice. You can also use whipped cream or a light lemon glaze. Adding mint leaves adds a nice touch. - Pairing with drinks or sides: Lemonade or iced tea pairs well. For a fun twist, try a light sparkling wine. It adds a refreshing touch to your treat. - How to slice and serve the squares elegantly: Use a sharp knife to cut. Wipe the knife between cuts for clean edges. Serve on a nice platter for a great look. - Using garnishes for visual appeal: A dusting of powdered sugar can make a big difference. Place a few blueberries on each square. A sprig of mint adds a pop of color and freshness. For the complete recipe, check out the [Full Recipe]. {{image_2}} You can switch up the flavors in your Lemon Blueberry Cheesecake Squares. Try using raspberries, strawberries, or even blackberries. Each berry brings its own taste and color. You can also mix berries for a vibrant look. If you love chocolate, consider adding a chocolate layer or drizzle on top. This adds a rich taste that pairs well with the lemon and blueberry. Many people have dietary needs, so I offer gluten-free options. Use gluten-free graham cracker crumbs for the crust. This keeps it tasty for everyone. For those who follow a vegan diet, you can make a vegan cheesecake. Replace cream cheese with a vegan alternative like cashew cream. Use plant-based eggs or flax eggs. This way, everyone can enjoy these delicious squares. You can adapt the squares for any season. For holidays, try adding spices like cinnamon or nutmeg. This gives your squares a festive touch. In summer, you can use fresh fruits like peaches or cherries. These fruits add brightness and sweetness. No matter the season, you can make these squares special and fun! To keep your lemon blueberry cheesecake squares fresh, store them in an airtight container. This helps prevent them from drying out. You can also cover the dish tightly with plastic wrap. These squares will last in the fridge for up to five days. After that, they may lose some flavor and texture. If you want to enjoy these squares later, freezing is a great option. First, cut the cheesecake into squares. Place wax paper between layers to avoid sticking. Then, wrap each square in plastic wrap and place them in a freezer bag. These squares can stay frozen for up to three months. To thaw, move them to the fridge overnight. This keeps them creamy and tasty. If you prefer warm cheesecake squares, here’s how to heat them. Take a square and place it on a microwave-safe plate. Heat it for about 10-15 seconds. Check if it is warm enough for your liking. If not, heat in small bursts to avoid overheating. Once warmed, serve with fresh blueberries on top for a delightful presentation. A runny cheesecake can happen for a few reasons. First, you may have overmixed the batter. Mixing too much adds air, which can cause it to be runny. Second, not using enough cornstarch can lead to a loose filling. To fix this, mix in a little more cornstarch and blend gently. You can also try baking the cheesecake a bit longer to help it set. Yes, you can prepare these squares ahead of time! Make them up to two days in advance. After baking, let them cool completely. Then, cover them tightly with plastic wrap and store them in the fridge. This allows the flavors to meld, making them even tastier! If you need a substitute for cream cheese, try using Greek yogurt or ricotta cheese. Both options provide a creamy texture. For a vegan choice, silken tofu works well. Blend it until smooth, then add a bit of lemon juice for tanginess. Check for signs of doneness while baking. The edges should look set, but the middle can still jiggle slightly. As it cools, the center will firm up. You can also insert a toothpick into the center; if it comes out mostly clean, it's done. Yes, frozen blueberries can work in this recipe. They may release more juice during baking, so expect a slightly different texture. To help with this, you can toss the frozen berries in a bit of cornstarch before adding them to the batter. This helps absorb some of the extra moisture. You now have a complete guide for making Lemon Blueberry Cheesecake Squares. By following the steps, you can create a delicious treat. Remember to consider ingredient swaps and measurements for your needs. Avoid common mistakes to ensure the best results. Store your cheesecake properly to keep it fresh. Feel free to try variations to make it your own. Enjoy making this dessert and impressing those around you. Happy baking!

Lemon Blueberry Cheesecake Squares Delightful Sweet Treat

Craving a dessert that combines tangy lemon and sweet blueberries? You’re in the right place! My Lemon Blueberry Cheesecake Squares

- 1 cup quinoa, rinsed - 2 cups vegetable broth - 1 can (15 oz) black beans, rinsed and drained - 1 cup corn (fresh, frozen, or canned) - 1 red bell pepper, diced - 1 small red onion, finely chopped - 1 jalapeño, seeded and minced - 1 cup cherry tomatoes, halved - 1 avocado, diced - 1/4 cup fresh cilantro, chopped - 3 tablespoons lime juice - 2 tablespoons olive oil - 1 teaspoon cumin - 1 teaspoon smoked paprika - Salt and pepper to taste For the Spicy Southwest Quinoa Salad, I focus on fresh and vibrant ingredients. Quinoa serves as a nutritious base. The vegetable broth adds depth of flavor. Black beans offer protein and fiber, while corn brings sweetness. Diced red bell pepper adds crunch and color. Next, I incorporate more texture. The small red onion gives a mild bite. A minced jalapeño enhances the heat for a spicy kick. Halved cherry tomatoes pop with juiciness, and diced avocado lends creaminess. Finally, fresh cilantro ties it all together with an herbal note. The dressing is simple yet zesty. Lime juice brightens the salad. Olive oil adds richness, and cumin with smoked paprika brings warmth. A sprinkle of salt and pepper rounds out the flavors. Check out the Full Recipe for detailed steps on mixing these ingredients into a delicious meal. - Combine rinsed quinoa and vegetable broth in a medium saucepan. - Bring to a boil, then simmer, cover, and cook for 15 minutes. Let the quinoa absorb the broth until fluffy. This step is key for great flavor. - In a large bowl, combine black beans, corn, red bell pepper, onion, jalapeño, tomatoes, and avocado. - Stir in the cooled quinoa. This mix creates a colorful and tasty base. - Whisk together lime juice, olive oil, cumin, smoked paprika, salt, and pepper. - Pour the dressing over the salad and toss. This dressing adds a zesty kick. - Gently fold in chopped cilantro. - Allow the salad to rest for at least 15 minutes. Resting helps flavors blend well. For the full recipe, check the earlier section! Enjoy your fresh and spicy salad! - Use fresh ingredients for the best taste. - Allow the salad to rest to let flavors meld. Using fresh ingredients makes a big difference. Fresh veggies pop with flavor and texture. Ripe tomatoes, crunchy peppers, and zesty cilantro bring life to the dish. A few minutes of rest after mixing lets the flavors blend. This step makes each bite even tastier. - Select ripe avocados for creaminess. - Optionally, add nuts or seeds for crunch. Ripe avocados add a smooth creaminess that complements the salad's other textures. Choose ones that yield slightly when pressed. For a fun twist, consider adding nuts or seeds. Toasted pumpkin seeds or chopped walnuts add a great crunch. - Serve chilled or at room temperature. - Garnish with cilantro and lime wedges. This salad is versatile. Serve it chilled for a refreshing meal or at room temp for a casual vibe. Garnishing with fresh cilantro and lime wedges adds a bright finish. It not only looks good but also enhances the flavor. For the full recipe, check out the instructions above. {{image_2}} You can keep the salad vegan by using the original ingredients. This salad is already packed with flavor and nutrients. If you want more protein, consider adding tofu. Tofu absorbs flavors well, making it a great choice. If you eat meat, try adding grilled chicken or shrimp. These options will enhance the protein content. Black olives are another tasty addition for flavor. They add a salty kick that pairs well with the other ingredients. Want to switch things up? Substitute lime juice with lemon juice for a fresh twist. This change brightens the salad in a new way. You can also add spices like chili powder for extra heat. Adjust the spice level to fit your taste. To keep your Spicy Southwest Quinoa Salad fresh, store it in an airtight container. This helps keep out air and moisture. The salad tastes best when eaten within three days. After that, the flavors may fade, and the veggies may get soggy. If you need to save it for later, you can freeze the salad. However, freezing can change the texture of some ingredients. To thaw, place it in the fridge overnight. Before serving, stir it well to mix the flavors. Meal prepping is a smart way to save time. Make a double batch of the salad for easy lunches or dinners. Store the dressing in a separate container to keep the salad crisp. Combine everything right before you eat to enjoy the best taste. For the full recipe, refer to the complete guide above. The total time to make this salad is 30 minutes. You’ll spend about 15 minutes prepping the ingredients. This recipe serves 4 to 6 people, so it’s perfect for sharing. Yes, you can make this salad ahead of time. Just store it in the fridge. The flavors will blend well if you let it sit for a few hours or even overnight. If you don’t have quinoa, try brown rice or farro. Both options have a nice texture and flavor. They work well with the other ingredients in the salad. Yes, this salad is gluten-free. All the ingredients used are naturally gluten-free. This makes it a great choice for anyone with gluten sensitivities. You can boost the protein by adding canned chickpeas or grilled chicken. Feta cheese also adds a nice touch. Each option complements the salad's flavors well. For the full recipe, check out the detailed instructions and ingredients list. This blog post covered everything you need to know about Spicy Southwest Quinoa Salad. You learned about its key ingredients, step-by-step instructions for making it, and tips for enhancing flavor and texture. Remember, you can tweak this recipe to fit your taste, whether it's adding protein or trying new spices. Simple storage tips help you enjoy leftovers easily. This salad is fresh, tasty, and perfect for any meal. Try it out and enjoy a healthy, flavorful dish!

Spicy Southwest Quinoa Salad Flavorful and Healthy Dish

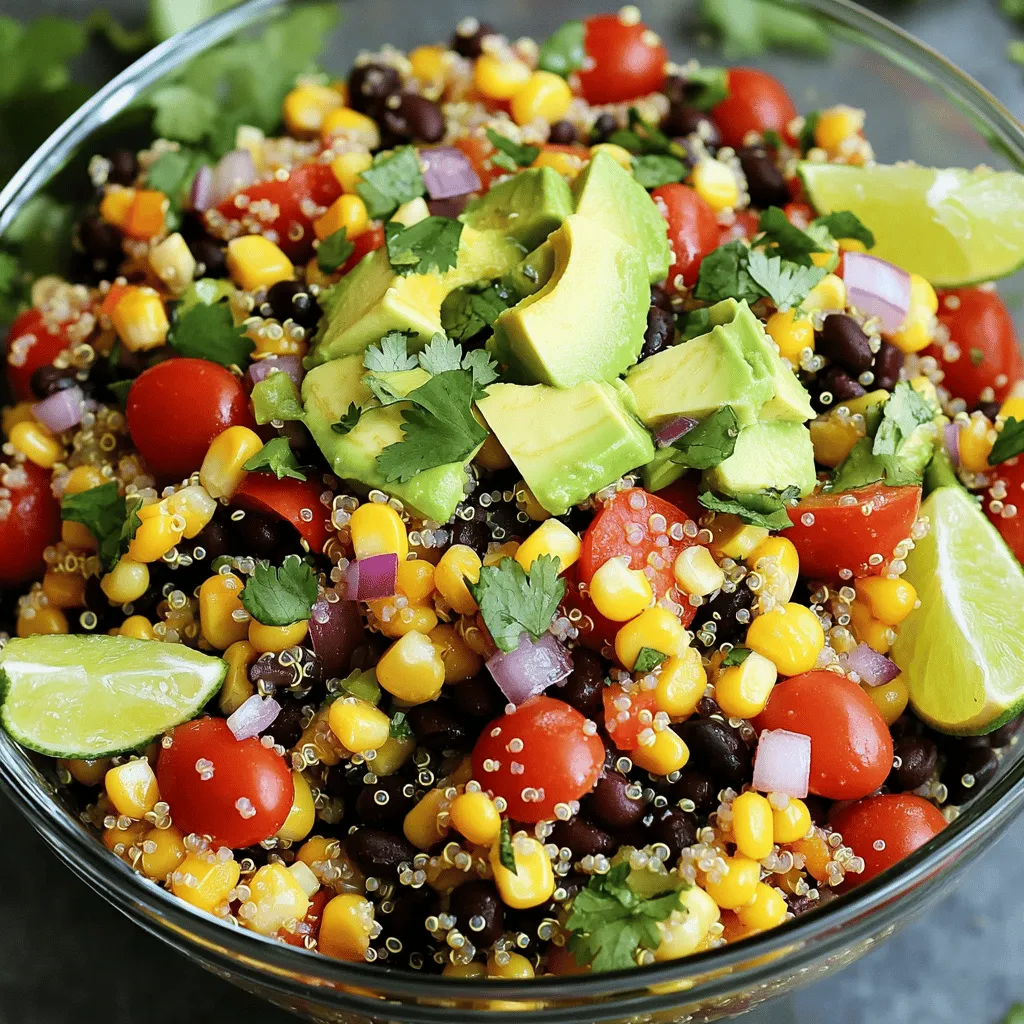
Looking for a fresh and exciting dish that packs a punch? The Spicy Southwest Quinoa Salad is your answer! This

- 1 pound Brussels sprouts, trimmed and halved - 3 cloves garlic, minced - 1 cup heavy cream - 1 cup grated Parmesan cheese - 1 tablespoon olive oil - 1/2 cup breadcrumbs (preferably panko for extra crunch) - 2 tablespoons unsalted butter, melted - 1/2 teaspoon nutmeg - Salt and pepper to taste - Fresh parsley, chopped Using fresh ingredients makes a big difference in taste. The Brussels sprouts should be firm and bright green. Look for garlic that feels plump and has a strong smell. Heavy cream adds richness, while Parmesan gives a nutty flavor. Panko breadcrumbs add a nice crunch, making your gratin stand out. You can adjust the amount of garlic based on your taste. If you love garlic, feel free to add more! Nutmeg gives a warm flavor to the cream. Just a little adds a nice touch. For garnish, fresh parsley adds color and freshness. It complements the rich flavors well. For the full recipe, check out the complete details. This dish is perfect for gatherings or cozy family dinners. Enjoy cooking! First, trim the Brussels sprouts. Cut off the stem ends and remove any yellow leaves. Next, halve each sprout. This helps them cook evenly. Now, bring a large pot of salted water to a boil. Add the halved Brussels sprouts and blanch them for about 3-4 minutes. They should be slightly tender but still bright green. Drain them well and set aside. This step helps keep them fresh and tasty. In a large skillet, heat the olive oil over medium heat. Once hot, add the minced garlic. Sauté the garlic for 1-2 minutes until it smells great, but don't let it burn. Next, lower the heat and pour in the heavy cream. Stir in half of the grated Parmesan cheese and the nutmeg. Season with salt and pepper. Let this mixture simmer for 3-4 minutes until it thickens just a bit. Add the blanched Brussels sprouts to the skillet. Gently mix them with the creamy sauce until they are well coated. Now, transfer the Brussels sprout mixture to a greased baking dish. In a small bowl, combine the breadcrumbs, melted butter, and the rest of the Parmesan cheese. Mix until the breadcrumbs are well coated. Sprinkle this mixture evenly over the Brussels sprouts in the baking dish. Bake in your preheated oven at 375°F (190°C) for 20-25 minutes. The top should turn golden brown and bubbly. Once it’s out of the oven, let it cool for a few minutes. Then, garnish with fresh chopped parsley before serving. For the full recipe, refer to the beginning of this article. To keep your cream smooth, avoid boiling it too much. Heat it gently instead. This helps prevent curdling, which can ruin the texture. Always use fresh cream for the best results. When it comes to Parmesan, choose a good quality block cheese. Grating it fresh makes a big difference in flavor and creaminess. Want to spice it up? Try adding a pinch of cayenne or smoked paprika for warmth. You can also mix in fresh herbs like thyme or rosemary for more aroma. For a different twist, substitute half of the Parmesan with Gruyère. This cheese melts beautifully and adds a nutty flavor. For a crispy topping, use panko breadcrumbs. They toast up lighter and crunchier than regular ones. Mix them with melted butter and the last bit of Parmesan for extra richness. Be sure to spread the topping evenly. This helps the gratin bake evenly and brown nicely. Check it around the 20-minute mark. Look for a golden-brown top to know it’s ready. {{image_2}} You can make this dish more colorful by adding other veggies. Try adding mushrooms, spinach, or cauliflower. Each brings a unique taste. If you want a vegan version, switch out the Parmesan cheese for a vegan alternative. Nutritional yeast or cashew cheese can work well. They add a cheesy flavor without dairy. For a gluten-free option, replace the breadcrumbs with crushed nuts or gluten-free oats. They add a nice crunch, too. You can also use cornstarch or arrowroot powder as thickening agents. Both help create a creamy sauce without gluten. To add more depth to the dish, consider including proteins like crispy bacon or grilled chicken. They give a hearty feel. You can also spice things up with fresh herbs like thyme or rosemary. A pinch of red pepper flakes can bring a nice kick. To store leftovers, let the gratin cool first. Then, place it in an airtight container. This keeps it fresh. I recommend using glass containers for easy heating. They also won’t stain. Store in the fridge for up to three days. To freeze the gratin, let it cool completely. Then, wrap it tightly with plastic wrap. Place the wrapped gratin in a freezer-safe bag. This helps prevent freezer burn. For reheating, thaw it overnight in the fridge. Then, bake it at 350°F (175°C) until heated through. In the fridge, this dish stays fresh for about three days. Signs of spoilage include a sour smell or mold. If you notice any of these, it's best to toss it out. Always check before serving. Enjoy your Creamy Garlic Parmesan Brussels Sprout Gratin from the Full Recipe! Yes, you can make this dish ahead of time. Prepare the gratin but do not bake it. Cover it and store it in the fridge for up to two days. When you’re ready to serve, just bake it straight from the fridge. This makes meal prep easy! If you freeze it, wrap it tightly. It should last for about a month. To reheat, bake it at 375°F (190°C) until heated through, about 30-40 minutes. This gratin goes well with many dishes. You can serve it with roasted chicken or grilled steak. It also pairs nicely with a fresh salad or some crusty bread. If you want a vegetarian meal, serve it alongside quinoa or rice. These options balance the rich flavors of the gratin. You can tell the gratin is done when the top is golden brown and bubbly. The edges should look slightly crisp. Insert a knife into the center; it should go in easily. If it feels firm, give it a few more minutes. Keep an eye on it to avoid burning. Enjoy this creamy dish! This blog post covered how to make Creamy Garlic Parmesan Brussels Sprout Gratin. We detailed the main ingredients, like Brussels sprouts, garlic, and cream. Next, we walked through step-by-step instructions for prepping, making the sauce, and baking. We shared tips for texture and flavor, plus variations for different diets. Finally, we discussed storage options. Enjoy this tasty dish as a side or a main meal. It’s simple, delicious, and perfect for many occasions. Happy cooking!

Creamy Garlic Parmesan Brussels Sprout Gratin Delight

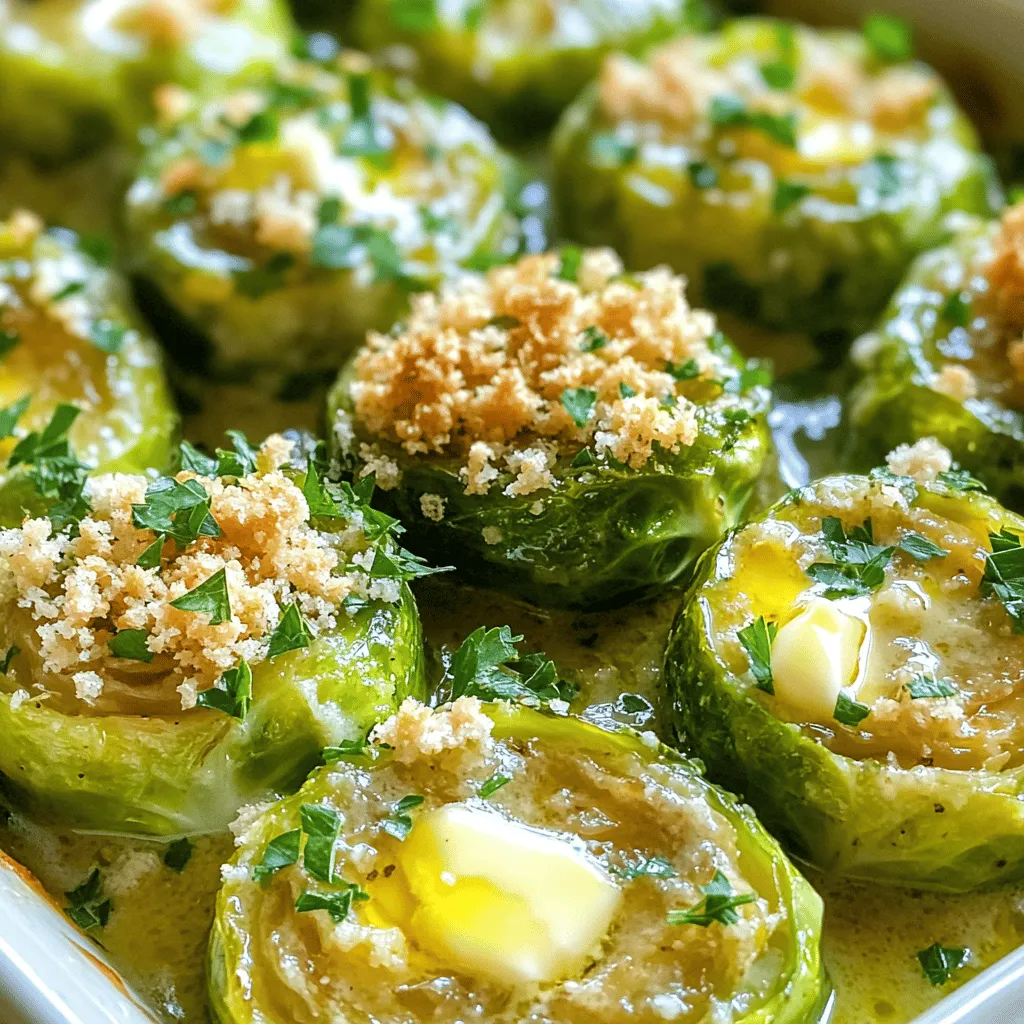
Discover the creamy, cheesy goodness of my Creamy Garlic Parmesan Brussels Sprout Gratin! If you think Brussels sprouts can’t be

- 1 ripe mango, diced - 2 avocados, diced - 1 small red onion, finely chopped - 1 small jalapeño, deseeded and minced - 2 tablespoons fresh lime juice - 1 tablespoon honey (optional) - 1/4 cup fresh cilantro, chopped - Salt and pepper to taste Gathering the right ingredients makes all the difference. For the main ingredients, start with a ripe mango. Choose one that is slightly soft to the touch. This means it's sweet and ready. Then, select two ripe avocados. They should also yield gently when pressed. Next, grab a small red onion. The onion adds a nice crunch and a sharp flavor. For the additional ingredients, you will need a small jalapeño. If you want some spice, keep the seeds. If you prefer it mild, remove them. Fresh lime juice adds brightness and keeps the avocado green. Honey is optional but can add a hint of sweetness if you like. Finally, fresh cilantro brings a fresh note. Add salt and pepper to taste. These simple ingredients come together to form a vibrant and delicious salsa. You can find the full recipe above for detailed instructions. To start, you need to prepare the mango and avocados. - Dicing mango and avocados: Take 1 ripe mango and cut it into small cubes. Then, grab 2 avocados, slice them, and remove the pit. Dice the avocado into similar-sized pieces as the mango. This helps in mixing later. Place both fruits in a large mixing bowl. - Chopping red onion: Next, take 1 small red onion. Finely chop it and add the pieces to your bowl. The onion adds a nice crunch and flavor to the salsa. Now that the ingredients are prepped, it’s time to mix. - Incorporating jalapeño and lime juice: Take a small jalapeño, deseed it, and mince it. Add it to the bowl for some heat. Squeeze 2 tablespoons of fresh lime juice over the mix. This keeps the avocados from browning and adds a zesty kick. - Folding in honey (if using): If you like a touch of sweetness, add 1 tablespoon of honey. Gently fold all the ingredients together. Be careful not to mash the avocados; you want them to stay chunky. You are almost done! Let’s add the final ingredients. - Adding cilantro and seasoning: Chop 1/4 cup of fresh cilantro and sprinkle it into the bowl. Season with salt and pepper to taste. Toss everything gently to combine. - Allowing flavors to meld: Let the salsa sit for about 10-15 minutes. This waiting time allows the flavors to blend and become even more delicious. This simple process gives you a fresh and vibrant mango avocado salsa that brightens any meal. For the complete recipe, check out the Full Recipe section. How to choose ripe mangoes? Pick mangoes that give slightly when you press them. They should smell sweet near the stem. Color varies, but avoid green ones. Look for a mix of yellow and red hue for ripeness. Perfect avocados for salsa. Choose avocados that yield to gentle pressure. They should be dark and smooth. If they are too hard, let them ripen at room temperature. Use them when they are soft but not mushy. Best pairings with the salsa. Mango avocado salsa shines with tortilla chips. It also pairs well with grilled chicken or fish. You can even use it as a topping on tacos. The fresh taste adds a fun twist to any dish. Creative serving ideas. Serve the salsa in a hollowed-out avocado for a stunning look. You can also place it on a bed of greens for a fresh salad. Another idea is to mix it with quinoa for a wholesome bowl. Storing salsa in the fridge. Keep salsa in an airtight container. It will last about two days in the fridge. If you see browning on the avocado, it’s still safe to eat. Just stir it before serving. Best practices for keeping the ingredients fresh. Store mangoes and avocados at room temperature until ripe. Once ripe, keep avocados in the fridge to slow down browning. Use lemon or lime juice to help maintain freshness in your salsa. For a full recipe, check out the details above! {{image_2}} You can make mango avocado salsa even more exciting. One way is to add fruits like pineapple or peach. These fruits bring a sweet twist that blends well with the mango. You can also try adding spices for heat. A dash of cayenne or some chili powder can kick it up a notch. This makes the salsa zesty and fun! If you want to switch things up, consider alternatives for jalapeño. You can use bell peppers for a milder taste. If you like spicy but need a different flavor, try serrano peppers. For those who prefer vegan options for honey, maple syrup works great. It adds sweetness without any animal products. You can create themed salsas for different occasions. For a tropical twist, mix in some shredded coconut. This adds a chewy texture and enhances the fruity flavor. If you want a Mexican-inspired version, throw in corn and black beans. This makes your salsa heartier and perfect for a fiesta. Try the [Full Recipe] to explore these fun variations on mango avocado salsa and enjoy the fresh flavors! Each serving of this Mango Avocado Salsa has about 150 calories. This makes it a light and tasty option for any meal. You can enjoy it without feeling guilty. Mangoes and avocados are both superfoods. They offer many health perks. Mangoes are rich in vitamin C, which helps your immune system. They also provide vitamin A for good vision. Avocados are packed with healthy fats that support heart health. They also contain potassium, which is great for muscle function. Together, these ingredients make a nutritious salsa. This salsa is gluten-free and vegetarian. It fits many diets. If you want to lower the carbs, skip the honey. You can also use less mango to cut down on sugar. This way, you can enjoy a fresh and healthy dish that suits your needs. Mango avocado salsa will last about 2 to 3 days in the fridge. To keep it fresh, store it in an airtight container. The lime juice helps slow down browning, but the avocados will still darken over time. If you notice browning, simply give it a stir. The flavor will still be good! Yes, you can make the salsa a day before. Just prepare the ingredients and combine them. Store it in the fridge to keep it fresh. Let the salsa sit for about 15 minutes before serving. This helps the flavors blend nicely. You can also add the avocado closer to serving time to keep it bright and green. Mango avocado salsa is very versatile. You can serve it with tortilla chips for a fun snack. It pairs well with grilled fish or chicken, adding a fresh twist to your meal. You can also use it in tacos or on top of salads. It’s a great way to add color and flavor to any dish! For the full recipe, check out the Tropical Bliss Mango Avocado Salsa. This blog post covered how to make mango avocado salsa. We explored key ingredients like ripe mango, avocados, and red onion. I shared tips for dicing and mixing these fresh flavors. You learned about variations and how to store leftovers. Remember, this salsa is versatile. It pairs well with many dishes and adds a tasty touch to any meal. Try it with your favorite foods or create your own spin. Fresh ingredients make all the difference. Enjoy the fun of making this vibrant dish!

Mango Avocado Salsa Fresh and Flavorful Delight

Are you ready to boost your snack game? In this post, I’ll show you how to make a Mango Avocado

To make the savory spinach feta stuffed salmon, gather these ingredients: - 4 salmon fillets (6 oz each) - 2 cups fresh spinach, chopped - 1 cup feta cheese, crumbled - ½ cup cream cheese, softened - 2 cloves garlic, minced - 1 tablespoon lemon juice - 1 teaspoon dried oregano - 2 tablespoons olive oil - Salt and pepper to taste - Lemon slices (for garnish) You can try these options for a unique twist: - Substitute goat cheese for feta. - Add sun-dried tomatoes for extra flavor. - Include fresh herbs like dill or parsley. - Mix in chopped artichokes for added texture. This dish offers great nutrition: - Calories: Approximately 450 per serving - Protein: 40g - Carbohydrates: 6g - Fat: 30g - Fiber: 2g - Sodium: About 600mg This recipe is not only tasty but also provides good protein and healthy fats. You can find the full recipe in the main article. Start by gathering your ingredients. You need salmon fillets, fresh spinach, feta cheese, cream cheese, garlic, lemon juice, oregano, olive oil, salt, and pepper. Preheat your oven to 375°F (190°C). Next, heat one tablespoon of olive oil in a skillet over medium heat. Add the minced garlic and cook it for about one minute. When the garlic smells good, add the chopped spinach. Cook the spinach until it wilts, about 2-3 minutes. Once done, remove the skillet from heat and let it cool a bit. In a mixing bowl, combine the sautéed spinach with feta cheese, cream cheese, lemon juice, oregano, salt, and pepper. Mix it all well. Now, let’s prepare the salmon. Make a slit on the top side of each salmon fillet. This creates a pocket to hold the stuffing. Spoon the spinach and feta mixture into each pocket. Press it down gently to keep it secure. Heat the remaining tablespoon of olive oil in an oven-safe skillet over medium-high heat. Carefully place the stuffed salmon fillets in the skillet. Sear them for about 3-4 minutes on one side until they turn golden brown. After that, flip the fillets over. Transfer the skillet to your preheated oven and bake for 10-12 minutes. The salmon is ready when it flakes easily with a fork. Let it rest for a couple of minutes before serving. To achieve flaky salmon, start with fresh fillets. Always check for bones before cooking. Use gentle heat when cooking, and avoid overcooking. Salmon is done when it reaches an internal temperature of 145°F (63°C). Letting it rest allows the juices to settle, enhancing the flavor. Cook the salmon until it just flakes apart. This method keeps it moist and tender. You can serve it on a white platter with lemon slices for a fresh touch. For the full recipe, check the details above. When making spinach feta stuffed salmon, watch out for a few key issues. First, do not overcook the salmon. It should flake easily but remain moist. Second, avoid stuffing too much filling. The salmon may burst during cooking. Lastly, make sure to season properly. Salt enhances the flavors of the spinach and feta. To achieve perfect stuffed salmon, start with fresh ingredients. Use bright green spinach and creamy feta for the best taste. Make sure the salmon fillets are even in size. This ensures they cook at the same rate. When you stuff the salmon, press gently but firmly. This keeps the filling secure while cooking. Searing the salmon first adds a crispy texture, which you will love. Pair your stuffed salmon with simple sides for a great meal. Here are a few ideas: - Quinoa salad with cherry tomatoes and cucumber - Roasted asparagus with lemon zest - Garlic mashed potatoes for creamy comfort - Steamed broccoli drizzled with olive oil These sides balance the flavors of the salmon. They add color and nutrition to your plate. For a full experience, check out the Full Recipe for more ideas. Enjoy! {{image_2}} You can change the cheese for a new taste. Try goat cheese for a tangy flavor. Cream cheese adds creaminess but keeps the dish rich. For a milder option, use ricotta cheese. Each cheese gives the dish a unique twist. This lets you enjoy stuffed salmon in many ways. Adding herbs and spices can change your dish. Fresh dill or parsley brightens the flavors. If you like spice, try red pepper flakes or smoked paprika. These can bring warmth and depth to the dish. Mix and match to find your favorite blend of flavors. You can use other fish if salmon is not your choice. Try using trout for a similar taste. Cod is another great option, as it holds up well. Each fish brings its own flavor and texture. Feel free to experiment with any fish you enjoy. To keep your stuffed salmon fresh, place it in an airtight container. Make sure it cools first. Store it in the fridge. It should last for up to three days. If you have extra filling, store it separately. This helps keep the flavors fresh. When you want to enjoy leftover salmon, preheat your oven to 350°F (175°C). Place the salmon on a baking sheet. Cover it lightly with foil to keep it moist. Heat it for about 15-20 minutes. Check to see if it is heated through. You can also use the microwave, but be careful not to overcook it. If you want to freeze the stuffed salmon, wrap each fillet tightly in plastic wrap. Then, place it in a freezer-safe bag. Make sure to remove as much air as possible. This helps prevent freezer burn. You can freeze it for up to three months. When ready to eat, thaw it in the fridge overnight before reheating. For the best results, consider freezing the salmon before cooking. If you want to swap feta cheese, try goat cheese. It has a creamy texture and tangy taste. You can also use ricotta cheese for a milder flavor. Cream cheese works too, but it lacks the saltiness of feta. Choose based on what you like best! Yes, you can prep this dish ahead. Stuff the salmon and cover it. Keep it in the fridge for up to 24 hours. When ready, cook it as directed. This saves time and still tastes great! To check if the salmon is cooked, look for flaky texture. Use a fork to gently flake the fish. It should easily come apart. The color should change from bright pink to opaque. An internal temperature of 145°F (63°C) is perfect for safety. Many sides pair nicely with this salmon. Consider serving steamed asparagus or a fresh salad. Quinoa or rice can add a nice touch too. For a tasty finish, add a slice of lemon on top! Enjoy your meal! This blog post covered the key steps to create Spinach Feta Stuffed Salmon. We discussed ingredients, preparation, and cooking techniques to ensure your salmon is flaky. You learned tips to avoid common mistakes and ways to add your own twist. We also explored storage methods for leftovers and answers to frequent questions. Remember, cooking should be fun! With these guidelines, you can impress anyone at your next meal.

Savory Spinach Feta Stuffed Salmon Delight Recipe

If you crave a dish that’s both simple and delicious, you’ll love my Savory Spinach Feta Stuffed Salmon Delight Recipe.

- 4 salmon fillets (6 oz each) - 4 tablespoons unsalted butter - 4 cloves garlic, minced - 1 tablespoon fresh parsley, chopped - 1 tablespoon fresh dill, chopped - 1 tablespoon fresh thyme, chopped - Juice of 1 lemon - Zest of 1 lemon - Salt and pepper to taste - Lemon slices for garnish - Fresh herbs for garnish (optional) When you start making Garlic Butter Herb Salmon, gather these ingredients first. You need fresh salmon fillets, which have a nice pink color. The butter adds richness, while garlic gives it a strong flavor. Fresh herbs bring brightness to the dish. I love using parsley, dill, and thyme for their unique tastes. Don’t forget the lemon! The juice and zest add a fresh and tangy note. Salt and pepper enhance all the flavors. You can use lemon slices as a pretty garnish. Fresh herbs can also add color and taste. For the full recipe, follow the steps I laid out after this section. Every ingredient plays a role in making this dish both tasty and beautiful. Let’s get cooking! - Preheat oven to 400°F (200°C). - Prepare a lined baking sheet for the salmon. Start by preheating your oven. This step ensures your dish cooks evenly. While the oven warms up, take a baking sheet and line it with parchment paper. This helps with easy cleanup and keeps the salmon from sticking. - Melt butter in a saucepan. - Sauté garlic until fragrant. - Mix in herbs and lemon flavorings. Next, melt the butter in a small saucepan over medium heat. Once melted, add the minced garlic. Sauté it for about 1-2 minutes until it smells great. Be careful not to let it brown. After that, remove the saucepan from heat. Stir in the chopped parsley, dill, thyme, lemon juice, lemon zest, salt, and pepper. This mix becomes your garlic herb butter sauce. - Brush fillets with garlic herb butter. - Bake for 12-15 minutes. - Check for doneness and rest before serving. Now, place the salmon fillets on the lined baking sheet. Brush each fillet with the garlic herb butter sauce you made. Make sure to coat them well. Pour any leftover sauce over the fillets. Place the sheet in the preheated oven and bake for 12-15 minutes. Salmon is done when it flakes easily with a fork and reaches 145°F (63°C). After baking, let the salmon rest for a minute. This helps keep it juicy. Enjoy this flavorful dish! For the complete recipe, check the Full Recipe link. To check the salmon for doneness, use a fork. Gently poke the salmon fillet. If it flakes easily, your salmon is done. The internal temperature should reach 145°F (63°C). A meat thermometer can help with accuracy. Let the salmon rest for a minute after baking. Resting allows the juices to settle. This helps keep the salmon moist and flavorful. You can add more flavor with some optional ingredients. Consider adding capers for a briny kick. A splash of white wine can also enhance the sauce. These additions can elevate the dish. For sides, I recommend simple and fresh options. Steamed asparagus or green beans pair nicely. A light salad with lemon vinaigrette complements this dish well. Garnishing can make your dish look even better. Use lemon slices and fresh herbs like parsley or dill. This adds color and freshness to your plate. When serving, place the salmon on a clean plate. Drizzle any leftover garlic herb butter over the top. This creates an inviting and flavorful presentation. {{image_2}} You can use different types of salmon for this dish. Sockeye or Coho salmon works well. Each has its own taste and texture. Salmon steaks offer a thick cut, while fillets are thin and easy to cook. Steaks may take a bit longer to cook, so adjust your time. Feel free to play with the herbs and spices. Basil, oregano, or cilantro can change the flavor profile. If you like heat, add red pepper flakes for a spicy kick. A pinch goes a long way, so start small. You can grill or bake the salmon. Grilling gives a nice smoky flavor. Baking is easier and keeps the salmon moist. Poaching is another great choice. It keeps the fish tender and allows it to soak up flavors. Each method brings out different tastes in the salmon. For the full recipe, check out the Garlic Butter Herb Salmon recipe. To keep your Garlic Butter Herb Salmon fresh, place it in an airtight container. This helps avoid any strong smells in the fridge. You should store the salmon within two hours of cooking. If you do this, the salmon will stay tasty. You can keep it in the fridge for up to three days. When it's time to enjoy your leftovers, you can reheat salmon in a few ways. The oven works great for this. Preheat it to 300°F (150°C) and place the salmon on a baking sheet. Cover it with foil to keep it moist. Heat for about 10-15 minutes until warm. You can also use the microwave. Just cover the salmon with a paper towel and heat for 30 seconds at a time. This helps prevent dryness. Keep an eye on it so you don't overcook it. If you want to save some for later, you can freeze Garlic Butter Herb Salmon. First, let it cool completely. Then, wrap each fillet in plastic wrap. After that, place the wrapped fillets in a freezer bag or container. This method keeps the flavor and texture nice. You can freeze it for up to three months. When you're ready to eat, thaw it in the fridge overnight. This slow method helps keep it juicy and delicious. The ideal temperature for cooking salmon is 145°F (63°C). This ensures that the fish is safe to eat and still moist. If you prefer a more tender texture, you can take it out at 140°F (60°C). Cooking at 400°F (200°C) in the oven works well for this recipe. It cooks quickly and gives a nice crust. Yes, you can use frozen salmon. Just thaw it in the fridge overnight. If you’re short on time, you can also thaw it in cold water for about an hour. Be sure to pat it dry before cooking. This helps the garlic butter sauce stick better. Some great side dishes include: - Garlic mashed potatoes - Steamed asparagus - Roasted vegetables - Quinoa salad - Rice pilaf These sides balance the rich taste of the salmon. They also add color and nutrients to your meal. Garlic Butter Herb Salmon lasts about 3 days in the fridge. Store it in an airtight container to keep it fresh. Be sure to reheat gently to avoid drying it out. Enjoy your delicious leftovers! For the complete recipe, check out the Full Recipe. In this post, we explored how to make Garlic Butter Herb Salmon, detailing each ingredient and step. We discussed tips for perfecting the cooking process and suggested delicious variations. You learned about storing leftovers and reheating them without losing flavor. Remember, cooking should be fun and creative. Use this recipe as a base, but feel free to explore new ideas. Don't hesitate to experiment with flavors and techniques. Happy cooking!

Garlic Butter Herb Salmon Flavorful and Easy Recipe

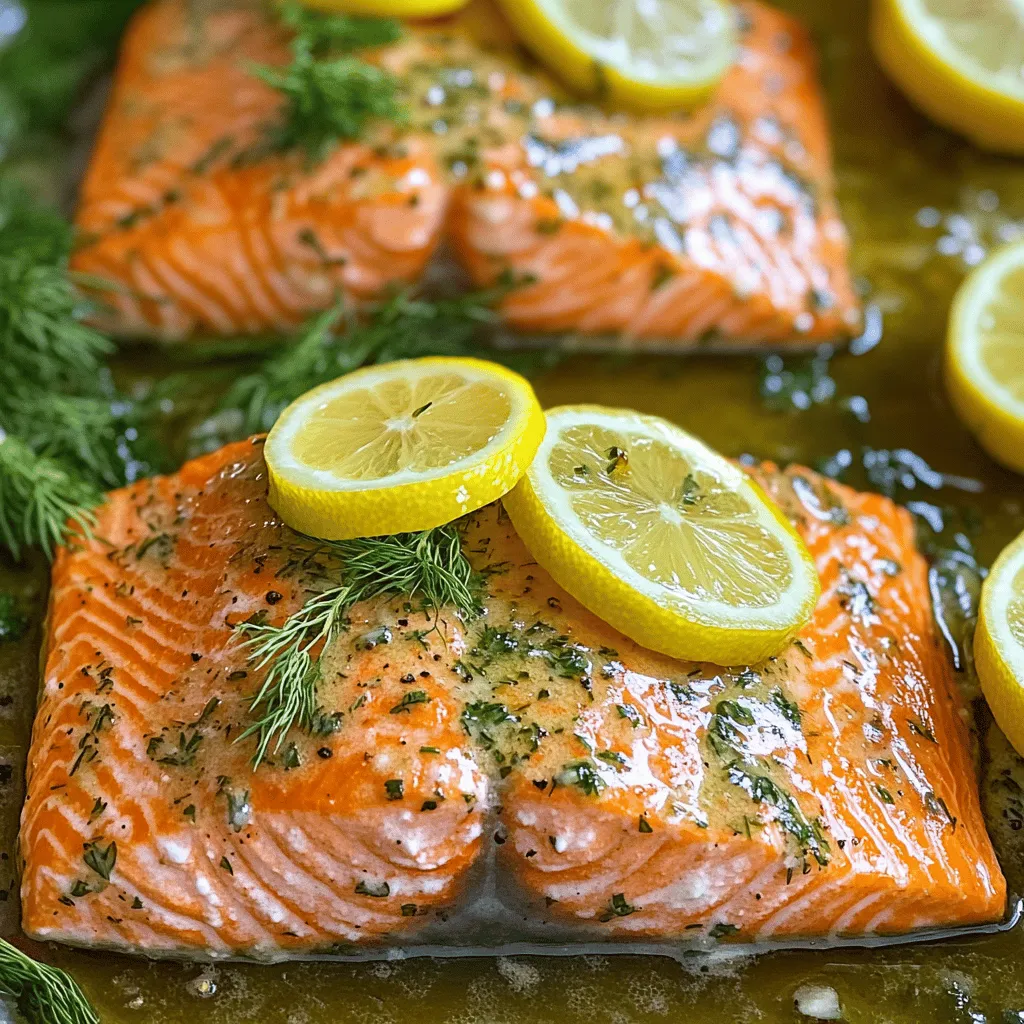
Are you ready to savor a dish that’s both flavorful and easy to make? Garlic Butter Herb Salmon combines the

- 1 cup all-purpose flour - 2 large eggs - 1 ½ cups milk - 2 tablespoons melted butter - 2 tablespoons sugar - ½ teaspoon vanilla extract - ½ teaspoon salt - ½ cup chocolate hazelnut spread - 1/4 cup roasted hazelnuts, crushed - Powdered sugar for dusting - Fresh berries (optional, for garnish) Finding the right ingredients is key to making great chocolate hazelnut crepes. You can easily find all these items at your local grocery store. I love using fresh eggs and whole milk for the best flavor. The chocolate hazelnut spread is the star of the show, so choose a quality brand that you enjoy. Roasted hazelnuts add a nice crunch, which I recommend for texture. - For all-purpose flour, you can use whole wheat flour or a gluten-free blend. - If you need dairy-free options, almond milk or oat milk works well. Instead of butter, try coconut oil or a vegan butter substitute. - For sugar, use maple syrup or agave nectar as a natural sweetener. These substitutions help you adjust the recipe to fit your needs. The taste may change slightly, but it can still be delicious. Always keep in mind that cooking is about finding what works for you. If you follow the [Full Recipe], you will make a tasty treat that everyone will love! To make the perfect batter, start by mixing the dry and wet ingredients. In one bowl, whisk together the all-purpose flour, sugar, and salt. In another bowl, beat the eggs and mix in the milk, melted butter, and vanilla extract. Slowly add the wet mix to the dry mix. Whisk until the batter is smooth and lump-free. Letting the batter rest is key. This helps the flour absorb the liquid and relaxes the gluten. Rest it for 30 minutes at room temperature. This step makes your crepes more tender and easy to work with. When it’s time to cook, heat a non-stick skillet on medium heat. Lightly grease it with butter. Pour about 1/4 cup of batter into the center of the skillet. Quickly swirl the pan to spread the batter evenly. Aim for a thin layer; this gives you that lovely crepe texture. Cook for 1-2 minutes. You’ll know it’s ready when the edges lift slightly and the bottom turns golden brown. Carefully flip the crepe using a spatula. Cook for another minute on the other side. Stack the crepes on a plate as you cook, keeping them warm. Now for the fun part! Take a cooked crepe and spread a generous tablespoon of chocolate hazelnut spread on one half. Sprinkle some crushed roasted hazelnuts over the spread for crunch. Fold the crepe in half, and then fold it again to form a triangle, or roll it up if you prefer. For serving, dust the filled crepes with powdered sugar. You can also add fresh berries for a colorful touch. Enjoy your delightful chocolate hazelnut crepes! For the complete recipe, check the Full Recipe section. To make light and fluffy crepes, I focus on the batter. Start with room temperature ingredients. This helps the batter mix well. I always let the batter rest for at least 30 minutes. Resting allows the gluten to relax, which makes the crepes tender. When cooking, use a hot pan but not too hot. A medium heat lets the crepes cook evenly without burning. Thin layers of batter are key for fluffiness. Swirl the batter quickly to spread it out. If you have extra batter, store it in the fridge. I recommend using an airtight container. The batter can last up to two days. Before using it again, give it a good stir. If it seems too thick, add a splash of milk. This ensures your crepes stay light and delicious. Yes, you can prep crepes in advance! I often make a batch the night before. Just stack them and cover with plastic wrap. They stay fresh in the fridge. When ready to serve, warm them in a skillet for a minute on each side. This brings back their soft texture. You can also freeze them for later use. Just layer parchment paper between each crepe. This prevents sticking. When you need them, thaw and warm them up. Enjoy your crepes any time with ease! For the complete process, check the Full Recipe. {{image_2}} If you want to skip nuts, you have many tasty options. Try using creamy peanut butter or almond butter instead of chocolate hazelnut spread. You can also use fruit spreads like raspberry or strawberry for a sweet twist. Another idea is to fill the crepes with whipped cream and fresh fruit. This makes a light and fun dessert. You can make your crepes even more special by adding flavors to the batter. For a vanilla touch, mix in an extra half teaspoon of vanilla extract. If you love citrus, add the zest of a lemon or orange. This gives a bright flavor that pairs well with chocolate. You can also try spices like cinnamon or nutmeg for warmth. Just a pinch can change the whole taste! Feeling adventurous? You can turn these sweet crepes into savory dishes. Start with the same batter but leave out the sugar. Then, fill them with cheese, spinach, or mushrooms. A bit of cooked chicken or ham also works great. Top with a light sauce or just some herbs for a delicious meal. These savory options are perfect for lunch or dinner. Explore these variations, and make your chocolate hazelnut crepes even more fun! For the full recipe, check out the complete guide. To keep cooked crepes fresh, stack them on a plate. Place a piece of wax paper between each crepe. This method prevents sticking and helps maintain texture. Cover the stack with plastic wrap or foil. Store in the fridge for up to three days. If you want them warm later, gently reheat them in a pan. Freezing crepes is a great way to save them for later. First, let the crepes cool completely. Then, stack them with wax paper in between. Wrap the stack tightly in plastic wrap and then place it in a freezer bag. Make sure to squeeze out any air to avoid freezer burn. When you're ready to enjoy them, simply thaw them in the fridge overnight. Reheat in a pan over low heat for the best taste. Cooked crepes last about three days in the fridge. If you freeze them, they can last up to two months. After that, the flavor and texture may start to fade. Always check for any signs of spoilage before using. For the freshest taste, enjoy them within the recommended time. To make Chocolate Hazelnut Crepes, start with the batter. Mix flour, sugar, and salt in one bowl. In another, beat the eggs and add milk, melted butter, and vanilla. Combine the wet and dry mixes. Whisk until smooth and let it rest. Heat a skillet and grease it lightly. Pour in the batter, swirl it thin, and cook until golden. Flip it and cook again. Spread chocolate hazelnut spread inside, sprinkle crushed hazelnuts, and fold. Dust with powdered sugar and enjoy! For the complete recipe, check the Full Recipe. Yes, you can swap the chocolate hazelnut spread for many delicious options. Try almond butter for a nutty taste. You can also use peanut butter if you love that classic flavor. For a fruit twist, spread some berry jam or fresh fruit puree. Nut-free options like sunflower seed spread work great too. Feel free to get creative with your choice! These crepes go well with many side dishes. Fresh berries add color and flavor. You can also serve them with whipped cream for extra creaminess. A scoop of vanilla ice cream makes it a treat! For a warm drink, pair with hot chocolate or coffee. Each option enhances the sweet flavors of the crepes. Enjoy mixing and matching! You can make delicious chocolate hazelnut crepes at home with simple ingredients. We discussed key ingredients, substitutes, and step-by-step instructions. I shared tips for fluffiness and storing options, plus ways to mix it up with flavors and fillings. In the end, enjoy these crepes as a sweet treat or a savory dish. Get creative and have fun in the kitchen!

Chocolate Hazelnut Crepes Perfect for Any Occasion

Craving a sweet treat that impresses at any gathering? Dive into the world of Chocolate Hazelnut Crepes! These delicious, thin

To make air fryer sweet potato fries, you need a few simple ingredients that bring out great flavor. Here is what you will need: - 2 large sweet potatoes, peeled and cut into fries - 2 tablespoons olive oil - 1 teaspoon paprika - 1 teaspoon garlic powder - 1/2 teaspoon onion powder - 1/2 teaspoon cayenne pepper (optional) - Salt and pepper to taste - Fresh parsley, chopped (for garnish) These ingredients work together to create a tasty and crispy snack. Sweet potatoes add natural sweetness and a lovely color. Olive oil helps them crisp up in the air fryer. The spices give the fries extra flavor that you will love. You can adjust the heat by adding more or less cayenne pepper. When you prepare these fries, remember to use fresh ingredients for the best taste. The parsley adds a nice touch of color on top. For the full recipe, follow along with the instructions to enjoy this delightful treat. To start, you need to peel the sweet potatoes. I use a simple vegetable peeler for this task. After peeling, cut the sweet potatoes into fries. Aim for about 1/4-inch thickness. This size helps them cook evenly. Uniform cuts ensure that every fry gets crispy and golden. If some pieces are thicker, they may not cook as well. Next, it’s time to season the fries. In a large bowl, add the cut fries. Drizzle in the olive oil, about 2 tablespoons. Toss the fries until they are well-coated. This step is key for flavor and crispiness. Then, sprinkle in the spices: paprika, garlic powder, onion powder, and optional cayenne pepper for some heat. Don’t forget to add salt and pepper! Mix everything well to ensure every fry has a good amount of flavor. Now, let's cook the fries in the air fryer. Preheat it to 400°F (200°C) for about 5 minutes. Once it’s ready, carefully place the seasoned fries in the basket. Make sure not to overcrowd the basket. If you have too many fries, they won’t cook evenly. Cook them for 12-15 minutes. Shake the basket halfway through to help with even cooking. You’ll know they are done when they look golden and crispy. Enjoy your delicious, crispy air fryer sweet potato fries! For the full recipe, check out the details above. To get your sweet potato fries crispy, start with dry fries. After cutting them, pat them with a paper towel. This removes excess moisture. Use a light coat of olive oil. Too much oil makes them soggy. Arrange the fries in a single layer in the air fryer basket. This allows hot air to circulate. I recommend shaking the basket halfway through cooking for even crispiness. For an extra crunch, consider using parchment paper. Just make sure to poke holes in it to let air flow. You can amplify the flavor of your fries with spices. Try adding some smoked paprika or cumin for a twist. A sprinkle of cinnamon can also give a sweet touch. For a kick, add more cayenne pepper. Pair your fries with tasty dipping sauces. A simple garlic aioli or spicy ketchup works well. You could also serve them with a yogurt dip for a fresh taste. Avoid overcrowding the air fryer basket. When fries are too close, they steam instead of fry. This leads to soft, unevenly cooked fries. Make sure to coat your fries evenly with oil and spices. If you don't, some will be bland while others are too salty. Finally, don't skip the preheating step. It ensures the fries cook properly from the start. For the full recipe, check out the earlier section. {{image_2}} You can play with different spices to make your fries special. For sweet flavors, try cinnamon or nutmeg. They add a warm touch. For savory options, mix in cumin or Italian herbs. These spices can bring a whole new taste to your fries. You can also take inspiration from regional flavors. For a Mexican twist, add chili powder and lime juice. For an Asian flair, use five-spice powder and soy sauce. Each mix gives your fries a unique taste and feel. Sweet potatoes are great, but other veggies can work too. Try yams for a similar flavor. Pumpkin also makes tasty fries with a different twist. You can even make fries from carrots or zucchini. Just cut them into the right shape and follow the same steps. If you want to make your dish healthier, consider oil substitutes. You can use cooking spray or even broth. These options help cut down on calories while keeping your fries tasty. Sweet potato fries pair well with many dishes. They go great with burgers or grilled chicken. You can even serve them with a fresh salad for a light meal. For a fun twist, try serving fries in wraps. Add some protein, like chicken or tofu, and pile on the veggies. This makes a delicious meal on the go. You can also layer fries in a sandwich for a crunchy bite. Check out the Full Recipe for all the details on making these fries. Enjoy your cooking! To keep your sweet potato fries fresh, store them in an airtight container. Make sure they cool down first. This stops them from getting soggy. Place the container in the fridge. They will stay fresh for about 3 to 5 days. To reheat fries and keep them crispy, the air fryer works best. Set it to 350°F (175°C) and cook for about 5 minutes. This gives you a crispy texture again. You can also use an oven. Preheat it to 400°F (200°C) and place the fries on a baking sheet. Heat for about 10 minutes. The microwave is quick, but it makes fries soft. So, I don’t recommend it. You can freeze both uncooked and cooked fries. For uncooked fries, lay them out on a baking sheet and freeze until solid. Then, place them in a freezer bag. To freeze cooked fries, let them cool completely. Then, put them in a freezer bag. When you want to cook frozen fries, don’t thaw them first. Just toss them in the air fryer straight from the freezer. Cook at 400°F (200°C) for about 15-20 minutes. Enjoy them crispy and tasty! For more details, check the Full Recipe. You cook sweet potato fries in an air fryer for 12 to 15 minutes. The exact time may change based on a few factors. The size of your fries matters. Thicker fries need more time. Also, your air fryer model can affect cooking times. It's best to check on them a few minutes before you think they’re done. They should be golden brown and crispy when ready. Yes, you can use frozen sweet potato fries in an air fryer. Start by preheating your air fryer. Set it to 400°F (200°C). Cook the frozen fries for about 15 to 20 minutes. Shake the basket halfway through to help them cook evenly. This method keeps them crispy and delicious. Sweet potato fries should be crispy on the outside and tender on the inside. To check, take one fry out and let it cool for a moment. If it feels firm and crunchy, it’s perfect. If it’s soft or mushy, it needs more time. Aim for that nice balance. Yes, you can cook other vegetables in the air fryer with sweet potato fries. Just ensure they have a similar cooking time. Good options include zucchini, bell peppers, or carrots. Cut them to similar sizes. This way, they cook evenly and taste great together. In this post, we've covered how to make crispy, tasty air-fried sweet potato fries. First, we listed all the ingredients and gave step-by-step instructions on prepping, seasoning, and cooking. Then, I shared tips for getting them extra crispy and variations for flavor. Lastly, we talked about storage and reheating. You now have everything you need to enjoy your fries, whether fresh or stored. With these easy steps, you can make fries everyone will love.

Air Fryer Sweet Potato Fries Crispy and Delicious Snack

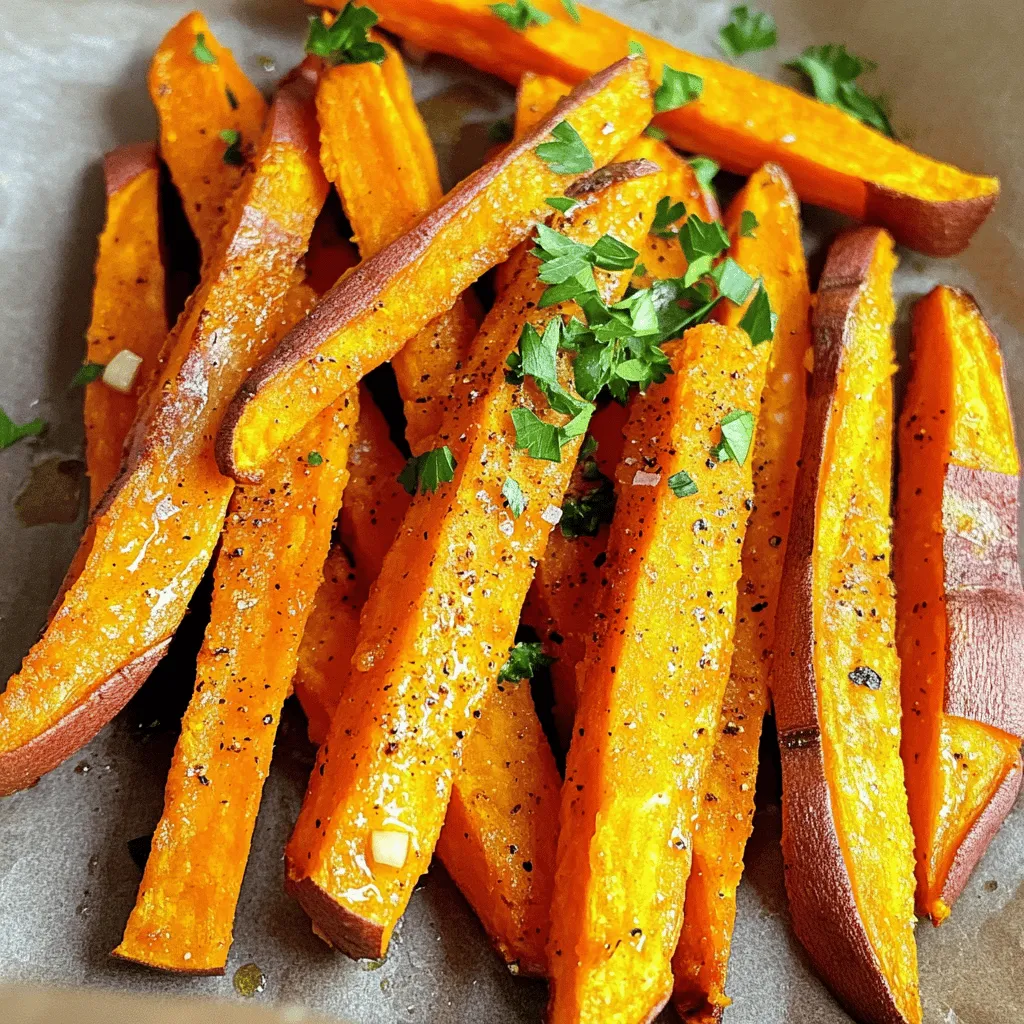
Craving a crispy and tasty snack? Look no further than air fryer sweet potato fries! These golden bites are easy

Older posts
Newer posts
← Previous Page1 … Page3 Page4 Page5 … Page76 Next →

dsad

© 2025 Cooking Wells • Built with GeneratePress

Our Policies

  • Copyright Policy
  • Cookie Policy
  • GDPR Policy
  • Privacy Policy
  • Disclaimer
  • Terms Of Use

More Information

  • Home
  • About
  • Contact
  • Appetizers
  • Dessert
  • Dinner
  • Drinks
©2025, Cooking Wells About Back To Top