Skip to content
DisclaimerTerms Of UseGDPR PolicyCookie Policy

Cooking Wells

  • Home
  • Drinks
  • Appetizers
  • Dinner
  • Dessert
  • About
  • Contact
  • Privacy Policy
DisclaimerTerms Of UseGDPR PolicyCookie Policy

Mia

To make this cake, you will need these main ingredients: - 1 ½ cups plain Greek yogurt - 1 cup granulated sugar - 3 large eggs - ½ cup vegetable oil - 1 tablespoon lemon zest - 1/4 cup fresh lemon juice - 2 teaspoons vanilla extract - 2 ½ cups all-purpose flour - 1 tablespoon baking powder - ½ teaspoon baking soda - ½ teaspoon salt - Powdered sugar for dusting (optional) These ingredients work together to create a moist and flavorful cake. The Greek yogurt adds richness and keeps the cake tender. The lemon zest and juice give it a bright, fresh flavor. You can easily customize your Lemon Yogurt Bundt Cake. Consider these optional ingredients: - Fresh berries (like blueberries or raspberries) for a fruity twist - Almond extract instead of vanilla for a nutty flavor - Poppy seeds for added texture and crunch - Cream cheese or lemon glaze for drizzling on top These small changes let you play with flavors and create new versions of the cake. You will need some basic tools to bake your cake: - Bundt pan - Mixing bowls - Whisk - Measuring cups and spoons - Rubber spatula - Toothpick for testing doneness Having the right tools makes the baking process smooth and enjoyable. With everything ready, you can focus on creating your delicious Lemon Yogurt Bundt Cake. For the complete recipe, check out the Full Recipe. Start by preheating your oven to 350°F (175°C). Greasing and flouring the bundt pan is key. I use a little vegetable oil and flour. This helps the cake come out clean. Make sure to cover all the grooves. A good pan prep is the first step to a perfect cake. In a large bowl, combine the Greek yogurt and granulated sugar. Whisk until it becomes creamy and smooth. Next, add the eggs one at a time. Mix well after each egg to ensure they blend in fully. Pour in the vegetable oil, lemon zest, fresh lemon juice, and vanilla extract. Stir until everything is well mixed. The batter should feel light and fresh. In a separate bowl, sift together the all-purpose flour, baking powder, baking soda, and salt. This step is important to avoid lumps. Gradually add the dry mix to the wet ingredients. Fold gently to combine, but do not overmix. This keeps your cake light and fluffy. You want to see a few flour streaks before moving on. Pour the batter into your prepared bundt pan. Smooth the top with a spatula for an even bake. Place it in the oven and bake for 45-50 minutes. Check for doneness by inserting a toothpick in the center. If it comes out clean, your cake is ready. Let it cool in the pan for 10-15 minutes before flipping it onto a wire rack. Cooling is key for the right texture. For a nice touch, you can dust the cake with powdered sugar once it is cool. For the full recipe, please refer to the detailed instructions provided. To make your cake moist, use Greek yogurt. It adds richness and helps keep the cake soft. Always measure the yogurt correctly. Too little can dry out your cake. It’s also key to not overmix the batter. Gently fold the dry ingredients into the wet. This keeps air in and gives you a fluffy cake. Greasing the bundt pan is crucial for easy removal. Use a mix of butter and flour for best results. First, coat the pan with softened butter. Make sure to cover all nooks and crannies. Then, add flour. Tap the pan to remove excess flour. This helps your cake slide out smoothly. One mistake is opening the oven door too soon. This can cause the cake to sink. Let it bake for the full time. Another mistake is overmixing the batter. This creates a dense cake instead of a light one. Lastly, don’t skip cooling time in the pan. It helps the cake set properly. For more detailed steps, refer to the Full Recipe. {{image_2}} You can add berries for a fruity twist. Blueberries and raspberries work well. Start by folding about one cup of fresh or frozen berries into the batter. This adds color and flavor. Berries also keep the cake moist. Be careful not to overmix. You want the berries to stay whole. You can make this cake gluten-free. Simply replace the all-purpose flour with a gluten-free blend. Look for a blend that contains xanthan gum. This will help the cake rise and stay together. Follow the same steps in the recipe. Your cake will still taste great and be fluffy. A lemon glaze adds sweetness and tang. To make it, mix powdered sugar with fresh lemon juice. Start with one cup of sugar and add lemon juice until it’s the right consistency. Drizzle the glaze over the cooled cake. This gives it a beautiful shine and extra flavor. The glaze also enhances the lemon taste. You will love how it looks and tastes! For the complete recipe, check out the [Full Recipe]. To keep your leftover lemon yogurt bundt cake fresh, wrap it tightly in plastic wrap. You can also place it in an airtight container. Store it at room temperature for up to three days. If you want to keep it longer, consider refrigeration. Just remember that cold can change the texture. If you have more cake than you can eat, freezing is a great option. First, let the cake cool completely. Then, slice it into individual pieces for easy serving later. Wrap each slice in plastic wrap, and then place them in a freezer bag. This way, your cake can last for up to three months in the freezer. When you're ready to enjoy a slice, just thaw it overnight in the fridge. To reheat your lemon yogurt bundt cake, you can use the microwave or the oven. For the microwave, place a slice on a microwave-safe plate. Heat it for about 15 to 20 seconds. If you prefer the oven, preheat it to 350°F (175°C). Wrap the cake in foil and heat for about 10 minutes. This keeps the cake moist and tasty. Enjoy your delicious cake warm! Yes, you can use flavored yogurt. It changes the taste of the cake. For example, lemon or vanilla yogurt can add more flavor. Just keep in mind that it will alter the final taste slightly. If you use sweetened yogurt, you may want to cut back on the sugar. To make this recipe dairy-free, swap the yogurt for a dairy-free option. Use coconut yogurt or almond yogurt. Both work great and still give that creamy texture. Make sure to use a plant-based oil, like coconut or canola oil, instead of regular options. This keeps the cake moist. A Bundt cake can stick for a few reasons. First, make sure you grease and flour the pan well. Use butter or oil to coat every nook and cranny. After baking, let it cool for about 10-15 minutes. This helps the cake release easily. If it still sticks, try running a knife around the edges. Lemon Yogurt Bundt Cake pairs well with many things. A scoop of vanilla ice cream adds creaminess. Fresh berries bring a nice contrast and color. You can also serve it with whipped cream or a light lemon glaze for extra sweetness. For a fun touch, garnish with mint leaves or lemon zest. Enjoy! You learned about making a delicious Lemon Yogurt Bundt Cake. We covered key ingredients and tools needed to start. I shared step-by-step instructions to help you bake it perfectly. You found tips to keep your cake moist and mistakes to avoid. We also explored tasty variations and storage tips. Now, you can bake this cake with confidence. Enjoy making it your own and sharing it with others. Happy baking!

Lemon Yogurt Bundt Cake Tasty and Simple Dessert

Looking for a tasty dessert that’s simple to make? Look no further than this Lemon Yogurt Bundt Cake! With its

To make these delicious cinnamon roll overnight oats, you need: - 1 cup rolled oats - 1 cup almond milk (or any milk of choice) - 1 tablespoon chia seeds - 1 teaspoon vanilla extract - 1 teaspoon ground cinnamon - 1 tablespoon maple syrup (or honey) - 1/2 cup Greek yogurt (or plant-based yogurt) - 1/4 cup walnuts, chopped - 1/4 cup raisins or dried cranberries (optional) - A pinch of salt Each ingredient plays a role. The oats form the base, while the milk adds creaminess. Chia seeds help thicken the mix, and vanilla brings sweetness. Ground cinnamon gives the oats that warm, cozy flavor. Maple syrup or honey adds extra sweetness. Greek yogurt boosts protein, while walnuts and raisins provide texture and taste. You can customize your oats with fun add-ins and toppings, such as: - Fresh fruit (like bananas or apples) - Nut butter (like almond or peanut butter) - Coconut flakes - Dark chocolate chips - Extra cinnamon or nutmeg These options add variety and can keep breakfast exciting. You can adjust your toppings based on your mood or what you have on hand. If you don’t have some ingredients, here are easy swaps: - Use any milk, like cow's milk or oat milk, instead of almond milk. - Swap Greek yogurt for regular yogurt or a dairy-free option. - For sweetness, use agave syrup or brown sugar instead of maple syrup. - If you can’t find chia seeds, use flax seeds for a similar effect. These substitutions make the recipe flexible, so you can still enjoy it without running to the store. You can find the full recipe in the earlier section to help you get started. To start, gather your ingredients for the cinnamon roll overnight oats. You will need rolled oats, almond milk, chia seeds, and more. Once you have everything, follow these steps: 1. In a large bowl, mix the rolled oats, almond milk, chia seeds, vanilla extract, ground cinnamon, maple syrup, and a pinch of salt. Stir it all together until it blends well. 2. Next, fold in the Greek yogurt. This makes the oats creamier and adds protein. Mix until everything is evenly combined. 3. Now, add in the chopped walnuts and raisins if you choose to use them. These add great texture and flavor. Mix gently to keep the pieces whole. 4. Transfer the mixture into mason jars or airtight containers. You can split this into 2 to 4 servings, depending on how hungry you are. 5. Seal the jars and place them in the fridge overnight. If you’re short on time, let them sit for at least 4 hours. This helps the oats absorb the liquid. 6. In the morning, stir the oats well. If you want a thinner texture, splash in a bit more milk. 7. Finally, top your oats with more walnuts, a drizzle of maple syrup, and a sprinkle of cinnamon for that extra touch. Mixing is key to a good outcome. Here are some tips: - Use a large bowl to make stirring easier. - Make sure to stir well after adding each ingredient. This helps all flavors blend nicely. - When adding yogurt, fold it in gently. This keeps it fluffy and light. - If you want a sweeter taste, add a bit more maple syrup or honey. Storing your oats properly ensures they taste great. Here’s how to do it: - Use small jars or containers. This makes serving easier and keeps them fresh. - Layer ingredients if you like. Try oats first, then yogurt, then nuts. This looks nice! - Seal your jars tightly before putting them in the fridge. This helps keep them fresh. - If you have leftovers, stir well before eating. You might want to add more milk for a creamier texture. Following these steps will help you create tasty cinnamon roll overnight oats every time. For the full recipe, check out the section above. Enjoy your delicious breakfast! To get the best creamy texture in your cinnamon roll overnight oats, use rolled oats. They soak up the liquid well. Mix in Greek yogurt to add extra creaminess. The chia seeds also help create a thick texture. Make sure to stir the mixture well so all ingredients blend nicely. Letting the oats sit overnight is key. This allows them to absorb the milk and yogurt fully. One common mistake is not using enough liquid. The oats need enough almond milk to soften. Another mistake is skipping the chia seeds. They give thickness and help the oats stick together. Also, don’t forget to mix well. If you leave clumps, the texture will not be pleasant. Lastly, avoid adding toppings too early. They can become soggy if mixed in before serving. To boost flavor, use fresh spices. Ground cinnamon is essential, but try adding nutmeg or cardamom for a twist. You can also increase sweetness by adding more maple syrup. If you like it sweeter, a touch of brown sugar works well too. For added flavor, try mixing in vanilla extract. It complements the cinnamon nicely. Consider topping with banana slices or a sprinkle of nuts for extra taste. {{image_2}} You can change the flavor of your cinnamon roll overnight oats. Try adding cocoa powder for a chocolate twist. Instead of cinnamon, use pumpkin spice for a fall vibe. For a fruity option, mix in mashed bananas or fresh berries. You can even add nutmeg for a warm and cozy flavor. Each change will make your oats new and exciting! These oats can fit many diets. For a vegan version, swap Greek yogurt for plant-based yogurt. Use maple syrup instead of honey to keep it vegan. If you need gluten-free oats, make sure to choose gluten-free rolled oats. This way, everyone can enjoy them! Using seasonal ingredients can make your oats tastier. In the summer, add fresh strawberries or peaches. During fall, try diced apples or pumpkin puree. In winter, you can mix in cranberries or pecans. Each season brings new flavors to your breakfast! Check out the Full Recipe for all the ingredients and steps to make these oats. To keep your cinnamon roll overnight oats fresh, store them in airtight containers. Glass jars work great. Make sure each jar has a tight seal. This helps keep the oats from drying out. Always place the jars in the fridge. This keeps them cool and safe to eat. When stored properly, your overnight oats can last up to five days in the fridge. If you notice any odd smells or changes in texture, it’s best to throw them away. Always check for signs of spoilage before eating. If you plan to eat them later in the week, make them in smaller batches. You can enjoy your cinnamon roll overnight oats cold or warm. If you prefer them warm, just heat them in the microwave. Use a microwave-safe bowl and heat for about 30 seconds. Stir and check the temperature. If it needs more heat, add 10-second intervals until it’s warm. You can also add a splash of almond milk to make it creamier. Cinnamon roll overnight oats can last up to five days in the fridge. Make sure to store them in airtight containers. This way, they stay fresh and tasty. You can enjoy them as a quick breakfast all week! Yes, you can use quick oats. They will soak up the liquid faster, making your oats creamier. Just remember that they might be softer in texture compared to rolled oats. Chia seeds are tiny powerhouses! They add fiber, protein, and healthy fats. This helps keep you full longer. Plus, they absorb liquid, making your oats thicker and creamier. To make your oats sweeter, add more maple syrup or honey. You can also add fruits like bananas or berries. A pinch of brown sugar can work too, giving that extra sweet flavor. Absolutely! You can prepare these oats up to five days in advance. Just follow the Full Recipe and store them in individual jars. It makes breakfast easy and ready to go! Yes, you can easily make them dairy-free. Simply use almond milk or any non-dairy milk of your choice. You can also swap Greek yogurt for a plant-based yogurt. Enjoy your tasty oats without dairy! Cinnamon roll overnight oats are fun and tasty. We covered key ingredients, ways to customize, and how to store them. You learned step-by-step prep and tips for perfect texture. There are many variations to try, whether you want vegan or seasonal options. Now you can enjoy a sweet, simple meal that fits your needs. Mix, match, and experiment with flavors to find your favorite. Overnight oats can be your new go-to breakfast.

Cinnamon Roll Overnight Oats Easy and Tasty Recipe

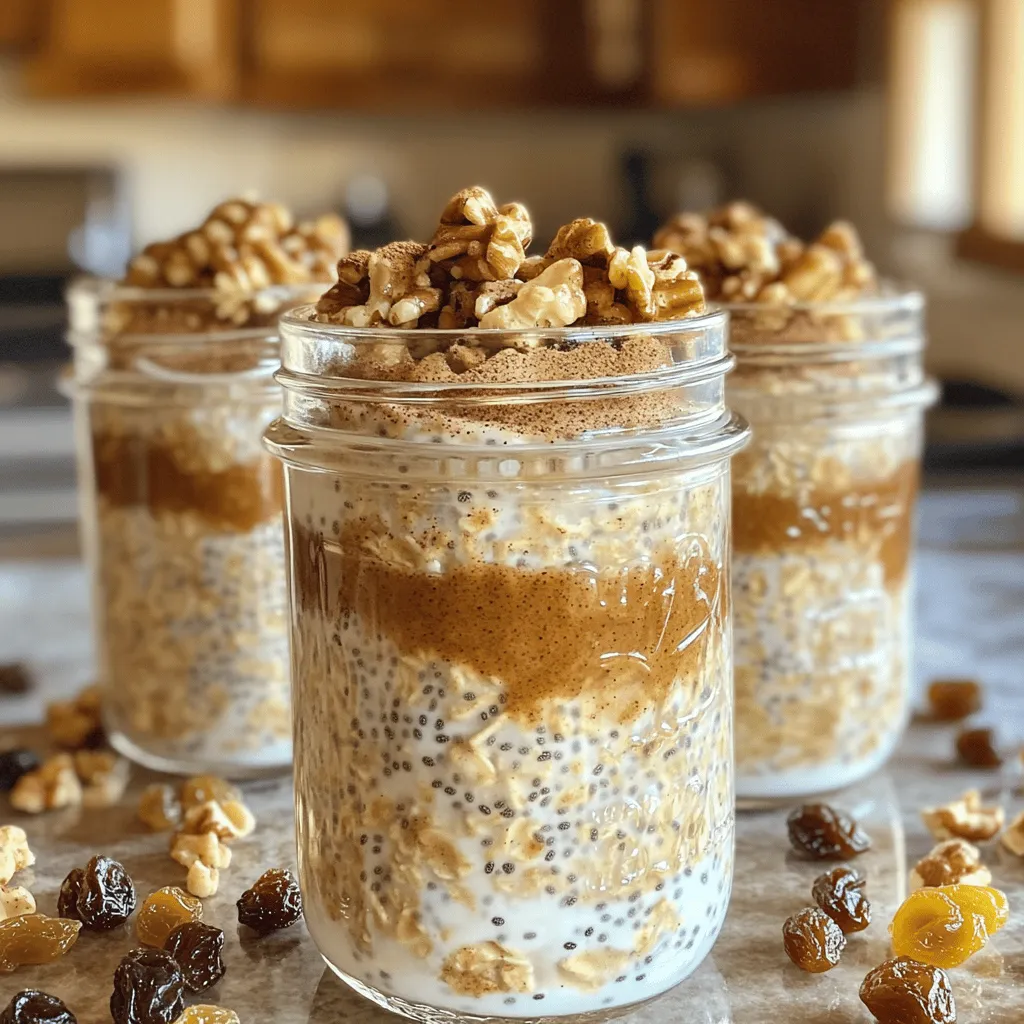
If you crave a warm cinnamon roll but need a healthy breakfast, I’ve got just the thing! My Cinnamon Roll

- Gnocchi: You can use store-bought or homemade gnocchi. Store-bought saves time. Homemade has a special touch but takes more work. - Vegetables: I love using fresh cherry tomatoes, bell pepper, zucchini, and spinach. They add color and flavor. Feel free to mix in your favorites. - Seasonings: Olive oil is a must for roasting. Garlic powder and Italian seasoning bring depth. Don’t forget salt and pepper to taste. - Cheese: Crumbled feta cheese is my go-to topping. It adds a salty, creamy bite that makes the dish shine. When you gather these ingredients, you're ready for a tasty and easy meal. Check out the Full Recipe for more details! - Preheat to 400°F (200°C). - Line a large baking sheet with parchment paper. First, you want to get your oven nice and hot. Preheating it to 400°F (200°C) helps the gnocchi cook evenly. While the oven heats up, grab a baking sheet. Lining it with parchment paper makes for easy cleanup. - Combine gnocchi and vegetables in a bowl. - Season and toss. Next, in a big bowl, mix the gnocchi with your veggies. Add halved cherry tomatoes, sliced bell pepper, zucchini, and fresh spinach. Drizzle in three tablespoons of olive oil. Then, sprinkle in garlic powder, Italian seasoning, salt, and pepper. Toss everything together. Make sure each piece gets some flavor. - Spread mixture on baking sheet. - Stir halfway through cooking. Now, spread the gnocchi and veggie mix onto your lined baking sheet. Keep it in a single layer for the best results. Bake it in the oven for 20 minutes. Halfway through, give it a good stir. This helps everything cook evenly. Once the time is up, sprinkle crumbled feta cheese on top. Bake for another five minutes to warm the cheese. This step adds a nice touch to your dish. Enjoy the meal! For full details on the recipe, check the Full Recipe. To avoid mushy gnocchi, cook it just until it floats in boiling water. Then, drain it well. If you roast it too long, it may turn soft. For even roasting, spread the gnocchi and veggies in a single layer on the baking sheet. This allows hot air to reach all parts. Stir halfway through cooking to ensure everything cooks evenly. For great flavors, try adding different seasonings. A pinch of red pepper flakes adds heat. You can also use smoked paprika for a rich taste. If you want to swap the feta cheese, consider goat cheese or mozzarella. Both will melt beautifully and add creaminess. This dish pairs well with a fresh green salad or crusty bread. A light white wine can also enhance the meal. For a beautiful presentation, top with fresh basil leaves. A drizzle of balsamic glaze adds a nice touch and extra flavor. Try these tips to elevate your Easy Sheet Pan Gnocchi and impress your guests! For the complete recipe, check out the Full Recipe. {{image_2}} You can easily swap out the vegetables in this dish. Use what’s in season or what you love. Try asparagus or broccoli for a nice crunch. You can also add proteins like chicken or shrimp for a heartier meal. Just cut them into bite-sized pieces and mix them in with the gnocchi. If you need gluten-free, choose gluten-free gnocchi. Many brands offer this option, and it tastes great. For a vegan version, skip the feta cheese. Instead, use plant-based cheese alternatives that melt well. Nutritional yeast is also a great choice for a cheesy flavor without dairy. To change the flavor, consider Italian-inspired additions. Sun-dried tomatoes add a rich taste. You can also give it a Mediterranean twist with olives and artichokes. These options make the dish exciting and new each time you prepare it. Check out the Full Recipe for more ideas! To keep your Easy Sheet Pan Gnocchi fresh, store leftovers in an airtight container. Place it in the fridge right away. It will stay good for up to three days. When you’re ready to eat, take it out for reheating. For the best flavor, reheat it in the oven at 350°F (175°C). This will help keep the gnocchi from getting too soft. Bake for about 10 to 15 minutes, until warm. You can also use the microwave for quick reheating but expect a softer texture. You can freeze your Easy Sheet Pan Gnocchi before or after cooking. If you freeze it before cooking, spread the uncooked gnocchi and veggies on a baking sheet. Freeze until firm, then transfer to a freezer bag. It can last up to three months in the freezer. If you cooked the dish first, let it cool completely before freezing. This will help keep the texture. Use a freezer-safe container for storage. To thaw, move the container to the fridge for a night. For quick thawing, you can microwave it on low. Remember to check the temperature before serving! The total cooking time for Easy Sheet Pan Gnocchi is about 30 minutes. You spend around 10 minutes prepping the ingredients. The baking time is 20 minutes. Stir the mixture halfway through to ensure even cooking. Yes, you can use store-bought gnocchi. Using ready-made gnocchi saves you time. It also gives you a chance to enjoy the dish quickly without making it from scratch. Homemade gnocchi can taste great, but store-bought is a fantastic option for busy days. You can serve many dishes with Easy Sheet Pan Gnocchi. A fresh salad adds a nice crunch. Garlic bread complements the meal well. You might also enjoy a glass of white wine with it. These pairings enhance the flavors and create a lovely dining experience. You can easily change the flavors in this dish. Try adding different veggies like mushrooms or asparagus. If you want more protein, add cooked chicken or shrimp. You can also swap feta cheese for a dairy-free option. Adjusting the seasonings can make it taste unique to your likes. This blog post covered everything you need for Easy Sheet Pan Gnocchi. We discussed key ingredients, like gnocchi and fresh veggies. You learned step-by-step instructions and discovered helpful tips for great texture and flavor. I also shared variations, storage methods, and answered common questions. Now, you have all the tools to create a delicious meal. Don't hesitate to experiment with flavors and ingredients you love. Enjoy cooking and savoring this dish!

Easy Sheet Pan Gnocchi Flavorful One-Pan Delight

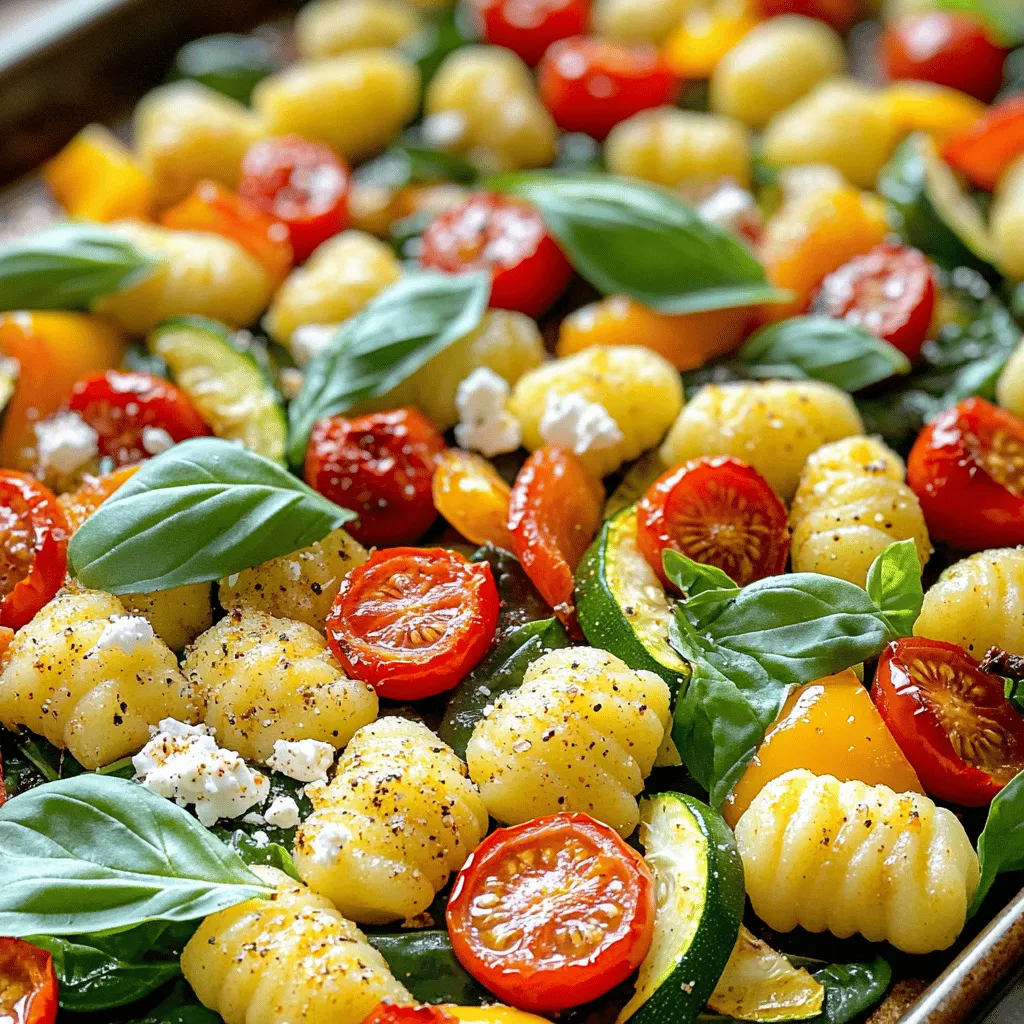
Looking for a simple yet delicious meal? My Easy Sheet Pan Gnocchi recipe combines tender gnocchi, fresh veggies, and savory

- 1 pound large shrimp, peeled and deveined - 3 tablespoons olive oil - 2 tablespoons fresh lime juice - 1 tablespoon chili powder - 1 teaspoon cumin - 1 teaspoon garlic powder - 1 teaspoon onion powder - 1/2 teaspoon salt - 1/4 teaspoon black pepper - Zest of 1 lime - Fresh cilantro, chopped for garnish - Lime wedges, for serving Each ingredient plays a key role. The shrimp should be large for a juicy bite. Olive oil adds richness and helps flavors stick. Fresh lime juice brings brightness. Chili powder gives it that spicy kick. Cumin adds warmth, while garlic and onion powders deepen the taste. Salt and pepper balance everything, and lime zest adds a fresh zing. Always choose fresh shrimp. Look for shrimp that smell clean, not fishy. The shells should be shiny and firm. If using frozen shrimp, ensure they are thawed before cooking. Fresh lime juice makes a big difference, so avoid bottled juice. For the best flavor, use fresh spices, as they will boost your dish. To start, you need to marinate the shrimp. In a large bowl, mix together: - 3 tablespoons olive oil - 2 tablespoons fresh lime juice - 1 tablespoon chili powder - 1 teaspoon cumin - 1 teaspoon garlic powder - 1 teaspoon onion powder - 1/2 teaspoon salt - 1/4 teaspoon black pepper - Zest of 1 lime Whisk all these ingredients until they blend well. Next, add 1 pound of large shrimp that are peeled and deveined. Toss them gently in the marinade until they are fully coated. Cover the bowl and place it in the fridge. Let the shrimp sit for at least 30 minutes. If you have time, keep them in the marinade for up to 1 hour. This step packs in the flavor! While the shrimp are marinating, it's time to prep the grill. Preheat it to medium-high heat. This usually takes about 10 minutes. If you're using wooden skewers, soak them in water for at least 30 minutes. This prevents them from burning on the grill. Make sure the grill grates are clean. You can brush them with oil to avoid sticking. Now, it's time to cook the shrimp! Thread the marinated shrimp onto the skewers. Place the skewers on the hot grill. Cook the shrimp for 2-3 minutes on each side. The shrimp should turn pink and opaque when done. Be careful not to overcook them; they can become tough. Once cooked, remove the skewers from the grill. Let the shrimp rest for a couple of minutes before serving. Enjoy your flavorful chili lime grilled shrimp! For the full recipe, check out the details provided above. To grill shrimp just right, follow a few key steps. First, make sure your grill is hot. Preheat it to medium-high heat. This helps the shrimp cook fast and keeps them juicy. Use skewers to hold the shrimp. If you use wooden skewers, soak them in water first. This helps them not burn on the grill. You can tell shrimp are done when they turn pink and opaque. Each side takes about 2-3 minutes on the grill. If you poke a shrimp and it feels firm, it’s ready. If it looks gray or feels soft, it needs more time. Be careful not to overcook. Overcooked shrimp can become tough and chewy. Chili lime grilled shrimp are great with many sides. You can serve them with rice, salad, or tacos. They also taste amazing with a fresh salsa or guacamole. For a special touch, add some fresh cilantro on top. Lime wedges are perfect for squeezing over the shrimp before eating. For the full recipe, check the earlier section. {{image_2}} You can change the flavor of chili lime grilled shrimp easily. Try using different spices. For a sweet twist, add honey or brown sugar to the marinade. You can also use smoked paprika for a deep, rich flavor. If you like heat, add cayenne pepper or hot sauce. Fresh herbs can also change the taste. Try using basil or mint for a fresh take. If you don't have shrimp, chicken or fish works well. Just adjust cooking times. You can swap olive oil for avocado oil. Lime juice is key, but lemon juice is a good alternative. If you don't have chili powder, mix paprika with cayenne pepper. Garlic and onion powders can be replaced with fresh garlic and onions for a bolder flavor. Chili lime grilled shrimp pairs well with many sides. Serve it with rice or quinoa for a filling meal. Fresh salads make a great match too. Try a corn salad or a simple green salad. For a hearty option, serve with grilled veggies or baked potatoes. Don't forget to squeeze more lime on top for extra zing! For the full recipe, check out the [Full Recipe]. To keep your chili lime grilled shrimp fresh, place leftovers in an airtight container. You can store them in the fridge for up to three days. Make sure the shrimp cool down to room temperature first. This helps keep the texture nice and prevents condensation. If you want to save your shrimp for later, freezing is a great option. Place the cooled shrimp in a freezer-safe bag. Squeeze out the air and seal the bag tightly. You can freeze them for up to three months. When you’re ready to eat, just thaw them in the fridge overnight. Reheating is easy! Use a skillet on low heat. Add a tiny bit of olive oil to keep them moist. Stir gently until they’re heated through. You may also use the microwave, but be careful not to overcook them. Heat in short bursts of 30 seconds, checking often. Enjoy your tasty leftovers! Yes, you can use frozen shrimp. Just thaw them before cooking. Place them in the fridge overnight or run cold water over them. This keeps them fresh and tasty. Make sure they are peeled and deveined for easy cooking. Chili lime grilled shrimp pairs well with many sides. Here are some ideas: - Rice or quinoa for a filling base - Grilled vegetables for added color - Fresh salad for a crisp bite - Warm tortillas for a fun wrap - Avocado slices for creaminess These options add flavor and balance to your meal. The spice level in this recipe is mild to medium. The chili powder adds warmth but not heat. You can adjust the spice by adding more chili powder or fresh jalapeños. If you prefer less spice, just cut back on the chili powder. This way, everyone can enjoy the dish. For a more fiery kick, try adding hot sauce or crushed red pepper. In this blog post, we covered key ingredients, step-by-step instructions, and helpful tips for grilling shrimp. Freshness and quality matter for the best taste. I shared variations to keep things fun and creative. Proper storage ensures your leftovers last longer. Grilling shrimp can be easy and tasty, even for beginners. With practice, you'll create delicious meals everyone will love. Enjoy the process and experiment with your own flavors!

Chili Lime Grilled Shrimp Flavorful and Simple Dish

Craving a dish that’s both flavorful and easy to make? You’re in the right place! In this blog, I’ll share

- 2 cups rolled oats - 1 cup mixed berries (fresh or frozen) - 1/2 cup almond or peanut butter These main ingredients form the base of your healthy berry oatmeal bars. Rolled oats bring fiber and texture. They hold everything together while giving a nice chew. Mixed berries add natural sweetness and vibrant color. You can use fresh or frozen berries, depending on what you have. Almond or peanut butter adds healthy fats and a creamy taste. It helps bind the bars and gives them a rich flavor. - 1/4 cup honey or maple syrup - 1/2 cup unsweetened applesauce For sweetness, you can use honey or maple syrup. Both options add a delightful taste. Honey is sweeter, while maple syrup has a unique flavor. Applesauce provides moisture and natural sweetness without adding extra sugar. It keeps the bars soft and helps them stay fresh longer. - 1/4 teaspoon salt - 1 teaspoon cinnamon - 1/4 cup chopped nuts (optional for crunch) A pinch of salt enhances all the flavors. Cinnamon adds warmth and spice. It pairs perfectly with the berries. If you want a crunch, feel free to add chopped nuts. They add texture and make the bars even more satisfying. This is where you can get creative and make the recipe your own. For the full recipe, check out the details to start making your healthy berry oatmeal bars! 1. Preheat the oven and prepare the baking dish: Start by preheating your oven to 350°F (175°C). Line an 8x8 inch baking dish with parchment paper. This helps you remove the bars easily later on. 2. Combine dry ingredients in a mixing bowl: In a large mixing bowl, add 2 cups of rolled oats, 1/4 teaspoon of salt, and 1 teaspoon of cinnamon. Stir these ingredients well to mix them evenly. 1. Whisk wet ingredients in a separate bowl: In another bowl, whisk together 1/2 cup of almond or peanut butter, 1/4 cup of honey or maple syrup, and 1/2 cup of unsweetened applesauce. Keep whisking until the mixture is smooth. 2. Combine wet and dry mixtures: Pour the wet mixture into the bowl with the dry ingredients. Mix everything until just combined. Gently fold in 1 cup of mixed berries and 1/4 cup of chopped nuts if you want that extra crunch. 1. Spread mixture in the baking dish: Transfer the mixture to your prepared baking dish. Spread it evenly and press down firmly to create a flat layer. This helps the bars hold their shape. 2. Bake until golden brown and set: Place the baking dish in the oven. Bake for 25-30 minutes, or until the edges turn golden brown and the center feels set. Once done, remove from the oven and let it cool in the pan for about 10 minutes. Use the parchment paper overhang to lift the bars out of the pan. Let them cool completely on a wire rack before cutting them into squares. Enjoy your healthy berry oatmeal bars! For the full recipe, check the complete instructions above. To avoid mushy bars, make sure you use the right amount of oats. Stick to 2 cups. If your mixture seems too wet, add a bit more oats. This helps bind the bars without making them soggy. Baking times can differ based on your oven. If your oven runs hot, check the bars at 20 minutes. If they look golden, they may be done. For cooler ovens, you might need a full 30 minutes. Always trust your eyes and check for a firm center. You can spice things up by adding a dash of nutmeg or ginger. Both can give your bars a nice twist. A teaspoon of vanilla extract also works wonders. It adds a lovely aroma and taste without extra calories. To boost the berry flavor, try using a mix of berries. Combine strawberries, blueberries, and raspberries for a vibrant taste. If using frozen berries, thaw them first to release their juices, adding more flavor. For chewy bars, press the mixture down lightly before baking. This keeps them soft. If you prefer crunch, press harder to create a firmer base. Your choice of nuts also affects texture. Almonds give a nice crunch, while walnuts add a softer bite. You could also skip the nuts if you want a more uniform texture. These tips will help you create the best Healthy Berry Oatmeal Bars. For the full recipe, check out the section above. {{image_2}} You can easily change the nut butter in this recipe. Almond butter works great, but you can also use cashew or sunflower seed butter. Each nut butter adds a unique flavor. Feel free to use different types of berries, too. You can choose blueberries, raspberries, or even blackberries. Each berry brings its own taste and nutrition. Mixing berries can create a fun flavor burst. To make these bars vegan, swap honey for maple syrup. This keeps the sweetness without animal products. You can also use a plant-based butter instead of nut butter for added creaminess. If you need gluten-free bars, make sure to use certified gluten-free oats. This small change makes a big difference for those with gluten sensitivities. For low-sugar options, use less honey or maple syrup. You can also add more applesauce for natural sweetness without extra sugar. Adding seeds can boost nutrition. Try chia seeds or flaxseeds for extra fiber. Dried fruits like raisins or cranberries can add sweetness and chewiness. If you want a treat, toss in some dark chocolate chips. They melt beautifully and give a delightful touch. Just a small amount adds a rich flavor without overpowering the bars. To keep your Healthy Berry Oatmeal Bars fresh, use airtight containers. Glass or plastic containers work well. They block air and moisture, which helps preserve the bars. You can also wrap them in plastic wrap or aluminum foil. Store the bars at room temperature for short-term use. If you want them to last longer, refrigeration is best. Just ensure they are in a sealed container to avoid drying out. Freezing these bars is simple. First, let them cool completely after baking. Then, wrap each bar tightly in plastic wrap. You can also place them in a freezer bag. This keeps them fresh and avoids freezer burn. To thaw, remove the bar from the freezer. Leave it at room temperature for about 30 minutes. For a quicker option, you can microwave it for about 10-15 seconds. These bars last about a week at room temperature. Keep them in a cool, dry place. If you refrigerate them, they can last up to two weeks. The cold slows down spoilage, but make sure they are in a tight container to keep them fresh. Can I use only one type of berry? Yes, you can use just one type of berry. I like to mix berries for a fun taste. Strawberries, blueberries, or raspberries all work well. Each berry gives a unique flavor. Use what you love! Is it necessary to use applesauce? No, applesauce is not strictly necessary. It adds moisture and sweetness. If you want to skip it, use more nut butter or a bit of yogurt. Just remember to adjust the liquid to keep the bars from getting too dry. What is the calorie count per bar? Each bar has around 150 calories. This number can change based on the mix-ins and sweeteners you choose. If you use less sweetener or skip the nuts, it will lower the count. Are these bars high in protein? Yes, these bars are a decent source of protein. The nut butter adds protein. If you want more, add seeds or use a protein-rich nut butter. This will help boost the protein level. What to serve with healthy berry oatmeal bars? These bars are tasty on their own! You can serve them with yogurt or fresh fruit. They also pair well with a glass of milk or a smoothie for a full meal. Can I use these as a breakfast option? Absolutely! These bars make a great breakfast. They are quick and easy to grab. Pair them with a piece of fruit or a drink for a balanced start to your day. Check out the Full Recipe for more details! This article covered delicious berry oatmeal bars. We explored main ingredients like oats, berries, and nut butter. We discussed sweeteners, moisture options, and various seasonings. You learned how to prepare, mix, and bake your bars perfectly. Tips helped enhance flavors and improve texture. We also shared storage advice and variations for different diets. Try making your own bars, and enjoy a healthy snack. With creativity, you can make them just right for you. Healthy eating can be fun, tasty, and easy!

Healthy Berry Oatmeal Bars Crunchy and Delicious Snack

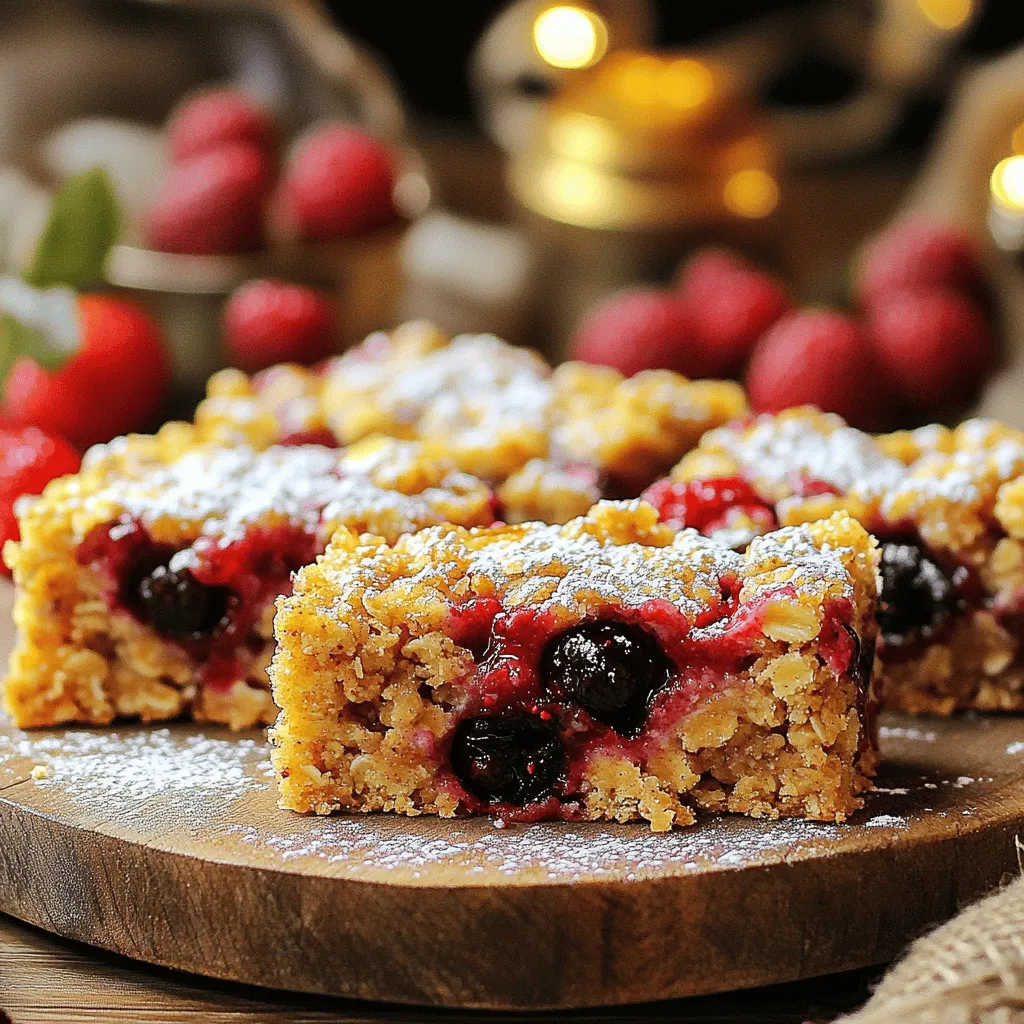
Looking for a tasty snack that’s good for you? These Healthy Berry Oatmeal Bars are crunchy, delicious, and packed with

- 1 large eggplant, thinly sliced - 2 tablespoons olive oil - 1 teaspoon garlic powder - 1 teaspoon onion powder - 1 teaspoon smoked paprika - ½ teaspoon salt - ½ teaspoon black pepper - Optional: ¼ teaspoon cayenne pepper for heat - Fresh herbs for garnish (such as parsley or basil) Using fresh, high-quality ingredients is key. The eggplant should be firm and shiny. Look for smooth skin without blemishes. Quality olive oil enhances flavor and health benefits. Fresh herbs add brightness to your chips. Always choose spices that are fragrant and fresh for the best taste. You can swap olive oil for avocado oil or coconut oil if you prefer. Garlic powder can be replaced with fresh minced garlic. If you dislike paprika, try chili powder for a different kick. You can also use sea salt instead of regular salt for a more complex flavor. For a gluten-free option, ensure all spices are certified gluten-free. - Preheat your oven to 400°F (200°C). - Rinse and dry the eggplant slices. - Optional: Sprinkle salt and let sit to draw out moisture. To prep the eggplant, I start by preheating my oven. A hot oven helps the chips get crispy. Then, I rinse the eggplant slices under cold water and pat them dry with a towel. If you want to remove some moisture, sprinkle them lightly with salt. Let them sit for about 20 minutes. This step helps them crisp up nicely later. - Combine olive oil and spices in a bowl. - Toss the eggplant slices in the mixture. Next, I mix olive oil with spices in a big bowl. I use garlic powder, onion powder, smoked paprika, salt, and black pepper. If you like a bit of heat, add cayenne pepper too. Then, I toss the eggplant slices in this mixture. Make sure each slice is covered well. This will give your chips a lot of flavor. - Arrange coated slices on a baking sheet. - Baking time and tips for crispiness. Now, I lay the coated slices on a baking sheet lined with parchment paper. It’s important to put them in a single layer. If they overlap, they won’t get crispy. I bake them for 20-25 minutes. Halfway through, I flip the slices to ensure even cooking. Keep an eye on them. They should turn golden brown and crispy. Once they’re out of the oven, let them cool a bit. If you want, add fresh herbs for a nice touch. For the full recipe, check out the details above. The right slice makes all the difference. Use a sharp knife or a mandoline. A mandoline gives even slices quickly. Aim for slices about 1/8 inch thick. This thickness ensures they crisp up well. Thicker slices may not get as crispy and can be chewy. Spice can turn your chips into a tasty treat. Try mixing garlic powder, onion powder, and smoked paprika. For a kick, add cayenne pepper. You can also sprinkle cheese on top before baking. Fresh herbs like parsley or basil add a nice touch after baking. Experiment with flavors to find your favorite. Soggy chips can be a problem. To avoid this, make sure to dry the eggplant well. Letting them sit with salt helps draw out moisture. Arrange the slices in a single layer on the baking sheet. Flip them halfway through baking to ensure even crisping. If you prefer them thicker, adjust your bake time as needed. {{image_2}} You can use many eggplant types to make chips. The common globe eggplant gives great results. Japanese eggplants are smaller and sweeter. They can add a nice twist to your chips. Try Italian or Indian varieties for a different taste. Coating methods also matter. You can use breadcrumbs for extra crunch. Panko breadcrumbs are light and crispy. You can mix in some grated cheese for more flavor. This gives your chips a cheesy, savory kick. Eggplant chips can be sweet or savory. If you want sweet chips, sprinkle a little cinnamon or sugar. This makes a fun snack for kids. For savory chips, try adding spices like cumin or chili powder. Regional spices can bring new life to your eggplant chips. For example, Italian herbs like oregano or basil work well. You can also add za'atar for a Middle Eastern twist. The options are endless! Dips and salsas can make your eggplant chips shine. Try serving them with a cool yogurt dip. Hummus is also a great choice. It adds creaminess and flavor. You can also use eggplant chips in meals. Crumble them over salads for crunch. They make great toppings for soups too. Get creative and enjoy your crispy, flavorful snack! To keep your baked eggplant chips fresh, store them in an airtight container. This helps prevent moisture from making them soggy. You can use a glass jar or a plastic container with a tight seal. If you have leftovers, let them cool completely before sealing them up. This way, they won’t trap steam, which can ruin their crispiness. When you're ready to enjoy your chips again, reheat them in the oven. Preheat it to 350°F (175°C). Spread the chips in a single layer on a baking sheet. Heat them for about 5 to 10 minutes. This method helps keep your chips crispy, giving them a fresh-baked taste. Avoid microwaving, as it can make them chewy. You may wonder if you can freeze baked eggplant chips. The answer is yes, but there's a catch. Freezing can change their texture. If you want to freeze them, make sure they are fully cooled. Place them in a freezer-safe bag or container. Try to remove as much air as possible. For best results, eat them within a month. When you’re ready to eat, thaw them in the fridge and reheat in the oven. To make your eggplant chips crispy, follow these tips: - Slice thinly: Aim for slices about 1/8 inch thick. - Remove moisture: After slicing, sprinkle salt and let them sit for 20 minutes. This step draws out moisture. Pat them dry after. - Single layer: Place slices on the baking sheet without overlapping. This helps them crisp up. - Flip halfway: Turn the chips over during baking for even crispiness. These steps will help you achieve that satisfying crunch! Yes, you can make baked eggplant chips ahead of time. Store them in an airtight container. They can stay fresh for up to three days. However, they may lose some crispness. To crisp them up again, reheat in the oven for a few minutes. This makes them taste freshly baked! Baked eggplant chips are generally healthier than potato chips. They use less oil and have fewer calories. Eggplants are rich in fiber and antioxidants, too. This makes them a nutritious snack choice. You can enjoy them without the guilt! Eggplant chips taste great with many dips! Here are some tasty options: - Hummus: Creamy and rich for a good match. - Guacamole: Adds a fresh twist. - Yogurt dip: Mix Greek yogurt with herbs and lemon for a zesty flavor. - Salsa: A spicy kick pairs well. Try these dips for a flavorful snack experience! For the full recipe, refer to the detailed instructions provided above. Enjoy your cooking! Baked eggplant chips are a fun and healthy snack. We covered ingredients, prep, and variations. Remember, using quality ingredients makes a big difference. Once you've baked them, store any leftovers properly to keep them fresh. Experiment with flavors and dips to find your favorite. Keep trying new methods to create the best eggplant chips for you. Enjoy the crunch and the joy of cooking!

Baked Eggplant Chips Crispy and Flavorful Snack

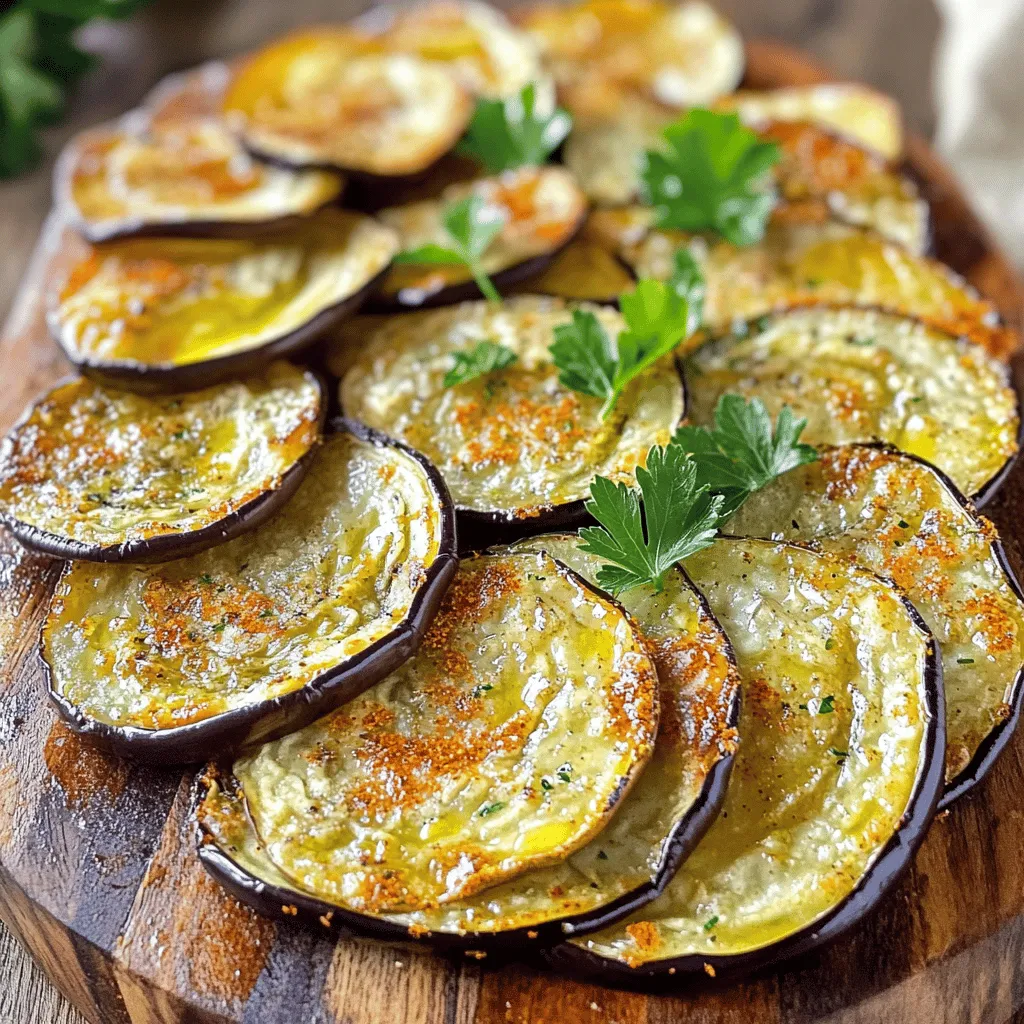
If you’re on the hunt for a tasty, guilt-free snack, you’ve landed in the right place! Baked eggplant chips are

- 2 medium sweet potatoes, peeled and diced - 1 can (15 oz) black beans, rinsed and drained - 1 cup shredded cheese (cheddar or Mexican blend) - 1 red bell pepper, diced - 1 small onion, chopped - 2 cloves garlic, minced - 1 teaspoon cumin - 1 teaspoon paprika - Salt and pepper to taste - 4 large whole wheat tortillas - Olive oil for cooking - Fresh cilantro, chopped (for garnish) - Avocado slices and salsa (for serving) This dish is vibrant and full of flavor. Sweet potatoes bring a nice sweetness, while black beans add protein. The cheese provides a creamy texture that ties it all together. I love using whole wheat tortillas for a health boost. You can switch up the cheese based on your taste. Cheddar is a classic, but a Mexican blend adds more zest. Don't forget to season well with cumin and paprika. These spices give the quesadillas a warm and rich flavor. For a fresh touch, I like to add chopped cilantro as a garnish. It brightens the dish. Serving with avocado slices and salsa adds creaminess and a kick. You can find the full recipe to make these savory quesadillas easily. Enjoy! First, you need to preheat your oven to 400°F (200°C). While it heats, grab a baking sheet and line it with parchment paper. This helps the sweet potatoes cook evenly. Next, take your diced sweet potatoes and spread them on the sheet. Drizzle the sweet potatoes with olive oil. Sprinkle them with salt, pepper, cumin, and paprika. Toss them well to coat all sides. Now, roast these in the oven for about 25 to 30 minutes. Flip them halfway through for even cooking. They should come out tender and slightly caramelized. Let them cool a bit before using. In a skillet over medium heat, drizzle some olive oil. Add the chopped onion and diced red bell pepper. Sauté these for about 5 minutes until they soften. Stir them often so they cook evenly. Next, add the minced garlic. Cook for one more minute until it smells great. This makes your filling flavorful and aromatic. In a large mixing bowl, combine the roasted sweet potatoes, the sautéed onion and bell pepper, and the rinsed black beans. Add half of the shredded cheese to this mix. Gently stir everything together until it’s well mixed. Now, taste your mixture. Adjust the seasoning with salt and pepper if needed. This step is key to making sure your quesadillas are delicious. You can find the full recipe for more details on assembling. To make your quesadillas crispy, use a non-stick skillet. Heat the skillet over medium heat. Add a little olive oil before placing your tortilla in. This helps get that nice golden color. Flip the quesadilla gently. Cook each side for about 3-4 minutes. This way, the cheese melts perfectly and the tortilla stays crunchy. Choose a heavy-bottom skillet for best results. Cast iron works great, but any sturdy non-stick pan will do. This ensures even heat, which helps cook the quesadilla evenly. If you have a griddle, that’s a fantastic option too. Just remember to keep an eye on the heat to avoid burning. To boost the flavor, try adding spices like chili powder or oregano. These herbs can really make your quesadillas pop. You can also mix in some lime juice for a fresh twist. A dash of hot sauce adds a nice kick too, if you like heat. For dipping, serve your quesadillas with salsa or guacamole. These sauces add extra flavor and moisture. You might also enjoy sour cream or yogurt. Experiment with different sauces to find your favorite pairings. {{image_2}} You can easily add meat to your quesadillas. Chicken or beef work well here. Cook the meat first and then mix it with the sweet potatoes and black beans. This adds protein and flavor. If you prefer to keep things vegetarian, try adding mushrooms or extra veggies. They give a nice texture without meat. If you want a dairy-free option, use vegan cheese. It melts well and adds creaminess. You can also mix different cheeses, like pepper jack for spice or mozzarella for stretchiness. Each cheese brings a new flavor to the dish, so feel free to experiment. Tortillas come in many types. If you're gluten-free, look for corn or rice tortillas. They hold up great and taste good! You can also make your own tortillas at home. They can be softer and fresher than store-bought. Just remember that the texture and taste will change depending on your choice. For the full recipe, check the earlier section. To keep your sweet potato black bean quesadillas fresh, store them in an airtight container. Let them cool before packing. This way, they won't steam and get soggy. In the fridge, they stay good for about 3 to 4 days. Always check for any signs of spoilage before eating. If you want to save some quesadillas for later, freezing is a great option. First, let them cool completely. Then, wrap each quesadilla in plastic wrap or foil. Place them in a freezer-safe bag or container. They can stay in the freezer for up to 3 months. When you are ready to eat a frozen quesadilla, remove it from the freezer. Unwrap it and place it in a skillet over medium heat. Cook for about 5 to 7 minutes on each side until heated through. You can also reheat it in the oven at 375°F (190°C) for about 10-15 minutes. This keeps the tortilla crispy and the filling warm. For the full recipe, check out the section above. Sweet Potato Black Bean Quesadillas can last up to 3-4 days in the refrigerator. Store them in an airtight container to keep them fresh. If you want to keep them longer, you can freeze them. They last about 2-3 months in the freezer. Just wrap each quesadilla in plastic wrap and place them in a freezer bag. When you're ready to eat, thaw them in the fridge overnight. Yes, you can make these quesadillas ahead of time. Prepare the filling and store it in the fridge. You can assemble the quesadillas later when you’re ready to cook. This makes meal prep easy and quick. You can also cook them in advance and reheat them. Just make sure to follow the storage tips above for the best results. These quesadillas pair well with many sides. Consider serving them with: - Fresh avocado slices - Salsa or pico de gallo - A side salad with lime dressing - Mexican-style rice or quinoa - Black bean soup for a warm touch You can also enjoy a refreshing drink, like agua fresca or a light beer, alongside your meal. For more ideas, check the Full Recipe for fun suggestions! This blog post shares a simple way to make sweet potato black bean quesadillas. We covered key ingredients like sweet potatoes, spices, and tasty cheese. The step-by-step instructions guide you through roasting the sweet potatoes and preparing the filling. Tips for perfect crispiness and flavor add to your cooking success. Lastly, we explored different variations and storage options to keep your quesadillas fresh. Enjoy experimenting with flavors and making this dish your own. Happy cooking!

Savory Sweet Potato Black Bean Quesadillas Recipe

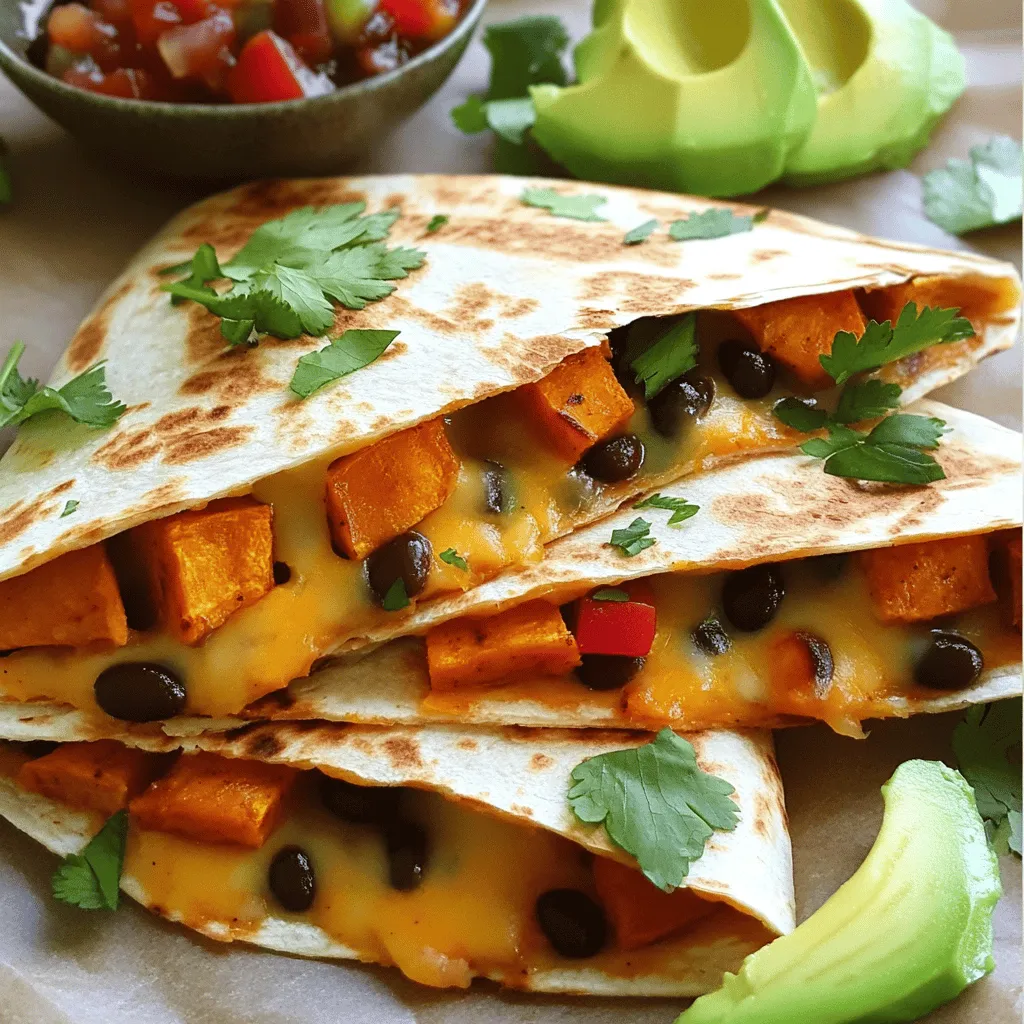
Looking for a delicious and easy meal? Try these Savory Sweet Potato Black Bean Quesadillas! With just a few key

- 2 cups cooked chicken, shredded - 1/2 cup peanut butter (or almond butter) - 1 tablespoon lime juice - 1 cup shredded carrots - 1 cup cucumber, julienned - 1 red bell pepper, thinly sliced - 1/4 cup fresh cilantro, chopped - 1/4 cup chopped peanuts - Optional: Red pepper flakes When I create Thai Peanut Chicken Wraps, I focus on fresh and simple ingredients. The main star is the chicken. You can use leftover rotisserie chicken or grill it fresh. This saves time and adds great flavor. Peanut butter gives the wraps a creamy texture. You can swap it with almond butter for a nutty twist. Lime juice adds a bright, zesty kick. It balances the creamy peanut butter perfectly. Next, fresh vegetables bring crunch and color. Shredded carrots add sweetness and a nice bite. Cucumber gives a refreshing crunch, while the red bell pepper adds a pop of color and flavor. For garnishes, I love using fresh cilantro. It adds an herbaceous note that brightens the dish. Chopped peanuts offer a satisfying crunch. If you like heat, sprinkle red pepper flakes on top. You can find the full recipe [here]. This meal is quick and easy, making it perfect for busy nights. Enjoy every bite of these tasty wraps! 1. In a mixing bowl, combine peanut butter, soy sauce, lime juice, honey, minced garlic, and grated ginger. 2. Stir well until smooth to create the peanut sauce. 3. Adjust sweetness to taste by adding more honey if needed. 1. Take your cooked chicken and coat it with half of the peanut sauce. 2. Place a large lettuce leaf on a flat surface. 3. Add a generous amount of the chicken on the leaf. 4. Layer on shredded carrots, cucumber, red bell pepper slices, and chopped cilantro. 1. Carefully fold the lettuce leaves around the filling to create wraps. 2. If needed, secure the wraps with a toothpick. 3. Drizzle with the reserved peanut sauce or use it as a dipping sauce. You can find the full recipe for these delicious Thai Peanut Chicken Wraps in the previous sections. Enjoy your meal! To make the best peanut sauce, you can adjust the flavors. If you want it sweeter, add more honey. If you like it saltier, add more soy sauce. For a tangy kick, squeeze in extra lime juice. If the sauce is too thick, add a bit of water or more lime juice. For a thicker sauce, use less liquid or add more peanut butter. This sauce can change your wraps from good to great. For the best wraps, use Romaine or Butterhead lettuce. These lettuces are strong and hold the filling well. If you want to mix it up, try using rice paper or tortillas. Both options add a fun twist and make assembly easy. Each wrapper brings its own taste and texture. These wraps pair well with side dishes like fresh fruit or crispy veggie sticks. They also go great with a light salad. For drinks, try iced tea or coconut water. Both options keep the meal refreshing and light. Enjoy your wraps with these tasty sides and drinks for a complete meal. {{image_2}} You can switch the chicken for tofu or tempeh. These options are great for plant-based diets. Simply cut the tofu or tempeh into cubes. Then, cook them until golden brown. This adds a nice texture and flavor. If you want more taste, try slow-cooking chicken or tempeh. This method helps the flavors blend well. It also makes the dish juicy and rich. Spice up your wraps by adding chili paste or sriracha. This brings a kick and makes the wraps exciting. You can also experiment with herbs like basil or mint. These herbs add freshness and a unique taste. Consider trying sesame oil for a nutty flavor. It makes the peanut sauce even richer and more complex. If you need a gluten-free meal, use tamari instead of soy sauce. This simple swap keeps the taste but removes gluten. For a vegan version, replace chicken with chickpeas. Simply mash them and mix with the peanut sauce. It creates a creamy and tasty filling. You can still enjoy these wraps while meeting your dietary needs. For the Full Recipe, refer back to the earlier section on ingredients and instructions. To keep your Thai peanut chicken wraps fresh, wrap them tightly in plastic. This helps prevent air from drying them out. Place the wrapped wraps in an airtight container in the fridge. They stay good for about 2 to 3 days. After that, the veggies may lose their crunch. If you have extra wraps, freezing is a great choice. To freeze them, wrap each one in plastic wrap. Then place the wrapped wraps in a freezer-safe bag. This keeps them fresh for up to 3 months. When you're ready to eat, take one out and let it thaw in the fridge overnight. To reheat, you can warm them in a microwave for about 30 seconds. You might have extra peanut sauce or veggies after making these wraps. Use the sauce as a dip for fresh veggies or spread it on toast. You can also mix leftover veggies into a salad for a quick meal. If you have chicken left, toss it into a stir-fry or a grain bowl. These ideas help reduce waste and add variety to your meals. If you need an alternative, try these nut butters: - Almond butter - Cashew butter - Sunflower seed butter Each option gives a unique taste. Almond butter has a sweet flavor. Cashew butter is creamy and mild. Sunflower seed butter is great for nut allergies. Yes, you can prep this dish ahead of time. Here are some tips: - Make the peanut sauce in advance. - Store it in the fridge for up to a week. - Cook and shred the chicken ahead. - Chop veggies and keep them fresh in containers. Assemble the wraps just before serving for the best taste. To make these wraps more appealing to kids, try these adjustments: - Use less soy sauce for a milder flavor. - Skip the red pepper flakes if they like it mild. - Add sweet veggies like bell peppers or carrots. - Let kids help assemble their own wraps. These steps can make cooking fun and tasty for little chefs! These wraps offer a burst of flavor and nutrition. We covered the key ingredients, like chicken and fresh veggies, plus a rich peanut sauce. I shared tips for making and storing your wraps, along with fun variations for everyone. In the end, cooking shouldn’t be hard. Enjoy experimenting and make the recipe your own!

Thai Peanut Chicken Wraps Easy and Tasty Meal Idea

Looking for an easy and tasty meal idea? Thai Peanut Chicken Wraps are the answer! This dish combines tender chicken,

To make this dish, you need some key ingredients. Here’s what you will use: - 2 cups cooked chicken, shredded - 1 can (15 oz) enchilada sauce (red or green) - 1 cup black beans, drained and rinsed - 1 cup corn (frozen or fresh) - 1 cup diced bell peppers (any color) - 1 teaspoon cumin - 1 teaspoon chili powder - 2 cups shredded cheese (cheddar or a Mexican blend) - 8 small flour tortillas You can start with cooked chicken. I like to use rotisserie chicken. It saves time and tastes great. Cheese makes this dish creamy and rich. I suggest using cheddar or a Mexican blend. Both melt well and add flavor. If you want something different, try pepper jack for a kick! You can also mix cheeses for a tasty twist. Garnishes can make your meal pop. I love adding fresh cilantro on top. It adds a nice color and flavor. Sour cream is a great side too. It cools down the spice. You can also serve it with rice or chips for a full meal. Enjoy your Easy Chicken Enchilada Bake with these fun extras! For the full recipe, check out the instructions above. First, set your oven to 375°F (190°C). This step warms the oven for the enchilada bake. While it preheats, gather your ingredients. You need cooked chicken, enchilada sauce, black beans, corn, bell peppers, spices, tortillas, and cheese. Having everything ready makes cooking smooth. In a large bowl, mix the shredded chicken, black beans, corn, diced bell peppers, cumin, and chili powder. Add half of the enchilada sauce to the mix. Stir everything well so the flavors blend nicely. This filling is the heart of the dish. It brings all the tastes together. Grab a 9x13 inch baking dish. Spread a thin layer of the remaining enchilada sauce on the bottom. This helps prevent sticking. Next, lay four tortillas on top of the sauce. Take a scoop of the chicken mixture and place it in each tortilla. Roll them tightly and place them seam side down in the dish. Repeat this with the other tortillas until the filling is gone. Pour any leftover enchilada sauce over the top. Finally, sprinkle shredded cheese over everything. Cover the dish with aluminum foil. Bake it in the oven for 20 minutes. This step helps the filling heat up. After that, remove the foil and bake for another 10 minutes. Keep an eye on the cheese; it should be bubbly and slightly golden. Once finished, let it cool for a few minutes. Then slice it into squares, garnish with fresh cilantro, and serve with sour cream if you like. Enjoy your Easy Chicken Enchilada Bake! To keep your enchiladas crisp, layer them with care. Start with a thin layer of sauce on the bottom. This helps prevent sogginess. Use only enough sauce to moisten the tortillas. Avoid drenching them before baking. You can also bake uncovered for the last few minutes. This makes the top nice and crunchy. Using the right tools makes a big difference. A large mixing bowl helps you combine the filling well. Use a spatula to spread sauce and cheese evenly. Tongs are great for handling hot tortillas. A 9x13 inch baking dish is perfect for this recipe. It holds all your enchiladas snugly. Want to give your enchiladas a kick? Add jalapeños or diced green chiles to the filling. You can also mix in some chipotle powder for a smoky flavor. If you like fresh herbs, try adding chopped cilantro or parsley. A squeeze of lime juice before serving adds a zesty touch. For a creamy twist, top with sour cream or avocado. For the full recipe, check out the Easy Chicken Enchilada Bake section! {{image_2}} You can make this dish without chicken. Use beans, like black or pinto, for protein. Add veggies, such as zucchini, mushrooms, or spinach. These options give a fresh taste. They also make the dish colorful and fun. Mix in some extra spices to boost flavor. This way, everyone can enjoy the meal, even non-meat eaters. Want a healthier twist? Swap out the flour tortillas for corn tortillas. They are lower in calories and gluten-free. You can also use low-fat cheese or skip it entirely. Try using Greek yogurt instead of sour cream. It adds creaminess and protein without extra fat. Finally, consider adding more veggies. This will increase fiber and nutrients, making the dish even better for your health. To change the flavor, try different enchilada sauces. Green sauce adds a fresh, bright taste. A tomatillo sauce brings a tangy twist. You can also add salsa for a kick. For a smoky flavor, try chipotle sauce. Each sauce creates a new vibe for your meal. Mix it up and see what your family loves best! For the full recipe, check out the section above. After enjoying your Easy Chicken Enchilada Bake, save any leftovers to enjoy later. Let the dish cool down to room temperature. Then, cover it tightly with plastic wrap or foil. You can also use an airtight container for best results. Store the leftovers in the fridge. They will stay fresh for up to three days. To reheat your enchilada bake, preheat your oven to 350°F (175°C). Place the dish covered with foil in the oven. Heat for about 20 minutes. This helps keep the dish moist and tasty. If you prefer, you can microwave individual portions. Heat them for one to two minutes, checking frequently. Want to save your enchilada bake for later? You can freeze it! First, let it cool completely. Then, cut the dish into portions. Wrap each piece in plastic wrap, then in foil. Place them in a freezer-safe bag. Label the bag with the date. Your enchiladas will be good for up to three months in the freezer. When ready to eat, thaw them in the fridge overnight before reheating. For best taste, reheat in the oven. Enjoy your easy meal anytime! For the full recipe, check out the section above. Yes, you can make this dish ahead of time. Prepare the filling and assemble the enchiladas. Cover the baking dish with foil and store it in the fridge. When you’re ready to bake, just add a few more minutes to the cooking time. This makes dinner easy on busy nights. If you want a change, try using corn tortillas. You can also use lettuce wraps for a low-carb option. Another idea is to use zucchini slices. These swaps still hold the filling well and keep the dish tasty. Absolutely! To use a slow cooker, layer the filling and tortillas in the pot. Pour the enchilada sauce over everything. Set it on low for about 4 hours or high for 2 hours. This method will keep the dish moist and flavorful. To make this bake gluten-free, use corn tortillas instead of flour tortillas. Check your enchilada sauce to ensure it’s gluten-free. Most brands offer gluten-free options. With these changes, you can enjoy this dish without worry. The Easy Chicken Enchilada Bake combines simple ingredients and straightforward steps. With tips to avoid soggy enchiladas and ways to enhance flavors, this dish is both fun and flexible. You can try vegetarian options or swap ingredients for healthier choices. Proper storage will keep your leftovers tasty. Whether you prepare it ahead or use a slow cooker, this recipe fits any schedule. Enjoy crafting this satisfying meal that your family will love!

Easy Chicken Enchilada Bake Tasty Family Dinner

Looking for a quick and tasty family dinner? This Easy Chicken Enchilada Bake is your answer! With simple steps and

- 3 ripe tomatoes, diced - 2 ripe avocados, diced - 1 small red onion, finely chopped - 1/4 cup fresh cilantro, chopped Fresh produce makes this salad shine. Choose ripe tomatoes for sweetness and color. Ripe avocados add creaminess and healthy fats. A small red onion gives a nice crunch and sharpness. Fresh cilantro brings a bright flavor that ties everything together. - 2 tablespoons lime juice - 1 tablespoon extra virgin olive oil - Salt and pepper to taste - Optional: 1 jalapeño, finely chopped (for heat) Lime juice adds a zesty kick. Extra virgin olive oil provides richness and depth. Salt and pepper enhance the flavors. If you like heat, add a jalapeño for a spicy twist. These additional ingredients make the salad vibrant and tasty. For the full recipe, check out [Full Recipe]. 1. Start by combining the diced tomatoes and avocados in a large bowl. 2. Next, add the finely chopped red onion and fresh cilantro. 3. If you like some heat, include the optional jalapeño, finely chopped. 1. Drizzle the lime juice and olive oil over your mixture. 2. Gently toss all the ingredients with a large spoon. Be careful not to mash the avocado. 3. Adjust the seasoning with salt and pepper to suit your taste. 1. Allow the salad to rest for about five minutes. This helps the flavors meld together. 2. For presentation, serve the salad in a large bowl or on individual plates. Garnish with extra cilantro and lime wedges for a pop of color. You can drizzle a bit more olive oil on top for a glossy finish. This simple tomato avocado salad is fresh and healthy. Enjoy the vibrant colors and flavors! For more details, check the Full Recipe. To make the best tomato avocado salad, choose your ripe avocados and tomatoes wisely. Look for avocados that yield slightly when you press them. For tomatoes, pick ones that smell sweet and feel firm but not hard. This ensures your salad tastes fresh and vibrant. When you toss the ingredients, do it gently. You want to mix them well but avoid mashing the avocados. This keeps the chunks intact and makes your salad look appealing. Use a large spoon and a soft touch for the best results. Storage is key for keeping your salad fresh. If you have leftovers, put them in an airtight container. Store in the fridge and eat within one day. This way, you can enjoy the salad's bright flavors again. To add extra zest to your salad, think about additional ingredients. Chopped jalapeños can bring heat, while feta cheese adds creaminess. You might also try diced bell peppers for crunch and color. For your oil or acid, use different options like avocado oil or red wine vinegar. Each choice adds a unique flavor twist. Experiment until you find your favorite combination. Balancing spices is essential for your personal taste. Start with salt and pepper, but feel free to add garlic powder or cumin for depth. Taste as you go to find the perfect mix for you. {{image_2}} You can switch up herbs or greens in this salad. If you prefer basil, use it instead of cilantro. Spinach or arugula also adds a nice touch. You might want to try other fruits or veggies too. For example, diced mango or cucumber can add sweetness or crunch. If you want a heartier meal, add protein. Grilled chicken, shrimp, or chickpeas work well. These swaps keep the dish fresh and exciting. Adjust your ingredients based on what is in season. In summer, use fresh, juicy tomatoes. In winter, try roasted peppers or sun-dried tomatoes for warmth. You can create a winter version with different flavors. Think about adding roasted squash or beets. These add color and taste. Experiment with dressings as well. A tangy balsamic vinaigrette suits fall, while a light lemon dressing fits summer. Each season brings new tastes to explore. For the full recipe of this refreshing salad, check out the Fresh Tomato Avocado Bliss Salad. To keep your tomato avocado salad fresh, store it in the fridge. Use an airtight container to seal in moisture and flavor. The salad tastes best within one day. After that, the avocado may brown, and the tomatoes can lose their crispness. If you have leftovers, try to eat them within two days for the best taste. Can you freeze this salad? It’s not the best option. Freezing can change the texture of the tomatoes and avocados. However, if you want to prep in advance, keep the ingredients separate. You can chop the tomatoes and avocados but store them in separate containers. This way, you can mix them fresh when you are ready to eat. It ensures you enjoy vibrant flavors and textures. Can I make this salad a day in advance? You can make this salad a day ahead. However, I suggest adding the avocado just before serving. This keeps it fresh and green. What can I serve with a tomato avocado salad? This salad pairs well with grilled chicken or fish. You can also serve it with crusty bread or as a side to tacos. How do I prevent avocados from browning? To stop avocados from browning, use lime juice. The acid in lime slows oxidation. Cover leftovers tightly to keep them fresh. Is a tomato avocado salad healthy? Yes, this salad is very healthy. It is low in calories and high in nutrients. The ingredients provide vitamins, minerals, and healthy fats. What are the nutritional benefits of the ingredients? Tomatoes are full of vitamins A and C. They help your skin and eyes. Avocados provide healthy fats that are good for your heart. Onions add antioxidants, while cilantro offers detox benefits. How does this salad fit into a balanced diet? This salad fits well into a balanced diet. It includes healthy fats, fresh produce, and flavor. Pair it with proteins for a complete meal. You can enjoy it as a light lunch or side dish. Be sure to check the Full Recipe for more tips! This blog post covered how to make a fresh and tasty tomato avocado salad. We discussed choosing ripe produce and what to mix for the best flavor. I shared tips for storage and ways to add your own twist with ingredients. Remember, using fresh ingredients makes all the difference. This salad is simple yet packed with nutrition. Enjoy trying new variations, and let your creativity shine. A delicious salad awaits you, so gather your ingredients and get started!

Simple Tomato Avocado Salad Fresh and Healthy Dish

Looking for a fresh and healthy dish? Try my Simple Tomato Avocado Salad! This vibrant salad combines ripe tomatoes, creamy

Older posts
Newer posts
← Previous Page1 … Page12 Page13 Page14 … Page66 Next →

dsad

© 2025 Cooking Wells • Built with GeneratePress

Our Policies

  • Copyright Policy
  • Cookie Policy
  • GDPR Policy
  • Privacy Policy
  • Disclaimer
  • Terms Of Use

More Information

  • Home
  • About
  • Contact
  • Appetizers
  • Dessert
  • Dinner
  • Drinks
©2025, Cooking Wells About Back To Top