Skip to content
DisclaimerTerms Of UseGDPR PolicyCookie Policy

Cooking Wells

  • Home
  • Drinks
  • Appetizers
  • Dinner
  • Dessert
  • About
  • Contact
  • Privacy Policy
DisclaimerTerms Of UseGDPR PolicyCookie Policy

Mia

To make Cheesy Spinach Stuffed Shells, you need a few key ingredients. These ingredients come together to create a rich and tasty dish. Here’s what you’ll need: - 20 jumbo pasta shells - 2 cups ricotta cheese - 1 cup shredded mozzarella cheese, divided - 1/2 cup grated Parmesan cheese - 2 cups fresh spinach, chopped - 1/2 teaspoon garlic powder - 1/2 teaspoon onion powder - 1/4 teaspoon nutmeg - Salt and pepper to taste - 2 cups marinara sauce - Fresh basil leaves for garnish Each ingredient plays a crucial role. The jumbo pasta shells hold the creamy filling. Ricotta adds a smooth texture, while mozzarella and Parmesan give a cheesy flavor. Fresh spinach adds color and nutrients. Garlic and onion powder enhance the taste with warmth. Nutmeg gives a hint of spice. Marinara sauce brings everything together with its tangy goodness. I love using fresh basil as a garnish. It adds a pop of color and a fresh taste. You can find the full recipe to guide you through each step. This dish is not just filling, but it also looks great on the table. - Preheat the oven: Start by preheating your oven to 375°F (190°C). A hot oven helps the cheese melt perfectly. - Cook the pasta: In a large pot, boil salted water. Cook the jumbo pasta shells until they are al dente. This usually takes about 8-10 minutes. Drain and rinse them under cold water to stop cooking. - Prepare the cheesy spinach filling: In a big mixing bowl, combine ricotta cheese, 1/2 cup of mozzarella, Parmesan cheese, and chopped spinach. Add garlic powder, onion powder, nutmeg, salt, and pepper. Stir until everything is well mixed. The filling should be creamy and flavorful. - Stuff the cooked shells: Take a spoon and carefully fill each shell with the cheesy spinach mixture. Don’t overfill! Each shell needs just the right amount to ensure they cook well. - Assemble the dish: Spread about 1 cup of marinara sauce on the bottom of a 9x13 inch baking dish. Place the stuffed shells in a single layer on top of the sauce. Pour the rest of the marinara sauce over the shells. Sprinkle the remaining mozzarella cheese on top. - Bake: Cover the dish with aluminum foil. Bake in the preheated oven for 20 minutes. After that, remove the foil and bake for another 10-15 minutes. You want the cheese to be bubbly and golden. Enjoy this warm, cheesy delight! You can find the full recipe and more tips to enhance your cooking experience. - Ensuring perfect pasta texture: Always cook the jumbo shells until they are al dente. This helps them hold the filling better. After cooking, rinse the shells in cold water. This stops the cooking process and keeps them firm. - Best practices for stuffing shells: Use a spoon or a piping bag to fill your shells. This makes the process clean and easy. Be sure not to overstuff them. A little filling goes a long way, and overstuffing can lead to messy shells. - Presentation ideas for serving: Serve the stuffed shells on a large platter. Drizzle extra marinara sauce over the top. A sprinkle of fresh basil on the finished dish adds color and flavor. - How to pair with side dishes: These stuffed shells go well with a simple green salad. Garlic bread also makes a great side. The bread soaks up the extra sauce and adds crunch. - Overstuffing shells: If you fill the shells too much, they might burst while baking. Stick to a moderate amount of filling for the best results. - Skipping marinara sauce: Always use marinara sauce in the dish. It adds moisture and flavor. Without it, the shells can be dry and bland. {{image_2}} You can change up the cheese in this recipe. Try using goat cheese or feta for a tangy twist. These cheeses add a rich flavor that pairs well with spinach. If you need a non-dairy option, use cashew cheese or tofu. Blend them with some nutritional yeast for a creamy filling. This way, you keep the taste without using dairy. Adding fresh herbs can elevate this dish. Basil, oregano, or thyme add a burst of flavor. You can mix them right into the cheese filling. You might also consider adding diced bell peppers or mushrooms. These veggies add texture and a nice taste. Sauté them before mixing for the best flavor. You can make these shells in a pressure cooker. Just layer the shells with sauce and cheese, then cook for about 10 minutes. This method saves time and keeps the pasta soft. A slow cooker is another great option. Layer the shells and sauce, then cook on low for 4 hours. This method allows the flavors to meld beautifully. For the full recipe, click [here](#). To store leftovers, let the Cheesy Spinach Stuffed Shells cool completely. Place them in an airtight container. They will stay fresh in the fridge for about 3 to 4 days. When you’re ready to enjoy them again, reheat in the oven or microwave. If using the oven, preheat it to 350°F (175°C). Cover the dish with foil to keep them moist. Heat for about 15 to 20 minutes until warm. You can freeze stuffed shells before baking. Prepare them as usual, but don’t bake them. Instead, cover the dish tightly with plastic wrap and then with foil. They can stay in the freezer for up to 2 months. When you’re ready to bake them, remove the wrap and foil. Bake from frozen, adding about 10 to 15 extra minutes to the cooking time. If you freeze after cooking, let the shells cool first. Store them in a suitable container. They can also last for about 2 months in the freezer. To reheat, thaw them overnight in the fridge and then follow the reheating guidelines. For more detailed steps, check the Full Recipe. Can I make Cheesy Spinach Stuffed Shells ahead of time? Yes, you can prepare the shells in advance. Stuff the shells and place them in a baking dish. Cover the dish with foil and store it in the fridge. Bake them when you're ready. This makes dinner easy after a busy day. How long do they last in the fridge? Cheesy Spinach Stuffed Shells can last up to three days in the fridge. Just make sure you store them in an airtight container. This keeps them fresh and tasty for your next meal. Caloric content per serving Each serving of Cheesy Spinach Stuffed Shells has about 350 calories. This means you can enjoy a filling meal without too much guilt. Protein and other nutrient breakdown A serving contains roughly 20 grams of protein. It also has good amounts of calcium and iron from the cheese and spinach. These nutrients help keep you strong and healthy. Recommended serving size for family dinners I suggest serving 2-3 stuffed shells per person. This is enough for a hearty meal. Pair it with a salad for a complete dinner. Scaling the recipe for larger gatherings You can easily double the recipe for a crowd. Just use a bigger baking dish and add more marinara sauce. This way, everyone can enjoy this cheesy delight. For the full recipe, check the section above. In this blog post, we explored making Cheesy Spinach Stuffed Shells. We covered key ingredients like jumbo pasta shells, ricotta, and fresh spinach. You learned step-by-step instructions for prep, filling, and baking. Cooking tips ensured perfect results, while variations offered exciting twists. We also shared storage info and answered common questions. Now, you have all the tools to create a delicious dish. Enjoy making this meal and impressing your family and friends!

Cheesy Spinach Stuffed Shells Flavorful and Filling Dish

Are you ready to delight your taste buds with a dish that’s both creamy and satisfying? These Cheesy Spinach Stuffed

To make Coconut Lime Shrimp, you need a few key ingredients. Here’s what you’ll need: - 1 lb large shrimp, peeled and deveined - 1 cup coconut milk - 1 tablespoon lime zest - 2 tablespoons lime juice - 2 garlic cloves, minced - 1 tablespoon fresh ginger, grated - 1 tablespoon honey - 1 teaspoon red pepper flakes (adjust for spice preference) - 2 tablespoons olive oil - Salt and pepper to taste - Fresh cilantro for garnish - Cooked rice or quinoa, for serving These ingredients blend to create a tasty dish that sings with tropical flavors. You can swap some ingredients for a twist. Try using lime juice from a bottle if you don't have fresh limes. You can also use different sweeteners like maple syrup instead of honey. If you want more heat, add more red pepper flakes or a dash of hot sauce. For a creamier base, you might mix in a bit of sour cream or yogurt. These changes let you customize the dish to fit your taste. Using fresh shrimp can enhance your dish. Fresh shrimp have a better texture and taste. They are often more tender and flavorful. However, frozen shrimp are a great option too. They are convenient and can be just as tasty if thawed correctly. If you choose frozen shrimp, make sure to thaw them overnight in the fridge. This keeps them from getting mushy. Whichever you pick, always check for quality. Fresh or frozen, shrimp make this dish a delight. To start, gather your ingredients for the marinade. In a medium bowl, mix together: - 1 cup coconut milk - 1 tablespoon lime zest - 2 tablespoons lime juice - 2 garlic cloves, minced - 1 tablespoon fresh ginger, grated - 1 tablespoon honey - 1 teaspoon red pepper flakes (adjust for spice) Whisk these until well combined. Next, add the shrimp. Make sure they are peeled and deveined. Let the shrimp sit in the marinade for 20 to 30 minutes in the fridge. This step enhances the flavor and makes the shrimp tender. Now, it’s time to cook the shrimp. Heat 2 tablespoons of olive oil in a large skillet over medium-high heat. Once the oil is hot, carefully add the marinated shrimp. Discard the marinade; we don’t need it now. Cook the shrimp for 2 to 3 minutes on each side. They should turn pink and opaque. Be careful not to overcook them. Overcooked shrimp can become tough and rubbery. Once cooked, season with salt and pepper to taste, then remove from heat. For serving, I recommend plating the shrimp over a bed of cooked rice or quinoa. Drizzle any remaining juices from the skillet over the shrimp for extra flavor. To make the dish pop, garnish with fresh cilantro. A wedge of lime on the side adds a nice touch too. For more details, check the Full Recipe. When picking shrimp, look for a few key signs. First, choose shrimp that are firm and shiny. Fresh shrimp should smell like the ocean, not fishy. If you see black spots, skip them. I prefer large shrimp for this recipe. They hold the marinade better and cook nicely. If you use frozen shrimp, thaw them in the fridge overnight for best results. Cooking shrimp just right is important. Cook them too long, and they get tough. I recommend cooking shrimp for only 2-3 minutes on each side. Watch for the color change. When they turn pink and opaque, they are done. If you have a lot of shrimp, cook in batches. This helps keep the heat even. Always remove them from heat once cooked to prevent further cooking. You can make this dish even better with fun extras. Consider adding diced bell peppers for crunch. They add color and flavor too. If you like heat, try adding more red pepper flakes or some chopped jalapeños. Fresh herbs, like basil or mint, can bring a unique twist. For a sweeter touch, a splash of pineapple juice works well. These little changes can create a fun new dish. For the full recipe, check out the detailed instructions above. {{image_2}} You can make Coconut Lime Shrimp healthier by using light coconut milk. This reduces fat while keeping the creamy taste. You can also swap honey for agave syrup or maple syrup. Both options provide sweetness with fewer calories. For a low-carb meal, serve the shrimp with cauliflower rice instead of regular rice. To make a vegan version of this dish, replace shrimp with firm tofu or tempeh. Cube the tofu and marinate it just like the shrimp. You can also use jackfruit for a meaty texture. Keep the coconut milk and spices to maintain that tropical flavor. Serve with quinoa or a fresh salad for a complete meal. If you want more heat, add more red pepper flakes or some chopped jalapeños. You could also mix in a bit of sriracha for a different kick. For sweetness, try adding diced mango or pineapple to the dish. This will give it a fruity twist. Each variation allows you to customize the dish based on your taste. Try different combinations to find your favorite! For the full recipe, check out the Coconut Lime Shrimp recipe above. After you enjoy your Coconut Lime Shrimp, store leftovers in an airtight container. This keeps the shrimp fresh and tasty. Make sure to cool them down first. Place them in the fridge within two hours of cooking. Leftovers can last for up to three days. If you want to keep them longer, freezing is a good option. To freeze your Coconut Lime Shrimp, start by placing them in a single layer on a baking sheet. This prevents them from sticking together. Once frozen, transfer the shrimp to a freezer bag. Remove as much air as possible to avoid freezer burn. They can stay in the freezer for up to three months. When you're ready, thaw them in the fridge overnight. When reheating, aim for low heat to avoid overcooking. You can use a skillet or microwave. If using a skillet, add a splash of water or broth to keep the shrimp moist. Heat just until warm, around two to three minutes. In the microwave, use short intervals and check often. This way, your shrimp will stay tender and juicy. Enjoy your meal! Cooking shrimp is quick! It takes about 4 to 6 minutes in total. Shrimp cooks fast, so watch closely. You want them pink and opaque. Overcooking makes them tough and chewy. Yes, you can! Chicken or tofu works well in this recipe. For chicken, cut it into small pieces. Cook it longer, about 8 to 10 minutes. Tofu needs firm tofu, cut into cubes. Cook it until golden brown. I love serving Coconut Lime Shrimp with rice or quinoa. They soak up the sauce nicely. You can also add a fresh salad or grilled vegetables. These sides balance the rich coconut flavor. Absolutely! Add more red pepper flakes for heat. You can also use fresh chopped chili peppers. Start with a small amount, then taste it. Adjust to your spice level for the best flavor. Store any leftovers in an airtight container. They stay fresh in the fridge for 2 to 3 days. Reheat gently on the stove or microwave. This keeps the shrimp tender and juicy. Yes, you can prep the marinade early. Just add the shrimp right before cooking. This keeps the shrimp fresh and flavorful. You can also make it a few hours ahead, then reheat for serving. Fresh cilantro adds a bright touch! You can also sprinkle some extra lime zest. This adds color and enhances the lime flavor. Try to add a lime wedge on the side for a nice touch too. You can find the full recipe for Coconut Lime Shrimp in the earlier sections. Enjoy cooking this tropical delight! Coconut lime shrimp is a simple and tasty dish. We covered essential ingredients, step-by-step cooking, and clever tips. Using fresh shrimp improves flavor, while alternative ingredients add fun twists. Storing your leftovers and knowing cooking times keeps your meal great. Remember, there are variations for health needs and flavor loves. Enjoy making this dish your own and impressing anyone at the table. Happy cooking!

Coconut Lime Shrimp Flavorful Tropical Delight Recipe

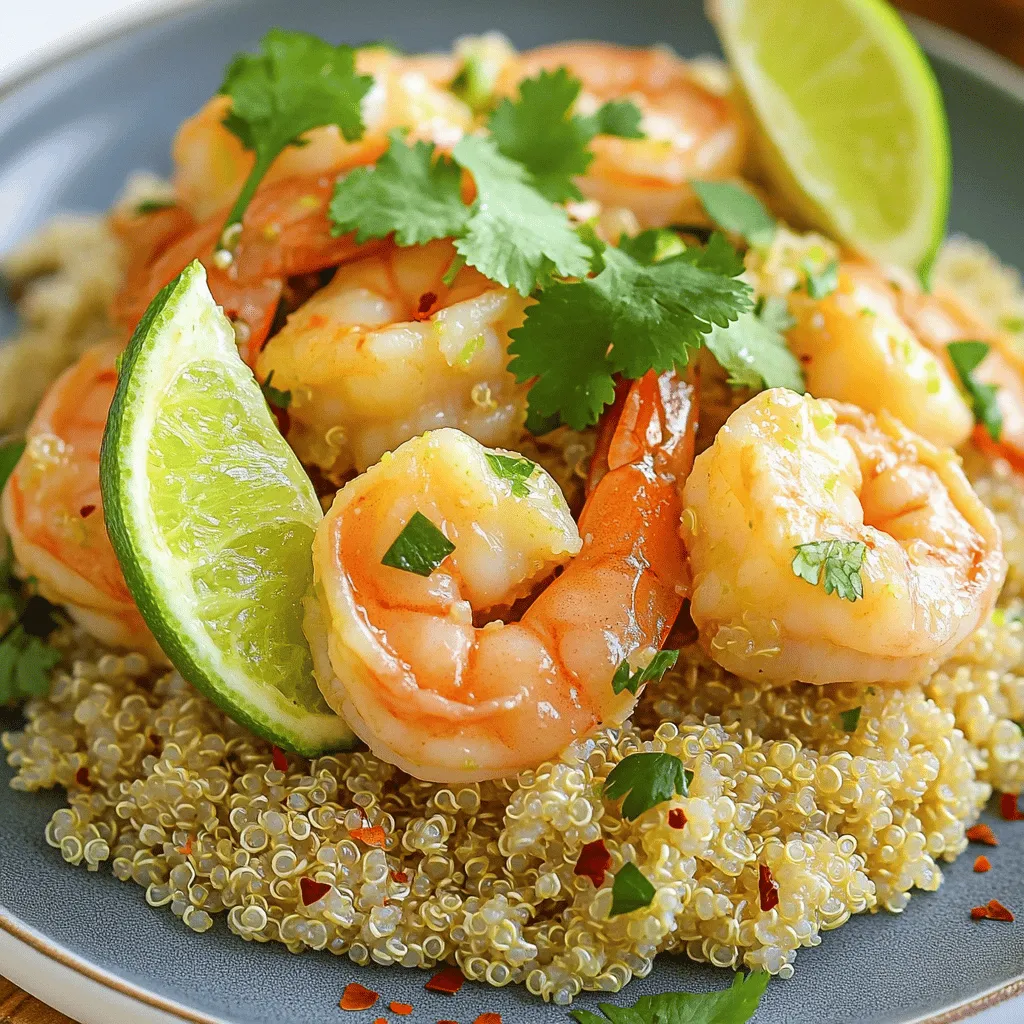
If you’re ready to take your taste buds on a tropical vacation, this Coconut Lime Shrimp recipe is for you!

- 1 cup rolled oats - 1 cup almond milk (or any milk of your choice) - 1/2 cup canned pumpkin puree - 1 tablespoon maple syrup - 1 teaspoon pumpkin pie spice - 1/2 teaspoon vanilla extract - Pinch of salt - Optional toppings: chopped nuts, dried cranberries, coconut flakes, or yogurt To make pumpkin spice overnight oats, you need a few simple ingredients. Rolled oats form the base. They soak up the milk and flavor well. I love using almond milk, but feel free to choose your favorite. Canned pumpkin puree adds creaminess and a rich taste. The maple syrup gives it a sweet touch. Pumpkin pie spice adds that warm, cozy flavor we all love. A dash of vanilla makes everything better. Lastly, a pinch of salt balances the sweetness. You can also add toppings for extra crunch and flavor. Chopped nuts give a nice texture. Dried cranberries offer a sweet and tangy bite. Coconut flakes add a tropical twist, while yogurt can make it creamy. Check the [Full Recipe] for more details on preparation and serving ideas. - Combine ingredients in a mixing bowl or mason jar. - Stir well until fully incorporated. - Cover and refrigerate overnight. Making pumpkin spice overnight oats is easy and fun. First, gather all your ingredients. You will need rolled oats, almond milk, pumpkin puree, maple syrup, pumpkin pie spice, vanilla extract, and a pinch of salt. This mix creates a creamy and flavorful base. Next, place your rolled oats in a bowl or a mason jar. Add the almond milk and pumpkin puree. Then, pour in the maple syrup and sprinkle the pumpkin pie spice. Don’t forget the vanilla extract and salt! Now, stir everything together until it’s well mixed. You want all the oats to soak in the liquid. This step is key for flavor. Once it looks good, cover your bowl or seal the jar. Finally, pop it in the fridge. Let it chill overnight. This soaking time is where the magic happens! - Give the oats a good stir before serving. - Add desired toppings for flavor and texture. In the morning, your oats will be ready. Take them out of the fridge and give the mixture a good stir. If it looks too thick, don’t worry. Just add a splash of almond milk to get your preferred texture. Now it’s time to serve! You can enjoy your oats in a bowl or right from the jar. For extra fun, add toppings. Some great choices are chopped nuts, dried cranberries, coconut flakes, or a dollop of yogurt. These toppings add crunch and sweetness. - Reference for detailed ingredient quantities and preparation methods. If you want the exact amounts and all the steps, check out the Full Recipe. It provides all the details to make this delightful dish perfectly! You can make this recipe your own. Try different milk options, like oat or soy milk. This can change the flavor and texture. Adjust the sweetness by using more or less maple syrup. Taste as you go to get it just right. To change the thickness, add more milk if you want it thinner. If you like a richer flavor, let it soak longer. The oats will absorb more pumpkin and spice, making each bite tasty. Serving your oats in clear jars makes them look great. You can see the layers, which is fun! Add extra spices on top for a nice touch. A sprinkle of cinnamon can bring out the fall vibe, making your breakfast even more inviting. {{image_2}} You can change the flavor of your oats easily. Try using apple puree instead of pumpkin. This adds a sweet and fruity taste that feels like fall. Another idea is to swap pumpkin spice for chai spice. This gives your oats a warm, spicy kick that's perfect for cozy mornings. Get creative with your ingredients! You can blend in chia seeds or flaxseeds for a nutrient boost. These seeds add fiber and healthy fats to your oats. If you prefer a different sweetener, use honey instead of maple syrup. Honey gives a nice floral note that pairs well with pumpkin. If you're vegan, simply use a plant-based yogurt. This keeps your oats creamy without dairy. For those who need gluten-free options, use certified gluten-free oats. This ensures you can enjoy this tasty dish without worry. To keep your pumpkin spice overnight oats fresh, store them in airtight containers in the refrigerator. This method prevents the oats from drying out or absorbing unwanted odors. You should enjoy them within 3-5 days for the best taste and texture. If you made a big batch, you can freeze the oats. Portion them into freezer-safe containers or bags. When you’re ready to eat, thaw them overnight in the fridge. This way, you can have a quick breakfast ready to go. You can enjoy your oats cold straight from the fridge. If you prefer warm oats, reheat them gently in the microwave. Just heat in short bursts, stirring in between to ensure even warmth. To make great overnight oats, start with a bowl or jar. Mix your rolled oats, almond milk, pumpkin puree, maple syrup, pumpkin pie spice, vanilla, and a pinch of salt. Stir well to combine everything. Make sure the oats are fully covered in the liquid. Cover the jar or bowl tightly. Then, place it in the fridge overnight. This soaking time helps the oats absorb the flavors. Yes, you can use instant oats, but the texture will be different. Instant oats cook faster and will be softer. You need less soaking time, around 30 minutes to 1 hour. Rolled oats keep a nice chewiness that many enjoy. If you like creamy oats, instant oats work well. But for a heartier bite, stick with rolled oats. Pumpkin spice overnight oats stay fresh for 3 to 5 days in the fridge. Proper storage is key. Use an airtight container to keep them safe. After a few days, the flavor may fade, but they stay safe to eat. If you want the best taste, enjoy them within the first couple of days. This keeps the oats fresh and flavorful. In this blog post, we explored making delicious pumpkin spice overnight oats. You learned about the key ingredients, preparation steps, and how to customize your oats. We also shared storage tips to keep them fresh and tasty. These oats are flexible and fun to make. They fit different tastes and diets. Feel free to switch ingredients and enjoy a tasty meal. Now, get creative in your kitchen and enjoy your oats!

Pumpkin Spice Overnight Oats Delightful and Easy Recipe

Fall is here, and it’s time to wake up to the cozy flavors of Pumpkin Spice Overnight Oats! This tasty

To make balsamic glazed Brussels sprouts, you need these simple ingredients: - 1 pound Brussels sprouts, trimmed and halved - 3 tablespoons balsamic vinegar - 2 tablespoons honey - 2 tablespoons olive oil - 1 teaspoon Dijon mustard - 2 cloves garlic, minced - Salt and pepper to taste - 1/4 cup toasted walnuts, chopped (for topping) - 1/4 cup crumbled feta cheese (optional, for garnish) Each ingredient plays a key role in creating the dish's rich flavor. The Brussels sprouts give a nice texture and taste. The balsamic vinegar adds a sweet and tangy kick. Honey balances out the acidity, while olive oil helps with roasting. Dijon mustard adds depth, and garlic brings a warm aroma. Salt and pepper enhance all the flavors. For a crunchy finish, you can add toasted walnuts on top. If you want a creamy touch, sprinkle some feta cheese. This mix of flavors makes the dish exciting and fresh. You can find the full recipe details below to guide you through the cooking process. - Preheat your oven to 400°F (200°C) and prepare a baking sheet. - In a large bowl, mix balsamic vinegar, honey, olive oil, Dijon mustard, minced garlic, salt, and pepper. Whisk until smooth. Getting the glaze right is key to flavor. The balance of sweet and tangy makes these Brussels sprouts shine. - Toss the halved Brussels sprouts in the balsamic mixture. Make sure they are well-coated for the best flavor. - Spread them out in a single layer on the baking sheet. Roast for 20-25 minutes, stirring halfway through. Watch for a golden-brown color and tender texture. Roasting brings out the natural sweetness of the Brussels sprouts. The glaze will caramelize, adding a delightful crunch. - Once roasted, top with chopped walnuts for a nice crunch. If you like, sprinkle crumbled feta cheese on top for creaminess. - Drizzle any remaining glaze from the baking sheet over the sprouts for an extra punch of flavor. These Balsamic Glazed Brussels Sprouts will impress anyone at your table. For the full recipe, check the earlier section. Enjoy your cooking! To roast Brussels sprouts perfectly, focus on size and spacing. Cut them in half so they cook evenly. Spread them out on the baking sheet. Crowding can lead to steaming instead of roasting. Aim for a single layer to get that nice crisp. Coating the Brussels sprouts evenly with glaze is key. This ensures every bite bursts with flavor. After tossing them in the glaze, look for a shiny coat. If you see spots without glaze, give them another toss. You can add more flavor by mixing in herbs or spices. Try thyme, rosemary, or even a touch of red pepper flakes. Each will bring a unique twist to your dish. For toppings, consider adding crispy bacon for a savory punch. If you're feeling adventurous, try a sprinkle of Parmesan cheese. This gives a nice salty contrast to the sweet glaze. For more ideas, check the Full Recipe to explore variations and tweaks. {{image_2}} You can change the taste of balsamic glazed Brussels sprouts by adding bacon or pancetta. Bacon gives a salty, rich flavor that pairs perfectly with the sweet balsamic glaze. Just cook the bacon until crispy, chop it up, and mix it in before roasting. You can also try using different vinegars. For a tangy twist, use apple cider vinegar or red wine vinegar instead of balsamic. Each vinegar offers a unique taste that can brighten the dish. Mix in seasonal vegetables to your Brussels sprouts. Carrots, sweet potatoes, or butternut squash work well and add color. You can roast them alongside the sprouts for a tasty fall dish. For holiday meals, consider adding cranberries or pecans. These ingredients add a festive touch and complement the glaze beautifully. These ideas help you enjoy this dish in many ways throughout the year. For the full details on how to make this dish, check out the Full Recipe. To store your leftover balsamic glazed Brussels sprouts, first let them cool. Place them in an airtight container. This method keeps them fresh and tasty. They will last in the fridge for 3 to 5 days. Always check for any signs of spoilage before eating. The best way to reheat Brussels sprouts is in the oven. Preheat it to 350°F (175°C). Spread the sprouts on a baking sheet and heat for about 10 minutes. This keeps them crispy. If you are short on time, you can use the microwave. Just heat them for 1 to 2 minutes. However, this method may make them a bit soft. For extra crunch, try placing them under the broiler for a minute. Enjoy your meal! You can find the full recipe earlier in this article. What can I substitute if I don’t have honey? If you don’t have honey, you can use maple syrup or agave nectar. Both options add sweetness and flavor. You may need to adjust the amount slightly based on your taste. Can I make this dish ahead of time? Yes, you can prepare the Brussels sprouts in advance. Toss them in the balsamic glaze and store them in the fridge. Just roast them when you’re ready to serve. They taste great fresh out of the oven! Caloric content and health benefits A serving of balsamic glazed Brussels sprouts has about 150 calories. They are full of vitamins C and K. They also have fiber, which is good for digestion. Eating Brussels sprouts can help boost your immune system and support heart health. Dietary modifications (vegan, gluten-free) This recipe is easily vegan. Just use maple syrup instead of honey. It is also gluten-free, so anyone can enjoy it without worry! What main dishes pair well with balsamic glazed Brussels sprouts? Balsamic glazed Brussels sprouts pair well with grilled chicken, pork tenderloin, or salmon. They add a tasty, healthy touch to any meal. Can they be served cold or as part of a salad? Yes, you can serve them cold! They make a great addition to salads. Mix them with greens, nuts, and cheese for a filling meal. For more ideas, check out the Full Recipe. To recap, I shared a simple and tasty recipe for balsamic glazed Brussels sprouts. You learned the key ingredients and step-by-step roasting instructions. We explored tips to enhance flavor and variations to suit your taste. You also got storage and reheating tips, plus answers to common questions. Making this dish is fun and rewarding. With a bit of creativity, you can enjoy it in many ways. Now, get cooking and savor the deliciousness!

Balsamic Glazed Brussels Sprouts Tasty and Simple Dish

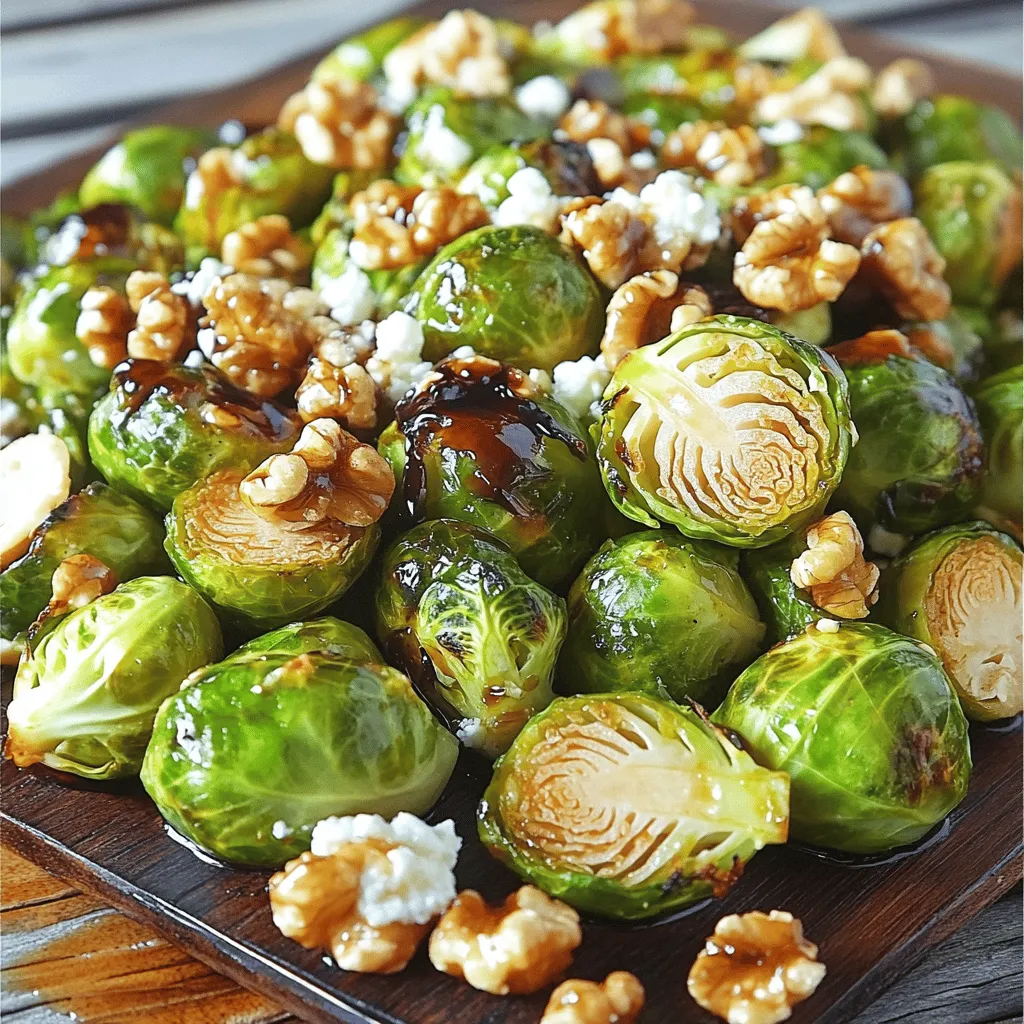
Looking for a tasty side dish that’s easy to make? Balsamic glazed Brussels sprouts are a favorite! This recipe showcases

Here are the main ingredients you need for this tasty dish: - 2 pounds boneless, skinless chicken thighs, cut into bite-sized pieces - 1 cup plain Greek yogurt - 1 tablespoon garam masala - 1 tablespoon ground cumin - 1 tablespoon ground coriander - 1 teaspoon turmeric powder - 1 teaspoon chili powder - 1 tablespoon minced garlic - 1 tablespoon minced ginger - 1 medium onion, finely chopped - 1 can (14 oz) crushed tomatoes - 1 cup coconut milk - Salt and pepper to taste These ingredients create a rich flavor base. The yogurt helps tenderize the chicken. The spices bring warmth and depth. If you want to boost the taste, consider adding these: - 1 tablespoon lemon juice for brightness - 1 teaspoon smoked paprika for a smoky touch - 1 tablespoon honey for sweetness - 1-2 green chilies for extra heat These optional ingredients can elevate your dish. They add layers of flavor that make the meal more exciting. Presentation matters, so think about these garnishes: - Fresh cilantro, chopped - Thinly sliced red onion - Lemon wedges - A dollop of Greek yogurt Adding these garnishes enhances the look and taste. They can make your meal feel special and inviting. For the full experience, try serving this dish with warm naan bread or fluffy basmati rice. Enjoy your cooking adventure! To start, gather your ingredients for the marinade. In a large bowl, mix 1 cup of plain Greek yogurt with 1 tablespoon of garam masala, ground cumin, ground coriander, turmeric powder, and chili powder. Add in 1 tablespoon of minced garlic and minced ginger. Season with a pinch of salt and pepper. Stir until smooth. Next, cut 2 pounds of boneless, skinless chicken thighs into bite-sized pieces. Toss the chicken in the yogurt mix until every piece is coated. Let it sit for at least 30 minutes. For best results, marinate overnight in the fridge. This makes your chicken juicy and full of flavor. Now, grab your slow cooker. Place 1 medium finely chopped onion at the bottom. Pour in 1 can (14 oz) of crushed tomatoes and stir them together. This forms a tasty base. Next, add the marinated chicken on top of the tomatoes and onions. Spread it out evenly. Pour in 1 cup of coconut milk over the chicken. Remember, do not stir! The layers help blend the flavors while cooking. Cover your slow cooker with its lid. You can choose two cooking options here. Set it to cook on low heat for 6-7 hours or on high heat for 3-4 hours. The chicken should cook through and be tender when done. After cooking, gently stir the chicken tikka masala. Taste and adjust seasoning with more salt and pepper if needed. Serve it hot with fresh cilantro on top, paired with basmati rice or warm naan bread for a complete meal. For the full recipe, refer to the earlier section. To get the best flavor from your slow cooker chicken tikka masala, use fresh spices. Fresh spices have more taste than old ones. Toast them in a dry pan for a few minutes to release their oils. This simple step boosts the flavor. Also, marinating the chicken overnight gives it a deeper taste. The yogurt and spices blend well during this time. One common mistake is not searing the chicken before adding it to the slow cooker. Searing locks in juices and adds depth. Another mistake is stirring the layers. When you pour the coconut milk over the chicken, don’t mix. This keeps the flavors layered and rich. Finally, don’t rush the cooking time. Letting it cook low and slow makes the chicken tender and flavorful. If you like it spicy, you can add more chili powder or fresh chilies. Start with a small amount and taste as you go. For a milder dish, reduce the chili powder and add more yogurt. You can also serve a side of yogurt for those who want to cool it down. This way, everyone can enjoy the meal at their own spice level. For more detailed instructions, check the Full Recipe for slow cooker chicken tikka masala. {{image_2}} You can easily make a vegetarian version of tikka masala. Swap the chicken for chickpeas, paneer, or tofu. Use the same spices and yogurt mix. For a lighter option, add vegetables like cauliflower, bell peppers, or peas. Cook them just like the chicken. This way, you keep all the great flavors and textures. If you love heat, add more chili powder or fresh chilies. You can use green chilies for a fresh taste. For a unique twist, add some cayenne pepper to the spice mix. This will give your dish a nice kick. Just be careful not to overdo it. You can always add more heat, but it's hard to take it away! For a gluten-free version, ensure your ingredients are gluten-free. Most spices and canned tomatoes are safe, but check labels. Serve your tikka masala with gluten-free rice or naan. You can even use quinoa as a base. This makes your meal healthy and tasty without any gluten. For the full recipe, check out the [Full Recipe]. To keep your slow cooker chicken tikka masala fresh, store it in an airtight container. Let it cool down to room temperature before sealing it. This helps prevent moisture buildup. Place the container in the fridge. It’s best to eat it within three to four days. You can freeze chicken tikka masala for later. Use a freezer-safe container or a zip-top bag. Remove as much air as possible before sealing. It will stay good for about three months. When you’re ready to eat it, thaw overnight in the fridge. Reheat in a pot over low heat. Stir often to ensure even heating. The shelf life of slow cooker chicken tikka masala depends on how you store it. In the fridge, enjoy it within four days. If you freeze it, aim to eat it within three months for the best taste. Always check for any off smells or changes in texture before eating leftovers. You can serve this dish with warm naan bread or fluffy basmati rice. These sides soak up the rich sauce well. Fresh cilantro adds a nice touch too. You might also enjoy a simple cucumber salad for crunch. Yes, you can use chicken breasts if you prefer. They will cook faster than thighs. However, thighs stay juicier and more tender in this dish. If you use breasts, cut them into larger chunks to avoid drying out. You can store leftovers in the fridge for up to four days. Just make sure to place them in an airtight container. For longer storage, you can freeze the chicken tikka masala. It stays fresh for three months in the freezer. When ready to eat, thaw overnight in the fridge and reheat gently on the stove. In this blog post, we covered how to make a delicious slow cooker chicken tikka masala. We explored key ingredients, preparation steps, and helpful tips. You learned about variations for different diets and how to store leftovers safely. You now have the tools to create a tasty dish that fits your needs. Enjoy experimenting and finding the best way to serve or modify this recipe. Happy cooking!

Satisfying Slow Cooker Chicken Tikka Masala Recipe

If you crave a warm, flavorful dish that practically cooks itself, you’ll love this Slow Cooker Chicken Tikka Masala recipe.

- Noodles: I use 8 oz of rice noodles. These noodles cook quickly. Boil them in water until just tender. Then, drain and rinse them under cold water. This stops the cooking and keeps them firm. - Vegetables: For crunch, I pick fresh and colorful options. I slice 1 cup of red bell pepper and julienne 1 cup of carrots and 1 cup of cucumber. I also add 1 cup of bean sprouts. Finally, I include 1/4 cup each of chopped green onions and fresh cilantro. These veggies add color and freshness. - Peanut Sauce: The sauce is key to this dish. I mix 1/2 cup of creamy peanut butter with 1/4 cup of soy sauce. Then, I add 2 tablespoons of lime juice and 1 tablespoon of sriracha. For sweetness, I add 1 tablespoon of honey or maple syrup and 1 tablespoon of sesame oil. If it’s too thick, I thin it with warm water. This sauce gives rich, bold flavor to the noodles. For the full recipe, check the details above. To cook the noodles, start by boiling water in a large pot. Add the rice noodles and cook them as the package says. This usually takes about 6 to 8 minutes. You want them to be tender but not mushy. Once done, drain the noodles in a colander. Rinse them under cold water. This stops the cooking and helps keep their texture just right. Next, prepare the peanut sauce. In a medium bowl, mix together the creamy peanut butter, soy sauce, lime juice, sriracha, sesame oil, and honey. Use a whisk to blend everything until it is smooth. If your sauce feels too thick, add a tablespoon of warm water. This will help it coat the noodles better. You can adjust the spice by adding more or less sriracha. Now it’s time to bring everything together. In a large mixing bowl, add the cooked noodles. Pour the peanut sauce over the noodles and toss gently. You want to coat the noodles without breaking them. Next, add your mixed veggies: red bell pepper, carrots, cucumber, bean sprouts, green onions, and cilantro. Toss everything together again. Make sure the sauce covers all the ingredients. For the full recipe, check back to the ingredients section. To get the best flavor from your spicy Thai peanut noodles, focus on balancing the seasonings. Start by tasting your dish as you cook. If it feels bland, add more soy sauce or lime juice. For extra heat, a dash of sriracha can make a big difference. You want that perfect mix of salty, sweet, and spicy. When it comes to veggies, think about texture. Some people like crunchy vegetables, while others prefer soft ones. For a crunchy bite, use fresh bean sprouts and red bell peppers. If you want softer veggies, cook the carrots briefly before adding them. This gives variety to each bite and makes your dish more exciting. How you serve your noodles can make your meal look more appealing. Use deep bowls to hold the noodles and arrange the veggies on top. This creates a colorful display that draws the eye. A lime wedge on the side adds a bright, zesty touch. For garnishing, crushed peanuts add a nice crunch. You can also sprinkle sesame seeds on top for a little extra flair. A handful of fresh cilantro not only adds flavor but also makes the dish pop with color. These small touches elevate your meal and impress your guests. {{image_2}} You can add protein to your spicy Thai peanut noodles for a heartier meal. Here are some great options: - Chicken: Cook and slice boneless chicken breast. Toss it in with the noodles for a savory kick. - Shrimp: Sauté shrimp in a pan until pink. Mix it in for a seafood twist. - Tofu: For a vegetarian option, use firm tofu. Press it to remove water, then cube and sauté until golden. For vegetarians and vegans, tofu is a perfect choice. It absorbs the sauce well and adds protein. You can also use tempeh for a different texture. Just remember to season it well to enhance the flavors. Finding substitutes can help if you have dietary needs. Here are some tips: - Gluten-free alternatives: Use rice noodles, which are already gluten-free. You can also try zucchini noodles for a low-carb twist. - Nut-free substitution: If you need a nut-free sauce, try sunbutter made from sunflower seeds. It mimics the creaminess of peanut butter without the nuts. These variations keep the dish tasty while catering to different diets. Enjoy experimenting with your spicy Thai peanut noodles! To store your spicy Thai peanut noodles, place them in an airtight container. This keeps the flavors fresh and prevents drying out. You can use glass or plastic containers that seal well. Make sure the noodles are cool before sealing. You can keep them in the fridge for up to three days. After that, the veggies may lose their crunch, and the noodles might become soggy. When it's time to eat again, reheating is key. To avoid mushy noodles, try to reheat gently. You have two main options: microwaving or stovetop reheating. - Microwaving: Place the noodles in a microwave-safe bowl. Add a splash of water to keep them moist. Heat in short bursts, stirring in between, until warm. - Stovetop reheating: Heat a non-stick pan over medium heat. Add a bit of oil or water, then toss in the noodles. Stir often until warmed through. This method helps maintain texture better than microwaving. By following these tips, you can enjoy your spicy Thai peanut noodles just as much as the first time! For complete details on making this dish, check the Full Recipe. Can I use other types of noodles? Yes, you can! While rice noodles are the go-to, feel free to use wheat noodles or even whole grain options. Just remember to adjust cooking times based on the type of noodle you choose. What is the origin of Thai Peanut Noodles? This dish comes from Thailand. It mixes Chinese and Thai flavors. Street vendors often serve it as a quick, tasty meal. The creamy peanut sauce makes it special and filling. How can I make this dish less spicy? To reduce the heat, cut back on sriracha. You can also skip it entirely or use a milder sauce. Adding more peanut butter or honey helps balance the spice too. What can I replace peanut butter with? If you need a substitute, try almond butter or sunbutter. Both have a similar texture and flavor. You can also use tahini, but it has a different taste. Alternatives for fresh vegetables? You can swap in any fresh veggies you like. Broccoli, snap peas, or even spinach work well. Just chop them into bite-sized pieces for easy mixing. You’ve learned how to make Spicy Thai Peanut Noodles from scratch. We covered main ingredients, cooking steps, and tips to enhance flavor. You now know how to customize the dish with proteins and adapt it to different diets. Remember, adjusting spice and balancing flavors can transform your meal. With the right storage and reheating methods, leftovers can be just as tasty. Dive into this dish and enjoy its vibrant flavors any time!

Spicy Thai Peanut Noodles Flavorful and Quick Recipe

Are you ready to spice up your dinner routine? My Spicy Thai Peanut Noodles recipe combines creamy peanut sauce, fresh

For herbed garlic butter mushrooms, you will need: - 500g fresh button mushrooms, cleaned and stemmed - 4 tablespoons unsalted butter - 3 cloves garlic, minced - 1 teaspoon fresh thyme leaves - 1 teaspoon fresh rosemary, finely chopped - 1 tablespoon fresh parsley, chopped - Salt and pepper to taste - Zest of 1 lemon - 1 tablespoon lemon juice If you don’t have fresh mushrooms, use cremini or shiitake. They add great flavor. For butter, you can use olive oil for a lighter option. If you lack fresh herbs, dried herbs work too, but use less. You can skip lemon zest and juice if you don't like the tangy taste. Each serving of herbed garlic butter mushrooms has about: - Calories: 150 - Protein: 3g - Fat: 13g - Carbohydrates: 6g - Fiber: 1g These mushrooms are rich in flavor and nutrients. You can enjoy them guilt-free alongside your favorite dishes. For the full recipe, check out the cooking instructions! Start by gathering your ingredients. You will need 500g of fresh button mushrooms. Clean them well and remove the stems. Mince 3 cloves of garlic. Chop 1 teaspoon each of fresh thyme and rosemary. You also need 1 tablespoon of chopped parsley, the zest and juice of 1 lemon, and 4 tablespoons of unsalted butter. Don't forget salt and pepper to taste. This prep will make cooking smooth and fun. Heat a large skillet over medium heat. Add the butter and let it melt until it foams. Once melted, add the minced garlic. Stir it for about 30 seconds. Be careful not to let it burn! Next, add the cleaned mushrooms. Toss them in the garlic butter. Cook for 5 to 7 minutes, stirring often. You want them to be tender and golden brown. Now, sprinkle the thyme, rosemary, lemon zest, salt, and pepper over the mushrooms. Stir well to mix all those delicious flavors. Let it cook for another 2 to 3 minutes so the herbs can infuse their flavor. Once done, remove the skillet from heat. Drizzle lemon juice over the mushrooms. Add the chopped parsley and toss gently. This will brighten the dish. Serve the mushrooms warm. They make a great side dish or a tasty appetizer over toasted crusty bread. For a beautiful presentation, use a rustic wooden bowl. Garnish with extra parsley and lemon wedges. For the full recipe, check the section above! Enjoy your cooking! Cooking mushrooms is simple if you follow some key steps. First, choose fresh mushrooms. Look for firm, smooth, and unblemished ones. Cleaning is vital. Use a damp cloth or a soft brush to wipe dirt off. Avoid soaking them in water, as mushrooms absorb moisture. When cooking, heat your skillet before adding butter. This step helps to brown the mushrooms evenly. Use medium heat and add butter until it foams. Then, toss in your garlic for flavor. Always stir the mushrooms gently. This process helps them cook evenly and prevents them from sticking. One common mistake is overcrowding the pan. If you add too many mushrooms at once, they will steam instead of brown. Instead, cook them in batches if needed. Another mistake is cooking at too high a heat. This can burn the garlic and ruin the dish. Always keep an eye on your heat level. Also, don’t skip the herbs. They add amazing flavor. Make sure to chop them fresh for the best taste. Lastly, remember to season your mushrooms with salt and pepper at the right time. Adding salt too early can draw out moisture and make them soggy. Reheating mushrooms is easy. Start by placing them in a skillet over low heat. Add a small amount of butter or oil to prevent sticking. Heat them gently, stirring often. This method keeps them tender and flavorful. Avoid microwaving them, as it can make them rubbery. Enjoy your leftovers warm, adding them to pasta or as a side with your favorite dish. For the complete recipe, check out the Full Recipe section. {{image_2}} You can boost the flavor of herbed garlic butter mushrooms by using different herbs. Basil adds a sweet touch. Oregano brings a warm, earthy flavor. You can also try using dill for a fresh twist. Just chop the herbs finely and add them in the same way as the thyme and rosemary. This lets each herb shine through in your dish. Feel free to mix and match based on what you have at home. If you like creamy dishes, adding dairy can take this recipe to the next level. You can stir in some cream or sour cream at the end of cooking. This makes the dish rich and velvety. For a lighter option, use Greek yogurt. Just mix it in off the heat to keep it smooth. This small change can make your mushrooms a comforting delight. For a vegetarian version, simply stick to the original recipe. If you want a vegan option, swap the butter for olive oil or vegan butter. This gives you the same rich flavor without dairy. You can also use a splash of vegetable broth instead of butter for a lighter taste. This way, everyone can enjoy these herbed garlic butter mushrooms! For the full recipe, check the section above. To store leftover herbed garlic butter mushrooms, let them cool first. Place them in an airtight container. Make sure to use a container that fits well. This helps keep the mushrooms fresh. Store the container in your fridge. They will last for about 3 days. If you want to keep them longer, consider freezing them. Freezing is a great way to save these mushrooms. Start by letting them cool down completely. Then, spread them on a baking sheet. Make sure they are in a single layer. Freeze them for 1-2 hours until firm. After that, transfer them to a freezer-safe bag. Remove as much air as possible before sealing. They will stay fresh for up to 3 months in the freezer. When you’re ready to eat your leftover mushrooms, you can reheat them easily. The best method is to use a skillet. Add a bit of butter or oil and heat over medium heat. Toss the mushrooms gently until they are warm. If they seem dry, add a splash of water or broth. This will help bring back their moist texture. You can also heat them in the microwave. Place them in a bowl and cover with a damp paper towel. Heat in short bursts, checking often. Enjoy them warm, just like when they were fresh! For the full recipe, check the [Full Recipe]. When choosing mushrooms, look for fresh button mushrooms. They should be firm and smooth. Avoid any that are slimy or have dark spots. Fresh mushrooms have a nice earthy scent. Their color should be bright and even. Always buy from a trusted source. You want mushrooms that look good and taste great. Yes, you can use dried herbs. They work well in this dish. Use about one-third of the amount. For example, if the recipe calls for one teaspoon of fresh thyme, use about one-third teaspoon of dried thyme. Dried herbs have a stronger flavor. So, adjust to your taste. However, fresh herbs add a special touch. They give a bright flavor that dried herbs can't match. Herbed garlic butter mushrooms last about three to four days in the fridge. Store them in an airtight container. Make sure they cool to room temperature before you store them. This keeps them safe and tasty. If you want to keep them longer, consider freezing. Just remember, the texture may change after freezing. Always enjoy them warm for the best flavor. For the full recipe, check out the details above. This post covered how to make herbed garlic butter mushrooms. We listed the key ingredients, shared substitutes, and provided nutritional info. You learned step-by-step cooking tips, variations, and storage methods. When preparing mushrooms, avoid common mistakes to keep them tasty. Feel free to experiment with herbs, spices, and creaminess. Remember to store your leftovers properly for future enjoyment. Cooking should be fun and straightforward, and I hope this guide helps you create delicious mushrooms every time. Enjoy your cooking adventure!

Herbed Garlic Butter Mushrooms Flavorful and Simple Dish

If you’re looking for a quick and tasty side dish, my Herbed Garlic Butter Mushrooms are perfect for you! This

- 1 lb boneless chicken thighs, cut into bite-sized pieces - 1 cup plain yogurt - 2 tablespoons vegetable oil - 2 tablespoons lemon juice - 2 cloves garlic, minced - 1 tablespoon ginger, grated - 1 tablespoon tandoori masala - 1 teaspoon turmeric powder - 1 teaspoon cumin powder - 1 teaspoon paprika - Salt to taste The chicken thighs are my favorite for this dish. They stay tender and juicy. The plain yogurt helps to marinate the chicken. It adds creaminess and tang. The spices and seasonings make the chicken pop with flavor. Tandoori masala is key here. It gives that classic taste. - Fresh cilantro for garnish - Lemon wedges for serving Fresh cilantro adds color and brightness. Lemon wedges give a zesty kick when squeezed over the skewers. Both enhance the dish in a simple way. - Skewers (metal or soaked wooden) - Grill or oven You can use metal skewers for easy handling. If you choose wooden skewers, soak them first. This step helps prevent burning. A grill gives a nice char, but an oven works too. Both methods will cook the chicken well. For the full cooking experience, check out the Full Recipe. To start, mix the yogurt and spices in a bowl. You’ll need one cup of plain yogurt. Then, add two tablespoons of vegetable oil, two tablespoons of lemon juice, and two cloves of minced garlic. Next, include one tablespoon of grated ginger and one tablespoon of tandoori masala. This spice gives the chicken its unique flavor. Add one teaspoon each of turmeric, cumin, and paprika. Finally, sprinkle in some salt. Whisk this mixture well. This marinade holds the key to great taste. Marination is very important. It allows the chicken to soak up all the flavors. The longer you marinate, the better it tastes. Try to marinate for at least two hours. If you have time, let it sit overnight. This step makes a big difference. After preparing the marinade, add the chicken pieces to the bowl. Ensure they are well-coated. Cover the bowl with plastic wrap and place it in the fridge. This cool temperature helps the chicken absorb the flavors better. If you want the most flavor, marinate for longer. Overnight is best. Just remember to take it out of the fridge about 30 minutes before cooking. This helps the chicken cook more evenly. Now, it's time to grill! Preheat your grill or oven to 400°F (200°C). If you use wooden skewers, soak them in water for at least 30 minutes. This prevents them from burning. Next, thread the marinated chicken pieces onto the skewers. Leave a little space between each piece. This helps them cook evenly. Place the skewers on the grill or on a baking sheet in the oven. Cook for 15 to 20 minutes. Turn them occasionally. The chicken should be cooked through and have a nice char. Ensure the internal temperature reaches 165°F (75°C). After cooking, let the skewers rest for a few minutes. This keeps them juicy. You can garnish with fresh cilantro and serve with lemon wedges for a burst of flavor. Enjoy your tasty Tandoori Chicken Skewers! For the full recipe, check out the instructions above. To bring out the best flavor in your Tandoori Chicken Skewers, marination is key. Use a good amount of yogurt for a tender and juicy chicken. The acidity in yogurt helps break down the meat. For maximum flavor, marinate the chicken for at least two hours. I recommend overnight marination for even better taste. - Tip: Always refrigerate your marinade. This keeps the chicken fresh and prevents any unwanted bacteria. Getting that perfect char on your skewers is a joy. Make sure to preheat your grill or oven to 400°F (200°C). This heat helps to seal in the juices. - Cooking Time: Grill or roast the skewers for about 15 to 20 minutes. Turn them occasionally for even cooking. Check the internal temperature; it should reach 165°F (75°C). - Tip: If you want extra char, finish with high heat for the last few minutes. Tandoori Chicken Skewers shine when paired with the right sides. I love serving them with naan bread or rice. You can also add fresh veggies like cucumber or a simple salad for a cooling effect. - Dips: Mint chutney or yogurt sauce are perfect companions. They add creaminess and balance the spices. - Presentation: For a stunning display, arrange the skewers on a platter. Garnish with fresh cilantro and lemon wedges. This makes the dish look vibrant and inviting. For the full recipe, check out the details above. {{image_2}} You can swap chicken for lamb or paneer. Lamb adds a rich taste, while paneer is great for a vegetarian twist. If you choose lamb, cook it for about 20-25 minutes. For paneer, just 10-15 minutes will do since it's softer. Experiment with spices to change the taste. For instance, try adding cardamom or cinnamon for warmth. You can also use a blend of herbs like mint or cilantro in the marinade. If you're vegetarian, use tofu or vegetables for a tasty alternative. You can bake or grill your skewers. Grilling gives a smoky flavor and nice char. Baking is easy—just set your oven to 400°F (200°C) and cook for 15-20 minutes. If you own an air fryer, it can cook these skewers quickly while keeping them juicy. Adjust the time to about 10-15 minutes for that perfect crisp. To store cooked Tandoori Chicken Skewers, let them cool first. Place the skewers in an airtight container. You can keep them in the fridge for up to four days. Make sure they are well-sealed. This helps maintain their flavor and texture. The best method to reheat Tandoori Chicken Skewers is in the oven. Preheat your oven to 350°F (175°C). Place the skewers on a baking sheet and cover them with foil. This keeps them moist. Heat for about 10-15 minutes, or until warmed through. Avoid using the microwave as it can dry them out. To freeze marinated chicken, place it in a freezer bag before cooking. Remove as much air as possible to avoid freezer burn. You can keep it frozen for up to three months. When ready to cook, thaw it overnight in the fridge. This ensures even cooking and keeps the chicken juicy. You can cook Tandoori Chicken Skewers in an oven or on a stovetop. For the oven, preheat it to 400°F (200°C). Place the skewers on a baking sheet. Cook for 15-20 minutes, turning halfway. Check the chicken's internal temperature; it should reach 165°F (75°C). For stovetop cooking, use a grill pan. Heat it over medium-high heat. Cook the skewers for about 15 minutes, turning often for even cooking. Both methods give you tasty, flavorful chicken. Yes, you can use chicken breasts. However, chicken thighs have more fat, making them juicier. Breasts can dry out faster if overcooked. If you choose breasts, watch the cooking time closely. Cut them into equal pieces for even cooking. This way, you can still enjoy a great meal, but thighs often give the best taste and texture. Tandoori masala is a spice blend used in Tandoori cooking. It usually includes spices like cumin, coriander, and paprika. You can make your own mix at home. Combine the following spices: - 1 tablespoon cumin powder - 1 tablespoon coriander powder - 1 tablespoon paprika - 1 teaspoon turmeric powder - 1 teaspoon garam masala - 1 teaspoon chili powder (adjust for heat) Mix these together and store them in an airtight jar. This homemade blend adds great flavor to your chicken skewers. The spice level of Tandoori Chicken Skewers can vary. You control it by adjusting the amount of chili powder in the marinade. If you want less heat, cut back on chili powder or use sweet paprika. You can also add a bit of honey or sugar to balance the spice. This way, you can make your skewers as mild or spicy as you like! Tandoori chicken skewers are simple yet flavorful. You learned about the main ingredients, like chicken thighs, yogurt, and spices. Marinating is key for great taste. We covered grilling techniques and serving ideas, plus variations using other proteins or spices. Remember, proper storage keeps leftovers fresh. Enjoy making this dish your own! Taste and creativity are your best friends in the kitchen. Dive in and share your tasty results!

Tandoori Chicken Skewers Flavorful and Easy Recipe

Are you ready to wow your family and friends with mouthwatering Tandoori Chicken Skewers? This recipe is simple, fun, and

To make creamy avocado pasta, gather these key ingredients: - 2 ripe avocados - 300g pasta (spaghetti or fettuccine) - 2 cloves garlic, minced - 1/4 cup fresh basil leaves - 1/4 cup Greek yogurt - 2 tablespoons lemon juice - 1/4 cup extra virgin olive oil - Salt and pepper to taste These ingredients blend well to create a smooth and rich sauce. The avocados provide creaminess, while garlic and basil add flavor. The Greek yogurt gives a slight tang that balances the dish. For an extra pop of color and taste, consider these toppings: - Cherry tomatoes, halved - Additional basil leaves You can also add protein like chicken or shrimp for a heartier meal. These garnishes not only enhance the look but also add freshness. This creamy avocado pasta is not just tasty; it's nutritious too. Each serving contains: - Calories: Approx. 480 - Protein: 12g - Carbohydrates: 60g - Fats: 24g This dish offers healthy fats from avocados and olive oil, making it a good choice for a filling meal. You can find the full recipe below to whip this up quickly for lunch or dinner. Start by boiling a large pot of salted water. Once it boils, add 300g of pasta, like spaghetti or fettuccine. Cook it according to the package instructions until it's al dente. This usually takes around 8 to 10 minutes. Before draining the pasta, reserve 1/2 cup of the pasta water. This water helps to adjust your sauce later. While the pasta cooks, let’s whip up the sauce. Grab 2 ripe avocados, and cut them in half. Remove the pit and scoop the flesh into a blender. Add 2 cloves of minced garlic, 1/4 cup of fresh basil leaves, and 1/4 cup of Greek yogurt. Squeeze in 2 tablespoons of lemon juice to brighten the flavor. Pour in 1/4 cup of extra virgin olive oil for creaminess. Blend until smooth. If the sauce is too thick, add some reserved pasta water. Blend again until you reach your desired consistency. Once your pasta is done, drain it well. In a large mixing bowl, combine the pasta with the creamy avocado sauce. Toss until every noodle is coated. Taste your dish and season with salt and pepper as needed. If you find the sauce too thick, stir in more reserved pasta water until it clings nicely to the pasta. Now, plate your creamy avocado pasta and garnish with halved cherry tomatoes and additional basil leaves for a fresh touch. Enjoy this quick and tasty meal! For the full recipe, check out the ingredients and steps above. To get the best sauce, start with ripe avocados. They should feel soft but not mushy. When blending, add Greek yogurt for creaminess. If the sauce is thick, gradually mix in reserved pasta water. This keeps it smooth and easy to coat the pasta. You want the sauce to cling nicely, not slide off. Cook your pasta until it is al dente. This means it should still have a slight bite. Follow the package instructions carefully. Usually, this takes about 8-10 minutes. Remember to save some pasta water before draining. This water is key for adjusting sauce thickness later. If you have leftovers, store them in an airtight container. The avocado sauce can brown quickly. To slow this down, add a little lemon juice on top. This helps keep it fresh. You can store it for up to two days in the fridge. When reheating, add a splash of pasta water. This will help bring back the creamy texture. For more details on making this dish, check the Full Recipe. {{image_2}} You can boost your creamy avocado pasta by adding protein. Grilled chicken adds a nice flavor. Cook it simply with salt, pepper, and a bit of lemon juice. Shrimp is a quick option, too. Sauté shrimp in olive oil until they turn pink. For a plant-based choice, use tofu. Press and cube firm tofu, then sauté until golden brown. Mix your chosen protein into the pasta for a heartier meal. If you want a vegan version, swap Greek yogurt for cashew cream. Soak cashews in water for a few hours, then blend until smooth. You can add a splash of lemon juice for tanginess. Another option is using silken tofu blended until creamy. Both choices keep a similar texture and flavor profile in your sauce. Add seasonal vegetables to your creamy avocado pasta for more color and nutrients. In spring, try peas or asparagus. In summer, add zucchini or bell peppers. For fall, roasted butternut squash offers a sweet touch. Simply sauté or roast the vegetables before mixing them into your pasta. This not only makes the dish vibrant but also adds more flavor. For the full recipe, check out the [Full Recipe]. Creamy avocado pasta works well with many foods. You can serve it with grilled chicken for extra protein. Shrimp also makes a great side. You might enjoy adding roasted vegetables like zucchini or bell peppers. A simple green salad adds freshness. Use a light vinaigrette to balance the creaminess. Plating is fun and easy with creamy avocado pasta. Start by twirling the pasta into a nest on the plate. Add a few cherry tomato halves on top for color. Sprinkle fresh basil leaves around the plate for a pop of green. Drizzle a bit of extra virgin olive oil on top for shine. This makes your dish look fancy and inviting. Pairing wine with creamy avocado pasta enhances the meal. A crisp Sauvignon Blanc complements the dish well. Its acidity cuts through the creaminess nicely. If you prefer red, try a light Pinot Noir. It brings a fruity note that matches the avocado flavor. Remember, serving wine in the right glass makes a difference too. Enjoy your meal with the perfect sip! You can find a full recipe for this dish in the recipe section. You can store leftover creamy avocado pasta in an airtight container. Place it in the fridge. It will last for about two days. When you reheat it, expect some changes in texture. The avocado sauce can thicken. You may want to add a bit of water or olive oil to loosen it up. Yes, you can make this dish ahead of time. Prepare the pasta and sauce separately. Store the sauce in the fridge until you are ready to serve. This way, the avocado stays fresh. Mix them just before serving for the best taste. I recommend using spaghetti or fettuccine for this creamy avocado pasta. Both types hold the sauce well. You can also try whole wheat or gluten-free pasta if you prefer. The key is to choose a pasta that cooks al dente. To make your creamy avocado pasta spicier, add red pepper flakes. You can mix in jalapeños or a dash of hot sauce. Taste as you go to find your perfect level of heat. Enjoy experimenting with flavors! For the full recipe, you can check out the [Full Recipe]. This blog post covered how to make creamy avocado pasta. We discussed the main ingredients, the cooking steps, and helpful tips. You learned about flavors, protein options, and fun ways to serve it. In the end, I hope you try this easy and healthy dish. Enjoy your cooking!

Creamy Avocado Pasta Quick and Delicious Meal Idea

Are you ready to whip up a meal that’s quick, healthy, and oh-so-delicious? Creamy avocado pasta is your new go-to

To make delicious banana oatmeal pancakes, gather these simple ingredients: - 1 cup rolled oats - 1 ripe banana, mashed - 1 cup milk (dairy or plant-based) - 1/2 teaspoon baking powder - 1/2 teaspoon cinnamon - 1 tablespoon honey or maple syrup (optional) - 1/4 teaspoon vanilla extract - Pinch of salt - Olive oil or butter for cooking These ingredients come together to create a tasty breakfast. The rolled oats add texture, while the banana brings natural sweetness. You can personalize your pancakes with these optional ingredients: - Chopped nuts (like walnuts or pecans) - Chocolate chips for a sweet twist - Fresh berries for a fruity boost - A dash of nutmeg for added warmth These ingredients let you create your favorite flavor profile. Mix and match to keep breakfast exciting! Need to make changes? Here are some easy substitutions: - Use gluten-free oats to make this recipe gluten-free. - Swap the milk for almond or oat milk for a dairy-free option. - Replace honey with agave syrup for a vegan-friendly choice. These modifications ensure everyone can enjoy banana oatmeal pancakes. Just remember that some changes may affect texture or taste. Enjoy experimenting! To make Banana Oatmeal Pancakes, you start by blending the oats. Take 1 cup of rolled oats and blend them until they form a fine flour. This step is key for a smooth texture. Next, add 1 ripe mashed banana, 1 cup of milk, 1/2 teaspoon of baking powder, 1/2 teaspoon of cinnamon, and a pinch of salt. If you want more sweetness, include 1 tablespoon of honey or maple syrup. Blend this mix until it is creamy and smooth. Then, heat a non-stick skillet over medium heat. Lightly grease it with olive oil or butter to keep the pancakes from sticking. Pour about 1/4 cup of your batter onto the skillet for each pancake. Cook for 2-3 minutes until small bubbles form on the surface. Flip the pancakes and cook for another 2-3 minutes until they are golden brown. Repeat until you use all the batter. Blending your ingredients properly is essential. Make sure your oats are finely ground. This ensures a better pancake texture. If your blender struggles, stop and stir the mix. Then, blend again until smooth. When you add the banana, make sure it is very ripe. A ripe banana makes the pancakes sweeter and more flavorful. Cooking pancakes perfectly takes practice. Keep the heat at medium, not high. High heat can burn the pancakes before they cook through. If you notice browning too fast, lower the heat. Use a non-stick skillet for the best results. You can also use a bit of cooking spray to help. Flip the pancakes gently to avoid breaking them. Serve them warm with toppings like bananas or maple syrup. For a great recipe, check out the Full Recipe. To make your banana oatmeal pancakes fluffy, use fresh ingredients. Ensure your baking powder is not expired. This helps the pancakes rise nicely. Blend your oats finely for a smooth batter. A smooth batter helps pancakes cook evenly. Do not overmix your batter; just blend until combined. Let the batter sit for a few minutes before cooking. This allows the oats to soak up the liquid. One common mistake is using too much flour. Stick to the rolled oats; they provide great texture. Also, avoid cooking on high heat. This can burn the pancakes' outside while leaving the inside raw. Make sure to flip your pancakes only when bubbles form on the surface. This signals that they are ready to turn. Lastly, do not skip the oil or butter in the pan. This keeps them from sticking. For these pancakes, you will need a good blender or food processor. This helps create a fine oat flour. A non-stick skillet or griddle is best for cooking. It ensures easy flipping and even cooking. Use a measuring cup for portioning the batter. This helps keep your pancakes uniform. A spatula is essential for flipping. With these tools, your cooking process will be smooth and fun. For the full recipe, check out the complete guide. {{image_2}} You can make your banana oatmeal pancakes even better by adding chocolate chips or nuts. I love mixing in a handful of dark chocolate chips. They melt and create a sweet treat in every bite. You can also add chopped walnuts or pecans for a nice crunch. Just stir them into the batter before cooking. This small change makes the pancakes taste amazing and adds texture. If you need gluten-free pancakes, use certified gluten-free oats. This swap works perfectly and keeps the taste great. For vegan pancakes, replace the milk with a plant-based option like almond or oat milk. You can also skip honey and use maple syrup instead. These swaps make the pancakes fit for everyone, without losing flavor. Seasonal fruits and spices can change the flavor of your pancakes. In summer, try adding fresh blueberries or strawberries. They add a burst of freshness. In the fall, sprinkle in pumpkin spice or nutmeg for a cozy taste. This gives your pancakes a fun twist and keeps them exciting all year long. For the full recipe, check out my guide on how to make banana oatmeal pancakes. To store leftover pancakes, let them cool first. Place them in a single layer on a plate. Cover the plate with plastic wrap or foil. If you have many pancakes, stack them with parchment paper between each one. This keeps them from sticking together. Store them in the fridge for up to three days. When you are ready to eat the pancakes, you can reheat them easily. The best way is to use a skillet. Heat your skillet over low heat. Add a little butter or oil. Place the pancakes in the skillet for about one minute on each side. This makes them warm and crispy again. You can also use the microwave. Heat each pancake for about 15-20 seconds. This works, but they may not be as crisp. Freezing pancakes is a great way to save time. After they cool, place them in a single layer on a baking sheet. Put the baking sheet in the freezer for about an hour. Once they are frozen, transfer them to a freezer bag. Label the bag with the date. You can keep them in the freezer for up to three months. When you want to eat them, just reheat them directly from the freezer. Enjoy those tasty pancakes whenever you like! For the full recipe, check the details provided above. Yes, you can make these pancakes ahead of time. Cook the pancakes as per the full recipe. Let them cool completely. Then, stack them with parchment paper in between. Place the stack in an airtight container. You can store them in the fridge for up to three days. If you want to keep them longer, freeze them. They can last up to a month in the freezer. Making these pancakes healthier is easy! You can try these tips: - Use whole oats instead of instant oats for more fiber. - Substitute milk with almond or oat milk for fewer calories. - Replace honey or syrup with mashed fruit for natural sweetness. - Add chia seeds or flaxseeds for extra nutrients. - Use unsweetened applesauce instead of oil or butter for a low-fat option. These pancakes are tasty on their own, but you can make them even better! Here are some ideas: - Top with fresh fruit like strawberries or blueberries. - Drizzle with honey or maple syrup for sweetness. - Serve with yogurt for a creamy touch. - Add nuts or seeds for crunch. - Pair with a side of scrambled eggs for protein. These simple serving ideas can take your banana oatmeal pancakes to the next level! You now know how to make great banana oatmeal pancakes. We covered all the ingredients, from the basics to fun custom options. I shared tips for blending and cooking to help you succeed. Don’t forget the variations to keep breakfast exciting! Lastly, I shared storage tips so you can enjoy leftovers later. Try these pancakes and see how easy and tasty they are. Enjoy your cooking adventure!

Satisfying Banana Oatmeal Pancakes Easy Recipe Guide

Want to whip up a tasty breakfast that’s both satisfying and healthy? Look no further than these Banana Oatmeal Pancakes!

Older posts
Newer posts
← Previous Page1 … Page35 Page36 Page37 … Page60 Next →

dsad

© 2025 Cooking Wells • Built with GeneratePress

Our Policies

  • Copyright Policy
  • Cookie Policy
  • GDPR Policy
  • Privacy Policy
  • Disclaimer
  • Terms Of Use

More Information

  • Home
  • About
  • Contact
  • Appetizers
  • Dessert
  • Dinner
  • Drinks
©2025, Cooking Wells About Back To Top