Skip to content
DisclaimerTerms Of UseGDPR PolicyCookie Policy

Cooking Wells

  • Home
  • Drinks
  • Appetizers
  • Dinner
  • Dessert
  • About
  • Contact
  • Privacy Policy
DisclaimerTerms Of UseGDPR PolicyCookie Policy

Mia

When you make Caprese Stuffed Avocados, gather these fresh and tasty ingredients: - Ripe avocados - Cherry tomatoes - Fresh mozzarella balls - Fresh basil leaves - Balsamic glaze - Olive oil - Salt and pepper These simple items bring bright flavors to your dish. Ripe avocados add creaminess, while cherry tomatoes offer a sweet burst. The mozzarella gives a nice texture, and fresh basil adds a lovely herbal note. Balsamic glaze elevates the dish with its tangy sweetness. Olive oil adds richness, and salt and pepper boost all the flavors. With these ingredients in hand, you're ready to create a fresh and flavorful delight. For the full recipe, check out the section on Step-by-Step Instructions. Start by cutting the avocados in half. Remove the pit carefully. Use a spoon to scoop out a bit of the flesh. This gives you extra room for the stuffing. Next, create the Caprese mixture. In a mixing bowl, add the halved cherry tomatoes and mozzarella balls. Then, toss in the torn basil leaves. Drizzle the olive oil and balsamic glaze over this mixture. Now, season with salt and pepper. Mix gently to combine all the flavors. Now it’s time to fill the avocado halves. Spoon the Caprese mixture evenly into each hollowed-out avocado half. Make sure each half is full and looks inviting. For the final touch, drizzle any remaining balsamic glaze over the stuffed avocados. This adds a nice shine and extra flavor. Serve the Caprese stuffed avocados right away. They taste best when fresh. If you prefer, chill them for a few minutes. This allows the flavors to meld together nicely. You can pair this dish with a light salad or crusty bread. It makes a great starter or side dish. Enjoy the fresh and vibrant flavors! For the complete recipe, refer to the Full Recipe. To make your Caprese stuffed avocados shine, start with ripe avocados. A ripe avocado feels slightly soft when you press it gently. If it feels hard, it’s not ready. If it's too soft, it may be overripe. Store avocados at room temperature until they ripen. Once ripe, keep them in the fridge to stay fresh longer. This keeps them from turning brown too fast. You can enhance the flavor of your Caprese stuffed avocados by adding a few extra ingredients. Consider adding some diced red onion for a sweet crunch. You could also try a sprinkle of chili flakes for heat. Balancing flavors is key. Make sure the salt and pepper complement the fresh ingredients. The balsamic glaze adds a sweet-tart punch, which pairs well with creamy avocado. Adjust the seasoning to suit your taste. For the full recipe and detailed steps, check the [Full Recipe]. {{image_2}} You can easily switch up the ingredients in Caprese stuffed avocados. For a vegan or dairy-free option, replace the mozzarella with plant-based cheese. This keeps the dish fresh, yet satisfying. You can also add extra veggies like bell peppers or zucchini for more flavor and crunch. Seasonal variations can bring new life to this dish. In summer, use fresh basil and ripe tomatoes. In fall, try arugula and roasted butternut squash. These changes keep it exciting and tasty all year long. Caprese stuffed avocados work well as both appetizers and main courses. Serve them as a light starter at a party or as a fun lunch. They are easy to share and look great on a plate. For a creative presentation, arrange the stuffed avocados on a colorful platter. Drizzle some balsamic glaze over the top for a striking look. You can also sprinkle fresh herbs around the avocados to add a pop of color. This makes the dish even more inviting. For the full recipe, check out the details above. To store leftover Caprese Stuffed Avocados, place them in an airtight container. This keeps them fresh. If you use a bowl, cover it tightly with plastic wrap. I recommend eating them within a day or two for the best taste. Avocados brown quickly due to oxidation. You can sprinkle a bit of lemon juice on the exposed flesh to slow this process. This helps maintain color and flavor. Can you freeze stuffed avocados? I do not recommend freezing them. The texture of avocado changes when frozen. It may turn mushy upon thawing. If you must freeze, try only the filling. Place it in a freezer-safe bag, removing as much air as possible. For thawing tips, move the filling to the fridge overnight. It will slowly get back to a nice texture. Once thawed, mix it well before serving. You can then assemble your fresh avocados. Enjoy the bright flavors without losing quality. To make Caprese stuffed avocados, start with ripe avocados. Cut each avocado in half and remove the pit. Scoop out a little flesh to create space. In a bowl, mix halved cherry tomatoes, mozzarella balls, and torn basil leaves. Drizzle olive oil and balsamic glaze over this mix. Season with salt and pepper, then stir gently. Spoon this mixture into the avocado halves. Drizzle with more balsamic glaze if desired. Serve right away or chill for a few minutes. You can find the full recipe above. Caprese stuffed avocados are nutritious and delicious. Avocados provide healthy fats that support heart health. They also offer fiber, which aids digestion. Tomatoes are full of vitamins and antioxidants, especially vitamin C. Fresh mozzarella adds protein to keep you full. Basil brings flavor and has anti-inflammatory properties. This dish is low in carbs and high in nutrients. Overall, it’s a balanced choice for a snack or light meal. You can prepare the filling in advance, but not the avocados. The avocado flesh can brown quickly when exposed to air. If you want to prepare ahead, mix the tomatoes, mozzarella, and basil. Store this mixture in the fridge. When ready to serve, cut and scoop the avocados. Fill them with the prepared mixture right before eating. This keeps the avocados fresh and tasty. This blog post detailed a simple and delicious recipe for Caprese Stuffed Avocados. You learned about the key ingredients, easy preparation steps, and serving tips. Selecting ripe avocados and enhancing flavors can elevate your dish. We also explored variations and storage tips for leftovers. Whether you serve it as an appetizer or a main course, this recipe is versatile and delightful. Now, take this knowledge and make a fresh, healthy dish that impresses everyone!

Caprese Stuffed Avocados Fresh and Flavorful Delight

If you’re looking for a fresh and tasty twist on a classic dish, you’ll love Caprese Stuffed Avocados! This simple

- 8 oz fusilli pasta - 1 cup cherry tomatoes, halved - 1 cucumber, diced - 1/4 cup red onion, thinly sliced - 1/2 cup fresh basil leaves, torn - 1/4 cup feta cheese, crumbled - 1/3 cup olive oil - 3 tablespoons fresh lemon juice - 1 teaspoon lemon zest - Salt and pepper to taste - Large mixing bowl - Small mixing bowl - Whisk for dressing - Servings: 4-6 - Nutritional benefits of key ingredients: - Fusilli pasta: Provides carbs for energy. - Cherry tomatoes: Packed with vitamins and antioxidants. - Cucumber: Adds hydration and crunch. - Red onion: Offers flavor and beneficial compounds. - Basil leaves: Rich in vitamins A, K, and antioxidants. - Feta cheese: Delivers protein and calcium. - Olive oil: Healthy fats for heart health. - Lemon juice and zest: Brighten flavors, high in vitamin C. The ingredients for this dish create a fresh and lively blend. Each element plays a role in the taste and health benefits. When you combine these ingredients, you get a pasta salad that is not only delicious but also good for you. Enjoy the full recipe to see how these components come together beautifully! To make Lemon Basil Pasta Salad, I start with 8 oz of fusilli pasta. Bring a large pot of water to a boil. Add salt to the water; it adds flavor to the pasta. Cook the fusilli for about 8-10 minutes, or until it is al dente. This means it should be firm but not hard. Once cooked, drain the pasta in a colander. Rinse it under cold water. This stops the cooking process and cools it down. Set the pasta aside in a large mixing bowl. Next, I prepare the veggies. I take 1 cup of cherry tomatoes and cut them in half. Then, I dice 1 cucumber and slice 1/4 cup of red onion very thin. I also tear 1/2 cup of fresh basil leaves into smaller pieces. This makes the flavors pop. For the dressing, I grab a small mixing bowl. I whisk together 1/3 cup of olive oil, 3 tablespoons of fresh lemon juice, and 1 teaspoon of lemon zest. I add salt and pepper to taste. Whisk until all the ingredients blend well. Now comes the fun part! I add the halved cherry tomatoes, diced cucumber, sliced red onion, and torn basil leaves to the bowl with the cooled pasta. Then, I pour the lemon dressing over everything. I gently toss the salad to coat all the ingredients evenly. This helps the flavors mix well. Finally, I sprinkle 1/4 cup of crumbled feta cheese on top. I give it one last toss. If needed, I adjust the seasoning with more salt and pepper. Letting the salad chill in the fridge for at least 30 minutes helps the flavors meld together. You can find the complete details in the Full Recipe. To make your Lemon Basil Pasta Salad shine, focus on fresh ingredients. Use ripe cherry tomatoes and crisp cucumbers. Their freshness brings joy to your dish. Adjust your seasoning by tasting as you go. A pinch of salt can brighten flavors. If you like more zing, add lemon juice or zest. This will enhance the overall flavor. Using fresh basil is key. It adds aroma and taste. Don’t skip the feta; it gives saltiness and creaminess. One big mistake is overcooking the pasta. Cook it until it's al dente, meaning it has a slight bite. After draining, rinse it with cold water. This will stop the cooking and keep it firm. When making the dressing, whisk well to blend the olive oil and lemon juice. If you don’t mix it enough, the dressing may separate. Always taste your dressing before adding it to the salad. Adjust the seasoning as needed. Lemon Basil Pasta Salad pairs well with grilled chicken or fish. It’s light and refreshing, making it perfect for summer meals. Serve it at picnics or barbecues for a crowd-pleaser. It also works great as a side dish for holiday meals. You can even serve it as a main dish with added protein. This salad is versatile and fits many occasions. For the full recipe, check the earlier section. {{image_2}} You can swap out fusilli pasta for gluten-free options. Try quinoa or rice pasta. Both offer great textures. They work well with all the tasty veggies. You can also change up the veggies. Add bell peppers or spinach for different flavors. If you want protein, grilled chicken or chickpeas fit nicely. To boost the dressing, add fresh herbs like dill or parsley. They bring new tastes to the salad. You can also use spices like garlic powder for extra flavor. For cheese, try goat cheese or parmesan instead of feta. Each option gives a unique taste to your dish. Use seasonal produce for a fresh twist. In summer, add zucchini or fresh corn. For winter, consider roasted carrots or butternut squash. These changes keep the salad exciting and vibrant year-round. Each season brings its own flavor, making this dish a true delight. To store your Lemon Basil Pasta Salad, place it in an airtight container. This helps keep it fresh. It’s best to refrigerate it within two hours of making. The salad stays good for about three to five days. To keep the salad fresh longer, avoid adding the dressing until you are ready to serve. If you do dress it, try to eat it within two days for the best taste. You can freeze this pasta salad, but it’s not ideal. Freezing can change the texture of the vegetables. If you decide to freeze it, make sure to use a freezer-safe container. When you are ready to eat it, move it to the fridge to thaw overnight. After thawing, give it a good stir and check the taste. You might want to add more lemon juice or fresh herbs to brighten it up. If you want to enjoy your pasta warm, you can reheat it. Use a microwave-safe dish and heat for 30 seconds at a time, stirring in between. To refresh the salad before serving, add a splash of olive oil and more lemon juice. Toss it gently to mix. This way, it will taste fresh and lively, just like when you first made it. Lemon Basil Pasta Salad stays fresh in the fridge for about three days. After that, the veggies may lose their crunch. You should check for signs of spoilage, like a sour smell or slimy texture. If you see any of these signs, it’s best to toss it out. Yes, you can make Lemon Basil Pasta Salad ahead of time. In fact, the flavors get better as they sit. I recommend making it a day in advance if you can. Just keep it covered in the fridge until you’re ready to serve. This salad tastes great cold, making it perfect for meal prep. Absolutely! Lemon Basil Pasta Salad is a great option for vegetarians. It has no meat, and it’s packed with fresh veggies and feta cheese. If you want to make it vegan, just swap the feta for a plant-based cheese. This salad is colorful, tasty, and fits many diets. Enjoy the fresh flavors! In this post, we explored the tasty Lemon Basil Pasta Salad. We covered its fresh ingredients, easy steps, and handy tips. You learned how to cook pasta and prepare veggies for the best flavor. Don't forget the dressing, as it adds a zesty touch. This salad is versatile for any season and perfect for gatherings. Remember to enjoy it fresh, or follow our storage tips for later. Dive into making this dish, and let it brighten your meals!

Lemon Basil Pasta Salad Fresh and Flavorful Delight

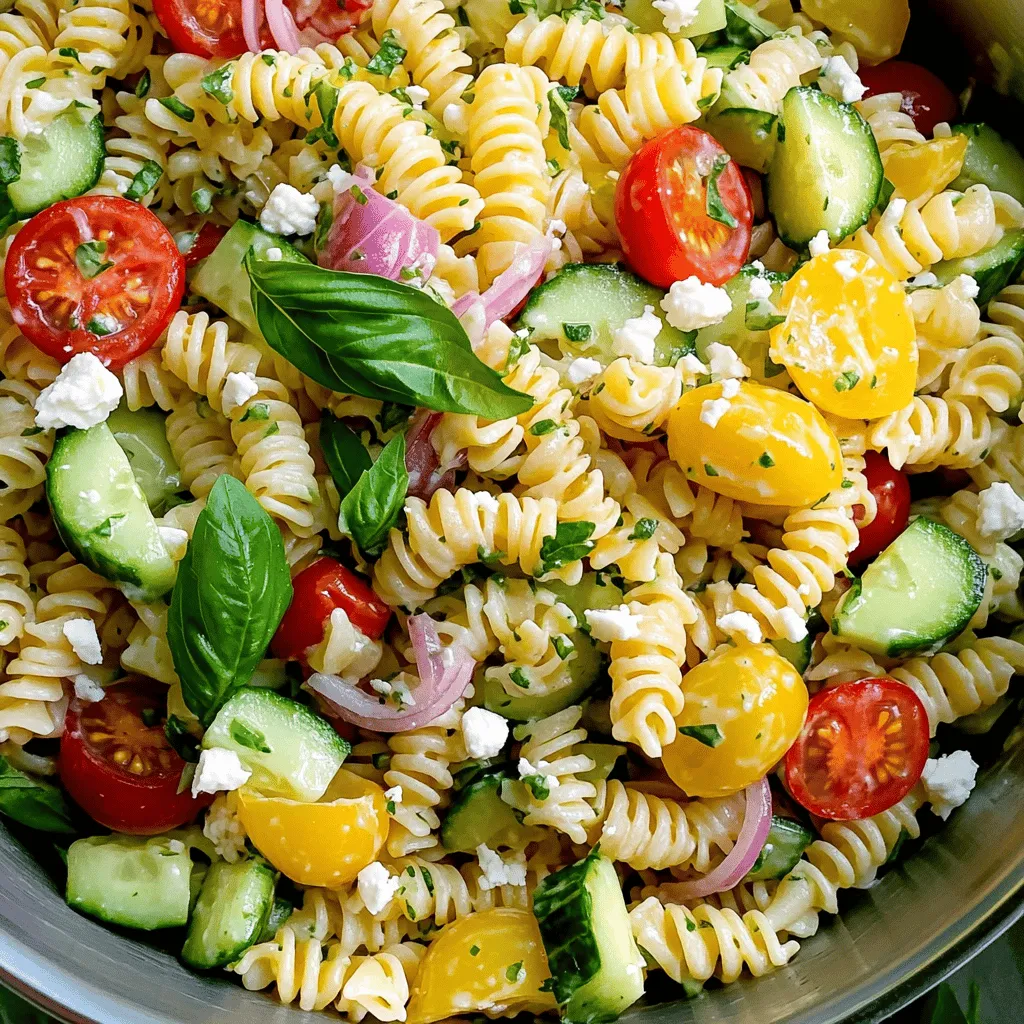
Looking for a bright and easy dish to impress at your next gathering? My Lemon Basil Pasta Salad is the

- 6 large eggs - 3 tablespoons mayonnaise - 1 teaspoon Dijon mustard - 1 teaspoon apple cider vinegar - ½ teaspoon garlic powder - Salt and pepper to taste - Paprika, for garnish - Fresh chives or parsley, chopped (for garnish) To make classic deviled eggs, you need simple and fresh ingredients. Start with six large eggs. They are the star of this dish. For creaminess, use three tablespoons of mayonnaise. The Dijon mustard adds a nice tang, so include one teaspoon of it. Apple cider vinegar gives a slight kick, so don’t skip the teaspoon of it. Garlic powder adds flavor, so just a half teaspoon will do. You will also need salt and pepper to taste. Use paprika to sprinkle on top for color and flavor. Lastly, fresh chives or parsley will add a nice touch. With these ingredients, you can create a tasty and classic snack. Check the [Full Recipe] for more details! To boil eggs perfectly, start by placing them in a pot. Add cold water until the eggs are covered. Heat the pot on medium until the water boils. Once it boils, cover the pot and take it off the heat. Let the eggs sit for 12 minutes. This method produces firm yolks without overcooking. An ice bath is key. It stops cooking and makes peeling easy. After 12 minutes, put the eggs in a bowl of ice water for at least 5 minutes. This method cools the eggs down quickly. For easy peeling, tap each egg gently on a hard surface. Peel them under running water to help remove the shells smoothly. Cut each peeled egg in half lengthwise. Carefully take out the yolks and place them in a bowl. Use a fork to mash the yolks until they are crumbly. Then, add mayonnaise, Dijon mustard, apple cider vinegar, garlic powder, salt, and pepper. Mix until smooth and creamy. The right texture is key for great taste. When filling the egg whites, you can use a spoon or a piping bag. A piping bag gives a nice look and is easier for precise filling. If you use a spoon, be generous with the yolk mixture. Fill each white until it overflows slightly. This makes them look inviting and delicious. Garnishes add color and flavor. Lightly sprinkle paprika over each filled egg for a classic touch. You can also top them with fresh chives or parsley for a pop of color. This step makes your deviled eggs not just tasty but also beautiful. A good presentation impresses everyone! To make perfect deviled eggs, avoid common mistakes. First, do not overcook the eggs. Overcooked eggs become green around the yolk. Stick to the 12-minute rule. Second, make sure to cool the eggs quickly. An ice bath helps stop the cooking. This also makes peeling easier. Adjusting the flavor is key. If you like a tangy taste, add more vinegar or mustard. For a creamier texture, increase the mayonnaise. Taste the filling as you mix. This helps you find the flavor you love. Deviled eggs shine at many occasions. They are perfect for picnics, parties, and holidays. People love them at brunch. You can serve them at any gathering. Pair deviled eggs with other appetizers. They go well with fresh veggies and dips. You can also serve them with crackers or cheese. This makes a great spread for guests. For more ideas, check out the Full Recipe. {{image_2}} Deviled eggs can be simple or fancy. The classic recipe uses basic ingredients. You can add unique flavors for a gourmet twist. Try adding crispy bacon bits for a savory crunch. Avocado adds creaminess and a fresh taste. You can also mix in jalapeños for heat or herbs for brightness. Each addition gives a new flavor to the dish. Regional variations exist too. In the Southern U.S., you might find deviled eggs with sweet pickle relish. In some Mexican recipes, you may see salsa mixed in. These changes reflect local tastes and traditions. You can make deviled eggs to fit different diets. To make them vegetarian, simply use the classic recipe without any meat. For a vegan version, swap mayonnaise for avocado or vegan mayo. This keeps the creamy texture while making it plant-based. If you need gluten-free options, rest assured. The classic deviled eggs are naturally gluten-free. Just make sure any added ingredients are also gluten-free. This way, everyone can enjoy this tasty treat! To keep deviled eggs fresh, store them in the fridge. Place them in an airtight container. This helps prevent them from drying out. If you have leftover filling, store it separately. Cover both the eggs and the filling with plastic wrap. Enjoy them within three days for the best taste. Can you freeze deviled eggs? No, freezing them can change their texture. The filling can become watery and grainy. However, you can freeze the egg yolk mixture before filling. To reheat, thaw it in the fridge overnight. Then, fill the egg whites when ready to serve. This keeps your deviled eggs fresh and tasty. For more details on making these delicious bites, check out the Full Recipe. Deviled eggs stay fresh for about three to five days in the fridge. To keep them safe, store them in an airtight container. This helps prevent them from absorbing other food smells. Yes, you can make deviled eggs a day in advance. Prepare the filling and store it separately from the egg whites. This keeps the whites firm and prevents them from getting soggy. If you want a lighter option, try Greek yogurt. It adds creaminess and a slight tang. You can also use avocado for a creamy texture without eggs. To fix runny filling, add more yolks or a little cornstarch. Mix well until the texture is thicker. You can also add more mayonnaise or Greek yogurt to balance it. No, it is not safe to eat deviled eggs left out for more than two hours. Bacteria can grow quickly, so always keep them refrigerated until serving. For more detailed steps, check the [Full Recipe]. You now have all the steps to make perfect deviled eggs. From boiling the eggs to creating a tasty filling, every process is clear. Remember to personalize your eggs with your favorite flavors and garnishes. These tips will help you avoid mistakes and impress your guests. Deviled eggs can fit any occasion. So, get creative with your variations! Enjoy making and sharing this classic treat. Your skills in the kitchen will shine brightly!

Classic Deviled Eggs Savory and Easy Recipe

Deviled eggs are a timeless classic that’s easy to make and always a hit. In this post, I’ll show you

- 1 cup rolled oats - 1/2 cup natural peanut butter (or almond butter) - 1/2 cup honey (or maple syrup) - 1/3 cup unsweetened cocoa powder - 1/4 cup milk (dairy or plant-based) - 1 teaspoon vanilla extract - Pinch of salt These main ingredients make a great base for our no-bake cookies. Rolled oats give the cookies a chewy texture. Natural peanut butter adds creaminess and protein. Honey or maple syrup acts as a sweetener and binder. Unsweetened cocoa powder provides that rich chocolate flavor. Milk adds moisture, while vanilla and salt enhance all the tastes. - 1/4 cup chocolate chips - 1/4 cup shredded coconut - 1/4 cup chopped nuts You can add extras to make your cookies even better. Chocolate chips bring extra sweetness and texture. Shredded coconut adds a tropical touch, while chopped nuts give a nice crunch. Feel free to mix and match these add-ins based on what you love. For the complete list of ingredients and steps, check out the Full Recipe. Start by taking a medium saucepan. Place it on low heat. - Combine the following ingredients: - 1/2 cup natural peanut butter (or almond butter) - 1/2 cup honey (or maple syrup) - 1/3 cup unsweetened cocoa powder - 1/4 cup milk (dairy or plant-based) - A pinch of salt Stir these together until smooth. This should take about 2 or 3 minutes. You want it well mixed and creamy. Once the mixture is smooth, take it off the heat. Now, add 1 teaspoon of vanilla extract. Stir it in well. Next, grab a large mixing bowl. Add 1 cup of rolled oats to the bowl. If you want extra flavor, now is the time to include any optional add-ins, like: - 1/4 cup chocolate chips - 1/4 cup shredded coconut - 1/4 cup chopped nuts Pour the warm chocolate mixture over the oats. Mix it all together until every oat is coated. Now, it’s time to shape your cookies. Using a spoon or a cookie scoop, drop spoonfuls of the mixture onto a lined baking sheet. Be sure to flatten each scoop slightly. This helps the cookies form a uniform shape. Once you finish this step, place the cookies in the fridge. Let them set for at least 30 minutes until firm. You can find the full recipe for more details. To get the right texture in your no-bake cookies, keep the mixture warm when you mix in the oats. If it cools too much, you may end up with a dry cookie. Stir the mixture on low heat until it is smooth. Cooking time can change based on your stovetop heat, so keep an eye on it. You want it hot enough to mix well but not boiling. Let your taste buds explore! Try different nut butters like almond or cashew. Each will change the flavor a bit. You can also add a pinch of sea salt to bring out the sweetness. This contrast makes each bite even better. Make your cookies look as good as they taste. Serve them on a nice plate to impress your guests. You can drizzle melted chocolate over the top or sprinkle cocoa powder for a fancy touch. These little details make your no-bake chocolate oatmeal cookies shine. For the full recipe, check out the detailed instructions provided earlier. {{image_2}} You can switch up the flavor of your cookies easily. Try different nut butters, like cashew or hazelnut. Each nut butter brings its own taste. You can also add spices like cinnamon or nutmeg. These spices add warmth and depth to your cookies. Making these cookies vegan is simple. Use maple syrup instead of honey and plant-based milk. This way, everyone can enjoy them. For gluten-free options, choose certified oats. They keep the recipe safe for those with gluten issues. Let’s make these cookies even more fun! You can mix in dried fruits like raisins or cranberries. They add a chewy texture and sweetness. If you want a protein boost, try adding protein powders. This helps make your cookies a bit more nutritious. With these variations, you can tailor your No-Bake Chocolate Oatmeal Cookies to fit your taste and dietary needs. Check out the Full Recipe for more details on how to make these delightful treats! To keep your no-bake chocolate oatmeal cookies fresh, use an airtight container. This step helps prevent them from drying out. You can store them at room temperature for a few days. If you want to keep them longer, refrigerate them. This simple trick can extend their life by a week or more. You can freeze these cookies for later enjoyment. Place them in a single layer on a baking sheet. After they freeze, transfer them to a freezer-safe bag. Make sure to remove as much air as possible before sealing. To defrost, take out the cookies and leave them in the fridge overnight. They’ll be ready to eat the next day. These cookies last up to a week in the fridge. If you freeze them, they can last up to three months. Always check for any signs of spoilage before eating. The cookies will taste great, but the texture may change after freezing. Enjoy the convenience of having these sweet treats ready whenever you want! For the full recipe, check out the No-Bake Chocolate Oatmeal Cookies. These cookies usually take about 30 minutes to set in the fridge. Factors like room temperature and how warm the mixture is can affect the time. If your kitchen is hot, consider chilling them for a bit longer. You want them firm enough to hold together but still tasty to eat. Yes, you can! If you have nut allergies, use sunflower seed butter instead of peanut butter. You can also swap honey for maple syrup if you're vegan. For a dairy-free option, stick to plant-based milk. This recipe is flexible, so feel free to make it your own! If your cookies turn out too soft, check a few things. First, ensure the mixture is warm when you add the oats. If it cools too much, it won't set well. You might also want to add a bit more cocoa powder or oats to thicken the mixture. If all else fails, extra time in the fridge can help! Absolutely! You can make these cookies a day or two in advance. Store them in an airtight container in the fridge. This way, they stay fresh and ready to enjoy anytime. Just remember to let them set properly before storing. In this post, we explored a simple recipe for No-Bake Chocolate Oatmeal Cookies. We covered the key ingredients, step-by-step instructions, and helpful tips for texture and flavor. You learned about variations and storage methods to keep cookies fresh. These cookies are easy to make and fun to customize. Whether you want sweet or a bit salty, there’s a version for you. Enjoy creating your own treats!

No-Bake Chocolate Oatmeal Cookies Simple and Sweet

Craving a sweet treat that’s quick and easy? Look no further! These No-Bake Chocolate Oatmeal Cookies are simple to make

- 1 lb Brussels sprouts, trimmed and halved - 3 tablespoons olive oil - 2 tablespoons pure maple syrup - 1 tablespoon Dijon mustard - 1 teaspoon garlic powder - ½ teaspoon salt - ½ teaspoon black pepper - ¼ cup chopped pecans (optional) - Fresh parsley for garnish (optional) To make Maple Dijon Roasted Brussels Sprouts, gather all these ingredients. They blend well and create a dish bursting with flavor. You can switch up the mustard if you want. Spicy brown mustard adds heat, while yellow mustard gives a milder touch. Each type brings its own taste to the dish. For maple syrup, honey or agave can work too. They will change the flavor slightly but still taste great. You will need a few simple tools. - Mixing bowls: A large one to mix the Brussels sprouts and sauce. - Baking sheet: Use a rimmed baking sheet to catch any drips. - Whisk: This helps combine the sauce ingredients smoothly. With these ingredients and tools, you will create a tasty dish. For the full recipe, check out the Maple Dijon Roasted Brussels Sprouts recipe. - Preheat your oven to 400°F (200°C). - Prepare the baking sheet with parchment paper. Getting the oven hot is key. It helps the Brussels sprouts roast well. The parchment paper makes cleanup easy and helps prevent sticking. - Combine olive oil, maple syrup, Dijon mustard, and seasonings. In a small bowl, mix olive oil, maple syrup, Dijon mustard, garlic powder, salt, and pepper. Whisk them together until they blend well. This sauce brings sweet and tangy flavors to your sprouts. - Toss Brussels sprouts in the maple Dijon mixture. - Spread on a baking sheet and roast for 20-25 minutes. In a large bowl, add halved Brussels sprouts. Pour the maple Dijon mix over them, then toss until coated. Spread them evenly on the baking sheet. Roast for 20-25 minutes. They should be tender and golden. Shake the pan halfway through for even roasting. For a delicious twist, sprinkle chopped pecans on top before roasting. They add crunch and flavor. Once done, garnish with fresh parsley for color. Enjoy your Maple Dijon Roasted Brussels Sprouts from the Full Recipe! To get crispy Brussels sprouts, start with dry, fresh sprouts. After cutting them in half, toss them in a bowl with the maple Dijon mix. Spread them out evenly on the baking sheet. This helps them roast better. Toss the sprouts halfway through cooking. This step ensures they cook evenly and get crispy on all sides. You can add more flavor by using spices like smoked paprika or cayenne. Both give a nice kick. You could also try adding garlic cloves for a stronger taste. For added crunch, consider using different nuts. Almonds or walnuts work well. They bring different flavors and textures to the dish. Maple Dijon Roasted Brussels sprouts pair well with roasted chicken or fish. Their sweet and tangy taste complements many main dishes. For presentation, serve them in a big bowl or on a platter. Drizzle the remaining sauce over the sprouts. This makes them look shiny and tasty. For the complete recipe, check out the [Full Recipe]. {{image_2}} This recipe is naturally vegan. You can enjoy the Maple Dijon Roasted Brussels Sprouts without worry. The key ingredients, like maple syrup and Dijon mustard, are plant-based. If you're looking for more flavor, try adding a dash of soy sauce or balsamic vinegar. These will add depth without changing the dish's essence. Brussels sprouts shine in fall and winter. However, you can mix in seasonal veggies for a twist. Consider adding chopped carrots or sweet potatoes. They roast well and will add a beautiful color to your dish. You can also try using butternut squash for a sweet touch. This not only enhances the flavor but also gives you a hearty meal. Want to spice things up? Add some chili flakes for heat. A pinch can really make your dish pop. If you crave more sweetness, explore other sweeteners. Honey or agave syrup can work if you’re not strict about being vegan. Each option brings a unique taste. Mixing flavors can lead to surprising and tasty results. Try these ideas to make your Maple Dijon Roasted Brussels Sprouts even more exciting. For the complete recipe, check out the Full Recipe. To keep your Maple Dijon Roasted Brussels Sprouts fresh, store them in an airtight container. Place them in the fridge within two hours of cooking. This helps keep the flavor and texture. They should last about 3 to 5 days. To reheat, the oven works best. Preheat it to 350°F (175°C). Spread the Brussels sprouts on a baking sheet and heat for about 10 to 15 minutes. This keeps them crispy. If you use a microwave, heat them in short bursts. Check them often so they don’t get soggy. You can freeze leftovers for later. First, let them cool. Then, place them in a freezer-safe bag. Try to remove as much air as possible. You can keep them frozen for up to three months. When ready to eat, thaw in the fridge overnight. Reheat as described above for the best results. Cooking time for Brussels sprouts depends on your oven temperature. At 400°F (200°C), roast them for about 20 to 25 minutes. They should be tender and golden brown. If your oven runs hot, check them at 20 minutes. If you prefer a softer texture, you can cook them a bit longer. Yes, you can prep Brussels sprouts ahead of time. Trim and halve them a day before. Store them in the fridge in an airtight container. Mix the maple Dijon sauce the night before and store it separately. Just combine them before roasting. This helps save time on busy days. These Brussels sprouts pair well with many dishes. Try serving them with roasted chicken or grilled salmon. They also go great with quinoa or wild rice for a vegetarian meal. For a festive touch, serve them alongside a holiday turkey or ham. For the complete Maple Dijon Roasted Brussels Sprouts recipe, check out the [Full Recipe]. This blog post covers a simple and tasty way to enjoy Brussels sprouts. We explored the key ingredients, how to mix the sauce, and steps for perfect roasting. Tips for flavor and serving add fun to your meal. You can use different mustards or sweeteners to make it your own. Don’t forget to store leftovers right to keep them fresh. With these ideas, you can make a delicious dish that impresses. Try new flavors and enjoy your cooking journey with Brussels sprouts.

Maple Dijon Roasted Brussels Sprouts Flavorful Dish

Want a dish that makes Brussels sprouts shine? My Maple Dijon Roasted Brussels Sprouts will do just that! This tasty

To make the best coconut macaroons, you need just a few key ingredients. Each one plays a big role in creating that perfect chewy texture and rich flavor. - 3 cups shredded unsweetened coconut - 1 cup sweetened condensed milk - 1 teaspoon vanilla extract - 1/4 teaspoon sea salt - 2 large egg whites - 1/4 teaspoon almond extract (optional) - 1/2 cup dark chocolate chips (for drizzling) Shredded unsweetened coconut is the star here. It gives the macaroons a great chew. Sweetened condensed milk adds sweetness and moisture. A hint of vanilla extract boosts the flavor, while sea salt balances the sweetness. Egg whites are crucial. They make your macaroons light and airy. If you like, add almond extract for extra flavor. Dark chocolate chips can be drizzled on top. This adds a nice touch and makes them even more special. For the full recipe, you can check the section above. - Preheat your oven to 325°F (160°C). This sets the stage for great macaroons. - In a large bowl, mix 3 cups of shredded coconut, 1 cup of sweetened condensed milk, 1 teaspoon of vanilla extract, and 1/4 teaspoon of sea salt. If you like, add 1/4 teaspoon of almond extract for extra flavor. Stir until well combined. - In another bowl, whip 2 large egg whites until they are frothy and form soft peaks. This will help your macaroons rise and stay light. - Gently fold the whipped egg whites into the coconut mix. Be careful! You want to keep the air in the egg whites. - Use a small cookie scoop or your hands to form mounds of the mixture. Place them on a lined baking sheet, spaced about an inch apart. This gives them room to grow. - Bake the macaroons in your preheated oven for 20-25 minutes. Check for a golden brown color on top. This is when they are done. - After baking, remove the macaroons from the oven. Let them cool completely on the baking sheet. Cooling helps them firm up and hold their shape. - To add a sweet touch, melt 1/2 cup of dark chocolate chips. Do this in a microwave-safe bowl in 30-second intervals, stirring in between. Keep going until the chocolate is smooth. - Once the macaroons are cool, drizzle the melted chocolate over them. You can use a fork or a piping bag for a nice look. - Let the chocolate set at room temperature or pop them in the fridge for a quicker firm-up. Follow these steps, and you'll enjoy delicious coconut macaroons in no time! Check the Full Recipe for more details. To make your macaroons light and fluffy, mix the egg whites gently. When they start to form soft peaks, stop whisking. This keeps air in the whites. For baking, every oven is different. Check your macaroons after 20 minutes. If they’re not golden yet, keep baking for a few more minutes. When serving macaroons, arrange them on a pretty platter. You can add a sprinkle of coconut flakes around them for a nice touch. This makes your dessert look even more inviting. For an extra flair, drizzle melted chocolate on top. It adds flavor and looks stunning. A common mistake is overmixing the egg whites. This can make your macaroons flat and chewy. Another error is not spacing the mounds properly on the baking sheet. They need room to spread. Aim for about an inch apart to keep them from sticking together. {{image_2}} You can change up your coconut macaroons in fun ways. Here are two ideas: - Chocolate-dipped coconut macaroons: After cooling, dip the bottom of each macaroon in melted chocolate. This adds a rich flavor. Let the chocolate set before serving. - Almond-flavored macaroons: Swap vanilla extract for almond extract. This gives a nice twist to the classic taste. Use both extracts for a unique blend. If you have dietary needs, you can still enjoy macaroons: - Gluten-free options: Coconut is naturally gluten-free. Just make sure your other ingredients, like sweetened condensed milk, are also gluten-free. Most brands are safe, but always check the label. - Vegan alternatives: You can make vegan macaroons by using aquafaba instead of egg whites. Aquafaba is the liquid from canned chickpeas. Whip it until frothy, then fold it into the coconut mixture just like egg whites. To make your macaroons shine, serve them with the right pairings: - Best beverages: A nice cup of coffee or tea works well. You could also try a glass of cold milk for a classic touch. - Other treats: Pair them with fresh fruit like strawberries or raspberries. The tartness balances the sweet coconut. You could also serve them with a scoop of ice cream for a delightful dessert. For the full recipe, check out the Coconut Bliss Macaroons section. To keep your macaroons fresh, store them in an airtight container. This helps to lock in moisture and flavor. You can keep them at room temperature for up to three days. If you want to store them longer, place them in the fridge for up to a week. For even longer storage, freeze them. In the freezer, they can last up to three months. When it’s time to enjoy your macaroons again, reheating is simple. Preheat your oven to 300°F (150°C). Place the macaroons on a baking sheet lined with parchment paper. Heat them for about 5-10 minutes, just until warm. This step keeps them soft and chewy. Avoid the microwave, as it can make them dry. Enjoy your Coconut Bliss Macaroons with a warm, tasty bite! To make coconut macaroons from scratch, follow these basic steps: 1. Preheat your oven to 325°F (160°C). 2. Line a baking sheet with parchment paper. 3. In a bowl, mix 3 cups of shredded unsweetened coconut, 1 cup of sweetened condensed milk, 1 teaspoon of vanilla extract, and 1/4 teaspoon of sea salt. 4. Whip 2 large egg whites until they are frothy and form soft peaks. 5. Gently fold the egg whites into the coconut mixture. 6. Scoop small mounds onto the baking sheet, spaced about an inch apart. 7. Bake for 20-25 minutes until golden brown. 8. Let them cool and drizzle with melted dark chocolate if desired. This recipe is simple and yields about 18 macaroons. Yes, you can make coconut macaroons in advance. Here are some tips for preparation and storage: - Prepare the macaroons and bake them as usual. - Allow them to cool completely. - Store them in an airtight container at room temperature for up to a week. - For longer storage, freeze them in a single layer. - Thaw in the fridge before serving. This way, you can enjoy them fresh anytime. Yes, coconut macaroons are typically nut-free. They mainly consist of shredded coconut, sweetened condensed milk, and egg whites. However, if you use almond extract, be aware that it contains nuts. Always check labels if you have nut allergies. This makes macaroons a great treat for many people. Macaroons and macarons are different types of cookies. Macaroons are made with shredded coconut and have a chewy texture. They are often sweet and dense. Macarons, on the other hand, are light, airy, and made from almond flour and egg whites. They come in many flavors and have a filling. Both are delicious but cater to different tastes. You learned how to make coconut macaroons from scratch using simple ingredients. I guided you through easy steps, baking tips, and serving ideas. You can create tasty variations and store them for later. Now, you have the tools to impress with your baking skills. Don't hesitate to experiment with flavors or pairings. Enjoy making these treats for yourself or to share with loved ones. Happy baking, and may your macaroons come out perfect every time!

Coconut Macaroons Scrumptious and Easy Recipe Guide

If you love sweet treats, you must try making coconut macaroons! They are easy to make and so delicious. In

- Broccoli florets - Olive oil - Garlic - Parmesan cheese - Garlic powder - Red pepper flakes - Salt and pepper - Lemon zest - Fresh parsley Garlic Parmesan Roasted Broccoli is simple and tasty. You need fresh broccoli florets for this dish. Choose vibrant green ones for the best flavor. Olive oil adds richness. It helps the broccoli roast nicely. Garlic gives a punch of flavor. Use fresh garlic for the best taste. Parmesan cheese brings a salty, nutty element. It melts beautifully on the hot broccoli. Garlic powder adds an extra layer of garlic taste. Red pepper flakes add a hint of heat. They are optional but worth trying for a spice kick. Don’t forget salt and pepper; they enhance all the flavors. Lemon zest brightens the dish. It adds freshness that balances the richness. Finally, fresh parsley is a lovely garnish. It adds color and a hint of earthiness. For the full recipe, you can see the step-by-step guide to make this dish. First, preheat your oven to 425°F (220°C). This step is essential for even cooking. While the oven heats up, prepare your broccoli by cutting it into florets. Aim for bite-sized pieces. This helps them roast evenly and cook faster. In a large mixing bowl, combine the broccoli florets with 4 tablespoons of olive oil. Add 4 minced garlic cloves, 1 teaspoon of garlic powder, and ½ teaspoon of red pepper flakes if you like heat. Don’t forget salt and pepper to taste! Toss everything together until the broccoli is evenly coated. This ensures every bite is packed with flavor. Spread the broccoli mixture on a baking sheet. Make sure they are in a single layer. This allows them to roast properly. Place the baking sheet in the preheated oven. Roast for 15-20 minutes until the broccoli is tender and slightly crispy. After the timer goes off, remove the broccoli. Sprinkle ½ cup of grated Parmesan cheese over the top. Return it to the oven for another 5 minutes. This step makes the cheese melt and bubble, creating a delicious, cheesy topping. Once done, take the broccoli out and sprinkle with lemon zest and chopped parsley. This adds freshness and a pop of color. You can find the full recipe detailed earlier. Enjoy this simple and tasty dish! To achieve the perfect roast, start with fresh broccoli. Cut it into even florets for uniform cooking. Preheat your oven to 425°F (220°C) to ensure a good sear. Spread the florets out in a single layer on your baking sheet. This helps them brown nicely. Avoid crowding the pan, as this can cause steaming instead of roasting. For a crispy texture, coat your broccoli well in olive oil. Use enough oil to cover all the florets, but don’t drown them. Toss them with garlic and spices to enhance flavor. Roasting them for 15-20 minutes gives a tender crunch. If you want extra crispiness, broil for the last few minutes. You can try adding more seasonings for a twist. A dash of balsamic vinegar gives a nice tang. Consider adding smoked paprika for a smoky flavor. You can also mix in a pinch of Italian herbs for added depth. Pair your Garlic Parmesan Roasted Broccoli with grilled chicken or fish for a complete meal. It also goes well with pasta dishes. This dish is not just tasty; it adds a colorful touch to your plate. For a special finish, sprinkle some toasted nuts over the top. This adds crunch and a nutty flavor. If you want more ideas, check out the Full Recipe for more tips on enhancing your dish! {{image_2}} You can easily swap out ingredients to suit your taste. If you want an alternative to Parmesan cheese, try nutritional yeast. It gives a cheesy flavor and is great for vegan dishes. You can also use pecorino cheese for a sharper taste. When it comes to oil, olive oil is a classic choice. However, you can use avocado oil or melted coconut oil instead. Both options add a unique flavor. To spice things up, consider adding smoked paprika or cumin. These spices bring a warm taste that pairs well with broccoli. For a vegan version of Garlic Parmesan Roasted Broccoli, replace the Parmesan cheese with nutritional yeast. This keeps the dish creamy and cheesy without dairy. You can also use vegan butter instead of olive oil for added richness. If you need a gluten-free option, you’re in luck! This recipe is already gluten-free. Just make sure any additional spices or toppings you use are also gluten-free. This way, everyone can enjoy this tasty dish without worry. For the full recipe, check out the recipe section. Enjoy making this versatile dish! After you enjoy your Garlic Parmesan Roasted Broccoli, store the leftovers right away. Place the broccoli in an airtight container. This helps keep it fresh and prevent odors from mixing with other foods. Refrigerate it within two hours of cooking. The broccoli will stay good for about 3 to 4 days in the fridge. If you want to keep it longer, freezing is a great option. To freeze, first let the broccoli cool completely. Spread it on a baking sheet in a single layer. Freeze it for about an hour until it is firm. Then, transfer the florets to a freezer-safe bag or container. You can keep frozen broccoli for up to three months. When you’re ready to eat it, just thaw it in the fridge overnight before reheating. To reheat the broccoli, I recommend using the oven for the best taste. Preheat your oven to 350°F (175°C). Place the broccoli on a baking sheet and cover it with foil to keep it moist. Heat for about 10 to 15 minutes. This will warm the broccoli without overcooking it. If you use a microwave, be careful. It can make the broccoli soggy. If you must use the microwave, heat it in short bursts of 30 seconds. Check the texture between each burst. Enjoy the warmth and crunch of your roasted broccoli again! How long can I store roasted broccoli? You can store roasted broccoli in the fridge for about 3 to 5 days. Keep it in an airtight container. This helps keep it fresh and tasty. Can I use frozen broccoli for this recipe? Yes, you can use frozen broccoli. Just thaw it first and pat it dry. This helps it roast better and keeps it from getting soggy. What goes well with Garlic Parmesan Roasted Broccoli? This dish pairs well with chicken, fish, or pasta. It also works great with grains like quinoa or rice. The rich flavors match nicely with many main dishes. How to make Garlic Parmesan Roasted Broccoli spicier? To add some heat, mix in more red pepper flakes. You can also add a pinch of cayenne pepper for an extra kick. Adjust it to your taste, and enjoy the spice. Is this recipe suitable for meal prep? Yes, this recipe is perfect for meal prep. You can roast the broccoli ahead of time and store it. Just reheat it in the oven or microwave when you’re ready to eat. Caloric content and serving size explanations One serving of Garlic Parmesan Roasted Broccoli has about 150 calories. This can vary based on how much oil or cheese you use. Each serving is a healthy side dish. Health benefits of the ingredients used Broccoli is high in vitamins C and K. It also has plenty of fiber, which is good for your digestion. Olive oil provides healthy fats, while garlic may boost your immune system. Parmesan cheese adds flavor and protein, making this dish nutritious and delicious. In this article, we covered how to make Garlic Parmesan Roasted Broccoli. You learned about the key ingredients, from fresh broccoli to zesty lemon. We shared step-by-step cooking instructions and tips for perfect roasting. You also got ideas for variations and storage methods. Roasted broccoli is easy and tasty. It’s a perfect side dish or snack. Enjoy making this healthy recipe and feel good about what you eat. Happy cooking!

Garlic Parmesan Roasted Broccoli Simple and Tasty Dish

Looking for a simple and tasty side dish? Garlic Parmesan Roasted Broccoli is the answer! This easy recipe transforms fresh

- 2 ripe avocados, pitted and peeled - 3 cloves garlic, minced - 2 tablespoons lemon juice - 1/4 cup fresh basil leaves These ingredients are key for a rich and creamy sauce. Ripe avocados give a buttery texture. Garlic adds flavor, while lemon juice brings a bright note. Fresh basil gives a lovely herb taste. - 1/4 cup grated Parmesan cheese or nutritional yeast - 3 tablespoons olive oil - Cherry tomatoes, halved (for garnish) Using Parmesan adds a savory touch. Nutritional yeast is a great vegan swap. Olive oil adds smoothness and richness. Cherry tomatoes not only look nice but also add a sweet burst. - Vegan substitutions: Use nutritional yeast instead of cheese. This keeps it plant-based. - Gluten-free pasta options: Swap regular pasta for gluten-free types. Brown rice or chickpea pasta works well. These choices make this dish suitable for many diets. You can enjoy creamy avocado pasta no matter your needs. For the full recipe, check out the details. First, fill a large pot with water and add salt. Bring the water to a boil. This step is key. The salt flavors the pasta. Once the water is boiling, add 12 ounces of spaghetti or your choice of pasta. Cook according to package instructions until it is al dente. This usually takes about 8 to 10 minutes. Do not forget this step: Reserve one cup of pasta water before draining the pasta. This water helps make the sauce creamy later. After reserving the water, drain the pasta and set it aside in the pot. Now, grab a food processor or blender. Add the two ripe avocados, three cloves of minced garlic, and ¼ cup of fresh basil leaves. Pour in 2 tablespoons of lemon juice and 3 tablespoons of olive oil. Blend until everything is smooth and creamy. If the sauce is too thick, add a few tablespoons of the reserved pasta water. Blend again until you reach the right consistency. Once blended, taste the sauce. Add salt and pepper to make it just right. Return the drained pasta to the pot. Pour the creamy avocado sauce over the pasta. Toss everything together well. Make sure all the pasta is coated evenly. If the sauce seems too thick, add more reserved pasta water. Now, it’s time to serve. Divide the creamy avocado pasta into bowls. For a pretty touch, garnish with halved cherry tomatoes and extra basil leaves. This dish looks as good as it tastes! Enjoy your meal. For the full recipe, check the link above. To get the right sauce thickness, you need to adjust it carefully. If your sauce is too thick, just add some reserved pasta water. This water helps loosen the sauce without losing flavor. It’s a key step. Always reserve some pasta water before draining the pasta. This way, you have it ready when you mix the sauce with the pasta. You can boost flavors by adding spices and herbs. A pinch of red pepper flakes brings warmth. Fresh herbs like parsley or cilantro can give a nice twist. You might also try toasted pine nuts for a crunchy topping. For an extra kick, consider adding lemon zest or a splash of balsamic vinegar. These simple tweaks can make your dish pop. Preparing ingredients ahead of time can save you minutes. Chop the garlic and basil and store them in a container. This way, you can blend the sauce faster. Another tip is to cook the pasta while you make the sauce. This cuts your cooking time down. Follow these tips for a quick and easy meal. For the full recipe, check out the Creamy Avocado Pasta section. {{image_2}} You can add protein to your creamy avocado pasta for a heartier meal. Here are two great options: - Grilled chicken: This adds a nice smoky flavor and makes it filling. - Shrimp or chickpeas: Shrimp brings a sweet taste, while chickpeas add a plant-based protein. Changing the flavor can make this dish even more exciting. Here are some ideas: - Adding different herbs: Try cilantro or parsley for a fresh twist. - Citrus variations: Use lime or orange juice for a bright zing. If you love heat, you can spice things up easily. Consider these options: - Incorporating chili flakes or fresh peppers: This adds a nice kick to your dish. - Experimenting with hot sauce: A few drops can transform the flavor profile. Feel free to mix and match these variations to make the dish your own. For the full recipe, check out the details above. To keep your creamy avocado pasta fresh, store it in the refrigerator. Use an airtight container to prevent air from getting in. This helps avoid browning of the avocado. You can keep it for up to three days. - Refrigeration tips: - Allow the pasta to cool before storing. - Layer a piece of plastic wrap directly on the pasta to reduce air exposure. When it's time to eat your leftovers, you can use either a microwave or stovetop. The microwave is quick, but be careful not to overheat. Overheating can make the sauce separate. - Stovetop method: - Heat on low, stirring gently. - Add a splash of reserved pasta water if needed to keep it creamy. Can you freeze avocado sauce? Yes, but it may change in texture. I suggest freezing just the sauce without the pasta. - Freezing best practices: - Use a freezer-safe container or bag. - Make sure to remove as much air as possible. - Label the container with the date for easy tracking. For freezing pasta dishes, it's best to avoid freezing once mixed. The pasta can become mushy. Instead, freeze the sauce and cook fresh pasta when you're ready to eat. For the full recipe, check out the complete steps and tips to make this dish shine! You can use any pasta you like! I often choose spaghetti for its long strands. Other great options include fettuccine, penne, or farfalle. These shapes hold the creamy sauce well. If you want a gluten-free option, try chickpea or zucchini noodles. They add a nice twist and keep the dish light. Yes, you can prep some ingredients ahead of time. Chop your garlic and basil a day before. Store them in the fridge to keep them fresh. You can also make the avocado sauce in advance. Just add a splash of lemon juice to keep it green. Store it in an airtight container. Cook the pasta right before serving for the best taste. Definitely! Avocados are full of healthy fats and fiber. They help keep your heart strong. Garlic adds flavor and has health benefits too. It can boost your immune system. Basil gives you vitamins and antioxidants. This dish fuels your body while tasting great. Enjoying it is a win-win! For the full recipe, check out the link provided. Creamy Avocado Pasta is a simple, tasty dish packed with great flavors. You need ripe avocados, garlic, lemon juice, and fresh basil for the sauce. You can add optional ingredients like Parmesan or cherry tomatoes to make it even better. Remember to adjust sauce thickness and try different herbs or spices to enhance the flavor. This dish is flexible and can fit many diets. Enjoy making it your own and share it with others!

Creamy Avocado Pasta Flavorful and Simple Dish

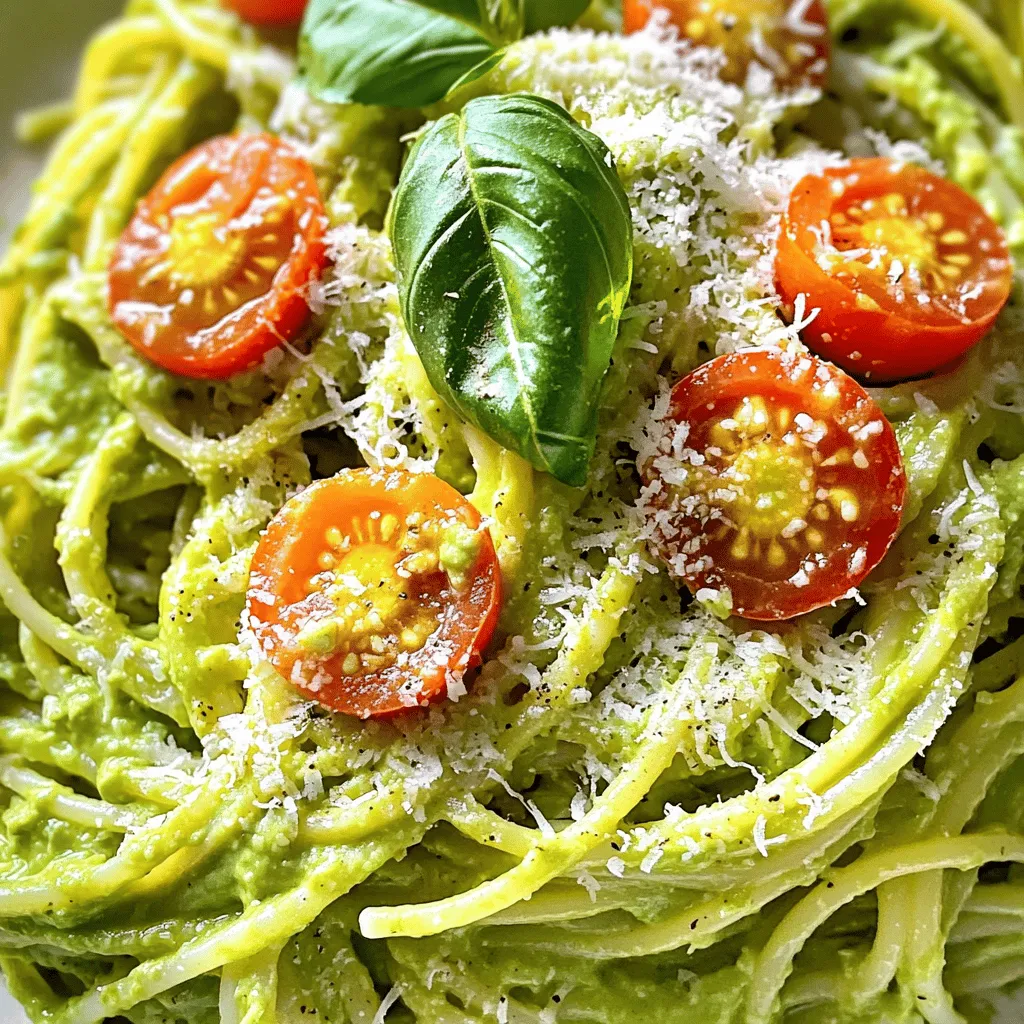
If you crave a quick and tasty meal, creamy avocado pasta is here to please! This dish combines ripe avocados,

For Honey Mustard Chicken Skewers, you need a few simple ingredients. Each one adds great taste and texture to your dish. - Chicken Breast: Use 1 pound of chicken breast, cut into 1-inch cubes. This meat cooks well and stays juicy. - Honey: You'll need 1/4 cup of honey. It gives the skewers a sweet touch. - Dijon Mustard: Use 1/4 cup of Dijon mustard for a tangy flavor. It really makes the dish pop! - Olive Oil: Add 2 tablespoons of olive oil. This helps keep the chicken moist while grilling. - Garlic: Use 2 cloves of minced garlic. It adds a nice savory depth to the marinade. - Spices and Seasonings: You will need smoked paprika, salt, black pepper, and dried thyme. These spices enhance the flavor. - Vegetables for Skewering: I like to use a bell pepper and red onion. Cut them into 1-inch pieces for easy skewering. - Skewers (Wood or Metal): Choose wood or metal skewers based on your preference. If you pick wood, soak them in water for 30 minutes to avoid burning. These ingredients come together to create a tasty meal. For more details, check out the Full Recipe. First, gather your ingredients. You need chicken, honey, Dijon mustard, olive oil, garlic, spices, and salt. In a bowl, mix the honey, mustard, olive oil, minced garlic, smoked paprika, salt, black pepper, and thyme. Whisk them well until combined. Next, add the chicken cubes to the bowl. Make sure every piece is coated in the marinade. Cover the bowl with plastic wrap and let it sit in the fridge. Marinate for at least 30 minutes. If you have time, let it marinate for up to 4 hours for better flavor. While the chicken marinates, prepare your grill. Preheat it to medium-high heat. If you use wooden skewers, soak them in water for 30 minutes. This step helps prevent burning during grilling. A hot grill will give your skewers nice grill marks and a great flavor. Now it’s time to thread the skewers. Grab your marinated chicken and the vegetables. You can use bell peppers and red onions for color and taste. Start with a piece of chicken, then add a square of bell pepper, and follow with an onion wedge. Repeat this until you fill the skewer. Be sure to leave a little space between each piece. This space helps them cook evenly. Once your grill is hot, place the skewers on it. Cook for 12-15 minutes. Turn them occasionally for even cooking. You want the chicken to reach an internal temperature of 165°F (75°C). When they are done, remove them from the grill. Let the skewers rest for a few minutes before serving. This waiting time allows the juices to settle. For a delightful touch, drizzle extra honey mustard sauce over the skewers before serving. For the full recipe, refer to the Honey Mustard Chicken Skewers section. Marination is key to great flavor. I recommend letting your chicken sit in the marinade for at least 30 minutes. For the best taste, aim for 4 hours. This time allows the chicken to absorb all that sweet and tangy goodness. If you have more time, try marinating overnight for an even deeper flavor. If you use wooden skewers, they can burn on the grill. To prevent this, soak them in water for at least 30 minutes before using. This simple step keeps them from catching fire. If you use metal skewers, you won’t need to worry about this. For those gorgeous grill marks, preheat your grill well. Cook the skewers over medium-high heat. Place them on the grill and let them sit without moving them for a few minutes. This helps form those beautiful sear lines. Turn them only once to get the best results. Following these tips will make your honey mustard chicken skewers look as good as they taste! Check out the Full Recipe to see how to make this dish. {{image_2}} You can switch up the protein in honey mustard chicken skewers. Try pork tenderloin for a juicy bite. Shrimp also works well and cooks fast on the grill. Firm tofu is great for a vegetarian option. Cut it into cubes and soak in the honey mustard sauce. Each protein adds a new twist to the dish. While honey mustard is a star, other sauces can shine too. Use teriyaki sauce for a sweet and salty flavor. A zesty barbecue sauce can give a smoky kick. For a tangy twist, try a yogurt-based marinade with herbs. Each sauce can change the taste while keeping it fun. You can mix up the veggies for skewers too. Zucchini or mushrooms can add a rich flavor. Cherry tomatoes bring a juicy burst with every bite. Asparagus spears make the dish look fancy and taste great. Just be sure to cut them to a size that cooks well on the grill. After your meal, let the skewers cool down. Place the leftover skewers in an airtight container. This keeps them fresh. Store them in the fridge for up to three days. When you're ready to eat, just take them out. You can freeze the skewers for longer storage. Wrap each skewer in plastic wrap. Then, put them in a freezer bag. Make sure to remove as much air as possible. They will stay good in the freezer for up to three months. To reheat, you can use the oven or a skillet. For the oven, place the skewers on a baking sheet. Heat them at 350°F (175°C) for about 10-15 minutes. In a skillet, warm them over medium heat for 5-7 minutes, turning often. This keeps the chicken juicy and tasty. For the full recipe, check the Honey Mustard Chicken Skewers section above. You can tell chicken skewers are done when they reach an internal temperature of 165°F (75°C). The meat should look white and no longer pink. If you cut into a piece, the juices should run clear. Use a meat thermometer for the best results. Yes, you can use store-bought honey mustard in this recipe. It saves time and still gives great flavor. However, making your own blend adds a fresh touch. You can mix honey and Dijon mustard to your taste. These skewers pair well with a light salad or grilled vegetables. You can also serve them with rice or quinoa for a filling meal. For a fun twist, add a side of sweet potato fries! Absolutely! Honey mustard chicken skewers are perfect for meal prep. You can marinate the chicken ahead of time and grill when ready. Store the cooked skewers in the fridge for up to four days. You can marinate the chicken for at least 30 minutes and up to four hours. The longer it sits, the more flavor it absorbs. Just make sure not to exceed four hours to keep the chicken tender. For the full recipe, check out Honey Mustard Chicken Skewers. This post covered making tasty honey mustard chicken skewers. We explored key ingredients, from chicken breast to spices. I shared steps for marinating, grilling, and even tips to get perfect grill marks. You also learned about storage and meal prep options. In my view, these skewers are easy and fun. They are great for parties or quick dinners. Enjoy these flavors, and feel free to experiment with the recipe!

Honey Mustard Chicken Skewers Flavorful and Easy Dish

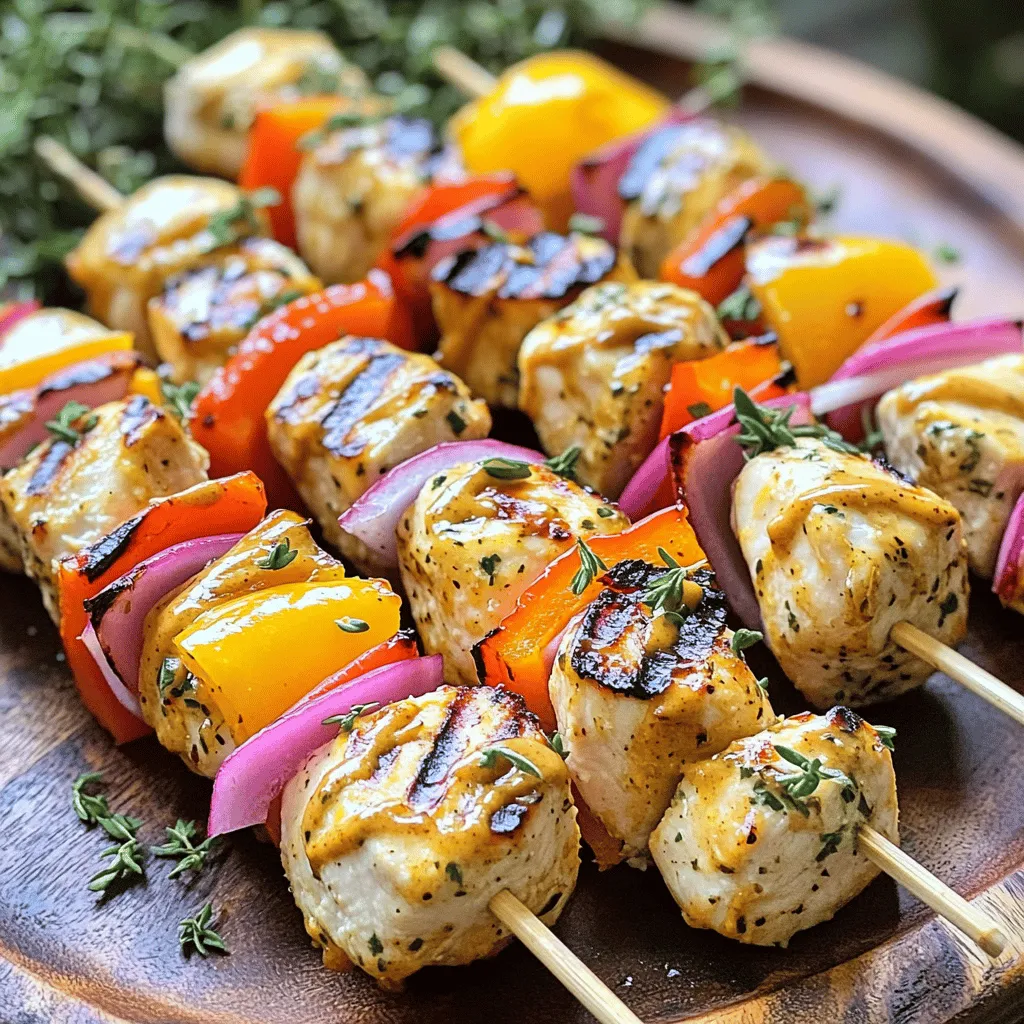
If you’re looking for a simple yet tasty meal, you’ve found it! Honey Mustard Chicken Skewers are easy to make

To create a tasty s'mores dip, you need simple and fun ingredients. Here’s what you will need: - 1 cup semi-sweet chocolate chips - 1 cup mini marshmallows - 1 tablespoon coconut oil (or unsalted butter) - 1/2 cup crushed graham crackers (plus more for serving) - 1/2 teaspoon vanilla extract - A pinch of sea salt These ingredients come together to make a warm, gooey treat that everyone loves. The chocolate chips melt perfectly and pair well with the sweet marshmallows. Coconut oil or butter adds a nice richness, while the graham crackers give a delightful crunch. The vanilla extract and sea salt enhance the flavors, making every bite unforgettable. When you gather these items, think about how you want to serve the dip. Extra graham crackers are a must for dipping! You can also use fruits or pretzel sticks to add variety. This recipe is easy to make and fun to share. For the complete recipe, check the section above. Enjoy the sweet and simple flavors of this s'mores dip! - Preheat the oven to 350°F (175°C). - In a medium mixing bowl, mix the chocolate chips, coconut oil, and vanilla extract. Stir until they blend well. - Pour the chocolate mixture into a cast-iron skillet or any oven-safe dish. Spread it out evenly. - Layer the mini marshmallows on top of the chocolate mixture. Make sure to cover the chocolate all the way. - Next, sprinkle the crushed graham crackers on top. This adds a nice crunch to the dip. - Bake in the oven for 10-12 minutes. Watch closely as the marshmallows puff up. - Tips for monitoring: Keep an eye on the color. You want them golden brown, not burnt. If they brown too fast, you can cover the dish lightly with foil. This simple process leads to a warm, gooey treat that you and your friends will love! For the full recipe, check out the details above. To get golden-brown marshmallows, you need to watch them closely. Bake for 10 to 12 minutes. Keep your eyes on the dip. If the marshmallows start to brown too quickly, take it out. You want that nice, toasted look without burning. Mixing your ingredients well is key. Combine chocolate chips, coconut oil, and vanilla extract in a bowl. Make sure the chocolate gets fully coated with oil. This helps it melt evenly. A smooth mix gives you a creamy dip. You can serve your S'mores Dip with many dippable items. Graham crackers are classic, but fruits work great too. Think strawberries or banana slices for a fresh twist. Pretzel sticks add a fun crunch and saltiness. For a special touch, drizzle some chocolate sauce on top. It enhances the flavor and looks pretty. You can also add a sprinkle of sea salt for a sweet-salty balance. The dip is best enjoyed warm, so serve it right out of the oven! {{image_2}} You can switch up the chocolate in your S'mores Dip. Here are some options: - Dark chocolate: Use dark chocolate chips for a richer taste. - Milk chocolate: This gives a sweeter flavor that many love. - White chocolate: It adds a creamy touch for a different twist. If you don’t have coconut oil, you can use: - Unsalted butter: This gives a nice flavor and texture. - Vegetable oil: This is a light option if you need a substitute. Want to make your dip more fun? Try these tasty add-ins: - Peanut butter: Swirl in some peanut butter for a nutty flavor. - Nuts: Chopped nuts can add crunch and taste. - Flavored extracts: A few drops of almond or mint extract can change the flavor. You can also adapt the dip for the seasons: - Pumpkin spice: Add this in the fall for a cozy flavor. - Peppermint: Use it around the holidays for a festive touch. These variations keep your S'mores Dip exciting and fun. Try mixing and matching to find your favorite! For the full recipe, check out the Oven-Baked S'mores Dip section above. To keep your s'mores dip fresh, store it in an airtight container. Let the dip cool completely first, then cover it tightly. Place it in the fridge. It will stay good for about three days. If you have some left, be sure to share it! When you want to reheat the dip, use the oven. Preheat it to 350°F (175°C). Scoop the dip into a safe oven dish. Warm it for about 5-10 minutes. This helps the marshmallows puff up again. You can also use a microwave. Heat in short bursts of 20 seconds. Stir between each burst to keep it smooth. When stored in the fridge, s'mores dip lasts about three days. After that, it might not taste as good. Check for signs of spoilage. If you see mold or it smells off, it’s time to toss it. Always trust your senses! Can I use different types of chocolate for this recipe? Yes, you can! Try dark, milk, or white chocolate. Each type adds a unique taste. Mix and match until you find your favorite. Is it possible to make this dip in a microwave? Yes, you can use a microwave. Just mix the chocolate and oil in a bowl, then heat in short bursts. Stir until smooth. Add marshmallows and heat again until puffy. How can I make S'mores Dip without graham crackers? You can use crushed cookies or pretzels instead. Even nuts or popcorn can work for a fun twist. Get creative! What is the best way to serve s'mores dip? Serve it warm with graham crackers, pretzel sticks, or fruit. You can also drizzle chocolate sauce on top for extra flair. Everyone will love it! Can I make this ahead of time for a party? You can prep the dip but bake it just before serving. This keeps it warm and gooey. Make sure to enjoy it fresh for the best taste. Do I need a cast-iron skillet to bake S'mores Dip? No, you don’t need a cast-iron skillet. Any oven-safe dish will work. Use what you have on hand. Can I use other dishes for baking this recipe? Yes, feel free to use a baking dish or even a pie plate. Just ensure it can handle the heat. The key is to have even coverage for baking. This blog post covered everything you need to make a great s'mores dip. We explored the ingredients, steps for preparation and baking, and helpful tips for serving. You discovered ways to customize your dip with variations and learned how to store leftovers. Enjoy experimenting with flavors and sharing this fun treat with friends. Now, gather your ingredients and start creating your tasty s'mores dip!

S’mores Dip in the Oven Simple and Tasty Recipe

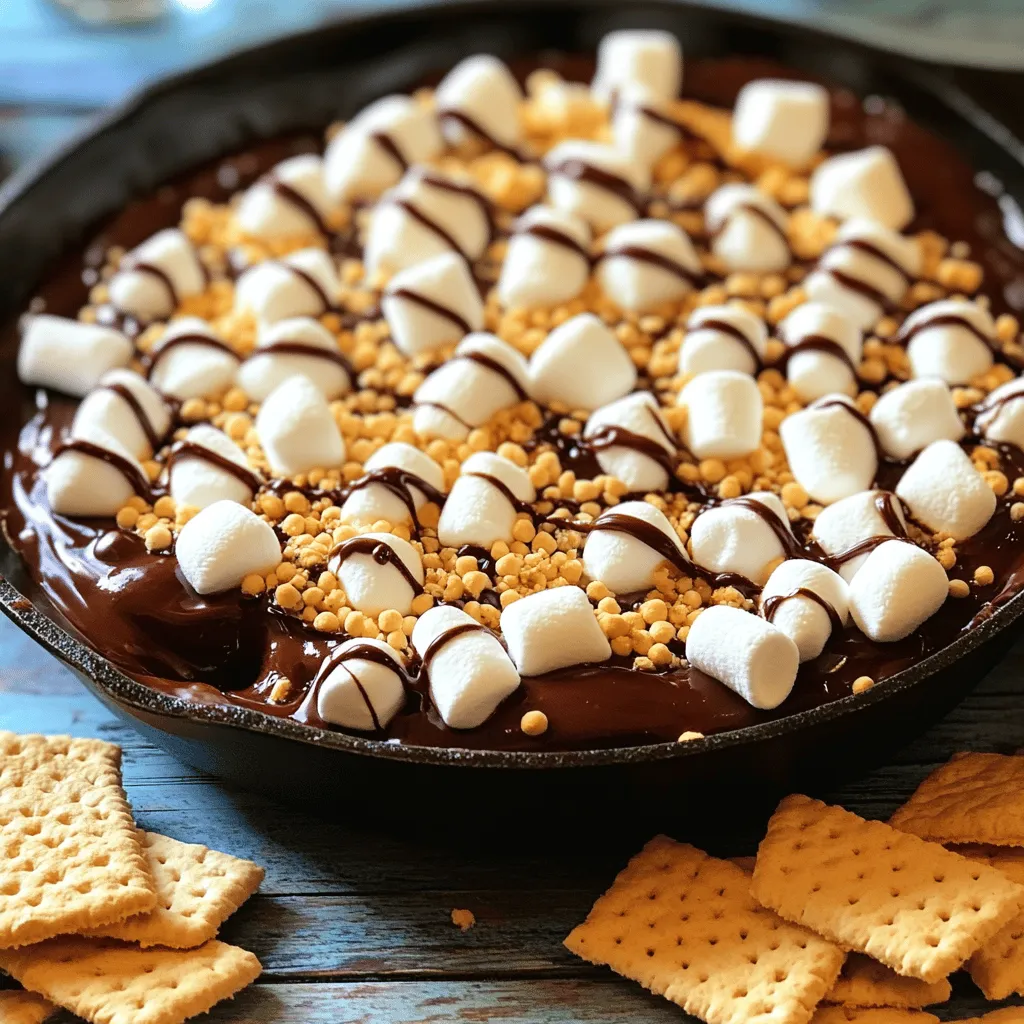
Craving a campfire treat without the bonfire? You’re in the right place! This S’mores Dip in the oven is the

Older posts
Newer posts
← Previous Page1 … Page36 Page37 Page38 … Page60 Next →

dsad

© 2025 Cooking Wells • Built with GeneratePress

Our Policies

  • Copyright Policy
  • Cookie Policy
  • GDPR Policy
  • Privacy Policy
  • Disclaimer
  • Terms Of Use

More Information

  • Home
  • About
  • Contact
  • Appetizers
  • Dessert
  • Dinner
  • Drinks
©2025, Cooking Wells About Back To Top