Looking for a fresh and tasty dish that’s easy to make? You’ve got to try this Pesto Pasta Salad! With bright flavors and simple ingredients, it’s perfect for lunch or dinner. I’ll walk you through each step, from cooking the pasta to making a delicious homemade pesto. Plus, I’ll share tips for tasty variations and storage tips for leftovers. Let’s dive in and make your next meal a hit!
Ingredients
Main Ingredients for Pesto Pasta Salad
To make a tasty pesto pasta salad, gather these main ingredients:
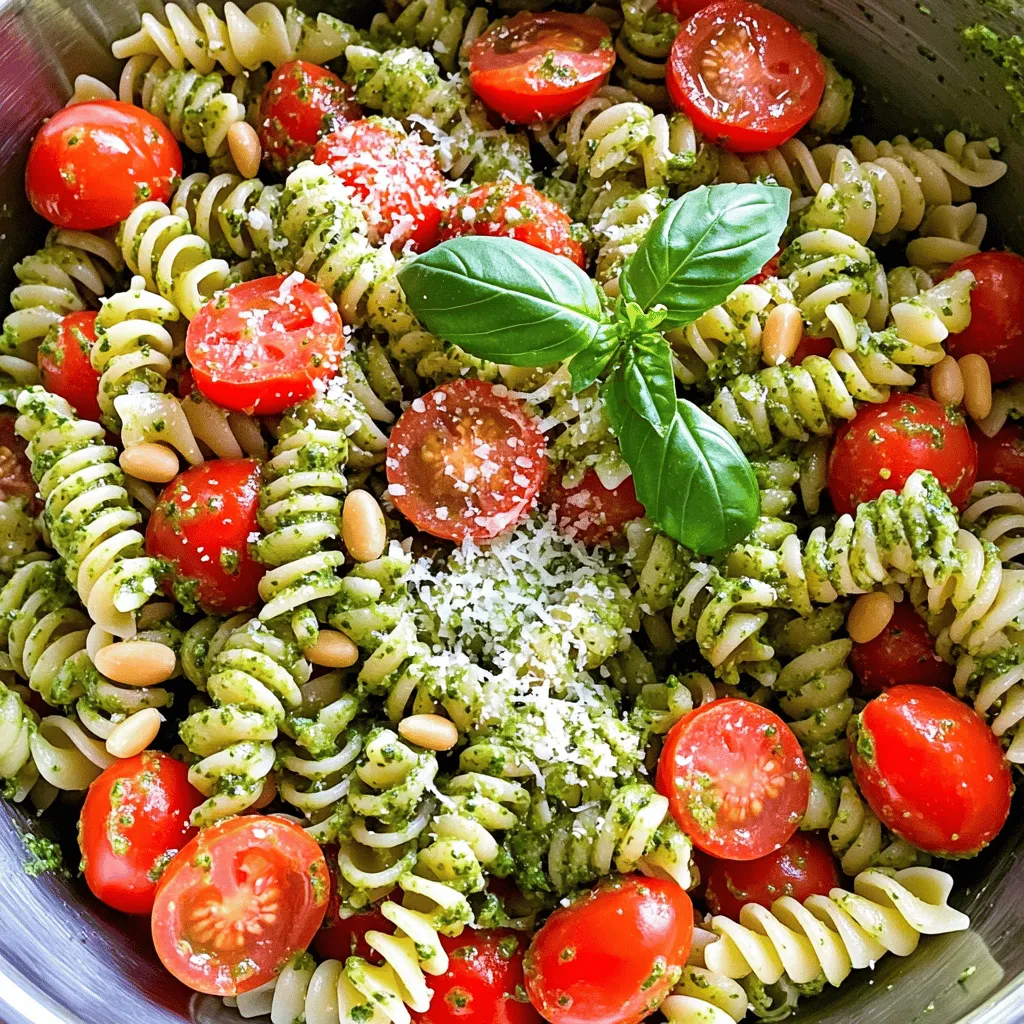
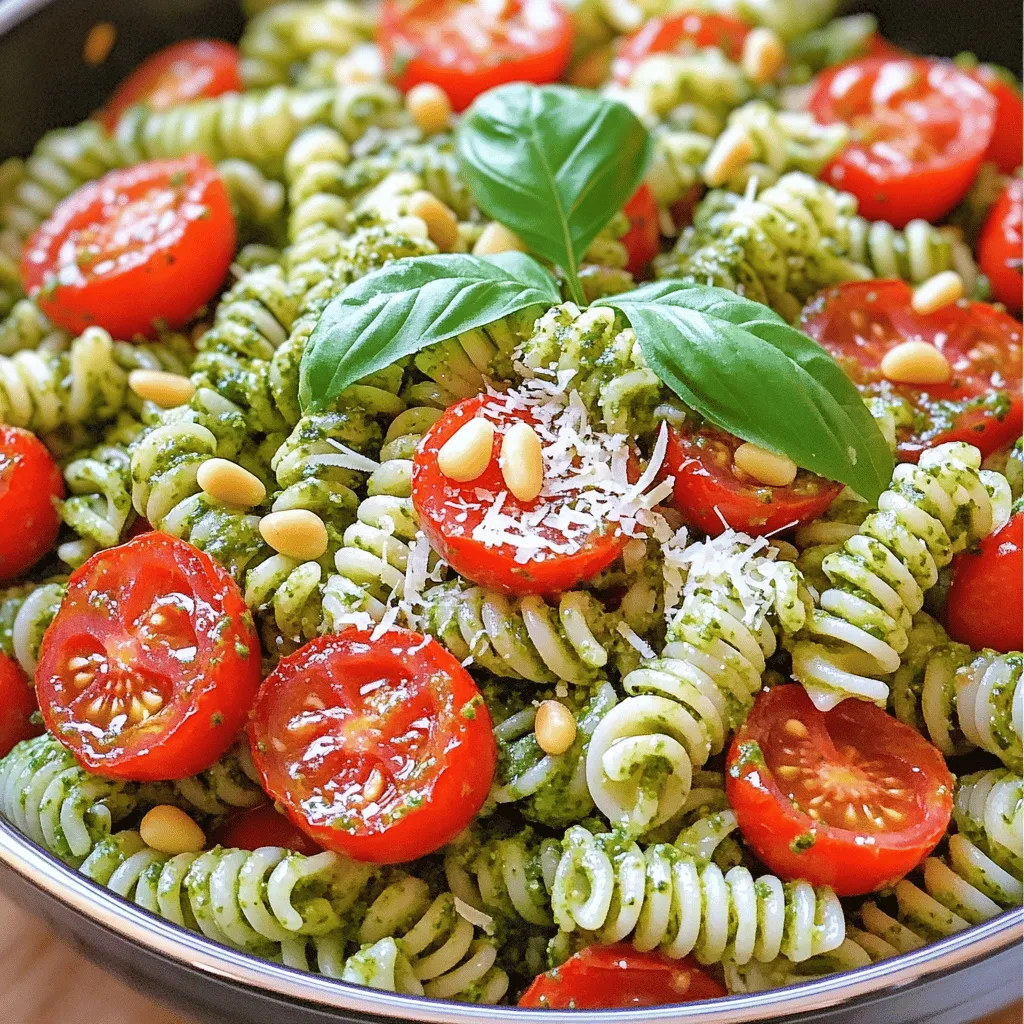
– 2 cups cherry tomatoes, halved
– 1 cup cooked fusilli pasta (or any pasta of your choice)
– 1 cup fresh basil leaves
– 1/2 cup pine nuts, toasted
– 1/2 cup grated Parmesan cheese
– 1/4 cup extra-virgin olive oil
– 2 tablespoons lemon juice
– 1 garlic clove, minced
– Salt and pepper to taste
These ingredients combine to create a fresh, vibrant flavor that makes this salad a hit.
Optional Garnishes
You can make your salad more special with these optional garnishes:
– Fresh mozzarella balls
– Extra grated Parmesan cheese
– Whole basil leaves
Adding these garnishes gives your dish a beautiful look and extra flavor.
Recommended Ingredient Quality Tips
For the best taste, choose high-quality ingredients:
– Use ripe cherry tomatoes for sweetness.
– Select fresh basil for a bright, fragrant flavor.
– Opt for good-quality Parmesan cheese, as it adds richness.
– Toast your pine nuts for added depth and crunch.
These tips ensure your pesto pasta salad shines with every bite.
Step-by-Step Instructions
Cooking the Pasta
Start by boiling water in a large pot. Add a pinch of salt to the water. Once it boils, add 1 cup of fusilli pasta. Cook it according to the package instructions. This usually takes about 8-10 minutes. You want the pasta to be al dente, meaning it should still have a slight bite. After cooking, drain the pasta and rinse it under cold water. This stops the cooking and cools it down. Set the pasta aside for later.
Making the Pesto Sauce
Next, grab a food processor. Add 1 cup of fresh basil leaves, 1/2 cup of toasted pine nuts, and 1/2 cup of grated Parmesan cheese. Toss in 1 minced garlic clove. Squeeze in 2 tablespoons of lemon juice. Sprinkle in a pinch of salt and pepper. Now, blend these ingredients together. While the processor runs, slowly pour in 1/4 cup of extra-virgin olive oil. Blend until the mixture is smooth. Taste and adjust the seasoning as needed. This is your fresh pesto sauce.
Combining Ingredients for the Salad
In a large mixing bowl, combine the cooled fusilli pasta and 2 cups of halved cherry tomatoes. Pour the pesto sauce over the pasta and tomatoes. Toss everything gently. Ensure that every piece of pasta is coated in the sauce. If you want extra creaminess, fold in fresh mozzarella balls at this point. Let the salad sit for about 15 minutes. This helps the flavors mix well. Serve the salad in a big bowl. Garnish with extra Parmesan and basil leaves for a pop of color. Enjoy it chilled or at room temperature.
Tips & Tricks
How to Perfect the Pesto Flavor
To get the best flavor from your pesto, use fresh basil. The leaves should be bright green and fragrant. I like to toast the pine nuts for a richer taste. Toss them in a dry pan over medium heat until golden. Don’t skip the lemon juice. It brightens the flavor and balances the richness. Blend everything slowly to avoid over-mixing. This keeps the pesto vibrant and fresh. You can also add a pinch of red pepper flakes for a little heat.
Optimal Serving Temperature
This pasta salad shines at room temperature. Let it sit for at least 15 minutes after mixing. This helps the flavors meld together. If you chill it, take it out a bit before serving. Cold pasta salad is nice, but serving it slightly warm enhances its taste. You want to enjoy all the flavors you worked hard to create.
Common Mistakes to Avoid when Making Pesto Pasta Salad
One mistake is using old basil. Always select fresh leaves. Another pitfall is not seasoning enough. Taste the pesto as you make it. Add salt and pepper gradually. Don’t rush the mixing process. If you over-blend, the pesto can turn brown and lose its fresh look. Lastly, avoid soggy pasta. Rinse the pasta with cold water right after cooking. This stops the cooking and helps keep the pasta firm.
Variations
Vegetarian or Vegan Pesto Pasta Salad Ideas
To make a vegetarian or vegan version, swap the cheese. Use nutritional yeast for a cheesy flavor. You can also add spinach or arugula to the salad. These greens bring a fresh taste to the dish. If you love nuts, try walnuts or cashews in place of pine nuts. They add a nice crunch and work well in pesto.
Gluten-Free Pesto Pasta Salad Alternatives
For a gluten-free option, choose gluten-free pasta. Many brands offer great choices made from rice, corn, or legumes. You can also use spiralized veggies like zucchini or carrots. They add color and a crispy texture. The flavors of the pesto still shine through with these swaps.
Adding Protein Options (Chicken, Shrimp, etc.)
If you want to add protein, grilled chicken works great. Cut it into bite-sized pieces and mix it into the salad. For seafood lovers, shrimp is a fantastic option too. Cook the shrimp until pink and toss it in. You can also use chickpeas for a plant-based protein boost. Each of these options makes your salad filling and tasty.
Storage Info
How to Properly Store Leftover Pesto Pasta Salad
After enjoying your pesto pasta salad, storing it correctly is key. First, let the salad cool to room temperature. This helps prevent condensation in your storage container. Transfer the salad to a clean container. If you have extra pesto, drizzle a little on top to keep it fresh. Seal the container tightly to lock in flavors.
Best Containers for Storage
For best results, use an airtight glass container. Glass keeps the salad fresh and won’t absorb odors. If you prefer plastic, choose BPA-free containers. Avoid using metal containers, as they can react with the ingredients. Always choose a size that fits your salad snugly to minimize air exposure.
Shelf Life and Freezing Tips
Properly stored, your pesto pasta salad lasts about 3-5 days in the fridge. Check for signs of spoilage, like off smells or color changes. If you want to save it longer, consider freezing. However, pasta can change texture when frozen and thawed. To freeze, place the salad in a freezer-safe container, leaving space for expansion. It can last up to a month in the freezer. When ready, thaw it in the fridge overnight. Give it a stir before serving to bring back its texture.
FAQs
How do I make pesto from scratch?
To make pesto from scratch, gather fresh basil, pine nuts, Parmesan cheese, garlic, and olive oil. Start by washing the basil leaves and toasting the pine nuts in a pan. In a food processor, combine the basil, toasted pine nuts, grated Parmesan, and minced garlic. Pulse until finely chopped. Then, slowly add olive oil while blending until smooth. Taste and season with salt and pepper as needed. This fresh pesto will add a burst of flavor to your salad.
Can I use store-bought pesto for this salad?
Yes, you can use store-bought pesto for this salad. It saves time and still offers great taste. Just choose a high-quality brand without additives. Store-bought pesto can work well when you’re short on time but still want a flavorful dish. Just mix it with the pasta and tomatoes, and you’re good to go!
What are some easy side dishes to serve with Pesto Pasta Salad?
Pesto pasta salad pairs well with many sides. Here are some easy options:
– Garlic bread for a crunchy bite
– Grilled vegetables for a smoky flavor
– A simple green salad for freshness
– Antipasto platter with olives and meats for variety
– Fresh fruit salad for a sweet touch
These sides complement the salad and make a complete meal. Enjoy experimenting with different pairings!
You learned how to make a great pesto pasta salad. We covered key ingredients and step-by-step instructions. I shared tips to enhance flavor and avoid common mistakes. Variations let you customize it to your taste, and storage advice helps keep leftovers fresh. This dish is both fun and easy. I hope you enjoy making it and sharing it with others. Happy cooking!