No-Bake Cinnamon Roll Cheesecake Cups Delightful Treat

WANT TO SAVE THIS RECIPE?

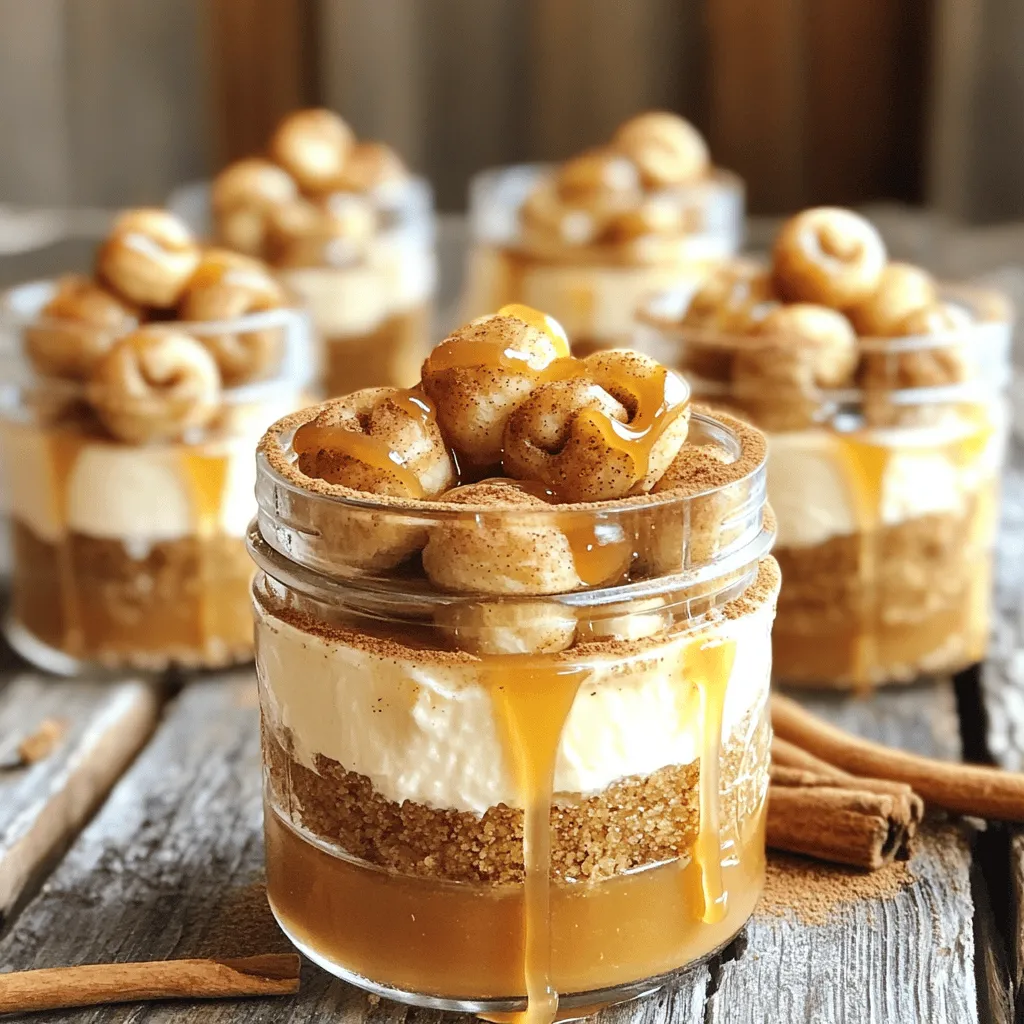
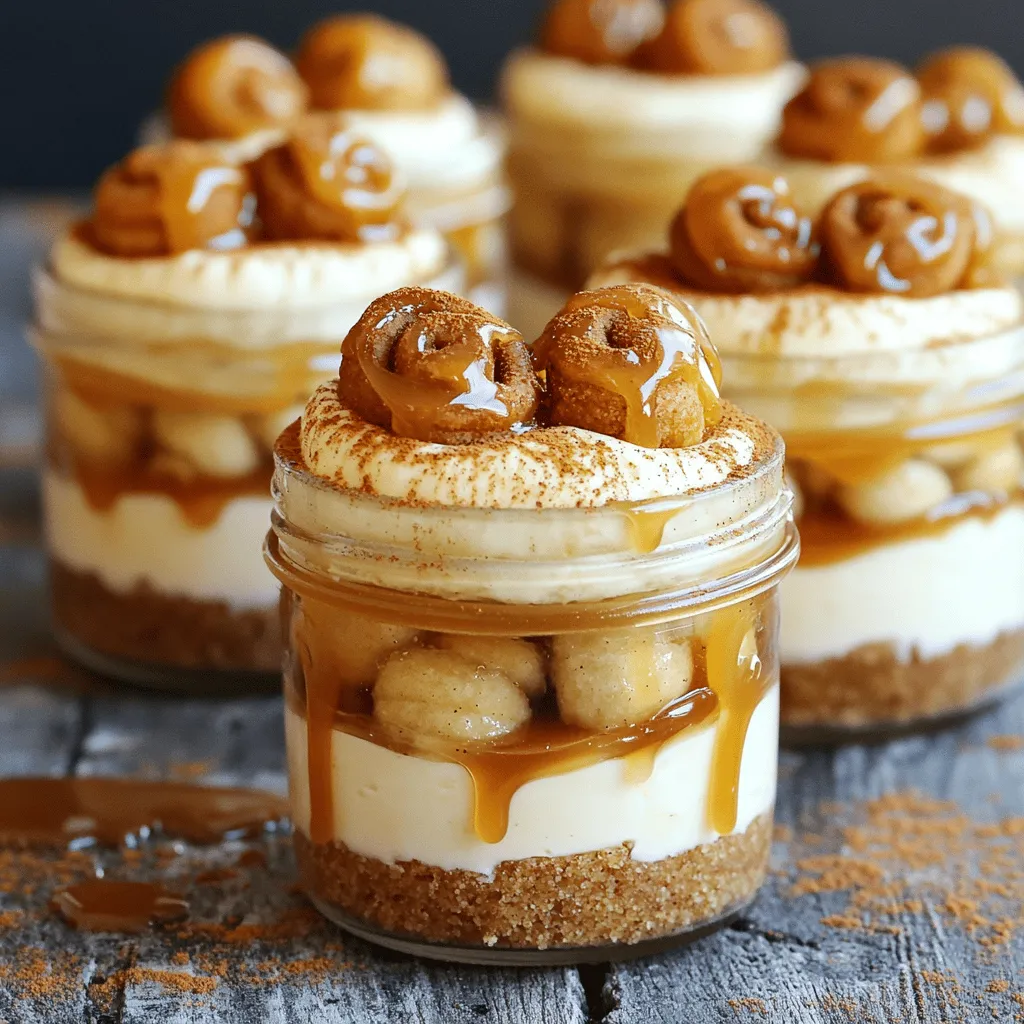
Are you ready for a sweet treat that’s both easy and delicious? My No-Bake Cinnamon Roll Cheesecake Cups are the perfect dessert for any occasion! With layers of creamy cheesecake and hints of cinnamon, these cups will wow your taste buds. Plus, they’re simple to make—no oven required! Join me as we whip up this delightful and tasty dessert that’s sure to impress everyone. Let’s dive in!

Ingredients

List of Ingredients

  • 1 cup graham cracker crumbs
  • 1/2 cup unsalted butter, melted
  • 8 oz cream cheese, softened
  • 1/2 cup powdered sugar
  • 1 teaspoon vanilla extract
  • 1/2 teaspoon ground cinnamon
  • 1 cup whipped cream (homemade or store-bought)
  • 1/2 cup mini cinnamon roll bites (store-bought or homemade, if desired)
  • 1 tablespoon caramel sauce (for drizzling)
  • Extra cinnamon for sprinkling

This recipe is easy and fun! You’ll need some key ingredients to make your no-bake cinnamon roll cheesecake cups. First, grab graham cracker crumbs. These will make a tasty crust. Use unsalted butter to hold the crumbs together. Next, cream cheese is a must. It gives the cheesecake its smooth texture.

You will also need powdered sugar to sweeten the filling. Vanilla extract adds flavor. Ground cinnamon gives a warm spice that is perfect for this treat. Whipped cream is key for a fluffy texture. Mini cinnamon roll bites add a fun twist. Lastly, caramel sauce makes everything even sweeter, and extra cinnamon for garnish makes it look nice.

With these ingredients, you can create a delightful treat that everyone will love!

Step-by-Step Instructions

Preparing the Crust

  • First, grab a mixing bowl.
  • Add 1 cup of graham cracker crumbs.
  • Pour in 1/2 cup of melted unsalted butter.
  • Stir the mixture until it looks like wet sand.
  • Now, take small cups or jars.
  • Spoon the crumb mixture into each cup.
  • Press it down gently to form a solid base.

Making the Cheesecake Filling

  • In a new bowl, beat 8 oz of softened cream cheese.
  • Add 1/2 cup of powdered sugar, 1 teaspoon of vanilla extract, and 1/2 teaspoon of ground cinnamon.
  • Mix until the filling is smooth and creamy.
  • Next, fold in 1 cup of whipped cream.
  • Be gentle so it stays fluffy.

Assembling the Cups

  • Spoon the cheesecake filling over the crust in each cup.
  • Fill them about three-quarters full.
  • If you like, add mini cinnamon roll bites on top.
  • Drizzle 1 tablespoon of caramel sauce over each cup.
  • Finally, sprinkle a little extra cinnamon for flavor.
  • Chill the cups in the fridge for at least 2 hours before serving.

Tips & Tricks

How to Achieve the Best Texture

To get the best texture in your cheesecake cups, start with the cream cheese. Soften it by leaving it out for about an hour. This step helps it mix smoothly. If you forget, you can microwave it in short bursts. Just don’t let it melt.

Next, when you add whipped cream, fold it gently into the cream cheese mix. Use a spatula to lift and turn the mixture. This keeps the filling light and airy, which is key for a great texture.

Serving Suggestions

For a beautiful presentation, garnish your cheesecake cups. A small piece of cinnamon roll on top looks great. A light dusting of extra cinnamon adds a nice touch too.

You can serve these cups chilled for a refreshing treat. If you want, they can also sit at room temperature for a bit. Just keep them cool if it’s hot outside.

Common Mistakes to Avoid

A common mistake is overmixing the cheesecake filling. This can make it too dense. Mix until just combined for the best texture.

Another mistake is not letting the cups set long enough. They need at least two hours in the fridge. This time allows the flavors to blend and the texture to firm up.

Variations

Alternative Flavor Combinations

You can easily switch things up with new flavors. Adding chocolate or maple syrup makes a rich twist. Just mix some chocolate syrup into your cheesecake filling. For a sweet touch, drizzle maple syrup on top. You can also use fruit toppings like apples or cherries. Fresh fruit adds a nice burst of flavor and color.

Healthier Options

If you’re looking for healthier choices, you have options. For the crust, swap graham crackers for gluten-free ones. This change keeps the dessert tasty for everyone! You can also use low-fat cream cheese. It cuts down on fat while keeping the creamy texture.

Mini vs. Regular Size Cups

You can adjust portions based on cup size. Mini cups are perfect for small bites, while regular cups give a more filling treat. The presentation also changes; mini cups look cute and fun, while regular cups feel more elegant. Choose your size based on your event or mood!

Storage Info

Best Practices for Refrigeration

You can store your no-bake cheesecake cups in the fridge for up to five days. To keep them fresh, cover the cups tightly with plastic wrap. This helps maintain their creamy texture. Avoid leaving them uncovered, as air can dry them out and change their taste.

Freezing Instructions

Yes, you can freeze no-bake cheesecake cups! They last up to three months in the freezer. To freeze, place the covered cups in a single layer in a freezer-safe container. When you’re ready to enjoy them, thaw them in the fridge overnight. This keeps the texture smooth and creamy.

Serving After Storage

Before serving, check the texture. If they seem a bit firm, let them sit at room temperature for about ten minutes. This helps them soften. For a fresh look, add a drizzle of caramel sauce and sprinkle cinnamon on top after refrigeration. This gives your dessert a nice touch and makes it look appetizing!

FAQs

Can I make these cheesecake cups ahead of time?

Yes, you can make these cheesecake cups ahead of time. I recommend preparing them up to two days in advance. This gives the flavors time to blend and the cups time to set. Just store them in the fridge. Cover each cup with plastic wrap to keep them fresh.

What can I use instead of whipped cream?

If you want a different option, you can use yogurt or sour cream. Both add creaminess to the cheesecake filling. For a dairy-free choice, try coconut cream. Just whip it up until it is fluffy. Each option will give a nice texture to your cheesecake cups.

How do I make homemade mini cinnamon roll bites?

To make mini cinnamon roll bites at home, start with your favorite dough. Roll it out and spread butter, sugar, and cinnamon on top. Then, roll it up tight and cut it into small pieces. Bake them until golden. These bites are fun and easy to make! You can add them on top of your cheesecake cups for extra flavor.

This blog post covered how to make delicious no-bake cheesecake cups. We went over the simple ingredients needed and provided clear steps for preparation. I shared tips for the best texture and how to avoid common mistakes. You can explore fun variations and learn how to store your treats properly.

In the end, these cheesecake cups offer endless fun in the kitchen. Enjoy crafting your own flavors and impressing others!

- 1 cup graham cracker crumbs - 1/2 cup unsalted butter, melted - 8 oz cream cheese, softened - 1/2 cup powdered sugar - 1 teaspoon vanilla extract - 1/2 teaspoon ground cinnamon - 1 cup whipped cream (homemade or store-bought) - 1/2 cup mini cinnamon roll bites (store-bought or homemade, if desired) - 1 tablespoon caramel sauce (for drizzling) - Extra cinnamon for sprinkling This recipe is easy and fun! You'll need some key ingredients to make your no-bake cinnamon roll cheesecake cups. First, grab graham cracker crumbs. These will make a tasty crust. Use unsalted butter to hold the crumbs together. Next, cream cheese is a must. It gives the cheesecake its smooth texture. You will also need powdered sugar to sweeten the filling. Vanilla extract adds flavor. Ground cinnamon gives a warm spice that is perfect for this treat. Whipped cream is key for a fluffy texture. Mini cinnamon roll bites add a fun twist. Lastly, caramel sauce makes everything even sweeter, and extra cinnamon for garnish makes it look nice. With these ingredients, you can create a delightful treat that everyone will love! - First, grab a mixing bowl. - Add 1 cup of graham cracker crumbs. - Pour in 1/2 cup of melted unsalted butter. - Stir the mixture until it looks like wet sand. - Now, take small cups or jars. - Spoon the crumb mixture into each cup. - Press it down gently to form a solid base. - In a new bowl, beat 8 oz of softened cream cheese. - Add 1/2 cup of powdered sugar, 1 teaspoon of vanilla extract, and 1/2 teaspoon of ground cinnamon. - Mix until the filling is smooth and creamy. - Next, fold in 1 cup of whipped cream. - Be gentle so it stays fluffy. - Spoon the cheesecake filling over the crust in each cup. - Fill them about three-quarters full. - If you like, add mini cinnamon roll bites on top. - Drizzle 1 tablespoon of caramel sauce over each cup. - Finally, sprinkle a little extra cinnamon for flavor. - Chill the cups in the fridge for at least 2 hours before serving. To get the best texture in your cheesecake cups, start with the cream cheese. Soften it by leaving it out for about an hour. This step helps it mix smoothly. If you forget, you can microwave it in short bursts. Just don’t let it melt. Next, when you add whipped cream, fold it gently into the cream cheese mix. Use a spatula to lift and turn the mixture. This keeps the filling light and airy, which is key for a great texture. For a beautiful presentation, garnish your cheesecake cups. A small piece of cinnamon roll on top looks great. A light dusting of extra cinnamon adds a nice touch too. You can serve these cups chilled for a refreshing treat. If you want, they can also sit at room temperature for a bit. Just keep them cool if it's hot outside. A common mistake is overmixing the cheesecake filling. This can make it too dense. Mix until just combined for the best texture. Another mistake is not letting the cups set long enough. They need at least two hours in the fridge. This time allows the flavors to blend and the texture to firm up. {{image_2}} You can easily switch things up with new flavors. Adding chocolate or maple syrup makes a rich twist. Just mix some chocolate syrup into your cheesecake filling. For a sweet touch, drizzle maple syrup on top. You can also use fruit toppings like apples or cherries. Fresh fruit adds a nice burst of flavor and color. If you're looking for healthier choices, you have options. For the crust, swap graham crackers for gluten-free ones. This change keeps the dessert tasty for everyone! You can also use low-fat cream cheese. It cuts down on fat while keeping the creamy texture. You can adjust portions based on cup size. Mini cups are perfect for small bites, while regular cups give a more filling treat. The presentation also changes; mini cups look cute and fun, while regular cups feel more elegant. Choose your size based on your event or mood! You can store your no-bake cheesecake cups in the fridge for up to five days. To keep them fresh, cover the cups tightly with plastic wrap. This helps maintain their creamy texture. Avoid leaving them uncovered, as air can dry them out and change their taste. Yes, you can freeze no-bake cheesecake cups! They last up to three months in the freezer. To freeze, place the covered cups in a single layer in a freezer-safe container. When you're ready to enjoy them, thaw them in the fridge overnight. This keeps the texture smooth and creamy. Before serving, check the texture. If they seem a bit firm, let them sit at room temperature for about ten minutes. This helps them soften. For a fresh look, add a drizzle of caramel sauce and sprinkle cinnamon on top after refrigeration. This gives your dessert a nice touch and makes it look appetizing! Yes, you can make these cheesecake cups ahead of time. I recommend preparing them up to two days in advance. This gives the flavors time to blend and the cups time to set. Just store them in the fridge. Cover each cup with plastic wrap to keep them fresh. If you want a different option, you can use yogurt or sour cream. Both add creaminess to the cheesecake filling. For a dairy-free choice, try coconut cream. Just whip it up until it is fluffy. Each option will give a nice texture to your cheesecake cups. To make mini cinnamon roll bites at home, start with your favorite dough. Roll it out and spread butter, sugar, and cinnamon on top. Then, roll it up tight and cut it into small pieces. Bake them until golden. These bites are fun and easy to make! You can add them on top of your cheesecake cups for extra flavor. This blog post covered how to make delicious no-bake cheesecake cups. We went over the simple ingredients needed and provided clear steps for preparation. I shared tips for the best texture and how to avoid common mistakes. You can explore fun variations and learn how to store your treats properly. In the end, these cheesecake cups offer endless fun in the kitchen. Enjoy crafting your own flavors and impressing others!

No-Bake Cinnamon Roll Cheesecake Cups

Indulge in the deliciousness of No-Bake Cinnamon Roll Cheesecake Cups! These easy-to-make desserts combine creamy cheesecake with mini cinnamon rolls for a delightful treat. Perfect for any occasion, this recipe requires minimal prep and no baking. Ready in just over two hours, they’re sure to impress your friends and family. Click to discover how to whip up these tasty cups that will satisfy your sweet cravings!

Ingredients
  

1 cup graham cracker crumbs

1/2 cup unsalted butter, melted

8 oz cream cheese, softened

1/2 cup powdered sugar

1 teaspoon vanilla extract

1/2 teaspoon ground cinnamon

1 cup whipped cream (homemade or store-bought)

1/2 cup mini cinnamon roll bites (store-bought or homemade, if desired)

1 tablespoon caramel sauce (for drizzling)

Extra cinnamon for sprinkling

Instructions
 

In a mixing bowl, combine the graham cracker crumbs and melted butter, stirring until well combined.

    Spoon the crumb mixture evenly into the bottom of small cups or jars, pressing it down gently to form a base layer for the cheesecake.

      In a separate bowl, beat the softened cream cheese with the powdered sugar, vanilla extract, and ground cinnamon until smooth and creamy.

        Gently fold in the whipped cream until fully combined and fluffy, creating a light cheesecake filling.

          Spoon or pipe the cheesecake mixture on top of the graham cracker crust in each cup, filling them about three-quarters full.

            Add a layer of mini cinnamon roll bites on top of the cheesecake filling if using.

              Drizzle caramel sauce over each cup and sprinkle with extra cinnamon for added flavor.

                Refrigerate the cheesecake cups for at least 2 hours to set before serving.

                  Prep Time: 20 mins | Total Time: 2 hrs 20 mins | Servings: 6

                    - Presentation Tips: Serve the cheesecake cups chilled, garnished with a small piece of cinnamon roll on top and a light dusting of cinnamon for a decorative touch.

                      WANT TO SAVE THIS RECIPE?

                      Leave a Comment

                      Recipe Rating