Skip to content
DisclaimerTerms Of UseGDPR PolicyCookie Policy

Cooking Wells

  • Home
  • Drinks
  • Appetizers
  • Dinner
  • Dessert
  • About
  • Contact
  • Privacy Policy
DisclaimerTerms Of UseGDPR PolicyCookie Policy

NO-ING-IMG

To create Garlic Butter Steak & Potato Foil Packs, you need these simple ingredients: - 1 lb sirloin steak, cut into 1-inch cubes - 1 lb baby potatoes, halved - 4 tablespoons unsalted butter, melted - 4 cloves garlic, minced - 1 teaspoon dried rosemary - 1 teaspoon dried thyme - Salt and pepper to taste - Fresh parsley, chopped (for garnish) Each ingredient plays a key role in bringing this dish to life. The sirloin steak offers a rich flavor that pairs well with the creamy garlic butter. Baby potatoes add a nice texture and soak up all the tasty juices. Melted unsalted butter is the star of the show, infusing the dish with richness. Garlic gives it a delightful aroma and taste. The dried rosemary and thyme contribute earthy notes that elevate the overall flavor. Don't forget to season with salt and pepper to enhance every bite. Finally, fresh parsley adds color and a hint of freshness as a garnish. With these ingredients, you are ready to create a delicious meal that's perfect for any gathering. - Preheat your grill to medium-high heat. This step is key for even cooking. - In a large bowl, combine steak cubes and halved baby potatoes. This mix forms the base. - In another bowl, create the garlic butter mixture. Use melted butter, minced garlic, and herbs. Stir it well to blend all the flavors. - Cut four large pieces of aluminum foil. Each piece should be about 12x12 inches. - Place a scoop of the steak and potato mixture in the center of each foil piece. - Wrap the foil tightly to create packets. This helps keep the juices inside. - Place the foil packs on the grill and cook for 20-25 minutes. Flip them halfway through for even cooking. - Carefully open the packs after cooking. Watch out for steam. Check if the potatoes are tender and the steak is cooked to your liking. For grilling, I love using sirloin steak. It has great flavor and tenderness. You want to cut it into 1-inch cubes for even cooking. Aim for a medium doneness, which is about 145°F. Use a meat thermometer to check. To boost flavor, consider adding smoked paprika or onion powder. These spices add depth to the dish. Marinate your steak for at least 30 minutes before cooking. A simple mix of olive oil, garlic, and herbs works well. When packing your foil, make sure it's sealed tight. This keeps the juices in and prevents spills. Always handle hot foil packs with care. Use tongs or an oven mitt to avoid burns. Enjoy your cooking! {{image_2}} You can boost flavor and nutrition with vegetables. Bell peppers add sweet crunch. Onions bring a nice zing. Zucchini is light and cooks fast. Carrots add color and sweetness. Just chop them small to fit in the foil packs. Toss them in with the steak and potatoes. They will soak up the garlic butter goodness, making every bite tasty. If you want to switch things up, try other proteins. Chicken works well and cooks nicely. Shrimp gives a fun, seafood twist. For a plant-based option, use tofu. Just make sure to cut it into small cubes. Marinate the tofu in the garlic butter for added flavor. This way, you can enjoy different meals while keeping it simple. Don't be afraid to play with flavors. Add spices like paprika for heat or cumin for a warm touch. A splash of soy sauce brings a savory element. You could also use herbs like basil or cilantro for fresh notes. Experimenting with sauces like teriyaki or barbecue can create delicious new versions. The key is to think outside the box and find what you love. To keep your Garlic Butter Steak & Potato Foil Packs fresh, pack them in airtight containers. If you have leftover foil packs, let them cool first. Then, place them in the fridge. Use them within three days for the best taste. For longer storage, freeze them. Wrap each pack tightly in plastic wrap and then in foil. This keeps them safe from freezer burn. They can last up to three months in the freezer. When you want to enjoy your leftovers, use these safe reheating methods. The best way is to reheat them in the oven. Preheat your oven to 350°F (175°C). Place the foil packs on a baking sheet and heat for about 15-20 minutes. This warms them gently and keeps them moist. You can also use a microwave. Just place the pack on a microwave-safe plate. Heat it for 2-3 minutes, but check to ensure everything is warm. How long can you keep those delicious foil packs? In the fridge, they are good for about three days. If you freeze them, they last longer—up to three months. Just remember, the sooner you eat them, the better they taste! Enjoy your meals fresh whenever you can. To check if the steak is cooked, use a meat thermometer. Insert it into the thickest part of the steak. - Rare: 125°F (51°C) - Medium-rare: 135°F (57°C) - Medium: 145°F (63°C) - Medium-well: 150°F (66°C) - Well done: 160°F (71°C) Let the steak rest for a few minutes after cooking. This will help keep it juicy. Yes, you can prep these foil packs ahead of time. This makes cooking easier later. - Chop the steak and potatoes: Do this a few hours in advance. - Mix the garlic butter: You can combine the butter, garlic, and herbs ahead of time. - Assemble the packs: Wrap them in foil and keep them in the fridge. Cook them within 24 hours for best results. These foil packs are tasty on their own, but sides can enhance the meal. Here are some great options: - Grilled vegetables: Bell peppers, zucchini, or asparagus add color and flavor. - Salad: A fresh green salad with a light dressing pairs well. - Corn on the cob: Sweet corn adds a fun touch. - Garlic bread: A slice of garlic bread complements the meal perfectly. Feel free to mix and match based on your taste! For detailed cooking instructions, refer to the full recipe above. Enjoy making your Garlic Butter Steak & Potato Foil Packs! In this post, we explored how to create Garlic Butter Steak and Potato Foil Packs. We went through the ingredients and step-by-step instructions for prepping and grilling. I shared tips on choosing steak, enhancing flavor, and safe cooking practices. Remember, you can customize these packs with different veggies or proteins. Enjoy experimenting with flavors! Proper storage lets you enjoy leftovers too. Keep these tips in mind for your next cookout, and happy grilling!

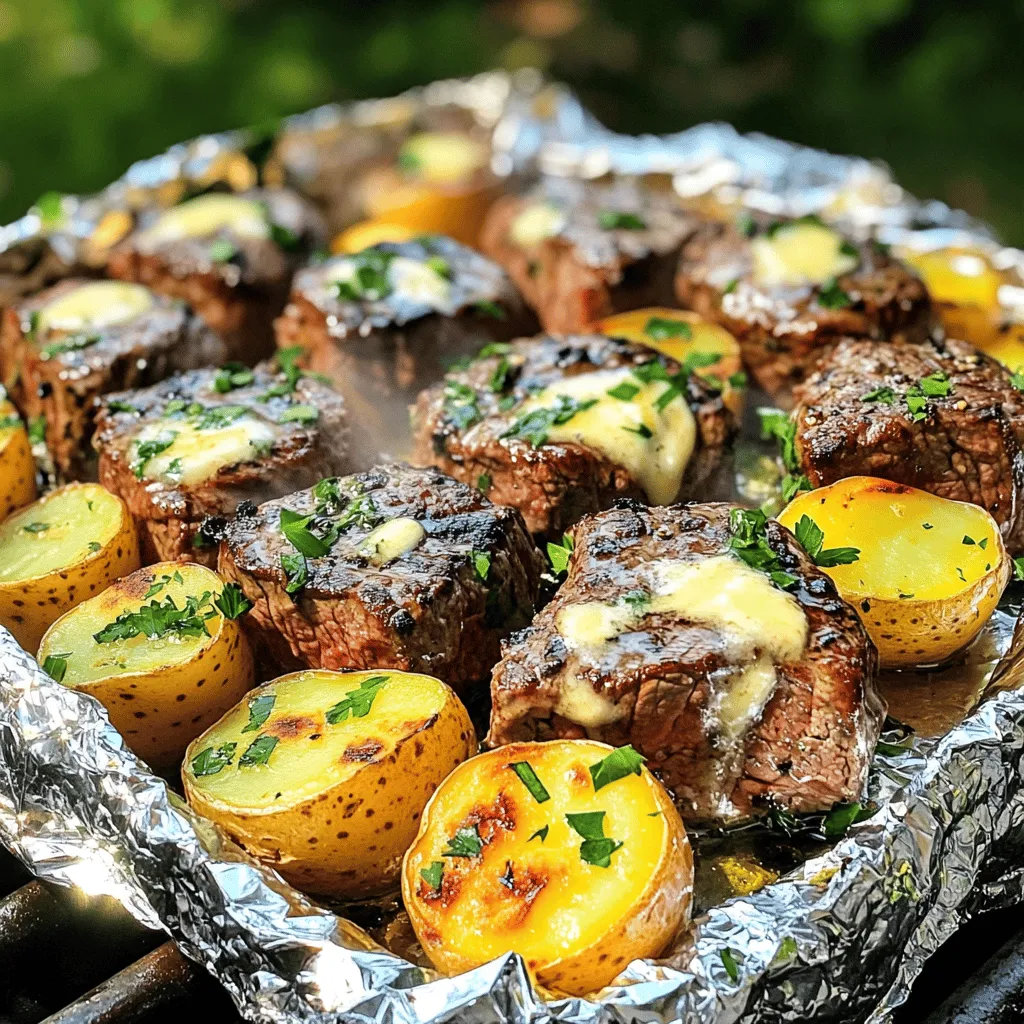
Garlic Butter Steak & Potato Foil Packs Delight

If you love easy, tasty meals, you’re in for a treat! My Garlic Butter Steak & Potato Foil Packs combine

Here’s what you need to make Cherry Pie Crumble Bars. Gather these items for a fun baking session: - Fresh or frozen cherries: 2 cups - Granulated sugar: 1 cup - Lemon juice: 1 tablespoon - Cornstarch: 1 teaspoon - All-purpose flour: 1 ½ cups - Rolled oats: ½ cup - Brown sugar: ½ cup - Unsalted butter: ½ cup, cubed - Vanilla extract: 1 teaspoon - Baking powder: ½ teaspoon - Salt: ¼ teaspoon Each ingredient plays a key role in creating that perfect balance of sweet and tart. The cherries give a burst of flavor. Sugar adds sweetness. Lemon juice brightens everything up. Cornstarch helps thicken the cherry filling. The flour, oats, and brown sugar form a crumbly base and topping. Butter brings richness, while vanilla adds warmth. Baking powder helps the bars rise slightly, and salt enhances all the flavors. When gathering your ingredients, opt for fresh cherries if you can. They bring a bright taste. If not, frozen cherries work just as well. Each bite will be a delightful mix of textures and flavors. Enjoy the process of gathering these ingredients; it’s the first step to baked bliss! Start by combining the cherries with sugar, lemon juice, and cornstarch in a medium bowl. Mix them well, and then set this mixture aside. Let it sit for a bit. This time allows the cherries to release their juicy goodness. In a large bowl, mix the dry ingredients: flour, oats, brown sugar, baking powder, and salt. Make sure they are well combined. Next, add the cold, cubed butter and the vanilla extract. Use a pastry cutter or your fingers to blend the mixture. You want it to look like coarse crumbs. Remember to reserve one cup of this crumb mixture for the topping. Now, take the remaining crumb mixture and press it evenly into the bottom of your prepared baking dish. This will form the crust. Then, spread the cherry filling evenly over the crust. Finally, sprinkle the reserved crumb topping over the cherries. Make sure it covers them well. Preheat your oven to 350°F (175°C). Place the baking dish in the oven. Bake the bars for 30 to 35 minutes. You will know they are done when the topping is golden brown and the cherries are bubbling. Enjoy the delightful aroma filling your kitchen! To know when your Cherry Pie Crumble Bars are ready, look for a golden top. The edges should bubble slightly, and the filling should look thick and juicy. This usually takes about 30-35 minutes in the oven. Letting the bars cool before slicing is very important. If you cut them too soon, they might fall apart. Allow them to cool in the dish for at least 30 minutes. This helps the filling set up and makes for neat slices. The best serving temperature is warm or at room temperature. Serve them fresh from the oven for a cozy treat. You can also dust them with powdered sugar for a nice touch. Pairing these bars with ice cream or whipped cream takes them to the next level. The creaminess balances the tart cherries. Vanilla ice cream is a classic choice, but feel free to try others, like almond or caramel. If you face a soggy crust, it may be due to too much juice from the cherries. To fix this, make sure to drain excess liquid before adding the filling. You can also bake the crust alone for a few minutes before adding the filling. To ensure even baking, rotate your baking dish halfway through the bake time. This helps the heat spread out evenly. If you notice uneven browning, you can cover the top with foil for the last few minutes. {{image_2}} You can change the flavor of these bars easily. Instead of cherries, try blueberries or peaches. Each fruit gives a new taste and look. You can also add spices like cinnamon or nutmeg to give warmth. Just a pinch can change everything. You will love how these flavors blend. If you need a gluten-free version, it is simple. Use gluten-free flour instead of all-purpose flour. This swap lets everyone enjoy these tasty bars without worry. Make sure to check that your other ingredients are gluten-free too. With this change, you will still get a great texture and flavor. For a vegan treat, swap out butter for plant-based margarine. This keeps the rich taste while being animal-friendly. You can also replace eggs with a flaxseed mixture. Just mix one tablespoon of ground flaxseed with three tablespoons of water. Let it sit for a few minutes until it thickens. This works well in many recipes, including our crumble bars. With these easy swaps, everyone can enjoy a slice! To keep your Cherry Pie Crumble Bars fresh, use an airtight container. This helps lock in moisture and flavor. Place the bars in a single layer, if possible. You can also separate layers with parchment paper. This way, they don’t stick together. For long-term storage, freeze your bars. First, let them cool completely. Then, wrap them tightly in plastic wrap. After that, place them in an airtight container or a freezer bag. This method keeps them fresh for about three months. To thaw the bars, move them to the fridge overnight. If you need them faster, let them sit at room temperature for a couple of hours. Avoid using the microwave, as it can change the texture. In the fridge, these bars last about five days. They stay tasty and fresh for a week. If you freeze them, they can last up to three months. Always check for any signs of spoilage before eating. You can use flour or tapioca as a thickener. Both work well with cherries. If you choose flour, use about 1 tablespoon. For tapioca, use 2 teaspoons. Both help absorb juice without changing the flavor. Yes, you can use canned cherries. Drain the juice first. Canned cherries are often sweeter, so reduce the sugar by a few tablespoons. Taste the filling and adjust sugar as needed. Yes, you can make these bars ahead of time. Once baked, let them cool. Store them in an airtight container. They stay fresh for about three days at room temperature. Each bar has about 200 calories. They contain carbohydrates, sugars, and fats. You get some fiber from the oats and cherries, too. For a healthier option, serve with fresh fruit or yogurt. In this post, we explored how to make Cherry Pie Crumble Bars. We covered the ingredients, step-by-step instructions, and helpful tips. You learned about flavor variations and storage options too. These bars are easy to make and perfect for any occasion. Experiment with different fruits to find your favorite. Enjoy these treats fresh or store them for later. Happy baking!

Cherry Pie Crumble Bars Delightful and Easy Recipe

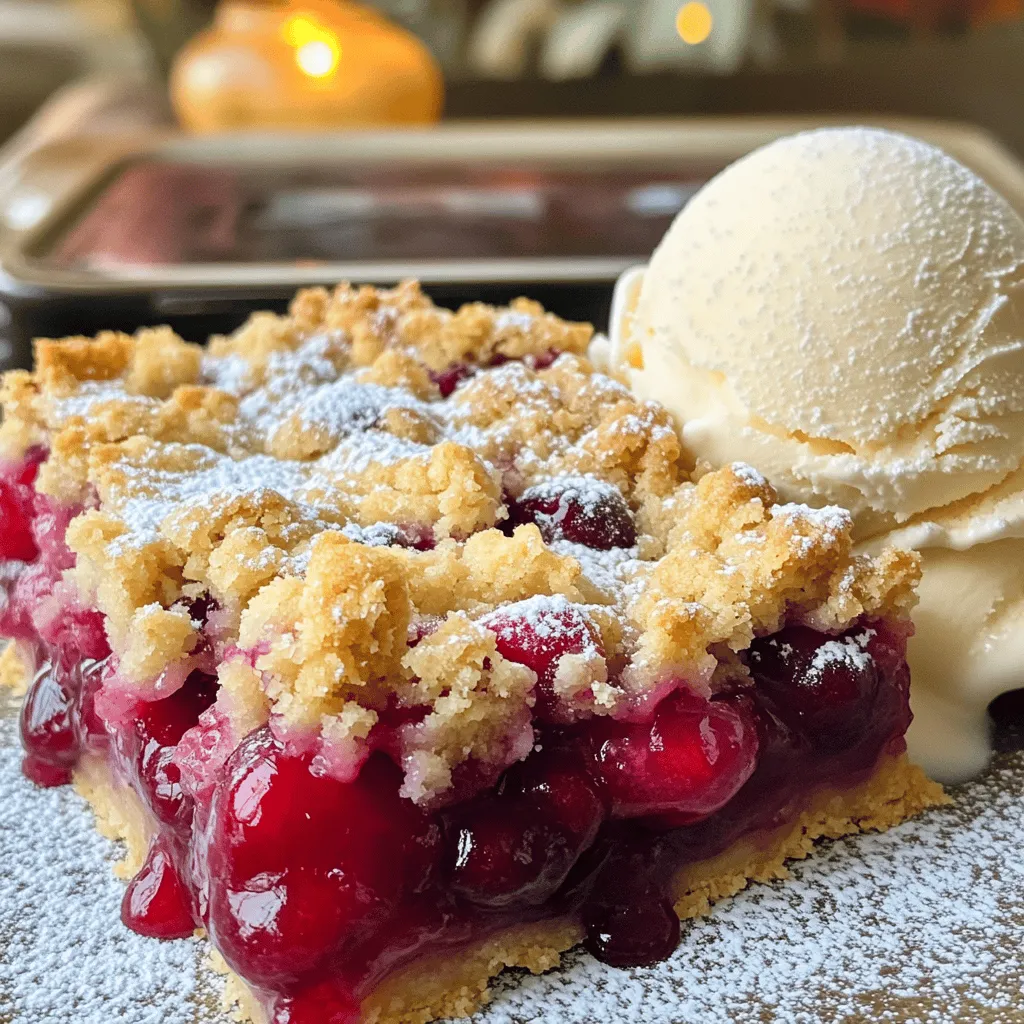
Are you ready to savor a treat that combines sweet cherries and a crunchy crumble? My Cherry Pie Crumble Bars

- 2 salmon fillets (about 6 oz each) - 1 cup jasmine rice - Teriyaki sauce and marinade components: - 2 tablespoons teriyaki sauce - 1 tablespoon sesame oil - 1 tablespoon low-sodium soy sauce - 1 teaspoon grated ginger - 1 clove garlic, minced Salmon fillets bring a rich flavor and protein to your bowl. Jasmine rice adds a fragrant base that pairs well with the teriyaki sauce. The marinade components elevate the dish with savory and tangy notes. - Vegetables: - 1 cup broccoli florets - 1 carrot, julienned - Garnishes: - ¼ cup green onions, chopped - Sesame seeds for garnish Broccoli adds crunch and color, while carrots provide sweetness. Green onions and sesame seeds finish the dish with fresh and nutty flavors. - You can swap salmon for chicken or tofu for different proteins. - Use brown rice or quinoa instead of jasmine rice for a healthier grain. - If you don’t have teriyaki sauce, mix soy sauce with honey for a sweet alternative. Feel free to get creative! Cooking allows room for personal taste and dietary needs. To start, rinse the jasmine rice. Place it in a fine-mesh strainer and run cold water over it. Keep rinsing until the water runs clear. This step washes away excess starch. It helps the rice cook better and taste great. Next, bring 2 cups of water or vegetable broth to a boil in a saucepan. Once boiling, add the rinsed rice. Stir it once, then cover the pot. Lower the heat to a gentle simmer. Let the rice cook for about 15 minutes. When the liquid is gone, remove the pot from heat. Keep it covered for 5 more minutes. This resting time makes the rice fluffy. Now, let’s prepare the salmon. In a small bowl, mix together teriyaki sauce, sesame oil, soy sauce, ginger, and garlic. This mix will be your marinade. Take the salmon fillets and season them with salt and pepper. Pour half of the marinade over the salmon. Let it soak for about 5 minutes. This step adds a lot of flavor. While the salmon marinates, heat a non-stick skillet over medium heat. Place the salmon in the skillet, skin-side down. Cook for 4-5 minutes on each side. The salmon is ready when it flakes easily with a fork. Brush any extra marinade on the salmon while cooking. This adds even more taste. For the veggies, you need to steam the broccoli and carrots. In a separate pot, add water and bring it to a boil. Place the broccoli florets and julienned carrots in a steaming basket. Steam them for about 3-4 minutes. They should be bright and tender but still crisp. This keeps their fresh flavor and nutrients intact. Now, you have perfectly cooked rice, flavorful salmon, and vibrant veggies ready to go! To get flaky salmon, start with fresh fillets. Fresh fish cooks better. I recommend checking for bright, clear eyes and firm flesh. Always season your salmon with salt and pepper before cooking. This step adds flavor and helps the salmon cook evenly. For even cooking, use medium heat. A hot skillet gives a nice sear. Cook skin-side down first. This method helps keep the salmon moist. Flip the fillets gently. Use a fork to test if it flakes easily. If it does, it’s ready! Present your rice bowls with style. Start with a base of fluffy jasmine rice. Place the salmon on top, then add steamed broccoli and carrots. For a pop of color, sprinkle with green onions and sesame seeds. You can also use a small side dish for extra sauce. This way, everyone can add more sauce as they like. For pairings, serve your rice bowls with a light salad or miso soup. These sides enhance the meal without overpowering it. To elevate your teriyaki sauce, try adding a splash of orange juice. This twist gives a fresh taste. You can also mix in a teaspoon of honey for more sweetness. If you enjoy spice, consider adding a pinch of red pepper flakes or a dash of sriracha. Fresh herbs like cilantro can brighten the dish too. Just chop them finely and sprinkle on top before serving. {{image_2}} You can switch up the salmon with other proteins. Chicken or tofu works great. For grains, try brown rice or quinoa. These options add different flavors and nutrients to your dish. Seasonal vegetables can also change your rice bowl. Use bell peppers in summer or squash in fall. Fresh veggies keep your meal exciting and colorful. Try using different sauces to mix things up. Teriyaki sauce is sweet and savory, but you can use hoisin or even sweet chili sauce. Each sauce brings a unique taste to your bowl. You can also change the spice levels. If you like heat, add some red pepper flakes or sriracha. For a milder flavor, skip the spice or use a dash of black pepper instead. Making this dish gluten-free is easy. Use gluten-free soy sauce or tamari instead of regular soy sauce. This small change keeps the flavor while meeting dietary needs. For a vegan version, swap the salmon for marinated tempeh or mushrooms. You can still enjoy all the tasty flavors with plant-based options. Adjust the teriyaki sauce to ensure it's vegan-friendly, and you’re set! To keep your Teriyaki Salmon Rice Bowls fresh, place leftovers in an airtight container. This helps prevent drying out. They will stay good in the fridge for up to three days. Always let the food cool down before sealing the container. Avoid putting hot food directly in the fridge. When reheating, aim for gentle heat. Use a microwave or stovetop. If using a microwave, cover the bowl with a lid or microwave-safe wrap. Heat in short bursts of 30 seconds. Stir in between to ensure even warming. This keeps your salmon moist and your rice fluffy. You can freeze the salmon and rice separately. For best results, wrap each salmon fillet tightly in plastic wrap, then place in a freezer bag. The rice can be placed in a freezer-safe container. When ready to use, thaw both in the fridge overnight. Reheat as mentioned above for the best texture. Teriyaki salmon is a dish made from salmon cooked in a sweet and savory sauce. The sauce includes soy sauce, sugar, and mirin, which gives it a shiny glaze. I love teriyaki salmon for its bold flavor and tender texture. You can grill, bake, or pan-fry the salmon, making it easy to cook in many ways. Yes, you can use frozen salmon. Just make sure to thaw it properly before cooking. You can place it in the fridge overnight or submerge it in cold water for about an hour. This way, the salmon will cook evenly, and you will still get that tasty teriyaki flavor. You can easily customize your rice bowls. Here are some fun ideas: - Add avocado slices for creaminess. - Toss in bell peppers for crunch. - Use brown rice or quinoa for a healthier grain. - Top with a spicy mayo for added heat. You can serve many tasty sides with teriyaki salmon rice bowls: - Edamame for a protein boost. - Seaweed salad for a fresh touch. - Pickled ginger to add a zing. - Miso soup for warmth and comfort. You can find the full recipe for Teriyaki Salmon Rice Bowls on my website. It includes step-by-step instructions and tips to make this dish perfect every time! This blog post covered how to make teriyaki salmon rice bowls. You learned about the main and extra ingredients, cooking steps, and tips to perfect your dish. I shared ideas for variations and smart storage methods. These bowls are easy to customize based on your taste. Whether you prefer a gluten-free or vegan option, there is something here for everyone. Now, you have the tools to make a great meal that is both tasty and satisfying. Enjoy your cooking adventure!

Teriyaki Salmon Rice Bowls Flavorful and Nutritious Meal

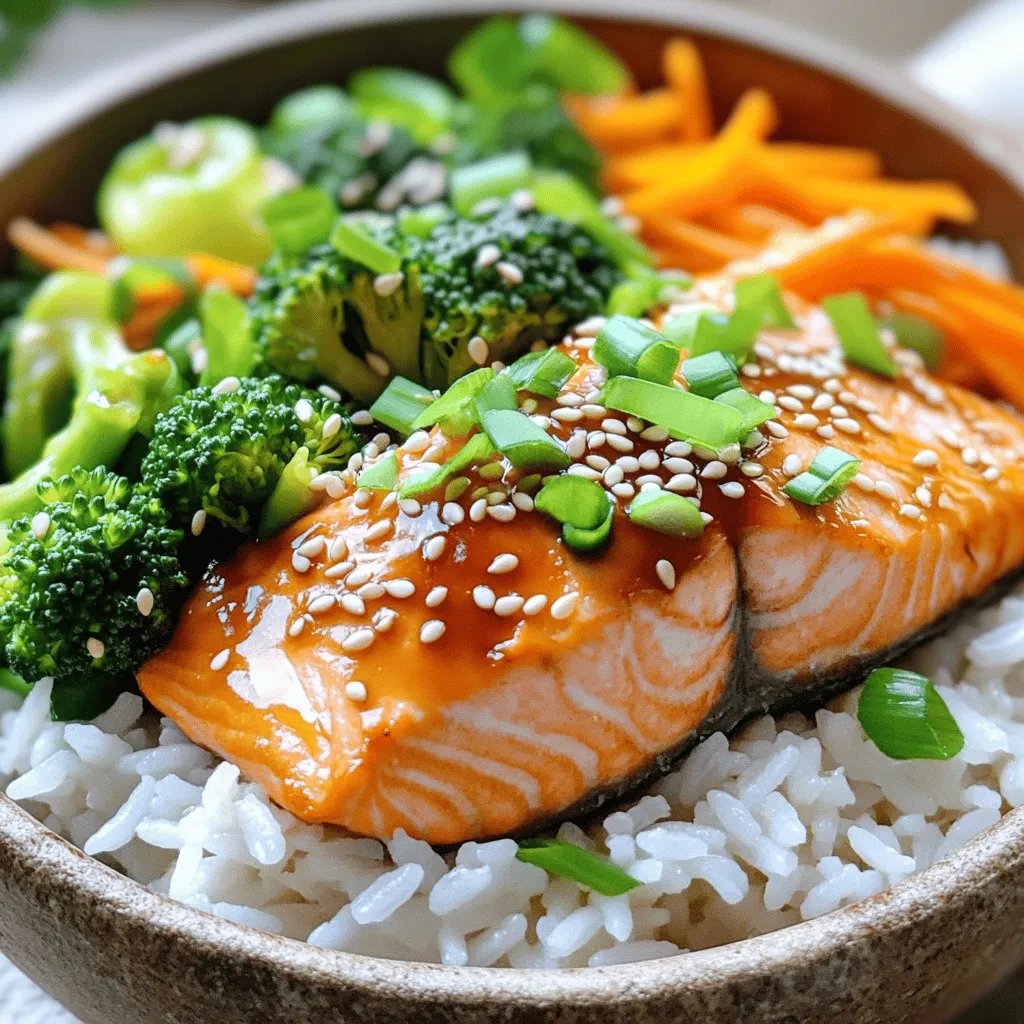
Do you crave a meal that’s both tasty and healthy? Look no further than teriyaki salmon rice bowls. This dish

For the crust, you will need: - 1 ½ cups graham cracker crumbs - ½ cup unsalted butter, melted - 2 tablespoons sugar For the cheesecake filling, gather: - 2 (8 oz) packages cream cheese, softened - ½ cup granulated sugar - 2 large eggs - 1 teaspoon vanilla extract - Zest of 1 lemon - ⅓ cup fresh lemon juice - 1 cup fresh blueberries (plus a few extra for garnish) For the topping, prepare: - ½ cup sour cream - 2 tablespoons powdered sugar - Zest of 1 lemon Each ingredient plays a key role. The graham cracker crumbs create a sweet and crunchy base. The butter helps bind the crumbs, while the sugar adds sweetness. The cream cheese is the star. It gives the cheesecake its rich and creamy texture. The sugar balances the tanginess. Eggs help set the filling as it bakes. Lemon zest and lemon juice add a bright and fresh flavor. Blueberries bring natural sweetness and a pop of color. The topping of sour cream and powdered sugar adds a creamy finish, brightened by more lemon zest. Gather these ingredients, and you are ready to create a delightful dessert treat! - Set oven temperature to 325°F (160°C) - Prepare an 8x8 inch baking pan Start by turning on your oven. This step is key to get the right bake. While the oven warms, get your baking pan ready. You can grease it with nonstick spray or line it with parchment paper. This makes it easy to lift out later. - Combine graham cracker crumbs, butter, and sugar - Press the mixture into the baking pan and bake Next, let's make the crust. In a mixing bowl, add graham cracker crumbs, melted butter, and sugar. Mix well until it looks like wet sand. Take this mixture and press it firmly into the bottom of your pan. This forms a solid base. Bake it in the oven for 8 to 10 minutes until it turns lightly golden. Once done, remove it and let it cool. - Beat cream cheese and sugar until smooth - Mix in eggs, vanilla, lemon zest, and lemon juice - Fold in fresh blueberries Now for the filling! In a large bowl, beat the softened cream cheese and granulated sugar together with an electric mixer. Keep mixing until it’s smooth. Then, add the eggs one at a time. Make sure to mix well after each egg. Next, stir in the vanilla extract, lemon zest, and fresh lemon juice. Finally, gently fold in the fresh blueberries, but be careful not to crush them. - Pour the filling over the crust and bake - Allow to rest in the oven after baking After making the filling, pour it over the cooled crust. Use a spatula to spread it evenly. Bake in the oven for 30 to 35 minutes. The edges should be set, but the center should jiggle a bit. Once baked, turn off the oven. Let the bars rest in the oven for 10 more minutes. This helps them set nicely. - Combine sour cream, powdered sugar, and lemon zest While the cheesecake cools, let’s make the topping. In a small bowl, mix sour cream, powdered sugar, and lemon zest until smooth. This adds a creamy and tangy layer on top. - Cool at room temperature before chilling in the fridge - Cut into bars after chilling After all the baking, let the cheesecake cool at room temperature for about 30 minutes. Then, spread the sour cream topping evenly over the cheesecake. It’s best to chill it in the fridge for at least 4 hours. For the best flavor, let it chill overnight. Once it’s set, lift the cheesecake bars out of the pan using the parchment paper. Cut them into squares or rectangles. Enjoy these delightful treats! To get a smooth cheesecake, always beat the cream cheese well. Start with softened cream cheese. This helps it mix easily. Use an electric mixer on medium speed. Beat until it looks creamy, with no lumps. When you add the blueberries, fold them in gently. This keeps the berries intact. If you stir too hard, you may crush them. You want to see those lovely blueberries in each bar. To kick up the flavor, try adding almond or coconut. A teaspoon of almond extract gives a nice twist. You can also use coconut cream instead of sour cream for a tropical feel. Adding more lemon zest boosts the fresh taste. Try using the zest of two lemons. This makes the bars even more vibrant and zesty. You’ll love that pop of flavor! When serving, cut the cheesecake bars evenly. Use a sharp knife and wipe it clean between cuts. This keeps the edges neat and pretty. Garnish with extra blueberries on top. You can also sprinkle some lemon zest for color. This makes each bar look inviting and delicious. {{image_2}} You can use other fruits in your cheesecake bars. Raspberries and strawberries work great. They add a nice tartness. You can also create a mixed berry cheesecake. This gives you a burst of flavor in every bite. Just combine blueberries, raspberries, and strawberries for a colorful treat. Switching up the crust can change the whole taste. Try using cookie crumbs like Oreos or nuts for a new flavor. You can even use almond flour for a gluten-free option. This is great for those with dietary needs. It adds a unique crunch that complements the creamy filling. If you want to make vegan cheesecake bars, it’s simple. Use plant-based cream cheese instead of regular cream cheese. Replace eggs with flaxseed meal or applesauce. This keeps the texture smooth and creamy. You can also substitute coconut cream for sour cream. These changes maintain the yummy taste while being dairy-free. To store your blueberry lemon cheesecake bars in the fridge, first, cover them well. Use plastic wrap or an airtight container. This helps keep them fresh and tasty. They can stay in the fridge for up to five days. Check for any changes in smell or texture before you eat them. For the best taste, enjoy them within three days. If you want to keep your cheesecake bars longer, you can freeze them. First, cut the bars into squares. Then, wrap each piece tightly in plastic wrap. Place the wrapped bars in a freezer-safe bag or container. They can stay frozen for up to two months. When you are ready to eat them, take them out and thaw in the fridge overnight. Serve them chilled for the best flavor. To prevent sogginess, do not cover the bars with anything too tight. This can trap moisture. Instead, use a loose cover. Also, keep them away from strong-smelling foods in the fridge. Strong odors can affect their taste. Lastly, let them cool completely before storing. This helps maintain their nice texture. Yes, you can prepare these cheesecake bars a day in advance. This helps the flavors meld together nicely. After cooling, chill them in the fridge. Cover them with plastic wrap to keep them fresh. This way, you’ll save time on the day of your event. Plus, they’ll be perfectly set and ready to serve. The cheesecake bars are done when the edges look set, but the center should jiggle slightly. This means the filling is creamy and smooth. After baking, turn off the oven and let them sit for about 10 minutes. This helps prevent cracks on the surface. You can use low-fat cream cheese or sour cream. However, this may change the taste and texture. The bars might not be as rich or creamy. If you want a lighter dessert, consider using these options, but keep in mind the final flavor may differ. To cut cheesecake bars, use a sharp knife. Dip the knife in hot water and wipe it clean between cuts. This helps prevent cracks and makes clean slices. For best results, cut them while they are chilled. This keeps the texture firm and easy to manage. You’ve learned how to make delicious cheesecake bars that everyone will love. We covered the key ingredients, step-by-step instructions, and helpful tips to ensure your success. Plus, we explored fun variations and proper storage methods to keep your bars fresh. Remember, a great dessert starts with careful preparation and creativity. Try experimenting with flavors or fruits. Enjoy making and sharing your cheesecake bars!

Blueberry Lemon Cheesecake Bars Delightful Dessert Treat

Are you ready to taste a dessert that perfectly blends sweet and tart? Blueberry Lemon Cheesecake Bars are a delightful

- Chicken wings I use 2 lbs of chicken wings. They are juicy and perfect for baking. - Gochujang and its flavor profile Gochujang is a Korean chili paste. It adds heat and a sweet flavor. This paste gives the wings a deep red color and a unique taste. - Key seasonings and sauces The marinade uses: - 1/4 cup Gochujang - 2 tablespoons soy sauce - 2 tablespoons honey - 1 tablespoon sesame oil - 3 cloves garlic, minced - 1 teaspoon ginger, grated - 2 tablespoons rice vinegar - 1 tablespoon vegetable oil - Salt and pepper to taste These ingredients blend well and create a rich flavor. The honey balances the heat from the Gochujang. The garlic and ginger add freshness. The soy sauce gives umami depth. Each bite bursts with flavor. - Prepping the ingredients Gather all your ingredients. You need 2 lbs of chicken wings, Gochujang, soy sauce, honey, sesame oil, garlic, ginger, rice vinegar, vegetable oil, salt, and pepper. Make sure you have green onions and sesame seeds for garnish. - Making the marinade In a large mixing bowl, whisk together 1/4 cup Gochujang, 2 tablespoons soy sauce, 2 tablespoons honey, and 1 tablespoon sesame oil. Add 3 minced garlic cloves, 1 teaspoon grated ginger, and 2 tablespoons rice vinegar. Pour in 1 tablespoon vegetable oil and add salt and pepper to taste. Mix until smooth. - Marinating the chicken wings Add your chicken wings to the marinade. Toss them well so every wing gets coated. You can let them marinate for at least 30 minutes. For more flavor, marinate them in the fridge for up to 4 hours. - Baking the wings for optimal crispiness Preheat your oven to 400°F (200°C). Line a baking sheet with parchment paper. Arrange the marinated wings in a single layer on the sheet. Make sure they are not overcrowded. Bake for 40-45 minutes until golden brown and crispy. - Tips for turning the wings Halfway through baking, turn the wings to ensure even cooking. This helps them get crispy on all sides. Use tongs to flip them carefully. - Garnishing and serving suggestions Once the wings are done, take them out of the oven. While they are hot, sprinkle sesame seeds on top. Garnish with sliced green onions for a pop of color and freshness. - Presentation ideas Serve your wings on a nice platter. Add fresh vegetable sticks, like cucumbers and carrots, around the wings. You can also include a small bowl of extra Gochujang for dipping. This adds a fun touch for your guests! To achieve perfect crispiness, start by drying the chicken wings. Pat them with paper towels before marinating. The less moisture, the better the crisp. Bake at 400°F (200°C) for 40-45 minutes. Turn them halfway through for even cooking. A single layer on the baking sheet helps them crisp up nicely. To adjust spice levels, start with less Gochujang if you want milder wings. You can always add more later. For extra heat, try a sprinkle of chili flakes. For the best flavor, marinate the wings for at least 30 minutes. If you can, marinate them for up to 4 hours in the fridge. This helps the flavors soak in. To enhance flavor, add fresh herbs or spices to the marinade. A dash of lime juice or a sprinkle of black pepper can make a big difference. This small touch can elevate the dish. {{image_2}} You can change the flavor of your spicy Korean chicken wings easily. Try adding more spices like cayenne or paprika to boost heat. If you want a sweeter taste, use more honey or add brown sugar. Finding the right sweet vs. spicy balance is key. Some like it hot, while others prefer a milder flavor. Adjust the amount of Gochujang to fit your taste. You can also mix in some sesame seeds or crushed peanuts for extra crunch. You can cook these wings in different ways. Grilling adds a smoky flavor that many love. If you choose to grill, preheat the grill and cook on medium heat. Turn the wings often for even cooking. Baking is also a good option; it keeps the wings crispy and juicy. If you want to save time, use an air fryer. Set the air fryer to 380°F (193°C) and cook for about 25-30 minutes. Shake the basket halfway through to ensure even cooking. No matter the method, keep an eye on them to prevent burning. Each method brings out a unique taste and texture. After enjoying your spicy Korean chicken wings, store the leftovers right. Place them in an airtight container. This helps keep them fresh. Make sure to cool them before sealing the container. Refrigerate the wings within two hours of cooking. They stay good for up to three days. To reheat, preheat your oven to 375°F (190°C). Spread the wings on a baking sheet. Bake for about 15-20 minutes, until they are hot and crispy. You can also use a microwave if you are in a hurry. Just heat them for one to two minutes. However, this might not keep them crispy. If you want to save wings for later, freezing is a great option. First, let the wings cool completely. Then, place them in a freezer-safe bag. Remove as much air as possible before sealing. This helps prevent freezer burn. You can freeze them for up to three months. When you are ready to eat, take the wings out of the freezer. Place them in the fridge overnight to thaw. Once thawed, reheat as mentioned before. This way, your wings stay tasty and enjoyable! Can I use frozen chicken wings? Yes, you can use frozen chicken wings. Just remember to thaw them first. Place the wings in the fridge overnight or use cold water for a quicker thaw. Once thawed, follow the same steps as fresh wings. What can I serve with spicy Korean chicken wings? Spicy Korean chicken wings pair well with many sides. Try fresh vegetable sticks like carrots and cucumbers. You can also serve them with rice or a light salad. For dipping, set out a small bowl of extra Gochujang. How do I adjust the recipe for a larger crowd? To serve more people, simply double or triple the recipe. Make sure to adjust the baking time if needed. Use multiple baking sheets to avoid crowding. This way, the wings will still get crispy and tasty. Spicy Korean chicken wings are a tasty dish you can easily make at home. We covered the main ingredients, like chicken wings and gochujang, along with key seasonings. I shared step-by-step instructions for preparation, cooking, and garnishing. We explored tips for achieving crispy wings and flavor variations. Remember to store leftovers right, and you can reheat them later. With these tips and tricks, you can create a delicious meal everyone will enjoy. Get ready to impress family and friends with your cooking skills!

Spicy Korean Chicken Wings Flavor-Packed Delight

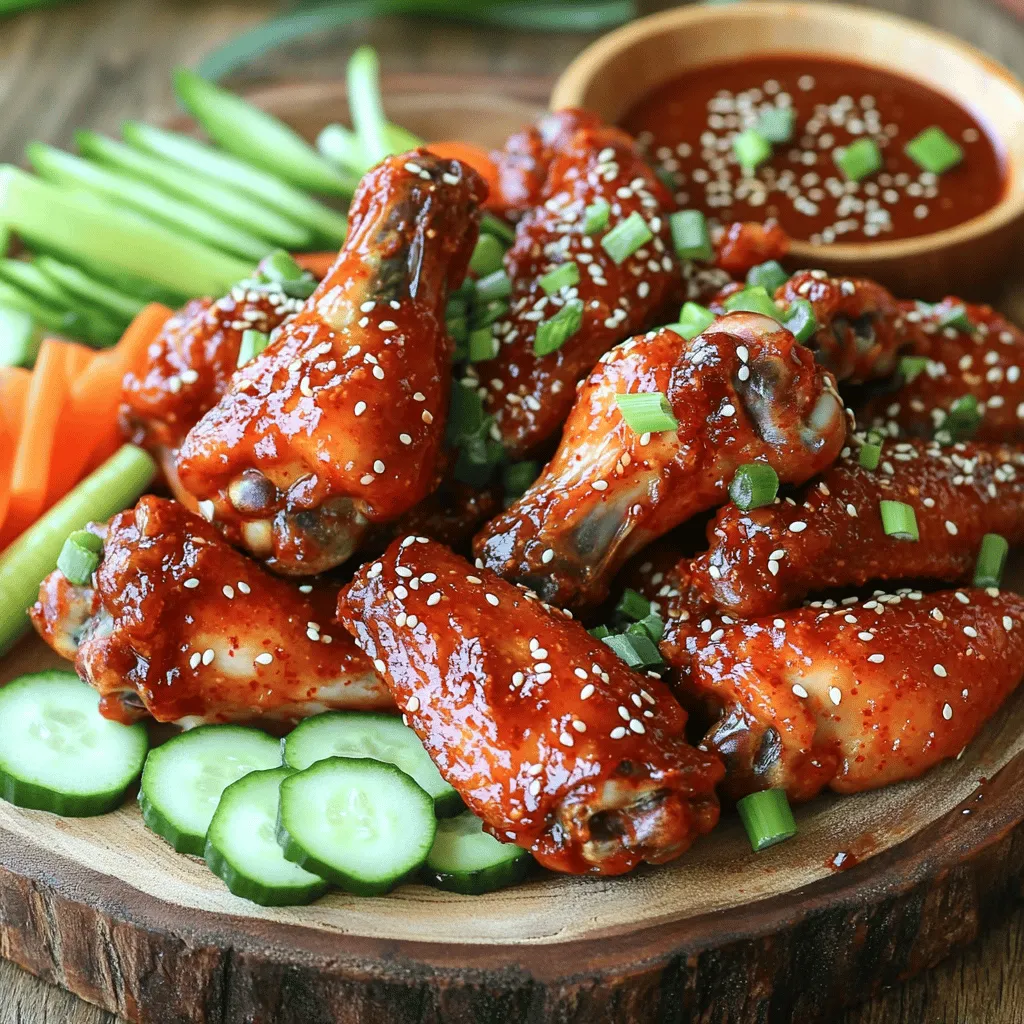
Are you ready to turn up the heat with Spicy Korean Chicken Wings? These wings pack a bold punch of

- 1 cup all-purpose flour - 1 tablespoon baking powder - 1/2 teaspoon baking soda - 1/2 teaspoon salt - 1 teaspoon pumpkin pie spice - 1/2 cup canned pumpkin puree - 1 tablespoon brown sugar - 1 large egg - 3/4 cup milk (dairy or non-dairy) - 1 teaspoon vanilla extract - 1/2 cup semi-sweet chocolate chips - Butter or oil for cooking When I make chocolate chip pumpkin pancakes, I always start with these key ingredients. They work together to create a fluffy and delicious pancake. The canned pumpkin puree adds moisture and flavor. The chocolate chips give a sweet surprise in every bite. - Chopped nuts (like walnuts or pecans) - Whipped cream for serving - Maple syrup for drizzling - Additional spices (like cinnamon or nutmeg) Adding optional ingredients can elevate your pancakes. Chopped nuts add crunch and flavor. Whipped cream makes them extra special. A drizzle of maple syrup brings all the flavors together perfectly. - Whole wheat flour instead of all-purpose flour - Coconut milk instead of regular milk - Honey or maple syrup in place of brown sugar - Dark chocolate chips instead of semi-sweet If you want to change things up, try these substitutes. Whole wheat flour gives a nutty taste. Coconut milk makes it dairy-free. Using honey or maple syrup can add a different sweetness. Dark chocolate chips can enhance the richness of your pancakes. To start, gather your ingredients. You will need: - 1 cup all-purpose flour - 1 tablespoon baking powder - 1/2 teaspoon baking soda - 1/2 teaspoon salt - 1 teaspoon pumpkin pie spice - 1/2 cup canned pumpkin puree - 1 tablespoon brown sugar - 1 large egg - 3/4 cup milk - 1 teaspoon vanilla extract - 1/2 cup semi-sweet chocolate chips - Butter or oil for cooking In a medium bowl, whisk the flour, baking powder, baking soda, salt, and pumpkin pie spice together. This mix should be light and fluffy. In another bowl, mix the pumpkin puree, brown sugar, egg, milk, and vanilla extract until it’s smooth. This step combines the sweet and creamy flavors. Now, gently add the wet mixture into the dry mix. Stir until just combined. It’s okay to have small lumps; they help keep the pancakes light. Finally, fold in the chocolate chips. This adds a touch of sweetness in every bite. Heat a non-stick skillet or griddle over medium heat. Add a small amount of butter or oil until it melts. This helps the pancakes not stick. Pour about 1/4 cup of batter onto the skillet for each pancake. Cook until you see bubbles on the surface and the edges look set, which takes about 2-3 minutes. Carefully flip the pancakes and cook for another 2-3 minutes until they turn golden brown. Once cooked, remove the pancakes from the skillet. Keep them warm while you finish cooking the rest of the batter. Now it’s time to serve! Stack the pancakes on a plate. Drizzle with warm maple syrup. For a splash of color, add more chocolate chips on top. A sprinkle of pumpkin spice adds a nice touch. You can also serve with a dollop of whipped cream on the side. This makes each bite even more delightful. Enjoy your tasty fall breakfast! To get the best texture, use the right flour. All-purpose flour works wonders here. It gives a soft, fluffy pancake. You can also sift your flour to remove lumps. This simple step helps mix better. If you like a lighter pancake, add a little extra baking powder. Just a pinch can help lift them. Mixing is key, but don’t overdo it. When you combine wet and dry ingredients, stir gently. A few lumps in your batter is perfectly okay. Overmixing makes pancakes tough instead of soft. Remember, you want a smooth batter without too much work. Timing is important for perfect pancakes. Heat your pan over medium heat. Pour about 1/4 cup of batter for each pancake. Cook for about 2-3 minutes. Look for bubbles on the surface. Once you see them, it’s time to flip! Cook for another 2-3 minutes until golden brown. Adjust your heat if needed to avoid burning. Each pancake should be cooked through but still moist inside. {{image_2}} You can change the taste of your pancakes easily. Try adding a pinch of nutmeg for warmth. This spice pairs well with pumpkin. You can also use different types of chocolate. Dark chocolate chips add a rich taste. For a fruity twist, mix in blueberries or chopped bananas. Each option brings a new flavor to your pancakes. If you need to make these pancakes fit your diet, it’s simple. For a gluten-free version, use almond flour or a gluten-free mix. You can swap the milk for almond or oat milk for a dairy-free treat. If you want to cut sugar, use a sugar substitute or skip the brown sugar. These changes help everyone enjoy the meal. The right toppings can elevate your pancakes. Maple syrup is a classic choice, but you can try honey or agave syrup. For extra fun, add whipped cream or yogurt on top. Fresh fruit like strawberries or raspberries adds color and taste. You can even sprinkle more chocolate chips or nuts for crunch. Choose what you love! Store leftover pancakes in an airtight container. Place parchment paper between layers to prevent sticking. They will stay fresh in the fridge for up to three days. If you want to enjoy them later, make sure they cool completely before sealing. To freeze pancakes, let them cool completely. Then, stack them with parchment paper in between. Place the stack in a freezer-safe bag or container. They can last up to two months in the freezer. Label the bag with the date for easy tracking. To reheat pancakes, you have a few options. For the microwave, place them on a plate and cover with a damp paper towel. Heat in 20-second bursts until warm. For a toaster, pop them in until heated through. You can also use a skillet on low heat, flipping them occasionally. Enjoy your tasty pancakes! Yes, you can use fresh pumpkin. First, cook the pumpkin until soft. Then, mash it or blend it into a smooth puree. This will give your pancakes a fresh taste. Just make sure to measure out 1/2 cup of the fresh puree. It works well in place of canned pumpkin. To make gluten-free pancakes, swap the all-purpose flour with a gluten-free blend. Look for a blend that has xanthan gum in it. This will help the pancakes keep their shape. Follow the same recipe. You will still get light and fluffy pancakes. The best way to reheat pancakes is in the microwave or on a skillet. For the microwave, place pancakes on a plate and cover them with a damp paper towel. Heat for 20 to 30 seconds. For the skillet, warm it on low and add the pancakes for a minute on each side. This keeps them soft and tasty. This guide has taken you through the key steps to make great pancakes. We covered ingredients, cooking tips, and fun ways to tweak your recipe. You can try new flavors or make them fit your diet. Don't forget about storage and reheating to enjoy leftovers later. With these tips, you’ll create pancakes everyone loves. Embrace the joy of cooking; it's a fun skill to have!

Chocolate Chip Pumpkin Pancakes Tasty Fall Breakfast

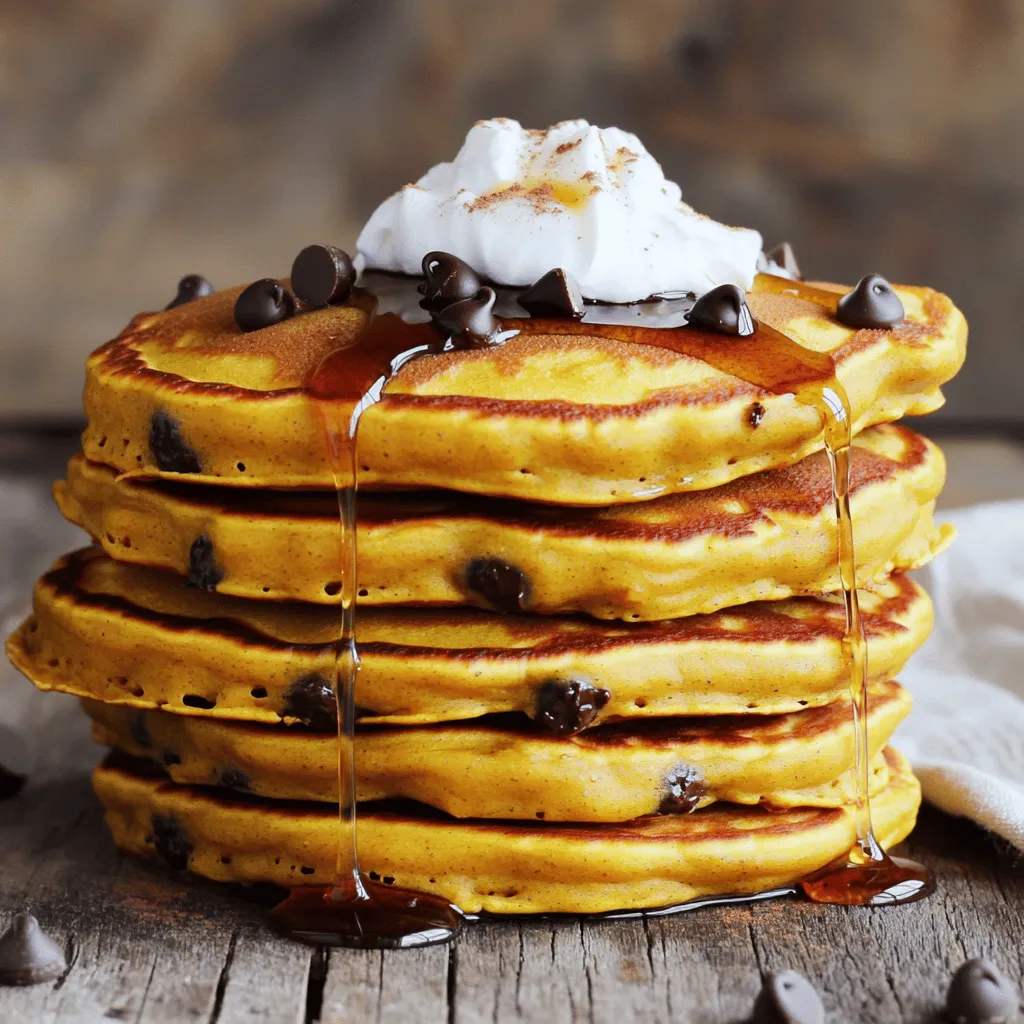
Fall is here, and it’s time to bring the flavors of the season to your breakfast table! Today, I’ll show

- 1 pound baby carrots (or regular carrots cut into sticks) - 3 tablespoons honey - 3 tablespoons olive oil - 4 cloves garlic, minced To make honey garlic roasted carrots, you need simple, fresh ingredients. Baby carrots work best, but you can use regular carrots sliced into sticks. Honey adds the sweet touch, while olive oil helps the carrots roast nicely. Garlic gives the dish a bold flavor. - 1 teaspoon fresh thyme leaves (or ½ teaspoon dried thyme) - Salt and pepper to taste - Fresh parsley, chopped (for garnish) Along with the main ingredients, seasonings make a big difference. Fresh thyme adds a lovely herb taste. Salt and pepper enhance the overall flavor. When you finish roasting, sprinkle fresh parsley on top. It brings a pop of color and freshness. 1. Preheat the oven: Set your oven to 400°F (200°C). This step is key for even cooking. A hot oven helps the carrots caramelize nicely. 2. Mix the marinade: In a large bowl, combine three tablespoons of honey, three tablespoons of olive oil, and four cloves of minced garlic. Add one teaspoon of fresh thyme leaves, or use half a teaspoon of dried thyme. Season with salt and pepper to taste. Stir until everything is well mixed. This blend gives the carrots their sweet and savory flavor. 1. Coat carrots and spread on baking sheet: Take one pound of baby carrots. If you don’t have baby carrots, you can cut regular carrots into sticks. Add the carrots to your marinade. Toss them well to coat them evenly. Next, place the carrots in a single layer on a baking sheet lined with parchment paper. This helps prevent sticking. 2. Roast in the oven: Place the baking sheet in the oven. Roast the carrots for 20 to 25 minutes. Halfway through, stir the carrots for even cooking. You want them tender and slightly caramelized. The edges should look golden and sweet. 1. Transfer and garnish: Once the carrots are done, take them out of the oven. Let them cool for a couple of minutes. Then, transfer the roasted carrots to a serving dish. For a fresh touch, sprinkle chopped parsley on top. This adds color and flavor. Now, your honey garlic roasted carrots are ready to enjoy! To get the best results with your honey garlic roasted carrots, focus on timing. Roast them for 20 to 25 minutes. This will give them a tender texture and a nice caramelized look. Keep an eye on them, as ovens can vary. Stir the carrots halfway through cooking. This helps them roast evenly. It also adds a lovely golden color all around. Use a spatula to turn them gently. You can easily boost the taste of your carrots. Try adding more herbs or spices. Rosemary or dill can add nice notes. A sprinkle of chili flakes gives a warm kick. You can also swap honey for other sweeteners. Maple syrup brings a unique flavor. Agave nectar works well for a different twist. Adjust the amount based on your taste. {{image_2}} You can use different kinds of carrots in this recipe. Baby carrots are cute and easy. They cook quickly and have a sweet taste. You can also use regular carrots. Just cut them into sticks for even cooking. If you want to get creative, try other veggies too. Sweet potatoes or parsnips work well. They add a nice twist to the dish. Just remember to adjust cooking times as needed. To make these carrots pop, think about adding citrus zest. Lemon or orange zest gives a bright taste. Just a little goes a long way. You can also add nuts or seeds for a crunch. Chopped almonds or sunflower seeds work great. Sprinkle them on top after roasting for a fun texture. These small changes can really enhance the flavor and make your dish unique. To keep your honey garlic roasted carrots fresh, store them in the fridge. Place them in an airtight container. They can last for about three to five days. If you notice any signs of spoilage, like an off smell or slimy texture, discard them. You can also freeze these carrots. Let them cool completely first. Then, pack them in a freezer-safe bag. Remove as much air as possible before sealing. They will stay good in the freezer for up to three months. When you're ready to eat them, thaw in the fridge overnight. You can reheat your carrots in either the oven or the microwave. For the oven, preheat it to 350°F (175°C). Spread the carrots on a baking sheet and heat for about 10 to 15 minutes. This method keeps them crispy. For the microwave, place the carrots in a bowl. Cover with a damp paper towel to keep moisture in. Heat them on high for 1 to 2 minutes. Check and stir halfway to ensure even heating. This method is fast but may make them a bit softer. Roasted carrots can last in the fridge for about 3 to 5 days. Make sure to store them in an airtight container. This keeps them fresh and tasty. If you notice any changes in color or smell, it's best to toss them out. Yes, you can easily make this recipe vegan. Just replace honey with maple syrup or agave nectar. Both options add sweetness without using animal products. The flavor will still shine, and you'll enjoy those yummy roasted carrots! These carrots pair well with many dishes. They go great with grilled chicken, beef, or fish. You can also serve them alongside rice or quinoa for a complete meal. For a fun twist, add them to salads or grain bowls for extra flavor. Can I use frozen carrots? Using frozen carrots is not the best choice. They may not roast well and can become mushy. Fresh carrots give the best taste and texture. How can I make these carrots spicier? If you love heat, add a pinch of red pepper flakes to the marinade. This will give your carrots a nice kick. Can I add other vegetables? Yes! You can mix in other veggies like bell peppers or zucchini. Just cut them to a similar size for even cooking. Roasting carrots is simple and rewarding. We explored key ingredients like carrots, honey, and garlic. I shared step-by-step cooking instructions and tips for perfect results. You can try different carrot types and flavor additions to make it your own. Remember to store leftovers properly to enjoy them later. With a few tweaks, you can make this recipe suit any meal. Roasted carrots can be a highlight on your table. Enjoy your cooking journey!

Honey Garlic Roasted Carrots Flavorful and Easy Recipe

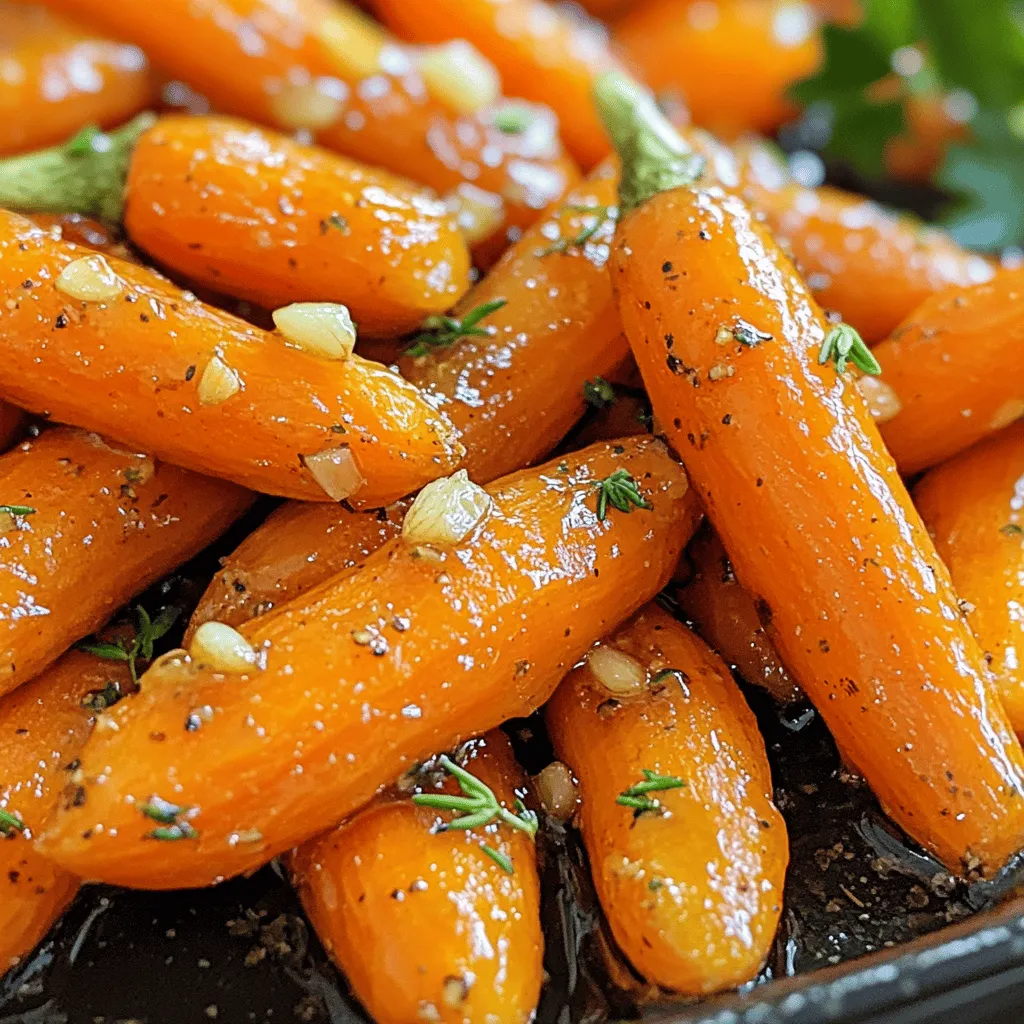
Are you ready to transform your next meal with a simple, tasty side? Honey Garlic Roasted Carrots bring a sweet

To make Spicy Honey Garlic Cauliflower, you will need: - 1 medium head of cauliflower, cut into florets - 2 tablespoons olive oil - 4 cloves garlic, minced - 1 tablespoon sriracha (adjust for spice preference) - 3 tablespoons honey - 1 tablespoon soy sauce - 1 teaspoon smoked paprika - Salt and pepper to taste - 2 green onions, thinly sliced (for garnish) - Sesame seeds (for garnish) Each ingredient plays a key role in flavor. The cauliflower gives texture. Olive oil adds richness. Garlic brings a strong taste. Sriracha gives heat, but you can use less if you want. Honey adds sweetness to balance the spice. Soy sauce adds umami flavor. Smoked paprika provides a warm, smoky note. Adjust salt and pepper to your taste. Green onions and sesame seeds add a nice touch on top. You can switch ingredients if needed. For a different heat, use chili paste instead of sriracha. Maple syrup can replace honey for a vegan option. Tamari works instead of soy sauce for gluten-free needs. You can also add other spices, like cumin or chili powder, for more flavor. If you want more veggies, add bell peppers or broccoli. Get creative and enjoy your dish! 1. Start by preheating your oven to 425°F (220°C). 2. Cut the cauliflower into small florets. This helps them cook evenly. 3. In a large bowl, mix the cauliflower florets with olive oil. 4. Add minced garlic, sriracha, honey, soy sauce, smoked paprika, salt, and pepper. 5. Toss everything well, so each floret is coated. 1. Line a baking sheet with parchment paper. This keeps the cauliflower from sticking. 2. Spread the cauliflower mixture on the sheet in a single layer. 3. Roast it in the oven for about 25-30 minutes. Halfway through, stir it for even cooking. 4. When the cauliflower is tender and golden, take it out. 5. Let it cool for a few minutes before serving. 1. Transfer the roasted cauliflower to a serving dish. 2. Sprinkle with thinly sliced green onions for a fresh touch. 3. Add sesame seeds for a nice crunch. 4. Serve it as a main dish or a tasty side. Enjoy this bold and sweet flavor! To get the best spicy honey garlic cauliflower, use fresh cauliflower. Cut it into even-sized florets. This helps them cook evenly. Toss the florets well with the sauce. Make sure every piece gets coated in that tasty mix. Roasting at 425°F gives a nice crisp. Stir halfway through cooking for even browning. If you run out of honey, maple syrup works great too. It adds sweetness without losing flavor. For a vegetarian option, use tamari instead of soy sauce. Want more heat? Add more sriracha or try chili paste. If you have other veggies, like broccoli or Brussels sprouts, feel free to swap them in. To boost flavor, add some lime juice before serving. It brightens every bite! You can also sprinkle some crushed red pepper flakes for an extra kick. Mixing in some ginger with the garlic adds a lovely warmth. If you love sesame, use toasted sesame oil in place of olive oil. These small changes can really elevate your dish! {{image_2}} You can add other vegetables to your spicy honey garlic cauliflower. Broccoli, bell peppers, or carrots work well. Just cut them into small pieces like the cauliflower. Mix them with the same spicy sauce for great flavor. This adds color and nutrition to your meal. You can enjoy a veggie medley while keeping the same taste. To make this dish vegan, swap honey for maple syrup or agave nectar. Both will give that sweet touch without using animal products. For a gluten-free version, use tamari instead of soy sauce. This way, you can enjoy the same great taste, no matter your diet. These simple swaps keep everyone happy at the table. You can serve spicy honey garlic cauliflower with different sauces. Try it with a tangy yogurt sauce or a creamy tahini dressing. If you love heat, drizzle extra sriracha on top. Each sauce brings a new taste to the dish. Mixing it up keeps your meals exciting and full of flavor. After you enjoy your Spicy Honey Garlic Cauliflower, let it cool. Then, place the leftovers in an airtight container. Store it in the fridge. It will last for about three days. Make sure to keep it sealed to avoid drying out. To reheat, you can use an oven or a microwave. If using the oven, preheat it to 350°F (175°C). Spread the cauliflower on a baking sheet. Heat for about 10-15 minutes until warm. For the microwave, place the cauliflower in a bowl. Heat it for 1-2 minutes, stirring halfway through. You can freeze Spicy Honey Garlic Cauliflower. First, let it cool completely. Then, place it in a freezer-safe bag. Squeeze out the air before sealing. It can stay frozen for up to three months. To thaw, place it in the fridge overnight. Reheat as mentioned above. Yes, you can prepare Spicy Honey Garlic Cauliflower in advance. Just follow the recipe until the roasting step. After tossing the cauliflower with all the ingredients, store it in an airtight container. Keep it in the fridge for up to two days. When you're ready to eat, simply roast it in the oven as directed. This saves time and lets the flavors blend well. To adjust the spice level, focus on the sriracha. If you want it milder, use less sriracha. You can start with half a tablespoon. If you like it spicier, feel free to add more. Taste the mixture before roasting. This lets you find the perfect heat for your palate. You can also add red pepper flakes for an extra kick. Spicy Honey Garlic Cauliflower pairs well with many sides. Here are some ideas: - Steamed rice or quinoa - A fresh green salad - Roasted vegetables - Grilled chicken or shrimp - Noodles tossed in soy sauce These options complement the dish's flavors and make for a balanced meal. Enjoy exploring different pairings! In this post, we explored the tasty Spicy Honey Garlic Cauliflower recipe. You learned about the key ingredients and their measurements. I shared easy steps from preparation to cooking and serving. Plus, we covered useful tips, variations, and storage methods. Use these insights to create a delicious dish. Feel free to try different ingredients and flavors. Enjoy experimenting and making this recipe your own! Happy cooking!

Spicy Honey Garlic Cauliflower Flavorful Dinner Dish

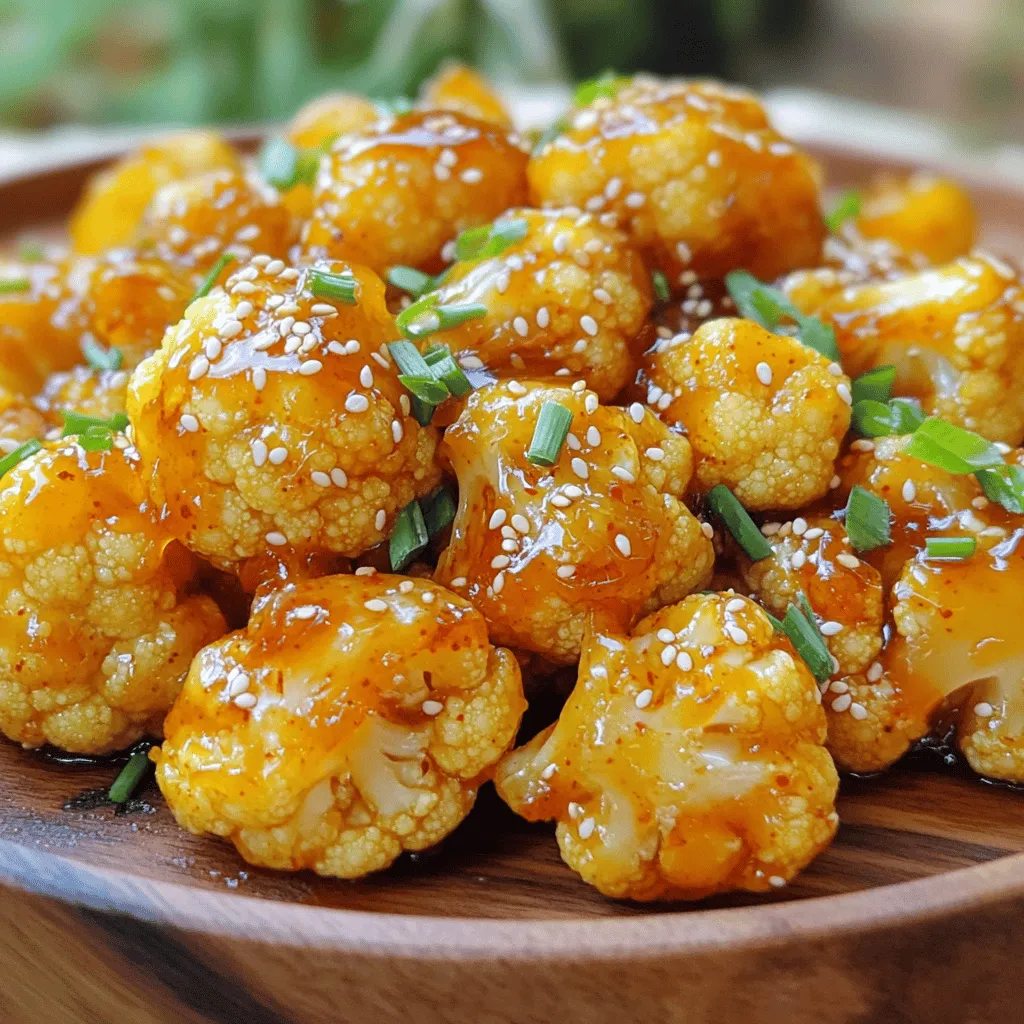
Are you ready to spice up your dinner routine? This Spicy Honey Garlic Cauliflower dish is not only tasty but

- 8 oz cream cheese, softened - 1/2 cup powdered sugar - 1 teaspoon vanilla extract - 1 cup sour cream - 1/2 teaspoon cinnamon - 1 cup apple, finely diced (preferably Granny Smith or Honeycrisp) - 1/4 cup caramel sauce (plus extra for drizzling) - 1/4 cup chopped pecans or walnuts (optional, for crunch) - Sliced apples, graham crackers, or pretzels for dipping To create a luscious and creamy dip, we start with cream cheese. This ingredient gives the dip its rich base. The powdered sugar adds sweetness, while vanilla extract brings warmth to the flavor. Sour cream adds a tangy note, making it even creamier. A touch of cinnamon enhances the sweet apple flavor. For the apples, I love using Granny Smith or Honeycrisp. They provide a nice crunch and a tartness that balances the dip's sweetness. Caramel sauce is a must! It adds that classic caramel apple taste. If you want some extra crunch, consider adding chopped pecans or walnuts. Finally, think about what you want to use for dipping. Sliced apples are a great choice, as they echo the apple flavor. Graham crackers add a sweet crunch, and pretzels offer a salty twist. Each choice complements the dip perfectly. - Gluten-free options: Use gluten-free graham crackers or fresh fruit for dipping. - Dairy alternatives for vegan versions: Swap cream cheese and sour cream for vegan options. - Nut-free variations: Omit nuts or replace them with seeds like sunflower seeds. This dip can adapt to many diets. You can easily switch ingredients to suit your needs. Enjoy making this dip for everyone! 1. Start by beating the cream cheese until it's smooth. Use an electric mixer for best results. 2. Gradually add the powdered sugar. Mix until everything is fluffy and well blended. 3. Next, mix in the vanilla extract, sour cream, and cinnamon. Blend until the mixture is completely smooth. 1. Gently fold in the diced apples. Make sure the apples are evenly spread throughout the dip. 2. Stir in the caramel sauce and nuts if you want a bit of crunch. This adds a nice texture to your dip. 1. Now, transfer the dip to a serving bowl. This is where the fun begins! 2. Drizzle extra caramel sauce on top for a beautiful finish. This makes it look as good as it tastes. - Best dippers for the dip: Sliced apples, graham crackers, and pretzels work well. Each adds a unique flavor and texture. I love the crunch of pretzels against the creamy dip. You can also try celery sticks for a fresh twist. - Ideal serving temperature: Serve the dip chilled or at room temperature. Chilling it enhances the flavors. Let it sit out for about 10 minutes before serving for the best taste and texture. - Proper storage methods: Store the dip in an airtight container. This keeps it fresh and prevents it from absorbing other smells in the fridge. - How long it lasts in the fridge: The dip stays good for about 3 to 5 days. If it starts to lose its creamy texture, it's time to toss it. - Flavor variations: You can mix in chocolate or peanut butter for a fun twist. Just add a few tablespoons to the cream cheese base. This gives the dip a new flavor while keeping it creamy and delicious. - Seasonal twists: Add pumpkin spice for fall or holiday-themed flavors. A dash of nutmeg or ginger can also give it a festive flair, making it perfect for gatherings. {{image_2}} You can spice up your dip for a new taste. Try adding nutmeg or ginger to bring warmth. Both spices complement the sweetness of the caramel and apples. If you love chocolate, make a chocolate caramel apple dip. Just mix in cocoa powder or melted chocolate. This twist creates a rich, indulgent flavor. Changing the texture can make your dip even more fun. Add mini marshmallows for a fluffy feel. Toffee bits can add a crunchy surprise. You can also switch the nuts. Try walnuts for a softer crunch or pecans for a richer flavor. Each change can make your dip unique. For parties, serve this dip in mini cups. It’s cute and easy for guests to grab. You can also package it as a gift. Use small jars and tie a ribbon around them. It’s a sweet surprise for friends and family. Caramel Apple Cheesecake Dip has about 150 calories per serving. Each serving includes: - Fat: 9 grams - Carbohydrates: 17 grams - Protein: 3 grams This dip is a tasty treat, but it packs a punch with calories. The cream cheese and sour cream add to the richness, while the apples and caramel bring in sweetness. The main ingredients in this dip offer some health perks. Apples provide fiber and vitamins. They help keep your heart healthy and aid digestion. Cream cheese adds calcium, which is good for bones. You can swap sour cream with Greek yogurt for extra protein. You could also use low-fat cream cheese for fewer calories. Many users rave about the creamy texture and sweet flavor. They love how easy it is to make. Some users suggest adding more apples for crunch. Others enjoy drizzling extra caramel on top for more sweetness. A few recommend serving it with pretzels for a salty contrast. To make this dip, start by beating 8 oz of softened cream cheese in a bowl. Add 1/2 cup of powdered sugar and mix until fluffy. Then, stir in 1 teaspoon of vanilla extract, 1 cup of sour cream, and 1/2 teaspoon of cinnamon. Next, gently fold in 1 cup of finely diced apples and 1/4 cup of caramel sauce. If you want, add 1/4 cup of chopped nuts for crunch. Transfer to a bowl, drizzle with caramel, and serve with dippers like sliced apples or graham crackers. Yes, you can make this dip ahead of time. Prepare it and store it in an airtight container. Keep it in the fridge for up to 2 days. Before serving, give it a good stir and drizzle with extra caramel sauce for a fresh look. If you want to replace cream cheese, try using Greek yogurt or mascarpone cheese. You can also use a dairy-free cream cheese for a vegan option. Each substitute changes the flavor a bit, but they all work well in this dip. This blog post covered how to make a delicious caramel apple cheesecake dip. You learned about the ingredients, preparation steps, and serving ideas. We discussed dietary options and ways to customize the dip. You can explore flavor variations and learn effective storage methods. In conclusion, this dip offers endless fun and tasty possibilities. Enjoy making it your own!

Caramel Apple Cheesecake Dip Luscious and Creamy Delight

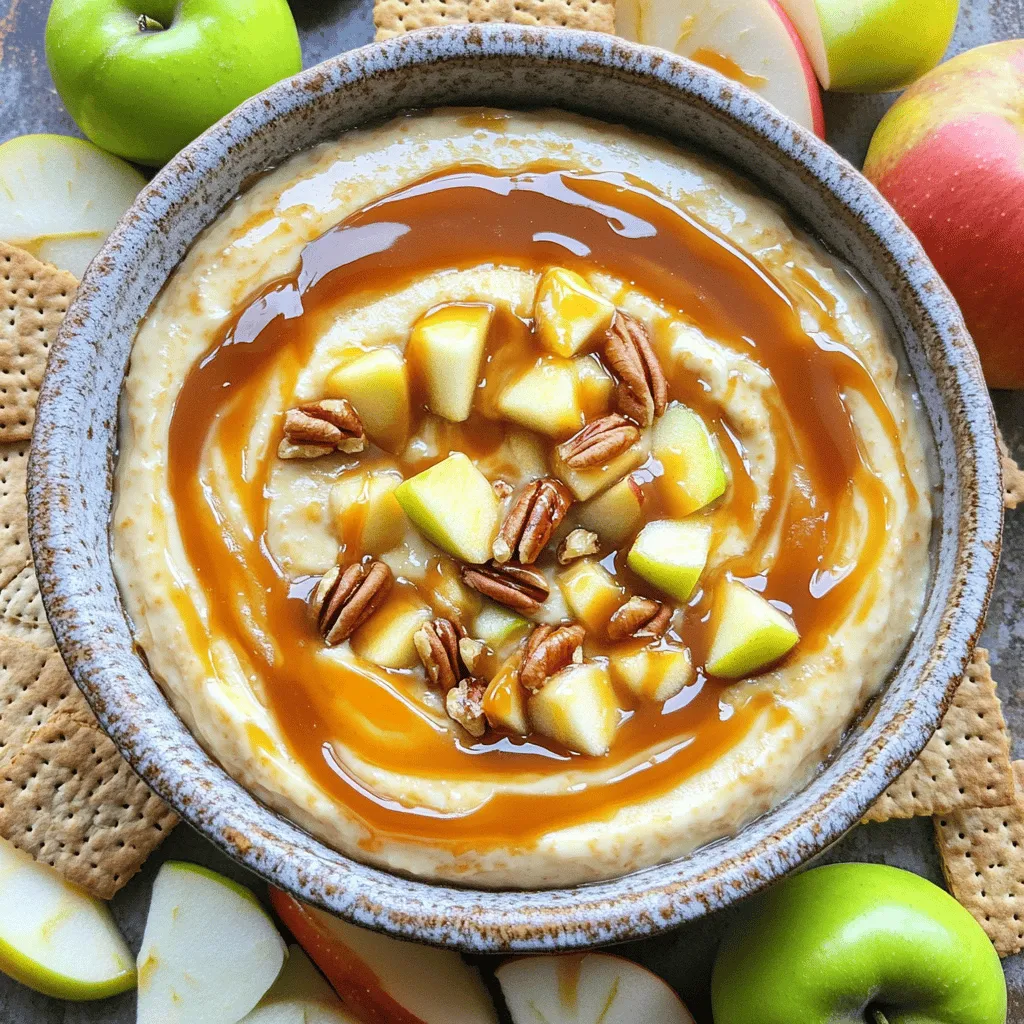
Welcome to your new favorite treat! Caramel Apple Cheesecake Dip combines creamy goodness with sweet apples and rich caramel. It’s

To make Creamy Mushroom Marsala Pasta, gather these ingredients: - 8 oz fettuccine or spaghetti - 2 tablespoons olive oil - 1 medium onion, finely chopped - 3 cloves garlic, minced - 12 oz mixed mushrooms (cremini, shiitake, and button), sliced - 1 teaspoon dried thyme - 1 teaspoon dried oregano - 1 cup vegetable broth - 1 cup heavy cream - 1 tablespoon balsamic vinegar - Salt and pepper to taste - Fresh parsley, chopped (for garnish) - Grated Parmesan cheese (optional, for serving) You can switch up the pasta type. Use your favorite shape, like penne or rigatoni. Each will hold the sauce well. When it comes to herbs, fresh is great but dried works too. Fresh herbs can add bright flavors. Dried herbs are handy and last longer. You can add toppings to make it special. Try crispy bacon or sautéed spinach. A sprinkle of nuts adds crunch. If you love cheese, more grated Parmesan is always welcome! 1. Preparing the pot for boiling Start by filling a large pot with water. Add a generous amount of salt. This helps flavor the pasta. Place the pot on the stove over high heat. Wait for the water to boil. 2. Tips for perfect pasta texture Once the water boils, add your fettuccine or spaghetti. Cook it according to the package instructions. I recommend checking it one minute early. You want the pasta to be al dente, meaning firm to the bite. 3. How to reserve pasta water Before draining, scoop out about 1/4 cup of the cooking water. This starchy water will help the sauce later. Drain the pasta and set it aside while you make the sauce. 1. Sautéing onions and garlic correctly In a large skillet, heat 2 tablespoons of olive oil over medium heat. Add the finely chopped onion. Sauté for 3 to 4 minutes until it turns translucent. Then, add 3 minced garlic cloves. Cook for another minute until it's fragrant. 2. Cooking mushrooms: Methods to enhance flavor Now it’s time for the mushrooms. Add 12 ounces of sliced mixed mushrooms to the skillet. Stir occasionally for about 5 to 7 minutes. You want them golden and softened. This step enhances their rich flavor. 3. Incorporating herbs into the sauce Next, sprinkle in 1 teaspoon of dried thyme and 1 teaspoon of dried oregano. Mix well to combine the herbs with the mushrooms. This adds depth and aroma to your sauce. 1. Best practices for mixing pasta with sauce Pour 1 cup of vegetable broth into the skillet. Let it simmer for about 3 to 4 minutes. Add 1 cup of heavy cream and 1 tablespoon of balsamic vinegar. Stir to combine. 2. Techniques for adjusting sauce thickness If the sauce gets too thick, use the reserved pasta water. Add a little at a time until you reach the desired consistency. Don't forget to season with salt and pepper to taste. 3. Plating tips for presentation Add the drained pasta to the skillet and toss it gently in the sauce. Ensure every strand is coated. For serving, garnish with fresh parsley and optional grated Parmesan cheese. This makes your dish look and taste amazing. To make your Creamy Mushroom Marsala Pasta even tastier, use some spices and herbs. I suggest adding: - 1 teaspoon smoked paprika - A pinch of red pepper flakes - Fresh thyme instead of dried, if possible These add warmth and depth. To achieve a richer taste, use high-quality vegetable broth. It boosts the flavor of your sauce. Also, add the balsamic vinegar before the cream. This order helps to meld the tastes better. Timing matters too. Add your herbs when the mushrooms are nearly done cooking. This way, they release their aroma and flavor fully. One common mistake is overcooking the pasta or mushrooms. Cook the pasta until al dente. For mushrooms, aim for a golden color. This brings out their best texture and taste. Be careful with salt and seasoning. Taste as you go. Too much salt can ruin the dish. Another mistake is not adjusting the sauce’s consistency. If your sauce is too thick, add some reserved pasta water. This keeps it creamy and perfect for tossing. Pair your pasta with some easy side dishes. A simple green salad or garlic bread works well. For wine, consider a light red like Pinot Noir. It complements the mushroom flavor nicely. When garnishing, sprinkle fresh parsley on top. Grated Parmesan cheese adds richness too. You can also add toasted pine nuts for crunch. Enjoy your meal! {{image_2}} To make a vegetarian or vegan version of creamy mushroom Marsala pasta, swap the heavy cream with coconut cream or cashew cream. Both options provide a rich and creamy texture. For cheese, try nutritional yeast or vegan cheese. Consider adding vegetables like spinach, bell peppers, or zucchini. These can enhance flavor and color. When using plant-based options, you may need to adjust the seasoning. Taste often and add more herbs or spices if needed. For a heartier meal, you can add chicken or shrimp. If you want chicken, slice it thin. Sauté it in olive oil until cooked through, then remove it before cooking the mushrooms. Add it back at the end. For shrimp, cook them in the same skillet after the mushrooms. They only need a few minutes. Ensure the flavors blend well by adding a splash of Marsala wine or lemon juice. This helps balance the dish. If you need a gluten-free option, choose gluten-free pasta, like rice or corn-based types. These can cook differently, so check the package for timing. To maintain texture, cook the pasta al dente. This helps it hold up when mixed with the sauce. If the sauce is too thick, add a splash of vegetable broth or pasta water. This keeps the dish flavorful and creamy. To keep your Creamy Mushroom Marsala Pasta fresh, follow these tips: - Refrigerate Promptly: Store leftovers in the fridge within two hours. This helps keep the food safe. - Use Airtight Containers: Place the pasta in airtight containers. This prevents moisture loss and keeps flavors intact. - Cover Well: If you use a bowl, cover it tightly with plastic wrap or a lid. This keeps the dish fresh. To prevent the sauce from separating, stir in a splash of vegetable broth or cream before storing. This keeps the sauce smooth. When reheating, you want to keep the pasta creamy and delicious: - Use the Stovetop: The best method is to reheat on low heat in a skillet. This helps maintain texture. - Time and Temperature: Heat for about 5-7 minutes. Stir occasionally to avoid burning. - Add Moisture: To keep it creamy, add a splash of broth or cream while reheating. This will help restore the sauce's richness. Freezing can be a great way to save this dish for later: - Cool Before Freezing: Allow the pasta to cool completely. This prevents ice crystals from forming. - Use Freezer Bags: Place the pasta in freezer-safe bags. Remove as much air as possible to avoid freezer burn. - Label Your Bags: Write the date on the bags. This helps you know when to use them. To thaw, place the bag in the fridge overnight. For best results, reheat it on the stovetop with a little extra moisture. This keeps the flavors and texture just right. To thicken your mushroom sauce, you can use a few easy methods. First, you can add more cream. This gives a richer taste and a thicker texture. Second, use starches like cornstarch or flour. Mix a small amount with water. Then stir this mix into your sauce slowly. Let it cook for a few minutes. This helps the sauce get thicker quickly. Yes, you can use many types of mushrooms. Each type brings its own flavor. For example, cremini mushrooms give a nice earthy taste. Shiitake mushrooms add a rich, umami flavor. Button mushrooms are mild and easy to find. You can even mix different mushrooms for a unique dish. This combination can make your sauce more gourmet and flavorful. Yes, this recipe works well for meal prep! You can cook the pasta and sauce ahead of time. Store them separately in the fridge. When you’re ready to eat, just reheat the sauce and pasta. If the sauce gets too thick, add a splash of water or broth. This keeps everything tasty and fresh. For the complete recipe, click [here](#). In this blog post, we explored a tasty pasta dish with a creamy mushroom sauce. We covered ingredient choices, cooking steps, and ways to enhance flavor. You learned about making vegetarian and gluten-free versions, plus how to store leftovers well. Remember, cooking is all about experimenting and having fun. Don't be afraid to make this dish your own. With the tips provided, you can create a meal that's both delicious and satisfying. Enjoy your cooking journey!

Creamy Mushroom Marsala Pasta Rich and Flavorful Dish

Craving a comforting meal that bursts with flavor? Let me introduce you to Creamy Mushroom Marsala Pasta. This rich dish

Older posts
Newer posts
← Previous Page1 … Page41 Page42 Page43 … Page86 Next →

dsad

© 2026 Cooking Wells • Built with GeneratePress

Our Policies

  • Copyright Policy
  • Cookie Policy
  • GDPR Policy
  • Privacy Policy
  • Disclaimer
  • Terms Of Use

More Information

  • Home
  • About
  • Contact
  • Appetizers
  • Dessert
  • Dinner
  • Drinks
©2026, Cooking Wells About Back To Top