Skip to content
DisclaimerTerms Of UseGDPR PolicyCookie Policy

Cooking Wells

  • Home
  • Drinks
  • Appetizers
  • Dinner
  • Dessert
  • About
  • Contact
  • Privacy Policy
DisclaimerTerms Of UseGDPR PolicyCookie Policy

NO-ING-IMG

For this dish, I use simple, fresh items. They make the flavors pop. Here’s what you need: - 2 medium zucchinis, sliced into half-moons - 1 pint cherry tomatoes, halved - 3 cloves garlic, minced These vegetables offer great taste and nutrition. Zucchini is mild and tender when cooked. Cherry tomatoes burst with sweetness. The garlic adds depth to the dish. Seasonings enhance the natural flavors of the veggies. I like to keep it easy with these: - 3 tablespoons olive oil - 1 teaspoon dried oregano - 1 teaspoon balsamic vinegar - Salt and pepper to taste Olive oil helps the veggies roast nicely. It makes them golden and flavorful. Dried oregano brings a warm, earthy taste. Balsamic vinegar adds a tangy note that balances the sweetness of the tomatoes. Garnishes give your dish a fresh look and taste. Consider adding: - Fresh basil leaves for garnish Basil has a lovely aroma and flavor. It brightens the dish and makes it more appealing. You can sprinkle the leaves on top just before serving. For the full recipe, check out the Easy Roasted Zucchini and Tomatoes section. Start by washing the zucchinis and cherry tomatoes. Cut the zucchinis into half-moons. Halve the cherry tomatoes. Keep the sizes even for best cooking. In a large bowl, add the sliced zucchinis and halved tomatoes. Then, add minced garlic, olive oil, dried oregano, balsamic vinegar, salt, and pepper. Toss everything together. Make sure each piece gets coated well. This step adds flavor to your vegetables. Preheat your oven to 425°F (220°C). Spread the vegetable mix on a baking sheet in a single layer. This helps them roast evenly. Roast in the oven for 20-25 minutes. You want the zucchini tender and the tomatoes blistered. After roasting, let them cool slightly. Serve warm with fresh basil leaves on top. This dish is simple and tasty. For the full recipe, check the beginning of the article. When picking zucchini, look for young and firm ones. They should feel heavy for their size. Their skin should be shiny and free of blemishes. For tomatoes, choose bright and plump ones. Cherry tomatoes should have smooth skin. A good tomato smells sweet and fresh, which means it’s ripe. To get even cooking, cut your zucchini into similar sizes. Half-moons work well because they cook nicely. Spread the veggies out on the baking sheet. Avoid crowding them, as this can cause steaming instead of roasting. Give them space to caramelize and brown evenly. Set your oven to 425°F (220°C) for great roasting. This high heat helps the veggies brown nicely. If your oven has hot spots, rotate the pan halfway through. This simple step makes sure all sides get that lovely roasted flavor. Follow these tips, and you will enjoy tasty roasted veggies! For the full recipe, check out Easy Roasted Zucchini and Tomatoes. {{image_2}} You can make this dish even better by adding more veggies. Try bell peppers for a sweet crunch. Carrots add a nice color and taste. You can also mix in red onions for a savory kick. Just cut them to match the zucchini size. This helps them cook evenly. The more veggies, the more flavors you’ll enjoy. Want to make your dish pop? Add some spice! You can sprinkle red pepper flakes for heat. Italian seasoning works great, too. If you like a smoky flavor, try smoked paprika. You can even add a squeeze of lemon for brightness. Experiment with different spices to find your favorite mix. Turn this side dish into a full meal. Serve it with grilled chicken or fish for protein. You can also mix in cooked quinoa or rice for extra fiber. This makes it filling and nutritious. Add a sprinkle of cheese on top for richness. This easy roasted zucchini and tomatoes dish can be your go-to meal anytime. For the full recipe, check out the detailed steps above. To keep your roasted zucchini and tomatoes fresh, let them cool down first. Transfer the veggies to an airtight container. They will stay good in the fridge for about three days. Make sure to store them away from strong-smelling foods. This helps keep their taste intact. When you’re ready to enjoy leftovers, preheat your oven to 350°F (175°C). Spread the zucchini and tomatoes on a baking sheet. Heat for about 10-15 minutes, or until warm. This method keeps them tasty and helps revive their original texture. You can also use a microwave if you're in a hurry. Just heat for 1-2 minutes, but watch for sogginess. If you want to save them for later, freezing is a great option. First, let the veggies cool completely. Then, place them in a freezer-safe bag or container. Make sure to squeeze out as much air as possible to avoid freezer burn. They can last up to three months in the freezer. When you're ready to eat, thaw in the fridge overnight before reheating. For the full recipe, check back here. Yes, you can use other types of tomatoes. You might try roma tomatoes or vine-ripened tomatoes. Both options add great flavor. Just make sure to cut them into similar sizes. This helps them cook evenly with the zucchini. Roasted zucchini and tomatoes pair well with many dishes. You can serve them with grilled chicken or fish. They also go great with pasta or rice. For a lighter meal, enjoy them on a fresh salad. You could even use them as a tasty topping for toast. You’ll know the vegetables are done when they become tender. The zucchini should feel soft when pierced with a fork. The tomatoes should look blistered and slightly caramelized. This usually takes about 20-25 minutes at 425°F (220°C). Keep an eye on them to avoid burning. Yes! You can prep them ahead of time. Slice the zucchini and tomatoes and store them in the fridge. Just remember to coat them with oil and seasonings right before roasting. This keeps them fresh and flavorful. Store any leftovers in an airtight container. They’ll stay fresh in the fridge for up to three days. To keep the flavors intact, avoid reheating them in the microwave. Instead, warm them gently in the oven or on the stove. You can freeze roasted zucchini and tomatoes, but they may lose some texture. Allow them to cool completely before placing them in freezer bags. Remove as much air as possible to prevent freezer burn. They can last up to three months in the freezer. You can mix in other vegetables like bell peppers or onions. Adding spices like red pepper flakes gives extra heat. You can also sprinkle some cheese on top for a rich flavor. This recipe is very flexible, so feel free to get creative! For the full recipe, check out the Easy Roasted Zucchini and Tomatoes section. For a simple and tasty dish, roasted zucchini and tomatoes shine. We discussed the best ingredients, how to prepare them, and the steps to roast them perfectly. Remember to pick fresh veggies and use the right seasonings. Explore variations to keep things exciting. When storing leftovers, aim for great flavor whether reheating or freezing. With these tips, you can enjoy this dish anytime. Happy roasting!

Easy Roasted Zucchini and Tomatoes Flavorful Dish

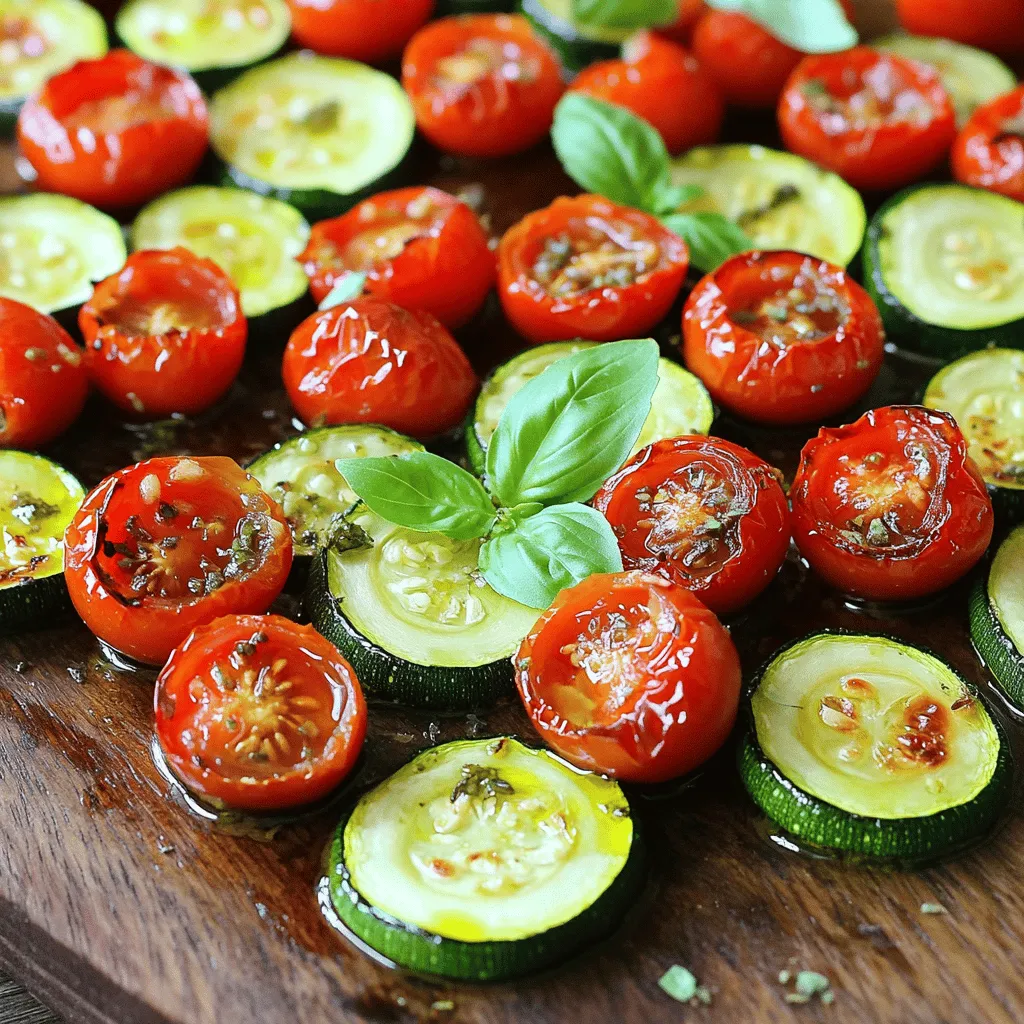
Are you ready to whip up a dish that’s simple, healthy, and bursting with flavor? My Easy Roasted Zucchini and

- 3 ripe bananas, mashed - 1/2 cup unsalted butter, melted - 3/4 cup brown sugar - 1/4 cup granulated sugar - 2 large eggs - 1 teaspoon vanilla extract - 1 teaspoon baking soda - 1/2 teaspoon baking powder - 1/2 teaspoon salt - 1 1/2 cups all-purpose flour - 1/2 cup cocoa powder - 1/2 cup chocolate chips (semi-sweet or dark) - 1/2 cup walnuts or pecans, chopped (optional) When making the best ever chocolate banana bread, choosing your ingredients is key. Ripe bananas bring sweetness and moisture. Their brown spots mean more flavor, so don’t shy away from them. Melted unsalted butter gives the bread a rich texture. Using a mix of brown and granulated sugar adds depth to the sweetness. Eggs help the bread rise and stay moist. Vanilla extract adds warmth to the flavor. Baking soda and baking powder work together to give your bread lift. Salt balances the sweetness, while all-purpose flour provides structure. Cocoa powder is what makes this bread chocolatey and rich. Chocolate chips add bursts of melted goodness. If you want a nutty crunch, add walnuts or pecans. If you have dietary needs, there are easy swaps. You can use applesauce instead of butter for a lighter option. For gluten-free bread, use almond flour or gluten-free flour blends. This allows everyone to enjoy this tasty treat, no matter their diet. For the full recipe, refer to the main article. First, set your oven to 350°F (175°C). This is the perfect heat for baking. Next, take a 9x5-inch loaf pan. Grease it well or line it with parchment paper. This helps the bread come out easily. In a large bowl, mash the ripe bananas until smooth. Then, add the melted butter. Stir these two together until they mix well. Next, add the brown sugar and granulated sugar. Mix until everything is combined. Now, crack in the eggs, one at a time. Mix after each egg. Finally, add the vanilla extract and stir until smooth. In another bowl, whisk together the dry ingredients. Combine the baking soda, baking powder, salt, flour, and cocoa powder. This mix gives your bread the rise and chocolate flavor it needs. Now, take the dry mix and gradually fold it into the wet mixture. Use a spatula to gently combine them. Be careful not to over-mix. This keeps your bread soft and light. Pour the batter into your prepared loaf pan. Smooth the top with a spatula. Bake in the oven for 60-65 minutes. To check if it's done, insert a toothpick in the center. It should come out clean. After baking, let the bread cool in the pan for about 10 minutes. Then, transfer it to a wire rack. Allow it to cool completely before slicing. This helps keep the texture just right. For the full recipe, check the previous section. Enjoy your baking! To make the best chocolate banana bread, avoid over-mixing the batter. Over-mixing can make your bread dense and tough. Mix just until you see no dry flour. This keeps the bread soft and moist. The ripeness of your bananas is key too. Use very ripe bananas. They should be brown and soft. This gives your bread a sweet, rich flavor. The more brown spots, the better the taste! To take your chocolate banana bread to the next level, add a pinch of cinnamon. This spice brings warmth and depth to the flavor. You can also try nutmeg for a different twist. Using various types of chocolate can also enhance taste. Semi-sweet chocolate chips work great. For a richer taste, use dark chocolate chips. If you love white chocolate, mix that in too. Each type adds its own special flavor! When serving your banana bread, plating matters. Slice it neatly and arrange the pieces on a pretty plate. You can dust the top with powdered sugar for a sweet touch. Toppings can make your bread even better. A dollop of whipped cream adds creaminess. A scoop of vanilla ice cream makes it a dessert treat. Fresh berries or sliced bananas on the side add color and taste. For the full recipe, check out the detailed instructions to make your own Best Ever Chocolate Banana Bread! {{image_2}} You can make your chocolate banana bread even better with fun mix-ins. Here are some ideas: - Nuts and dried fruits: Chopped walnuts or pecans add crunch. You can also use dried fruits like raisins or cranberries for a sweet touch. They give great flavor and texture. - Various chocolate types: Use semi-sweet, dark, or even white chocolate chips. Each type brings a unique taste. Mixing different types makes it exciting. Adding a twist to your recipe can surprise your taste buds. Try these ideas: - Use of coffee or espresso: A little coffee enhances the chocolate flavor. Just add a small amount to the wet mix. It brings out the richness. - Cinnamon or nutmeg additions: A dash of cinnamon or nutmeg can warm up the bread. These spices add depth and make it cozy. If you want to change things up, consider these formats: - Chocolate banana muffins: Bake the batter in muffin tins for easy serving. They are great for breakfast or snacks. - Mini loaf versions: Making mini loaves is fun. They bake faster and are perfect for sharing or gifts. Feel free to explore these variations to make your chocolate banana bread even more delightful! For the full recipe, check the main article. To store your chocolate banana bread at room temperature, wrap it well. Use plastic wrap or aluminum foil. Place it in an airtight container. This keeps the bread soft and moist. It lasts up to four days on your counter. Be sure to keep it away from heat and sunlight. For long-term storage, freezing is your best option. Slice the bread first for easy thawing. Wrap each slice in plastic wrap, then place in a freezer bag. Remove as much air as possible. Your chocolate banana bread can stay fresh in the freezer for up to three months. To thaw, leave it in the fridge overnight or at room temp for a few hours. To avoid spoilage, always use clean hands and tools. Make sure your bread is completely cool before wrapping. Check for any signs of mold before eating. If you notice a dry texture, try warming it slightly in the microwave. This helps restore some moisture. Enjoy every bite of your delicious chocolate banana bread! For the full recipe, check out the Best Ever Chocolate Banana Bread section. To make this banana bread vegan, you can swap out eggs and butter. - Egg substitution: Use 1/4 cup of unsweetened applesauce for each egg. - Butter substitution: Replace the butter with 1/2 cup of coconut oil or vegan butter. These swaps keep the bread moist and delicious. Yes, you can use frozen bananas. Just thaw them before mashing. - Tip: Drain any excess liquid after thawing. Frozen bananas work great in this recipe. They add extra sweetness and moisture. If your bread turns out too moist, adjust your baking time and ingredients. - Baking time: Try baking it a bit longer. Check every five minutes after the first hour. - Ingredient adjustment: Use a little less mashed banana or add more flour. These changes can help achieve the perfect texture. To check if your bread is done, use a toothpick. - Toothpick test: Insert a toothpick in the center. If it comes out clean, the bread is ready. If it has wet batter, bake for a few more minutes. This simple test ensures a great bake every time. You now have the tools to make a delicious chocolate banana bread. We covered the key ingredients, step-by-step instructions, and helpful tips to improve your baking. Remember to keep your bananas ripe and avoid over-mixing for best results. Try different mix-ins for fun twists. Store your bread right to keep it fresh. Enjoy your baking adventure, knowing you can adjust for dietary needs. Simple adjustments can make a big difference! Happy baking!

Best Ever Chocolate Banana Bread Recipe Delight

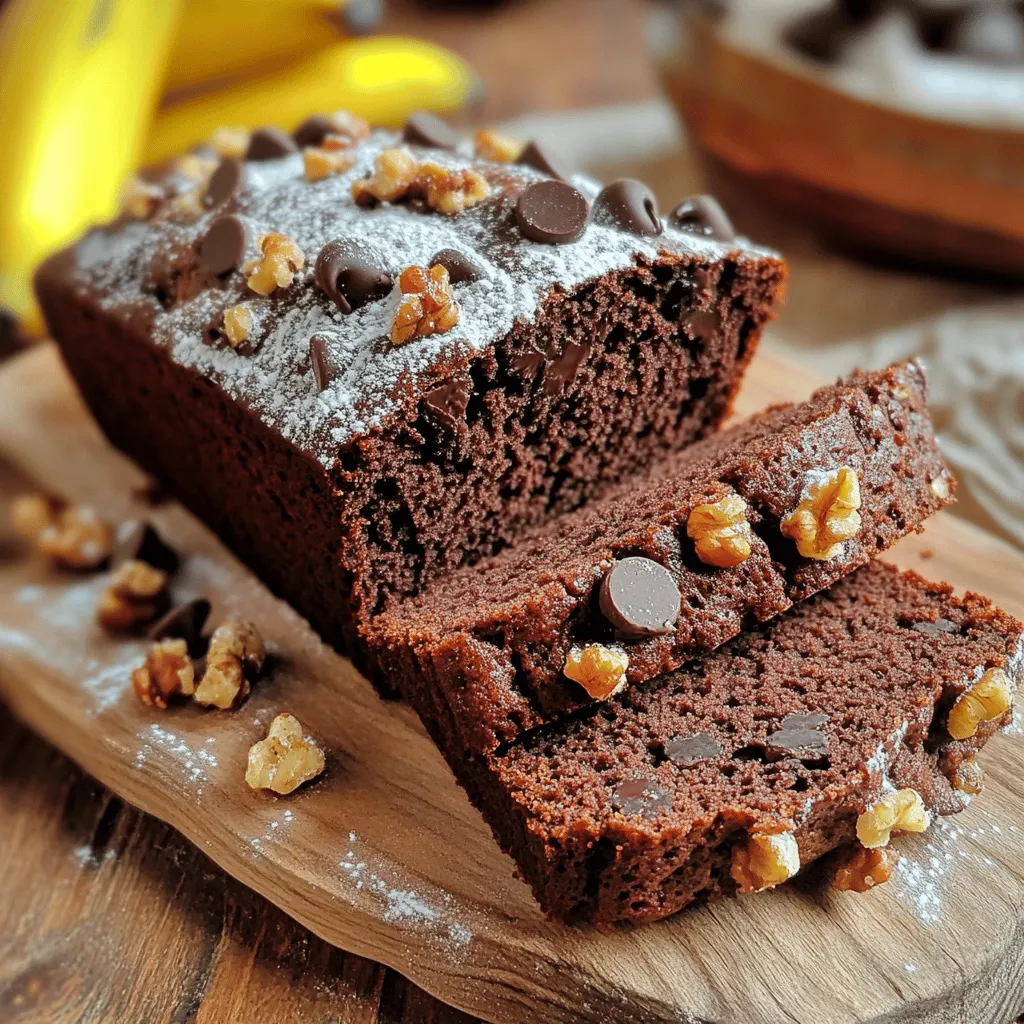
Craving a warm slice of chocolate banana bread? You’re in for a treat! This Best Ever Chocolate Banana Bread Recipe

- 2 pounds of Yukon Gold potatoes, peeled and diced - 1 cup green peas (fresh or frozen) - ½ cup sweet pickle relish Yukon Gold potatoes are my go-to choice for potato salad. They have a smooth texture and a nice flavor. You can use fresh or frozen green peas. They add a pop of color and sweetness. Sweet pickle relish gives the salad a nice tang and sweetness. - ½ cup mayonnaise - ¼ cup Greek yogurt - 1 tablespoon Dijon mustard For the dressing, I mix mayonnaise and Greek yogurt. This combo makes it creamy and a bit lighter. Dijon mustard adds a nice kick and depth to the flavor. - 1 tablespoon apple cider vinegar - 1 small red onion, finely chopped - 3 stalks celery, finely diced - ½ teaspoon garlic powder - Salt and pepper to taste Apple cider vinegar brightens the salad. Red onion adds a bit of crunch and sharpness. Celery gives it a nice crispness. I always sprinkle in garlic powder, salt, and pepper to enhance all the flavors. For the full recipe, check out the details on how to make this classic dish. Start by boiling the potatoes. Use a large pot and fill it with water. Add a pinch of salt. Bring the water to a boil. Once boiling, add the diced Yukon Gold potatoes. Cook them until they are fork-tender. This should take about 10 to 15 minutes. If you choose to add fresh peas, do so in the last 2 to 3 minutes of cooking. This helps keep them bright and fresh. If you use frozen peas, just thaw them separately. Once cooked, drain the potatoes and peas. Let them cool in a large bowl. Now, let’s make the dressing. In a separate bowl, combine these ingredients: mayonnaise, Greek yogurt, Dijon mustard, apple cider vinegar, garlic powder, salt, and pepper. Whisk everything together until it’s smooth. You want a creamy texture that coats well. Once the potatoes and peas have cooled, mix them with the dressing. Gently fold in the chopped red onion and diced celery. Make sure everything is well coated. Taste the salad and adjust the seasoning as needed. Add more salt or pepper if desired. Cover the bowl and refrigerate it for at least 1 hour. This waiting time lets the flavors meld together beautifully. When you are ready to serve, garnish the top with fresh dill for a special touch. Enjoy this classic potato salad with your favorite dishes! For the complete recipe, check out the Full Recipe. To make the best potato salad, cook your potatoes until they are fork-tender. This means they should be soft enough for a fork to pierce easily but not mushy. Boil the potatoes for about 10 to 15 minutes. Be sure to check them often. Once cooked, you want to cool down the potatoes quickly. To do this, drain them well and transfer them to a large bowl. Spread them out to let the heat escape. You can also place the bowl in an ice bath for faster cooling. This helps keep the potatoes firm and nice. You can change the dressing for your potato salad. If you want a lighter option, use yogurt instead of mayonnaise. Greek yogurt adds a creamy texture and tangy flavor. You can also mix in flavors like sour cream or even avocado for fun twists. Herbs and spices can give extra flavor to your salad. Fresh dill, chives, or parsley work great. A pinch of paprika or a squeeze of lemon juice can brighten the taste. Don’t be afraid to experiment! Potato salad pairs well with many dishes. It is great with grilled meats like burgers or chicken. You can also serve it at picnics, barbecues, or family gatherings. For presentation, use a large bowl and garnish with fresh dill on top. You can also serve it in individual cups for a fun touch. This makes it easy for guests to grab their own. For the full recipe, check out [Full Recipe]. {{image_2}} To make potato salad stand out today, you can swap some ingredients. Instead of classic mayonnaise, try using Greek yogurt for a creamy twist. You can also add spices like paprika or chili powder to give it some heat. Fresh herbs can brighten the dish. Some popular herbs include parsley and chives. Around the world, potato salad varies a lot! In Germany, they use vinegar and bacon for flavor. In Russia, they mix in peas and carrots for a colorful touch. Each version brings its own charm. If you want a gluten-free potato salad, you’re in luck! This dish is often naturally gluten-free. Just check your dressing for added gluten. For a vegan option, use plant-based mayo or avocado instead of eggs. You can also make a simple dressing with olive oil and lemon juice. Both options keep the salad light and fresh. Want to make your potato salad unique? Add fresh herbs like dill or basil for a burst of flavor. You can also toss in crunchy elements like pickles or nuts. For a fun twist, try adding apples or bacon bits. These add-ins keep your salad exciting and tasty. You can find the full recipe to explore these ideas further. To store potato salad, place it in an airtight container. This keeps it fresh and prevents odors from mixing. You can also cover the bowl tightly with plastic wrap. The shelf life in the refrigerator is about three to five days. Always check for off smells or colors before eating. Can you freeze potato salad? I don’t recommend it. Freezing can change the texture of the potatoes and dressing. If you must freeze it, use a freezer-safe container and leave space for expansion. Thaw it in the refrigerator overnight before using. Stir well after thawing to help blend the textures. The best method for reheating is to let it sit at room temperature. If you need to use the microwave, do so in short bursts. Stir in between to keep it even. This helps maintain texture and flavor. For a fresher taste, add a little extra dressing after reheating. Enjoy it as a side for your meals or at gatherings. To make potato salad creamy, you need the right mix of ingredients. Start with good mayonnaise. I like to blend it with Greek yogurt for a lighter touch. This mix gives a smooth and rich flavor. Add a splash of apple cider vinegar for tang. This helps balance the creaminess. Here are a few tips for the best texture: - Use Yukon Gold potatoes; they are creamy and tender. - Do not rush the cooking. Boil until fork-tender. - Let the potatoes cool before mixing. This keeps them from getting mushy. - Fold the dressing in gently. This keeps your salad light and fluffy. Yes, you can make potato salad a day ahead. This allows the flavors to blend well. It's a great option for meal prep too. Just keep it in the fridge in a sealed container. When you make it ahead: - Prepare the salad and chill for at least an hour. - If you use fresh peas, add them right before serving. - Stir in any extra salt or pepper before serving too. This helps keep the taste fresh. The best potatoes for potato salad are Yukon Gold. They have a buttery flavor and creamy texture. They hold their shape well after cooking. Here are other great options: - Red potatoes are waxy and also hold up well. - Fingerling potatoes have a unique shape and taste. - Avoid starchy potatoes like Russets as they can become mushy. You can check the [Full Recipe] for more details on making the perfect potato salad! In this post, we explored how to make a delicious potato salad. We covered essential ingredients, like Yukon Gold potatoes, green peas, and sweet pickle relish. We discussed a creamy dressing made with mayonnaise, Greek yogurt, and Dijon mustard. I shared step-by-step instructions, helpful tips, and variations for dietary needs and creative twists. You can store this salad easily and enjoy it later. With these insights, you can create a tasty dish that suits your taste and occasion. Enjoy making your perfect potato salad!

Classic Potato Salad Comforting and Tasty Dish

Are you ready to make the perfect Classic Potato Salad? This comforting dish is a summer cookout staple, but it’s

- Pasta (Spaghetti or Fettuccine) - Fresh Mushrooms (Cremini or Button) - Garlic and Aromatics To start, you need pasta. I love using spaghetti or fettuccine. Both types cook well and hold sauce nicely. Next, fresh mushrooms bring a rich, earthy taste. Cremini or button mushrooms are my go-to choices. They add great flavor and texture. Don’t forget garlic! It gives your dish a bold kick. Aromatics like onions can also enhance the taste. - Heavy Cream - Vegetable Broth - Grated Parmesan Cheese For that creamy texture, heavy cream is essential. It makes the sauce smooth and rich. Vegetable broth adds depth to the flavor. You can use homemade broth or store-bought. Grated Parmesan cheese is the final touch. It adds saltiness and umami, making the dish irresistible. - Dried Thyme - Salt and Pepper - Fresh Parsley Seasoning is key. I like to use dried thyme for its warm flavor. Salt and pepper enhance everything. Taste as you go to find the right balance. Finally, fresh parsley adds a pop of color and freshness. It makes your dish look gorgeous and taste bright. If you want the full recipe, check out the details above to create this comforting meal. - Preparing the Water: Start by filling a large pot with water. Add a good amount of salt. The salt helps flavor the pasta. Bring the water to a rolling boil. This is key for cooking pasta well. - Cooking Time and Method: Once the water boils, add 250g of spaghetti or fettuccine. Cook it according to the package instructions. Usually, this takes about 8 to 10 minutes. You want the pasta to be al dente, which means it should have a slight bite. When done, drain it and save a bit of the pasta water for later. - Ideal Skillet Temperature: Use a large skillet for this step. Heat 2 tablespoons of olive oil over medium heat. The oil should shimmer, which shows it’s hot enough. - Signs of Proper Cooking: Add 3 cloves of minced garlic to the skillet. Sauté for about 1 minute until it smells great. Then, add 300g of sliced mushrooms. Cook them for 5 to 7 minutes. They should become soft and golden brown. Stir them a few times for even cooking. - Combining Broth and Cream: Pour in 1 cup of vegetable broth. Bring it to a gentle simmer. Then, stir in 1 cup of heavy cream and 1 teaspoon of dried thyme. - Achieving the Right Consistency: Let this mixture simmer for 3 to 4 minutes. It should thicken slightly. If it gets too thick, add a splash of the reserved pasta water to adjust. The sauce should be creamy and luscious, ready to coat the pasta perfectly. Now that you have these steps, you can make a delicious creamy garlic mushroom pasta at home. For the full recipe, check out the instructions above! To get the sauce just right, you can adjust its thickness with pasta water. When you drain the pasta, save a bit of the water. If your sauce feels too thick, add a splash of this water. It helps loosen the sauce without losing flavor. Enhancing flavor with herbs can make a big difference. I love using dried thyme in this recipe. You can also try fresh herbs like basil or oregano. They add a fresh taste and aroma that brightens the dish. Achieving al dente texture is key for great pasta. Cook the spaghetti or fettuccine in salted boiling water. Follow the package instructions closely. This gives you that perfect firm bite. To prevent stickiness, stir the pasta while it cooks. After draining, toss it with a little olive oil. This keeps the pasta from clumping together when you mix it with the sauce. For accompaniments and pairings, think about a side salad or garlic bread. A crisp green salad balances the creamy pasta. Garlic bread is always a hit, adding extra flavor and texture. Presentation tips can elevate your dish. Serve the pasta in warm bowls. Sprinkle fresh parsley on top for a pop of color. Grate some extra Parmesan cheese for a fancy touch. This makes the dish not just tasty but also beautiful. For the complete recipe, check out the Full Recipe. {{image_2}} Adding Chicken or Shrimp You can add chicken or shrimp to make this dish heartier. Cook the protein first in the skillet. Use the same oil and garlic for flavor. Chicken thighs or shrimp work best. Cook until golden brown and then follow the creamy sauce steps. Vegetarian Options For a vegetarian twist, consider adding tofu or beans. Tofu absorbs flavors well. It adds protein without meat. Chickpeas are also tasty and filling. They add a nice texture to your meal. Utilizing Plant-Based Cream To make this dish vegan, swap heavy cream for plant-based cream. Almond, coconut, or cashew cream work great. They keep the dish rich and creamy. Adjust the amount based on your taste. Substitutions for Cheese For cheese lovers, use nutritional yeast instead of Parmesan. It adds a cheesy flavor without dairy. You can also try vegan cheese. Just make sure it melts well in the sauce. Experimenting with Wild Mushrooms Wild mushrooms can add unique flavors. Try shiitake, oyster, or portobello mushrooms. They bring a deep, earthy taste. Mix different types for a gourmet twist. Combining Varieties for Texture Combining mushrooms adds texture. Some mushrooms are soft, while others are meaty. This mix makes each bite exciting. You can use any blend you like, so have fun with it! For the full recipe, check out the Creamy Garlic Mushroom Pasta section. To store leftover creamy garlic mushroom pasta, cool it first. Place it in an airtight container. This helps keep the pasta fresh and tasty. Use glass or plastic containers with tight lids. They prevent air from getting in, which can spoil the food. If you want to freeze creamy garlic mushroom pasta, let it cool. Portion it into freezer-safe bags or containers. Squeeze out extra air before sealing. This helps avoid freezer burn. To thaw, place it in the fridge overnight. You can reheat it on the stove over low heat. Add a splash of water or broth to make it creamy again. In the fridge, your pasta lasts about 3 to 5 days. Check for signs of spoilage. If it smells off or looks moldy, toss it out. Always trust your nose and eyes. Keeping track of dates helps you enjoy your creamy garlic mushroom pasta safely. To make creamy garlic mushroom pasta gluten-free, choose gluten-free pasta. Many brands offer options like rice, quinoa, or chickpea pasta. Cook it just like regular pasta. Follow the package's instructions for the best results. The sauce works well with any pasta type, so enjoy your meal without worry! Yes, you can prepare this dish ahead of time. Cook the pasta and make the sauce separately. Store both in the fridge. When you're ready to eat, combine them in a skillet over medium heat. This keeps the pasta from getting soggy. You can also add a splash of broth to freshen it up. Experiment with herbs to enhance flavor! You can use fresh basil, oregano, or rosemary. Each herb adds a unique taste to the dish. Try mixing them for a new twist! Add them while cooking for the best flavor. Always taste and adjust as you go. In this blog post, we explored how to make a creamy garlic mushroom pasta. We covered essential ingredients, step-by-step cooking, tips for perfect sauce, variations, and storage advice. Each part plays a key role in your dish’s success. Remember, you can adjust flavors with herbs or try different mushrooms. Whether you add proteins or keep it vegetarian, there’s an option for everyone. Enjoy your cooking journey, and never hesitate to experiment with your ingredients!

Creamy Garlic Mushroom Pasta Delightful Comfort Food

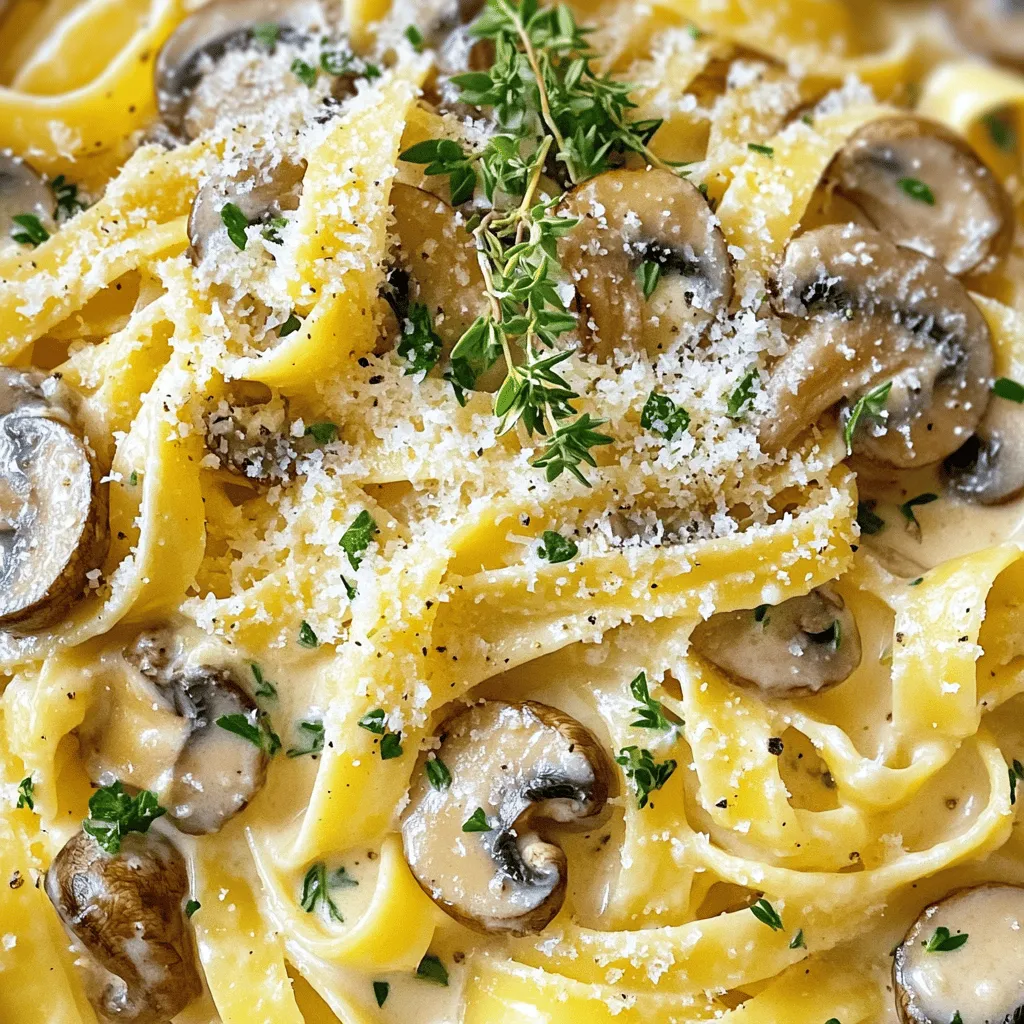
Are you craving a dish that’s both creamy and packed with flavor? Look no further than this Creamy Garlic Mushroom

- 1 pound fresh strawberries, washed and dried - 8 ounces semi-sweet chocolate chips - 1 tablespoon coconut oil (optional) - Sea salt or crushed nuts (optional toppings) When making chocolate-covered strawberries, you want to start with fresh, ripe strawberries. Choose berries that are firm and bright red. Wash them gently and dry them well. Moisture can stop the chocolate from sticking. For the chocolate, I prefer semi-sweet chocolate chips. They melt easily and taste great. If you want a shiny finish, add coconut oil. It helps create a smooth and glossy look. If you like, you can top your strawberries with sea salt or crushed nuts. This adds a nice crunch and flavor contrast. You can find the full recipe above. Enjoy crafting this simple yet delightful treat! Start with dry strawberries. Water can make the chocolate slide off. Use a paper towel to gently pat them dry. This step is key for a great dip. Choose ripe strawberries for the best taste. Look for bright red color and fresh green stems. Next, melt the chocolate. Use a microwave-safe bowl. Add chocolate chips and coconut oil if you want gloss. Heat it in 30-second bursts. Stir well between each burst. This helps prevent burning. Keep stirring until it’s smooth and creamy. Now, it's time to dip! Hold each strawberry by the stem. Dip it into the melted chocolate. Let the extra chocolate drip back into the bowl. Place the dipped strawberry on a lined baking sheet. If you want, sprinkle toppings like sea salt or crushed nuts right away. Finally, chill the strawberries. Put the baking sheet in the fridge for about 30 minutes. This helps the chocolate set well. You’ll know it’s set when it feels firm to the touch. Enjoy these delightful treats once they are ready! For a complete guide, check out the Full Recipe. To get that shiny look on your chocolate-covered strawberries, add a little coconut oil. It helps the chocolate shine and makes it look great. You only need one tablespoon. If you don’t have coconut oil, you can use vegetable oil or shortening. Just remember that less is more. Temperature is key when melting chocolate. You want it warm but not too hot. If it gets too hot, it can seize up. Seizing means the chocolate clumps and becomes hard. To avoid this, melt the chocolate slowly and stir often. This keeps it smooth and ready for dipping. How you serve your strawberries matters. Use a clean platter to show them off. You can arrange them in a circle or in rows. For garnish, sprinkle some sea salt or crushed nuts on top. It adds flavor and makes them look fancy. You can even use edible flowers for a pop of color. {{image_2}} You can switch up flavors by using different types of chocolate. Dark chocolate adds a rich taste. White chocolate offers a sweet, creamy flavor. Each type creates a unique treat. You can also infuse flavors into your chocolate. Try adding a drop of vanilla or a sprinkle of sea salt. These small changes can elevate your chocolate-covered strawberries. You can mix in citrus zest for a fresh twist, too. Experimenting with flavors keeps it fun! Seasonal toppings can make your strawberries even more special. For Valentine's Day, add red sprinkles for a festive look. For Halloween, use orange and black toppings. You can even match toppings to birthdays or holidays. Mixing fruits and nuts can create tasty combinations. Try adding chopped almonds or hazelnuts. You can also sprinkle crushed freeze-dried strawberries on top for a fruity crunch. This variety keeps the treat exciting and fresh. If you want to go dairy-free, there are great chocolate options. Look for vegan chocolate chips made from cacao and coconut. They melt well and taste amazing. This way, everyone can enjoy them! Plant-based toppings are also a great choice. You can use shredded coconut or chopped nuts. Fresh fruit like blueberries or raspberries works too. These toppings add color and flavor without dairy. Enjoy your chocolate-covered strawberries in a new, fun way! For the complete recipe, check out the Full Recipe! To store chocolate-covered strawberries, keep them in a single layer. Place them on a parchment-lined plate or a tray. Cover them lightly with plastic wrap. This helps keep dust away without trapping moisture. Avoid storing them in the fridge for too long. The moisture can make the strawberries soggy. Keep them in a cool, dry place instead. If you must refrigerate, use an airtight container. This will help reduce moisture exposure. Chocolate-covered strawberries last about 24 hours in the fridge. After this, they may lose their fresh taste and texture. Check them daily for freshness. Signs that strawberries are no longer fresh include: - A soft or mushy texture - A change in color, like dullness - An off smell or any signs of mold If you see any of these signs, it’s best to discard them. Enjoy your treats while they are at their best! You can use a bar of chocolate instead of chips. Simply chop the chocolate into small pieces. Place the pieces in a microwave-safe bowl and follow the same melting steps. Stir often to get a smooth texture. This method works well and gives you great results. Yes, white chocolate is a tasty option. It has a sweet and creamy flavor. Just melt it the same way as semi-sweet chocolate. Keep in mind that white chocolate can be thicker, so you may need to add a bit of coconut oil for a smoother dip. To avoid cracks, let the chocolate cool slightly before dipping. Make sure your strawberries are dry before you dip them. If the chocolate is too hot, it can crack as it cools. Chilling the dipped berries in the fridge also helps the chocolate set evenly. If your chocolate is thick, you can add a little coconut oil or vegetable oil. This will help thin it out. Stir in the oil slowly until you reach your desired consistency. You want it to be smooth and easy to dip. You can create tasty chocolate-covered strawberries with just a few simple steps. Start with fresh strawberries and melt chocolate. Dip and decorate them as you like. Use tips for shining and storage to ensure they last. You can even try fun flavor twists or vegan options. Remember, a little creativity goes a long way. Enjoy making these delicious treats!

Easy Chocolate Covered Strawberries Delightful Treat

Craving a sweet treat that’s simple and delicious? Look no further! Easy chocolate-covered strawberries are the perfect bite-sized delights for

- Greek yogurt and its types: Greek yogurt is thick and creamy. It has more protein than regular yogurt. You can choose full-fat, low-fat, or non-fat. Each type has a unique taste and texture. Full-fat yogurt is rich and creamy. Low-fat yogurt is lighter but still tasty. Non-fat yogurt is the lightest option. It is great for lower calories. - Fruit options for parfaits: Fresh fruits add flavor and color. You can use mixed berries, bananas, apples, or peaches. Berries like strawberries, blueberries, and raspberries are my favorites. They are sweet and juicy. You can also try seasonal fruits for variety. Just make sure the fruit is ripe and fresh. - Granola and sweeteners: Granola adds crunch to your parfait. Choose granola with nuts and seeds for extra flavor. You can find many types in stores. If you want a sweeter taste, honey is a great choice. Maple syrup is another option. Both add a lovely sweetness to your parfait. Check out the Full Recipe for step-by-step details on making this tasty treat! To make the yogurt mixture, take a mixing bowl. Add 2 cups of plain Greek yogurt. Pour in 1/4 cup of honey and 1 teaspoon of vanilla extract. Use a whisk or spoon to mix. Stir until the mixture is smooth and creamy. This step is key. A smooth texture makes your parfaits more enjoyable. When layering your parfait, use clear glasses or bowls. This way, you can see the pretty layers. Start with a generous scoop of the yogurt mixture at the bottom. Then, add a layer of mixed berries. I love using strawberries, blueberries, and raspberries. After the berries, sprinkle a layer of granola. Repeat these layers until the glasses are nearly full. Finish with another scoop of yogurt on top. This method helps balance flavors and textures. For portion control, aim for smaller servings. This helps you enjoy the parfait without overindulging. Presentation is important for your parfaits. You can use fresh mint leaves for garnish. A pinch of cinnamon on top adds a nice touch. Serve these parfaits for breakfast, snacks, or dessert. They work well for both casual meals and fancy gatherings. If you want the flavors to meld, refrigerate them for about 30 minutes before serving. This allows the ingredients to blend beautifully. For the full recipe, refer to the Creamy Berry Bliss Greek Yogurt Parfaits. When picking Greek yogurt, know that brands differ. Some are thicker, while others are creamier. Check labels for added sugars and fillers. I prefer plain yogurt. It has no added flavors and offers the best taste for parfaits. You can choose between full-fat and low-fat options. Full-fat yogurt is rich and creamy. It gives a satisfying feel. Low-fat yogurt is lighter but still tasty. Both work well in recipes. To add more flavor, try spices and extracts. A pinch of cinnamon can make a big difference. Vanilla extract adds warmth and depth. You can also use almond extract for a nutty twist. Incorporating seasonal fruits makes your parfait fun and fresh. Strawberries, blueberries, and peaches are great choices. They add color and natural sweetness. Mix and match fruits for a vibrant look. If you want a dairy-free option, there are many alternative yogurts. Look for coconut or almond-based yogurts. These can provide creamy textures without dairy. For sweeteners, you can substitute honey with maple syrup or agave. Both add a nice sweetness and flavor. You can also use stevia for a low-calorie option. For the full recipe, check out Creamy Berry Bliss Greek Yogurt Parfaits. {{image_2}} You can create fun fruit combinations for your Greek yogurt parfaits. One tasty option is the tropical fruit parfait. This version includes pineapple, mango, and banana. These fruits add bright colors and sweet flavors. They also bring a refreshing taste that brightens your day. Another great choice is the stone fruit parfait. Use peaches, nectarines, or plums for your parfait. These fruits have a juicy bite and a unique flavor. Just slice them up and layer with yogurt and granola. The mix of creamy and fruity makes a delightful treat. If you need gluten-free options, you can easily adapt your parfait. Look for certified gluten-free granola at the store. It gives you the same crunch without the gluten. You can find many brands that make this. You might also enjoy making your own granola. For a simple recipe, mix oats, nuts, seeds, and honey. Bake until golden brown for a warm, crunchy topping. This DIY granola adds a personal touch to your parfait. Adding protein boosts your parfait's health benefits. Consider adding protein powder to the yogurt mix. Just stir in a scoop for extra nutrition. This option is great for breakfast or a post-workout snack. You can also use nut butters to increase protein. Almond or peanut butter blends well with Greek yogurt. Just swirl it in for a rich, nutty flavor. This adds more creaminess while keeping it healthy. Explore these variations to make your parfaits even more exciting! For the full recipe, check out the Creamy Berry Bliss Greek Yogurt Parfaits. To keep your parfaits fresh, store them in an airtight container. If you plan to eat them later, it’s best to store the ingredients separately. This way, the granola stays crunchy. You can store the assembled parfaits in the fridge for up to 2 days. If you keep the yogurt, fruit, and granola separate, they can last longer. Mixed berries can last 3 to 5 days in the fridge. Granola can stay fresh for weeks if sealed well. Enjoy your parfaits within two days for the best taste. After this time, the yogurt can lose its creaminess. The fruit can also get mushy and spoil. Look for signs of spoilage, like a sour smell or off-color yogurt. If the berries look slimy or dark, it’s time to toss them out. Always check for freshness before eating. Keeping these tips in mind ensures your parfaits taste great every time. For detailed steps on making these delicious treats, check out the Full Recipe. Greek yogurt is rich in protein, which helps you feel full. It has live cultures that support gut health. This yogurt also contains calcium, great for strong bones. Plus, it is lower in sugar than regular yogurt. The antioxidants in berries boost your immune system. Yes, you can prep these parfaits in advance! Just layer the yogurt, berries, and granola in jars. Store them in the fridge. They stay fresh for about 24 hours. If you want crunch, add granola just before serving. This keeps it from getting soggy. To cut down on sugar, swap honey for a low-calorie sweetener. Stevia or monk fruit work well. You can also use unsweetened Greek yogurt. It still tastes great with the fruit. Choose berries, which are naturally lower in sugar than other fruits. For the complete recipe, check out the Creamy Berry Bliss Greek Yogurt Parfaits. This article covered how to create tasty Greek yogurt parfaits. We explored ingredients like yogurt, fruits, and granola. You learned step-by-step preparation, layering tips, and serving ideas. I shared advice on choosing yogurt, enhancing flavors, and making dairy-free versions. There are also variations for different tastes and storage tips to keep them fresh. Now, you can make delicious parfaits with ease. Enjoy crafting your own unique blends, and have fun with each layer!

Healthy Greek Yogurt Parfaits Packed with Flavor

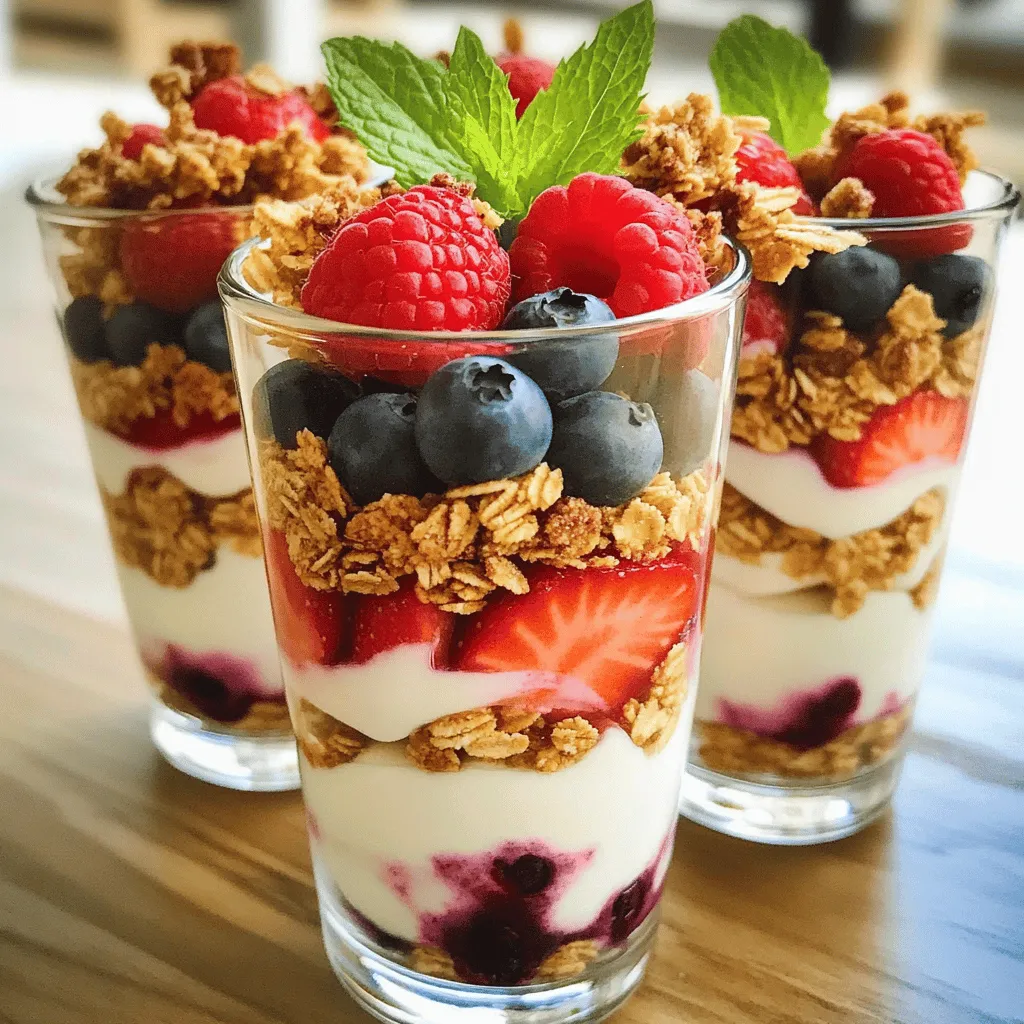
If you’re looking for a tasty and healthy treat, Greek yogurt parfaits are a perfect choice. They are easy to

To make Lemon Herb Chicken Meatballs, you will need: - 1 lb ground chicken - 1/4 cup breadcrumbs - 1/4 cup grated Parmesan cheese - Zest of 1 lemon - 2 tablespoons lemon juice - 2 cloves garlic, minced - 1 teaspoon dried oregano - 1 teaspoon dried basil - 1/2 teaspoon salt - 1/4 teaspoon black pepper - 1/4 cup fresh parsley, finely chopped - 1/4 cup olive oil, for frying These ingredients create a fresh and zesty flavor that shines in every bite. You can switch some items if needed. Here are my top swaps: - Ground chicken can be replaced with ground turkey or pork. Both will work well. - Instead of breadcrumbs, use crushed crackers or oats for a different texture. - If you don’t have Parmesan, try Pecorino or skip it for a dairy-free option. - Fresh herbs can replace dried ones. Use three times the amount for fresh herbs. - If you want more zest, add more lemon juice and lemon zest. These swaps keep the taste fresh while allowing you to use what you have on hand. To ensure your dish tastes great, pick high-quality ingredients: - Choose ground chicken with a little fat for moist meatballs. Look for a bright pink color. - Fresh herbs should look vibrant and green. Avoid any wilted or yellow leaves. - When selecting lemons, pick firm ones with a smooth skin. This means more juice! - Check for dry breadcrumbs that are not stale. Freshness helps with the meatball's texture. Using the best ingredients makes a big difference in flavor and quality. Enjoy your cooking! {{ingredient_image_1}} To make Lemon Herb Chicken Meatballs, gather all your ingredients first. This makes cooking easier. You will need: - 1 lb ground chicken - 1/4 cup breadcrumbs - 1/4 cup grated Parmesan cheese - Zest of 1 lemon - 2 tablespoons lemon juice - 2 cloves garlic, minced - 1 teaspoon dried oregano - 1 teaspoon dried basil - 1/2 teaspoon salt - 1/4 teaspoon black pepper - 1/4 cup fresh parsley, finely chopped - 1/4 cup olive oil, for frying Start by measuring out all your ingredients. This helps keep things organized. It takes about 10 minutes to prep. Now, let's cook! In a large bowl, mix the ground chicken, breadcrumbs, and Parmesan cheese. Add the lemon zest, lemon juice, minced garlic, oregano, basil, salt, pepper, and parsley. Use your hands to mix gently. Don’t overmix, or your meatballs will become tough. Next, heat a large skillet over medium heat. Add the olive oil once the skillet is hot. While the skillet warms, form small meatballs, about 1 inch wide. Carefully place the meatballs in the skillet. Make sure there is space between them. Cook the meatballs for 5 to 6 minutes on each side. They should turn golden brown. When they reach an internal temperature of 165°F (75°C), they are done. To check if your meatballs are cooked right, use a meat thermometer. This ensures safety and taste. After cooking, transfer them to a paper towel-lined plate. This helps drain any extra oil. For a nice presentation, serve them with fresh parsley and lemon wedges. You can also add a side of garlic yogurt sauce or a salad. Enjoy your delicious Lemon Herb Chicken Meatballs! When making lemon herb chicken meatballs, avoid overmixing the ingredients. This can make your meatballs tough. Make sure to form them gently and keep them about one inch wide. Also, ensure the skillet is hot before adding the meatballs. This helps them brown nicely. Don’t overcrowd the pan; cook in batches if you need to. This keeps them juicy and tender. To boost the flavors, use fresh herbs when possible. Fresh parsley adds a bright taste. You can also swap in fresh oregano and basil if you have them. For a zesty kick, try adding a bit more lemon zest. If you like heat, a pinch of red pepper flakes works well. A dash of Worcestershire sauce can also enhance the savory notes. These meatballs shine when served with a side of garlic yogurt sauce. It adds creaminess and a subtle tang. You can also pair them with a fresh green salad. For a heartier meal, serve them over pasta or rice. Garnish with extra parsley and lemon wedges for a colorful touch. This makes your dish look great and taste even better. Pro Tips Don't Overmix: Mixing the meatball mixture too much can lead to tough meatballs. Combine just until everything is evenly incorporated. Chill Before Cooking: For firmer meatballs, refrigerate them for 20-30 minutes before frying. This helps them hold their shape better during cooking. Use a Meat Thermometer: To ensure your meatballs are safely cooked, check that they reach an internal temperature of 165°F (75°C). Experiment with Herbs: Feel free to mix and match herbs according to your taste. Fresh herbs can also be used for enhanced flavor. {{image_2}} You can switch the ground chicken for other meats. Try ground turkey or lean pork. These options still keep the flavors bright. Each meat brings its own taste. Ground beef is another choice, but it may change the texture. Adjust cooking times for different meats. Always aim for an internal temperature of 165°F (75°C). For a veggie twist, use chickpeas or lentils. Mash them up and mix in the same herbs. You can also try store-bought plant-based meat. Look for products that mimic ground meat well. Add some grated zucchini for moisture. This keeps your meatballs tender and tasty. Want to spice things up? Add some red pepper flakes for heat. You can also mix in sun-dried tomatoes for extra flavor. Fresh herbs like dill or cilantro can change the taste, too. A bit of lemon zest brightens the dish. Experiment with different cheeses, like feta or mozzarella. Each tweak can make your meatballs unique. Freezing these meatballs is easy. After cooking, let them cool completely. Place them in a single layer on a baking sheet. Freeze for about 1 hour. Then, transfer them to a freezer-safe bag or container. Label the bag with the date. They will stay fresh for up to three months. To store leftovers, let the meatballs cool. Place them in an airtight container. You can keep them in the fridge for up to four days. Make sure to separate layers with parchment paper. This helps prevent sticking. Reheating meatballs is simple. You can use the oven or microwave. For the oven, preheat to 350°F (175°C). Place meatballs on a baking sheet and heat for about 10-15 minutes. For the microwave, heat on high for 1-2 minutes. Check that they are hot all the way through. Enjoy your tasty leftovers! You can make these meatballs a day before. Mix all the ingredients as usual. Shape the meatballs and place them on a tray. Cover the tray with plastic wrap and put it in the fridge. This helps the flavors blend. When you are ready to cook, simply take them out and fry or bake as desired. Yes, you can bake the meatballs! Preheat your oven to 400°F (200°C). Place the formed meatballs on a baking sheet lined with parchment paper. Bake for about 20-25 minutes. Check their internal temperature; it should reach 165°F (75°C). Baking gives a healthier option without extra oil. These meatballs are very versatile. They go well with a fresh green salad. You could serve them with garlic yogurt sauce for dipping. Pasta with a light lemon sauce is another great option. For a hearty meal, pair them with quinoa or rice. Each option brings out the lemony flavor beautifully. In this post, I covered the key ingredients needed for lemon herb chicken meatballs. I shared ingredient substitutes and tips for choosing fresh items. You learned step-by-step instructions, including how to cook meatballs perfectly. We explored common mistakes and ways to enhance flavors. I also provided storage tips and answered common questions about meal prep. These meatballs can be a tasty dish for any occasion. With practice, you can master them and impress your friends and family. Enjoy your cooking journey!

Lemon Herb Chicken Meatballs Flavorful and Simple Dish

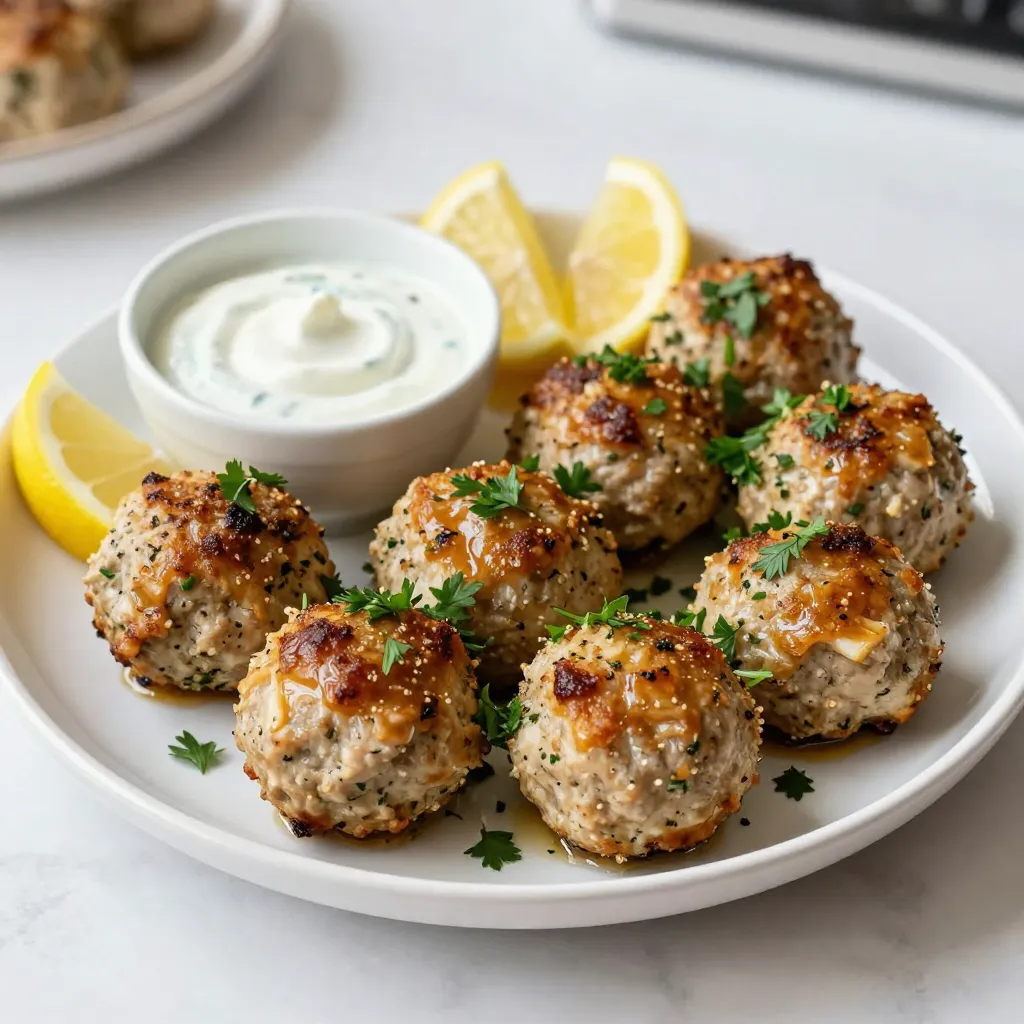
Looking for a tasty and simple meal? You’ll love these Lemon Herb Chicken Meatballs! Bursting with fresh flavors, they’re easy

- 1 ½ cups all-purpose flour - ½ cup granulated sugar - 1 ½ teaspoons baking powder - ½ teaspoon baking soda - ½ teaspoon salt - 1 teaspoon ground cinnamon (plus extra for coating) - ½ teaspoon ground nutmeg - 1 large egg - ½ cup buttermilk (or milk with a splash of vinegar) - ¼ cup unsalted butter, melted - 1 teaspoon vanilla extract These ingredients work together to create soft, fluffy donuts. Each one plays a key role: - All-purpose flour gives the donuts structure. It helps them rise and hold shape. - Granulated sugar adds sweetness. It also helps create a nice crust. - Baking powder and baking soda are leavening agents. They make the donuts light and airy. - Salt enhances flavors. It balances the sweetness. - Ground cinnamon and nutmeg add warmth and spice. They make your donuts taste cozy and comforting. - Egg binds the ingredients. It helps the donuts to rise. - Buttermilk provides moisture. It keeps the donuts tender and adds a slight tang. - Melted butter gives richness. It adds flavor and helps with texture. - Vanilla extract boosts the overall flavor. It adds a nice, sweet note. If you need substitutes, consider these options: - Use whole wheat flour for a healthier version. - Replace granulated sugar with brown sugar for a deeper flavor. - If you don’t have buttermilk, mix regular milk with a splash of vinegar to create a similar effect. - You can swap butter with coconut oil or a vegan butter for a dairy-free treat. Check out the Full Recipe to see how these ingredients turn into delightful baked cinnamon sugar donuts. Preheating the Oven First, set your oven to 350°F (175°C). This is the right heat for soft donuts. Preparing the Donut Pan Grab your donut pan and spray it with non-stick spray. This helps the donuts come out easily. Mixing Dry Ingredients In a large bowl, whisk together the dry ingredients. You’ll need: - 1 ½ cups all-purpose flour - ½ cup granulated sugar - 1 ½ teaspoons baking powder - ½ teaspoon baking soda - ½ teaspoon salt - 1 teaspoon ground cinnamon (plus extra for coating) - ½ teaspoon ground nutmeg Make sure everything blends well. This step makes your donuts light and fluffy. Whisking Wet Ingredients In another bowl, beat one large egg. Add in the buttermilk, melted butter, and vanilla extract. Stir until smooth. Merging Wet and Dry Mixtures Now, pour the wet mix into the dry mix. Gently stir until the ingredients come together. Do not overmix; this keeps your donuts tender. Filling the Donut Pan Grab a piping bag or a zip-top bag with a corner cut off. Fill each donut cavity about ¾ full with batter. This allows room for rising. Optimal Baking Time and Temperature Place your filled pan in the oven. Bake for 10-12 minutes. The donuts should spring back when touched. Checking Doneness To check if they are done, insert a toothpick into a donut. It should come out clean. This means your donuts are ready to enjoy! For the complete recipe, check [Full Recipe]. - Avoid Overmixing: When you mix your batter, do it gently. Overmixing makes donuts tough. Stir until just combined. A few lumps are okay. This keeps your donuts light and airy. - Temperature Tips for Ingredients: Use room temperature ingredients for better mixing. If your butter is too cold, it won’t blend well. Take the egg and buttermilk out early. This helps them blend smoothly into the batter. - Variations on Cinnamon: While cinnamon is the star, you can mix it up. Try using different types of cinnamon, like Ceylon. It has a sweeter taste. This adds a unique twist to your donuts. - Adding Other Spices or Extracts: Feel free to get creative! A pinch of cardamom or allspice can elevate the flavor. You can also add vanilla or almond extract for extra depth. Just a little goes a long way. - Pairing with Coffee or Milk: Baked cinnamon sugar donuts go great with coffee or milk. The warm donuts and cool drinks create a perfect balance. Enjoy them fresh for a cozy treat. - Creative Presentation Ideas: Serve your donuts on a colorful plate or a cake stand. Dust extra cinnamon sugar on top for a beautiful look. You can also add fresh fruit or a drizzle of chocolate for fun. {{image_2}} You can switch up the coating on your donuts for fun. If you want glazed donuts, use a simple glaze made from powdered sugar and milk. Mix about 1 cup of powdered sugar with 2 tablespoons of milk. Stir until smooth. Dip each warm donut into the glaze and let them set on a rack. For more flavors, try adding citrus zest or vanilla to your glaze. You can add cocoa powder to make a chocolate glaze. The options are endless! If you want a healthier donut, consider using whole wheat flour instead of all-purpose flour. This change boosts fiber and gives a nutty taste. You can also try oat flour for a gluten-free option. For sugar, you can use honey or maple syrup. These sweeteners offer a natural flavor. You can also use coconut sugar or stevia for lower-calorie choices. Adjust the liquid in your recipe to keep your batter right. Donuts aren't just for any time of year. You can make seasonal flavors to match the seasons. For fall, add pumpkin spice to your batter. Just add 1 cup of pumpkin puree and 1 teaspoon of pumpkin pie spice to the mix. In winter, try chocolate-covered donuts. Dip your cooled donuts in melted chocolate. Allow them to set before serving. These little twists keep your baking fresh and exciting. For the full recipe, check out the complete guide on making baked cinnamon sugar donuts. For short-term storage, keep your baked cinnamon sugar donuts at room temperature. Place them in an airtight container. They stay fresh for about 2 to 3 days. If you want to store them longer, consider freezing. For long-term storage, wrap each donut in plastic wrap. Then, place them in a freezer bag. This helps keep them tasty for up to 3 months. To reheat your donuts, use the oven. Preheat it to 350°F (175°C). Place the donuts on a baking sheet and warm them for about 5 minutes. This gives them a fresh taste and soft texture. For leftover donuts, you can upgrade them! Try dipping them in melted chocolate or drizzling icing on top. This adds a fun twist and makes them feel special. Baked and fried donuts differ mainly in cooking method. - Health Considerations: Baked donuts use less oil. This makes them lower in calories and fat. They are often seen as a healthier choice. Fried donuts absorb oil, which adds more fat and calories. - Texture Differences: Baked donuts are soft and cake-like. They feel light and airy. Fried donuts are often denser and have a crisp outer layer. This gives them a richer taste. Yes, you can freeze baked donuts. Freezing is a great way to keep them fresh. - Freezing Process: After the donuts cool, place them in a single layer on a baking sheet. Freeze them for about an hour. Once frozen, transfer them to a zip-top bag or container. This keeps them from sticking together. - Thawing Instructions: To thaw, take the donuts out and leave them at room temperature. They will be ready in about 30 minutes. You can also warm them in the oven for a few minutes for a fresh taste. Knowing when donuts are done is easy with the right cues. - Visual Cues: Look for a golden-brown color. The donuts should spring back when gently touched. If they look pale, they need more time. - Testing with a Toothpick: Insert a toothpick into the center of a donut. If it comes out clean or with a few crumbs, the donuts are done. If it comes out wet, give them a few more minutes in the oven. In this post, we covered how to make baked cinnamon sugar donuts, from ingredients to storage. You learned about key ingredients, their functions, and healthy substitutes. We shared step-by-step instructions for perfect donuts, plus tips to enhance texture and flavor. Try out variations for seasonal treats or healthy options as you bake. Store your donuts properly to keep them fresh. Don’t hesitate to experiment with flavors. Enjoy your delicious creations. Happy baking!

Baked Cinnamon Sugar Donuts Simple and Soft Treat

Craving a sweet treat that’s both simple and soft? You’re in the right place! Baked cinnamon sugar donuts are my

- Apples - Nut Butter Options - Sweetener Choices - Toppings and Garnishes To make Healthy Apple Nachos, you need a few simple ingredients. First, choose your apples. I love using crisp varieties like Granny Smith or Honeycrisp. They add a nice crunch and flavor. Next, pick your nut butter. Almond butter works great, but peanut butter is tasty too. Both add protein and creaminess. For sweeteners, you can use honey or maple syrup. They give a touch of sweetness without being too much. Finally, let’s talk toppings. Granola adds crunch, while mini chocolate chips bring a sweet twist. Unsweetened shredded coconut gives a tropical flair. A pinch of cinnamon adds warmth. You can also add fresh berries for color and extra flavor. You can find the full recipe below for more details. Start by washing your apples under cool water. This removes any dirt or wax. Next, dry them with a clean towel. Slice the apples into thin rounds. Aim for about 1/4 inch thick. You can remove the core, but leaving it adds a nice crunch. Once sliced, arrange the apple pieces on a plate. You can place them in a circle or a fun pattern. Make it colorful and inviting for everyone! Grab a small bowl for the drizzle. Add 1/4 cup of almond butter to the bowl. Then, mix in 2 tablespoons of honey or maple syrup. Stir well until it’s smooth. This sweet and creamy mix will be the star of your nachos. You want it to be easy to drizzle over the apples. Now it’s time to layer your toppings! Drizzle the almond butter mix evenly over the apple slices. Each piece needs a little touch of sweetness. Next, sprinkle 1/4 cup of granola on top for that perfect crunch. Then, add 2 tablespoons of mini chocolate chips and 1/4 cup of shredded coconut. For a warm touch, finish with a pinch of cinnamon sprinkled over everything. If you want, add fresh berries on top for color and taste. For the full recipe, check out the details above. Enjoy the fun and tasty experience of healthy apple nachos! To make your apple nachos even better, try adding spices. A dash of nutmeg or ginger can bring warmth. You can also sprinkle chili powder for a fun kick. Mixing toppings can change the taste. Try using dried fruits like raisins or cranberries. You can also switch the chocolate chips for crushed nuts or seeds. This way, you can create your own unique flavor combo. Presentation matters! Arrange your apple slices in a fun pattern. Use a bright plate to make the colors pop. You can serve the apple nachos with a small bowl of almond butter for dipping. Fresh mint leaves on top add color and a nice aroma. For drinks, pair with a light herbal tea or sparkling water. These drinks will balance the sweetness of the nachos. {{image_2}} You can swap apples for other fruits. Pears, bananas, or peaches work great too. Each fruit adds a unique taste. For a seasonal twist, try using berries in summer or citrus fruits in winter. These fruits are sweet and juicy, making them perfect for nachos. I understand some people have dietary needs. For nut-free options, use sunbutter or soy nut butter. Those on a vegan diet can replace honey with maple syrup. If you are gluten-free, choose gluten-free granola. If you want to make it healthier, use ripe bananas or dates instead of sweeteners. These fruits add natural sweetness and flavor. You can still enjoy a tasty treat while sticking to your diet! For the full recipe, check out the Healthy Apple Nachos section above. To store leftover apple nachos, first separate the toppings from the apple slices. This keeps the apples from getting soggy. Place apple slices in an airtight container. Cover the container tightly to keep air out. For toppings, use small bags or containers. Store them in the fridge. To keep the ingredients fresh, try to use them within a day. Apples can brown quickly, so it’s best to eat them soon. You can also add a little lemon juice to the apple slices. This helps them stay bright and fresh for a bit longer. You can keep apple nachos for about one day in the fridge. After this time, the apples may lose texture and taste. Signs of freshness include crispness and bright color. If the apples feel mushy or look brown, it’s time to toss them. For best results, enjoy your apple nachos right after making them. You will get the best flavor and crunch that way. If you want to prepare ahead, keep the toppings separate. This keeps everything fresh and ready for a tasty treat. For more details, check out the Full Recipe for Healthy Apple Nachos. Yes, you can try other nut butters. Peanut butter works well with apples. Cashew butter or sunflower seed butter also makes a great choice. Each nut butter adds its own flavor and texture. If you want a different taste, go for it! To make this recipe vegan, swap honey for maple syrup. Use a plant-based nut butter like almond or peanut. Check that your granola is vegan-friendly too. These small changes keep the dish tasty and vegan. Apple nachos pair well with yogurt or cottage cheese. You can also serve them with a fresh fruit salad. Nuts or seeds on the side add healthy crunch. These options balance the sweetness of the nachos. For a fun twist, try serving with a smoothie! Apple nachos are a fun and tasty snack. You learned about ingredients like apples and nut butter. The steps showed how to prepare and assemble this dish. We shared tips on flavors and serving ideas, plus variations for different tastes and diets. You can store these nachos for later, keeping them fresh and delicious. Try new fruits or nut butters to mix it up. Enjoy making this tasty treat that fits your style and needs!

Healthy Apple Nachos Tasty and Fun Dessert Idea

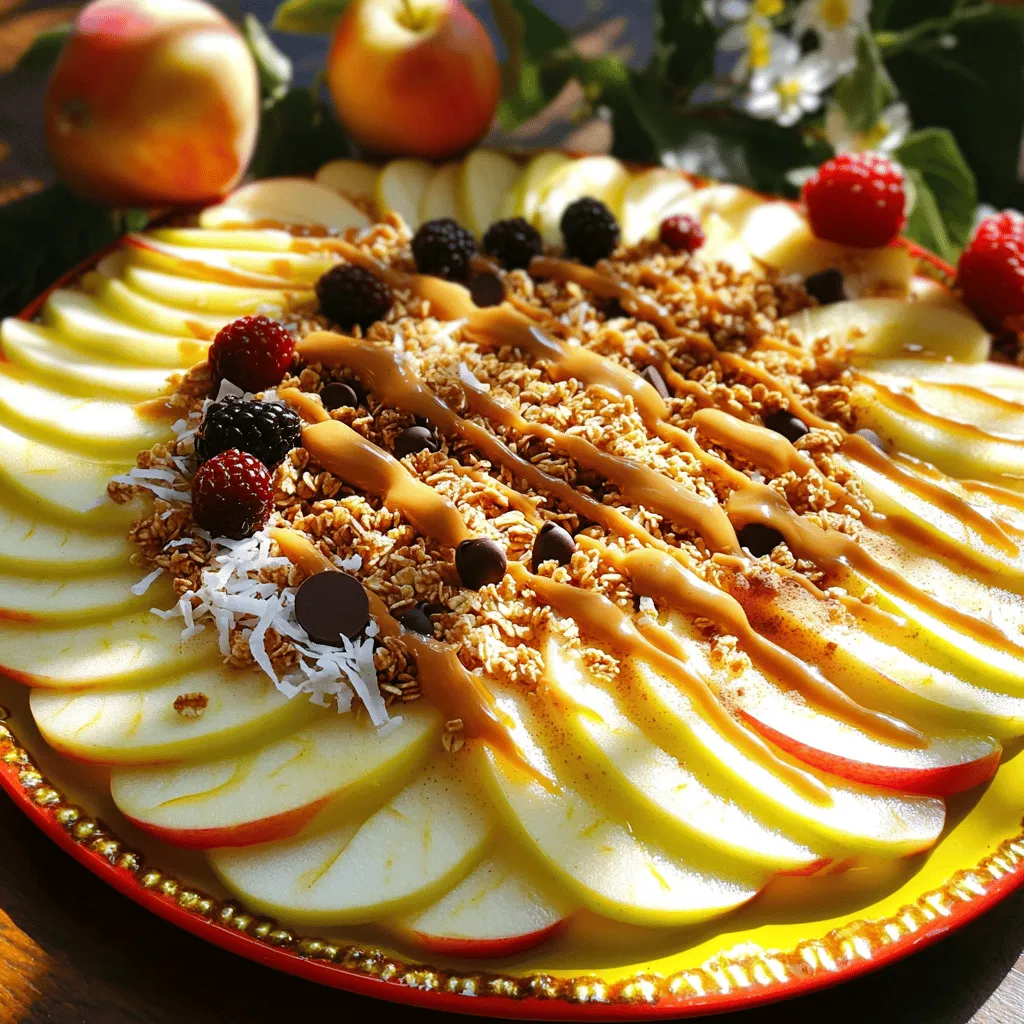
Looking for a fun and healthy dessert? Try making Healthy Apple Nachos! This sweet treat is not only yummy but

Making Greek Lemon Rice Soup is simple and fun. You need fresh, quality ingredients to get the best flavor. Here is the list of ingredients you will need: - 1 cup long-grain rice - 6 cups vegetable or chicken broth - 1 medium onion, finely chopped - 2 cloves garlic, minced - 2 large lemons, juiced and zested - 3 large eggs - 2 tablespoons olive oil - Salt and black pepper to taste - Fresh dill or parsley for garnish Each ingredient plays a key role in the soup. The rice adds heartiness, while the broth brings warmth. Onions and garlic provide a strong base, giving depth to the flavor. Lemons add bright, zesty notes. Eggs make the soup creamy and rich. Olive oil adds a touch of smoothness. Finally, fresh herbs like dill or parsley add a pop of color and freshness. For the Full Recipe, follow the steps carefully to create a delicious bowl of soup. Enjoy the process, and feel free to experiment with the ingredients! 1. First, heat 2 tablespoons of olive oil in a large pot over medium heat. 2. Add 1 medium chopped onion. Sauté it for about 5 minutes until it turns soft and clear. 3. Next, stir in 2 minced garlic cloves and cook for 1 more minute. 4. Now, add 1 cup of long-grain rice to the pot. Stir the rice for about 2 minutes. This helps to toast the rice slightly and enhance its flavor. 1. Pour in 6 cups of vegetable or chicken broth. Bring this mixture to a boil. 2. Once boiling, reduce the heat and let it simmer for 15 to 20 minutes. The rice should be tender at this point. 3. In a separate bowl, whisk together 3 large eggs, the juice of 2 lemons, and the zest from those lemons. This creates a creamy mixture. 4. To prevent the eggs from scrambling, ladle 1 cup of hot broth into the egg mixture while whisking quickly. This is called tempering the eggs. 1. Slowly pour the tempered egg mixture back into the pot of soup while gently stirring. 2. Heat the soup for a couple more minutes. Ensure it’s hot, but do not let it boil. Boiling can curdle the eggs. 3. Finally, season with salt and black pepper to taste. 4. Serve the soup warm, garnished with fresh dill or parsley for a lovely touch of color. For the full recipe, please refer to the Greek Lemon Rice Soup section above. Enjoy your cooking! To make the best Greek Lemon Rice Soup, pick the right rice. Long-grain rice works well. It cooks evenly and stays fluffy. Avoid sticky rice types like jasmine or sushi rice. Next, control the temperature for the egg mixture. This step is crucial. If it’s too hot, the eggs may scramble. Always whisk and add hot broth slowly to the eggs. This helps temper them. You can choose between sautéing and boiling. Sautéing the onion and garlic first adds depth. It gives the soup a richer flavor. After sautéing, you’ll boil the broth with rice to cook it through. Whisking is vital in this recipe. It helps blend the egg mixture smoothly into the hot soup. If you skip this, you may end up with chunks of cooked egg. Pair the soup with fresh bread or a simple salad. A Greek salad works great because it complements the soup's flavors. For a meal, serve it with grilled chicken or fish. This adds protein and makes the meal heartier. Enjoy your delicious and nourishing soup! {{image_2}} You can switch out the rice for other grains. Quinoa or barley work well. They add unique flavors and textures. For those who prefer a protein boost, try shredded chicken or cooked lentils. Both options add heartiness to the soup. When it comes to broth, you have choices. Use vegetable broth for a lighter taste. Chicken broth offers a richer flavor. You can also mix both for a balanced taste. Looking to spice things up? Adding spices like cumin or paprika can change the flavor. Fresh vegetables like carrots or spinach can also enrich the soup. They add more nutrients and color. Herbs can elevate this recipe too. While dill and parsley are classic choices, try thyme or oregano for a new twist. Each herb brings its own unique taste. If you need a gluten-free option, use rice as your only grain. This soup is naturally gluten-free, so you can enjoy it worry-free. For vegan options, replace the eggs with silken tofu. Blend it until smooth before adding it to the soup. You can also skip the chicken broth and use vegetable broth instead. This keeps the soup rich and tasty. For more details, check the Full Recipe. You can store leftovers of Greek Lemon Rice Soup for up to three days. Use airtight containers to keep it fresh. Make sure to let the soup cool before sealing it. This helps avoid steam buildup, which can alter the texture. If you want to freeze the soup, pour it into freezer-safe containers. Leave some space at the top for expansion. It’s best to freeze the soup without the eggs added. When you are ready to eat, thaw it overnight in the fridge. To reheat frozen soup, warm it on low heat in a pot. Stir it gently and add a splash of broth if needed. Once it’s hot, whisk in a few beaten eggs for a creamy finish. Enjoy your comforting bowl of Greek Lemon Rice Soup! For the full recipe, you can refer to the earlier sections. What is Greek Lemon Rice Soup? Greek Lemon Rice Soup is a warm, creamy dish. It features rice, broth, and a tangy lemon flavor. The soup often includes eggs, adding richness. It’s comforting and nourishing, perfect for chilly days or when you need a pick-me-up. How can I adjust the soup for more servings? To make more soup, simply increase the ingredients. Double the rice, broth, and eggs. Keep the same lemon juice for that bright flavor. Adjust seasoning to taste as you go. Why did my eggs scramble in the soup? Scrambled eggs can happen if the soup is too hot when you add them. To avoid this, temper the eggs. Slowly add hot broth to the egg mixture while whisking. This warms the eggs without cooking them too fast. How can I thicken the soup if needed? If your soup is too thin, try one of these tricks. You can add more rice and let it cook a bit longer. Another option is to mix a bit of cornstarch with water and stir it in. Let it simmer until thickened. Can I use brown rice instead? Yes, you can use brown rice. Just remember it takes longer to cook. You may need to add more broth and simmer until tender. This will change the soup's texture but keep it flavorful. What’s a good substitute for lemon juice? If you don't have lemon juice, try using lime juice. It gives a similar tang. You can also use vinegar, like white wine vinegar, but adjust the amount to taste. This blog post showed you how to make Greek Lemon Rice Soup. We covered key ingredients, and step-by-step instructions for a tasty dish. You learned helpful tips and variations to suit your tastes. With proper storage tips, you can enjoy this soup later. Remember, cooking is fun and you can be creative! Now, gather your ingredients and enjoy making this nutritious meal. Happy cooking!

Greek Lemon Rice Soup Flavorful and Nourishing Recipe

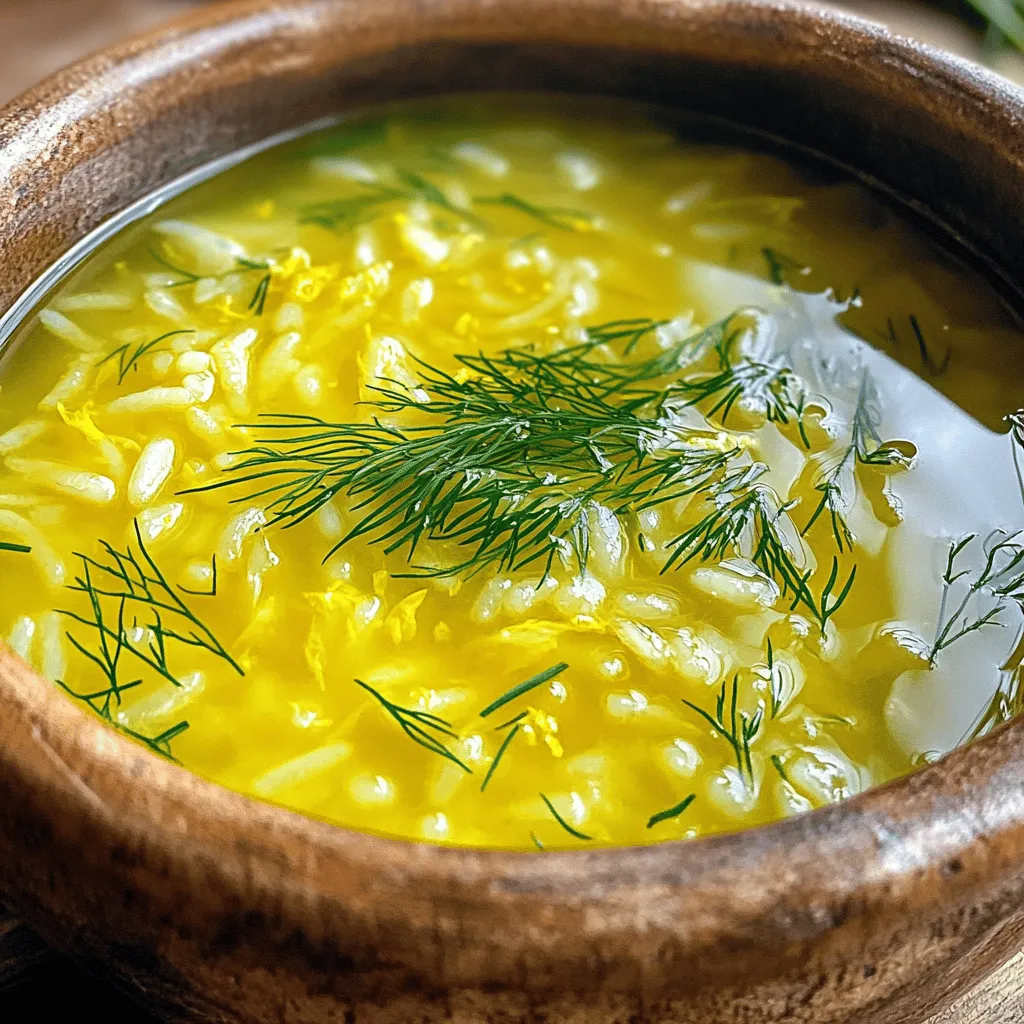
Are you ready to dive into a bowl of warmth and flavor? Greek Lemon Rice Soup, or Avgolemono, is a

Older posts
Newer posts
← Previous Page1 … Page73 Page74 Page75 … Page86 Next →

dsad

© 2026 Cooking Wells • Built with GeneratePress

Our Policies

  • Copyright Policy
  • Cookie Policy
  • GDPR Policy
  • Privacy Policy
  • Disclaimer
  • Terms Of Use

More Information

  • Home
  • About
  • Contact
  • Appetizers
  • Dessert
  • Dinner
  • Drinks
©2026, Cooking Wells About Back To Top