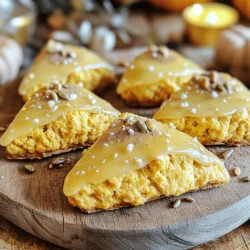
Maple Glazed Pumpkin Scones
Indulge in the fall flavors with these delicious Maple Glazed Pumpkin Scones! Perfectly spiced and easy to make, they’re a delightful treat for any occasion. This simple recipe guides you through creating tender scones topped with a rich maple glaze. Elevate your baking game and enjoy the warm, cozy essence of pumpkin in every bite.