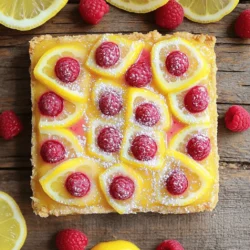
Raspberry Lemonade Bars
Satisfy your sweet tooth with these delightful zesty raspberry lemonade bars! Perfectly combining the refreshing flavors of lemon and fresh raspberries, this easy recipe features a buttery crust and a tangy, fruity filling. Whether you're hosting a summer party or just looking for a tasty snack, these bars are sure to impress.