Skip to content
DisclaimerTerms Of UseGDPR PolicyCookie Policy

Cooking Wells

  • Home
  • Drinks
  • Appetizers
  • Dinner
  • Dessert
  • About
  • Contact
  • Privacy Policy
DisclaimerTerms Of UseGDPR PolicyCookie Policy

NO-ING-IMG

To make Air Fryer Cinnamon Apple Chimichangas, gather these items: - 2 large apples (like Granny Smith or Honeycrisp), peeled, cored, and diced - 1 tablespoon lemon juice - 1 teaspoon ground cinnamon - 2 tablespoons brown sugar - 1 teaspoon vanilla extract - 4 large tortillas (flour or whole wheat) - 1 tablespoon melted butter (for brushing) - Cooking spray - Optional: powdered sugar for dusting If you can’t find fresh apples, you can use canned apples. Drain them well before use. For the tortillas, whole-wheat is good, but you can choose corn tortillas too. If you want a different sweetener, you can swap brown sugar for maple syrup or honey. Just adjust the amount to taste. Choosing the right apples is key. Look for firm apples that are not bruised. Granny Smith apples give a nice tart flavor. Honeycrisp apples add sweetness and crunch. Smell the apples too; they should have a fresh scent. If you can, try to pick local apples. They often taste better and support local farms. Start by gathering your apples. I like to use Granny Smith or Honeycrisp for a sweet-tart flavor. Peel, core, and dice the apples into small pieces. This helps them cook evenly. In a medium bowl, mix the apple pieces with one tablespoon of lemon juice. This keeps the apples fresh and bright. Next, add one teaspoon of ground cinnamon, two tablespoons of brown sugar, and one teaspoon of vanilla extract. Stir well to coat all the apples. The smell will be amazing! Now, let’s make the chimichangas. Lay a tortilla flat on a clean surface. Spoon about 2-3 tablespoons of your apple filling onto one side of the tortilla. Be careful not to overfill it. Fold the sides over the filling, then roll the tortilla tightly from the bottom up. This keeps the filling inside. Repeat this with the rest of the tortillas and apple filling. Before cooking, preheat your air fryer to 375°F (190°C). This step is key for getting a nice crisp. Spray the air fryer basket with cooking spray to prevent sticking. Brush each chimichanga lightly with melted butter. Place them seam side down in the basket. Make sure they don’t touch. This allows hot air to flow around them. Air fry the chimichangas for about 8-10 minutes. Flip them halfway through for even browning. They should come out golden brown and crispy. Let them cool slightly before serving. Enjoy your delightful treat! To get that lovely golden brown color, brush each chimichanga with melted butter. This step is key. The butter helps the chimichangas crisp up nicely in the air fryer. Set your air fryer to 375°F (190°C). Cook them for 8-10 minutes. Flip them halfway through for even cooking. Keep an eye on them. Every air fryer is different, so check a minute or two before the time ends. These chimichangas taste amazing when served warm. You can sprinkle some powdered sugar on top for a sweet touch. Serve with a scoop of vanilla ice cream or whipped cream. The cold cream pairs well with the warm chimichangas. You might also try a drizzle of caramel sauce. It adds a nice, rich flavor that everyone loves. One mistake is overfilling the tortillas. If you add too much filling, they can burst open while cooking. Be sure to use just 2-3 tablespoons of the apple mixture. Another error is not sealing the edges. Make sure to fold and roll tightly. This keeps the filling inside. Lastly, don’t skip the cooking spray! It prevents sticking and helps them crisp up. {{image_2}} You can use many apple types for your chimichangas. Granny Smith apples give a tart taste that pairs well with cinnamon. Honeycrisp apples offer a sweet and crisp bite. You can also try Fuji or Gala apples for a sweeter option. Each type adds its unique flavor, so experiment to find your favorite. Want to add more texture and taste? Toss in some chopped nuts or raisins. Walnuts or pecans add a nice crunch. They also bring a toasted flavor that pairs with the sweet apples. If you like raisins, they can add a chewy texture. Just mix them with your apple filling for a fun twist. If you need a nut-free option, it's easy! Simply leave out any nuts from the filling. You can still enjoy the chimichangas with just apples and spices. If you miss the crunch, consider adding some crushed graham crackers. They can give you that extra texture without any nuts. To keep your leftover chimichangas fresh, place them in an airtight container. This helps prevent them from drying out. You can also wrap each chimichanga in plastic wrap for extra protection. Store them in the fridge if you plan to eat them in the next few days. They will stay good for about 3 to 4 days. When you are ready to enjoy your leftover chimichangas, reheating them carefully is key. I like to use the air fryer for this. Set the air fryer to 350°F (175°C). Heat the chimichangas for about 3 to 5 minutes. This will make them crispy again. You can also use an oven. Preheat it to 350°F (175°C) and bake for about 10 minutes. Both methods keep the crunch while warming them up. If you want to save chimichangas for later, freezing is a great option. First, let them cool completely. Then, wrap each chimichanga in plastic wrap. After that, place them in a freezer-safe bag or container. Make sure to remove as much air as possible. They can last in the freezer for up to 3 months. When you're ready to eat, just reheat them straight from the freezer in the air fryer or oven. This way, you can enjoy this tasty treat anytime! Yes, you can use corn tortillas. They give a different taste and texture. Corn tortillas are thinner, so be careful when rolling them. Use fresh corn tortillas for the best results. They will still hold the apple filling well. Just remember to adjust the cooking time if needed. If your chimichangas are soggy, try a few tricks. First, check how much filling you used. Too much filling can make them soggy. Next, make sure to air fry them long enough. They need to be golden brown and crispy. You can also try lowering the heat and cooking them longer. This helps get rid of excess moisture. Cooking frozen chimichangas takes about 12-15 minutes in the air fryer. Set the temperature to 375°F (190°C). Flip them halfway through for even cooking. Check them for a golden color before serving. If they need more time, add a few extra minutes until crispy. Making air fryer cinnamon apple chimichangas is fun and easy. You learned about the right ingredients, how to prep the filling, and tips for crispiness. I shared common mistakes and ways to avoid them. You can switch ingredients for variety and store leftovers right. Enjoy experimenting with flavors and perfecting your technique. With these steps, you’ll impress family and friends with tasty treats. Now, you can make the best chimichangas and wow everyone at your next gathering!

Air Fryer Cinnamon Apple Chimichangas Crispy Treat

Are you ready to enjoy a delightful treat that’s both crispy and sweet? Air Fryer Cinnamon Apple Chimichangas are about

Here are the ingredients you need for your Instant Pot spicy beef ramen: - 1 lb beef chuck, cut into bite-sized pieces - 4 cups beef broth - 2 tablespoons soy sauce - 1 tablespoon sriracha (adjust to taste) - 1 teaspoon ginger paste - 3 cloves garlic, minced - 2 teaspoons sesame oil - 2 cups ramen noodles - 1 cup bok choy, chopped - 1 carrot, julienned - 2 green onions, sliced - 1 tablespoon sesame seeds (for garnish) - Salt and pepper to taste You might not have everything on hand. Here are some swaps: - Beef chuck: Use flank steak or sirloin instead. - Beef broth: Chicken broth works well too. - Soy sauce: Tamari is a gluten-free option. - Sriracha: Try chili paste or hot sauce for heat. - Bok choy: Spinach or kale can replace bok choy. - Ramen noodles: Substitute with udon or rice noodles. This dish is not only tasty but also has some good nutrition. Here’s a breakdown per serving: - Calories: 450 - Protein: 30g - Carbohydrates: 50g - Fat: 15g - Fiber: 2g Enjoy this meal knowing it’s packed with flavors and nutrients! 1. Sauté the Beef: Start by setting your Instant Pot to the sauté mode. Add the sesame oil and let it heat. Then, add the beef pieces. Sear them until they are brown on all sides. This takes about 5 to 7 minutes. Once done, remove the beef and set it aside. 2. Sauté Aromatics: In the same pot, toss in the minced garlic, ginger paste, and sriracha. Sauté these for about 1 to 2 minutes. This step helps release the strong flavors. 3. Add Liquids: Now, pour in the beef broth and soy sauce. Stir well to mix everything. Bring the mixture to a simmer. Don’t forget to scrape any tasty brown bits from the bottom of the pot. 4. Pressure Cook: Return the seared beef to the pot. Close the lid and set the valve to sealing. Cook on high pressure for 30 minutes. 5. Release Pressure: After cooking, let the pot release pressure naturally for 10 minutes. Then, do a quick release for the rest of the pressure. 6. Cook Noodles: Stir in the ramen noodles, bok choy, and julienned carrots. Switch the Instant Pot back to sauté mode. Cook until the noodles are tender, about 3 to 5 minutes. 7. Adjust Seasoning: Taste your ramen. You can add salt, pepper, or more sriracha based on your preference. 8. Serve: Finally, ladle the ramen into bowls. Garnish with sliced green onions and sesame seeds for a nice touch. Sautéing is key to building flavor. When you sear the beef, it forms a crust. This crust adds depth to your broth. Make sure not to overcrowd the pot. If you do, the meat will steam instead of sear. Always let it brown well for the best taste. - Don't Skip the Sauté Step: This step enhances the flavor. - Check the Sealing Valve: Ensure it is set to sealing before pressure cooking. This prevents steam from escaping. - Natural Release is Important: Letting the pot release pressure naturally gives the beef time to stay tender. - Use the Right Amount of Liquid: Too much or too little liquid can affect cooking times. Stick to the recipe measurements for best results. To make your Instant Pot spicy beef ramen shine, focus on layering flavors. Start by searing the beef well. This gives a deep, rich taste. Use fresh garlic and ginger for the best aroma. Adjust sriracha to fit your spice level. If you want more heat, add extra! Don't forget to taste as you go. This step helps you find the right balance of salt and spice. A few common mistakes can ruin your ramen. First, don’t skip the searing step. This adds flavor to your broth. Also, avoid overcooking the noodles. They should be tender but not mushy. Remember to release pressure naturally for a better texture. Lastly, always taste before serving. Adjust seasoning to your liking, as flavors can change during cooking. When using the Instant Pot, follow these best practices. Ensure you have enough liquid to create steam. For this recipe, use beef broth and soy sauce. Don’t fill the pot too much; leave space for expansion. Always check the sealing valve is in the right position. Once cooking is done, let the pot cool down a bit. This helps keep your beef tender and juicy. {{image_2}} You can swap beef for other proteins in this ramen. Chicken thighs work well. Just cut them into small pieces. Cook them the same way as beef. Pork also makes a great choice. Use pork shoulder for juicy bites. Firm tofu is a great option for a vegetarian meal. It absorbs flavors well. Remember, adjust cooking times for different meats to ensure they are tender. Making this ramen vegan is easy. Replace beef with tofu or jackfruit. Use vegetable broth instead of beef broth. For the sriracha, check if it’s vegan. You can also add more veggies. Mushrooms add great flavor and texture. Try adding bell peppers or zucchini for more color. You’ll still enjoy all the deliciousness without any meat. Adjusting spice is simple and fun. If you love heat, add more sriracha. Start with one tablespoon and taste as you go. For less heat, cut the sriracha to half a tablespoon. You can also omit it completely. Add chili flakes or hot sauce for a different heat profile. Always taste your broth before serving to find your perfect spice level. After enjoying your Instant Pot spicy beef ramen, let it cool first. Place the ramen in an airtight container. Store it in the fridge for up to three days. Make sure to keep the broth and noodles together to maintain flavor. If you separate them, the noodles may get mushy. To reheat, pour the ramen into a pot. Heat it over medium heat until warm. Stir it often to avoid sticking. You can also use the microwave. Transfer the ramen to a microwave-safe bowl. Cover it loosely and heat for 1 to 2 minutes. Stir halfway through to ensure even heating. If you want to freeze ramen, do it right after cooking. Let it cool completely, then pack it in freezer-safe bags. Remove as much air as you can. This helps prevent freezer burn. You can freeze it for up to three months. When you are ready to eat, thaw it overnight in the fridge. Cooking beef ramen in an Instant Pot takes about 1 hour. This includes 10 minutes for prep and 30 minutes for pressure cooking. You also need to allow some time for the pressure to release. The flavors develop well during this time. Yes, you can use other noodles! Though ramen noodles work best, you can try udon or rice noodles. Just remember that cooking times may change. Always check the package for the right cooking times. Adjust the cooking in the Instant Pot as needed. You can add many toppings to make your ramen special. Here are some ideas: - Soft-boiled eggs - Sliced mushrooms - Fresh cilantro - Chili flakes for more heat - Nori (seaweed) strips These toppings add color and flavor to your dish. Feel free to mix and match based on your taste! To sum up, this post covers all you need for a yummy beef ramen dish. We shared ingredients, cooking steps, and tips for the Instant Pot. You learned about variations like proteins and vegan choices. We also talked about storing leftovers and reheating. In conclusion, with this guide, you can cook ramen like a pro. Enjoy experimenting with flavors and options! Your kitchen adventures start now.

Instant Pot Spicy Beef Ramen Easy and Flavorful Meal

Are you ready to spice up your dinner routine? This Instant Pot Spicy Beef Ramen is not just quick—it’s packed

To make this dip, you need a few key ingredients. These are: - 8 oz cream cheese, softened - 1 cup pumpkin puree - 1/2 cup powdered sugar - 1 teaspoon vanilla extract - 1 teaspoon ground cinnamon - 1/2 teaspoon ground nutmeg - 1/4 teaspoon salt - 1/2 cup caramel sauce, plus extra for drizzling These ingredients blend well to create a creamy, sweet dip with the perfect fall flavor. For the best dipping experience, I suggest using: - Graham crackers - Apple slices - Pretzels These items add crunch and flavor. The sweet dip pairs well with each option. You can change some ingredients to suit your taste. Here are some ideas: - Swap cream cheese for Greek yogurt for a lighter dip. - Use maple syrup instead of powdered sugar for a different sweetener. - Add more spices like ginger or cloves for extra warmth. These alternatives help you make the dip your own while still tasting great. First, grab a large mixing bowl. You will need 8 ounces of softened cream cheese. Using an electric mixer, beat the cream cheese. Mix until it becomes smooth and creamy. This step is key to a silky dip. Next, add 1 cup of pumpkin puree to the bowl. Then, mix in 1/2 cup of powdered sugar. Add 1 teaspoon of vanilla extract for sweet flavor. Sprinkle in 1 teaspoon of ground cinnamon, 1/2 teaspoon of ground nutmeg, and 1/4 teaspoon of salt. Mix everything together until it’s fully combined. The colors should blend into a warm orange hue. Now, gently fold in 1/2 cup of caramel sauce. Be careful not to overmix. You want to see swirls of caramel in the dip. Once mixed, transfer your dip to a serving bowl. Drizzle extra caramel sauce on top for a lovely finish. Serve this creamy dip with graham crackers, apple slices, or pretzels. Enjoy the flavors of fall! To get a smooth and creamy dip, start with softened cream cheese. This makes mixing easier. Use an electric mixer to beat the cream cheese until it is silky. Next, add pumpkin puree, powdered sugar, vanilla, cinnamon, nutmeg, and salt. Mix until combined. Avoid over-mixing, as it can make the dip too airy. Gently fold in the caramel sauce for a nice swirl. This keeps the texture rich and dense. Presentation matters when serving your dip. Use a beautiful bowl to hold the dip. Drizzle extra caramel sauce on top for a nice look. Surround the dip with graham crackers, apple slices, or pretzels. This gives guests fun options for dipping. You can also use small cups for each dipping item. This makes it easy for everyone to enjoy. Add a sprinkle of cinnamon or some chopped nuts on top for extra charm. You can make this dip ahead of time. Prepare it a day before your event. Store it in an airtight container in the fridge. This helps the flavors blend together more. When ready to serve, take it out and let it sit for a few minutes. This brings it back to room temperature. Drizzle more caramel sauce just before serving for that fresh touch. This way, your dip stays creamy and delicious! {{image_2}} You can spice up this dip with fun flavors. Try adding a pinch of ginger. It gives a nice kick. You might also mix in a bit of clove. This will make your dip taste warm and cozy. If you want more texture, fold in some chopped pecans or walnuts. They add a crunch that makes it more exciting. Looking for ways to make this dip healthier? You can use Greek yogurt instead of cream cheese. It will still be creamy but with less fat. Swap out the powdered sugar for honey or maple syrup. This change adds natural sweetness. You can also use light caramel sauce. It cuts down on sugar without losing flavor. Seasonal toppings can make your dip stand out. Try adding crushed candy corn for a sweet crunch. You can also sprinkle some toasted pumpkin seeds on top. They add flavor and a nice look. If you want a fresh twist, add apple slices or pomegranate seeds. They bring a burst of color and flavor that everyone will love. Store any leftover dip in an airtight container. Make sure to seal it well. This keeps the dip fresh and tasty. You can place it in the fridge for up to five days. Always check for any changes in smell or texture before using. You can freeze this dip if you want to save some for later. Use a freezer-safe container to prevent freezer burn. When you want to eat it, move it to the fridge to thaw overnight. Avoid microwaving it directly from the freezer. This can change the texture. To keep your dip fresh, cover it tightly with plastic wrap. This helps prevent air from getting in. If you plan to serve it later, add the caramel drizzle just before serving. This keeps the dip looking nice and prevents it from getting too soggy. Yes, you can use fresh pumpkin. First, cook the pumpkin until soft. Then, scoop out the flesh and mash it well. Make sure to remove any strings or lumps. You want a smooth texture for your dip. Fresh pumpkin adds a nice flavor but may require more work than canned puree. You can keep the dip in the fridge for up to five days. Store it in an airtight container to keep it fresh. Always check for any changes in smell or texture before serving. If it looks or smells off, it's better to toss it out. You have many fun options for dipping! Try apple slices for a fresh crunch. Pretzels add a salty twist that pairs well with sweetness. You can also use cinnamon sugar pita chips for a tasty treat. Choose what you like best! This blog post shared a simple way to make Caramel Pumpkin Cheesecake Dip. We covered key ingredients, step-by-step instructions, and tips for the best taste. You can customize your dip with healthy swaps or seasonal touches. Storing leftovers properly keeps it fresh for later. Remember, using fresh pumpkin is a great option, and many foods work for dipping. Enjoy creating this treat, and let your creativity shine!

Caramel Pumpkin Cheesecake Dip Creamy Fall Delight

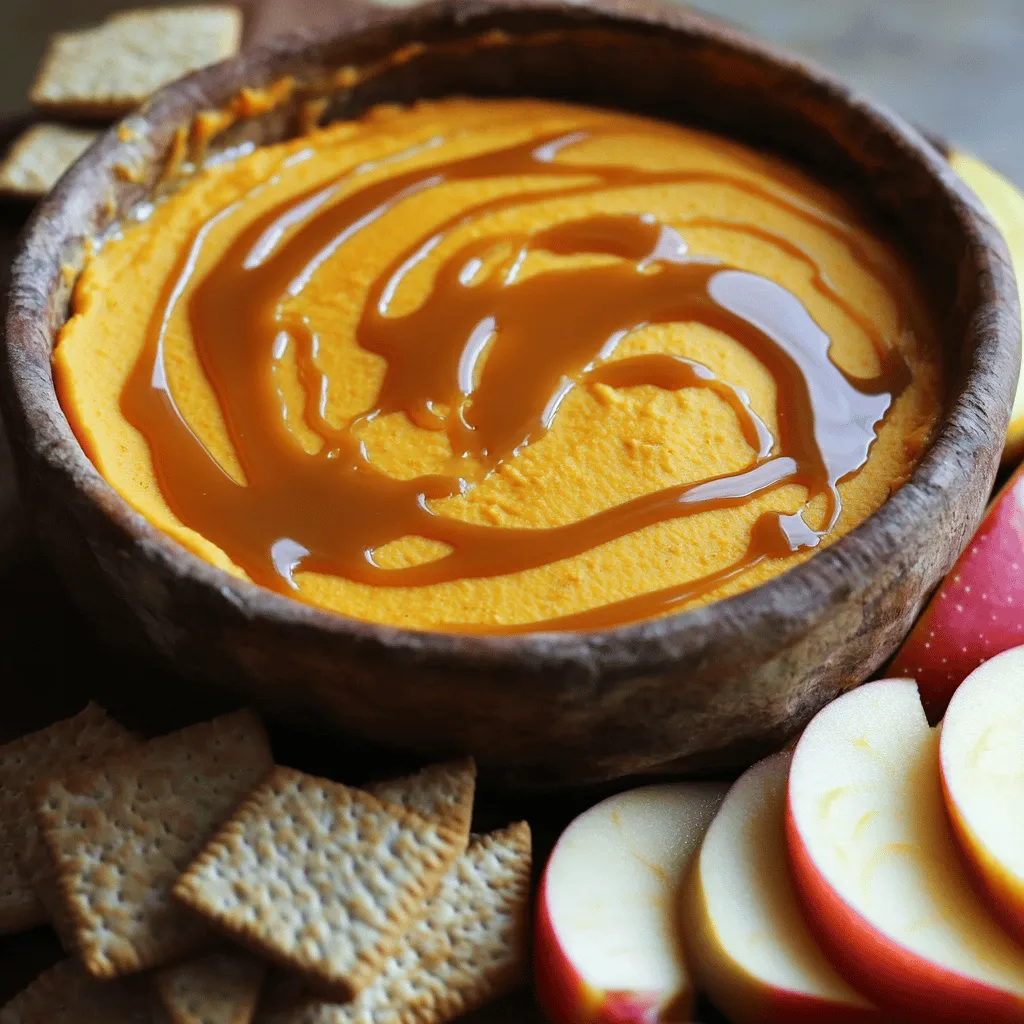
Are you ready to savor the flavors of fall? This Caramel Pumpkin Cheesecake Dip is a creamy delight that will

- 1 pound large shrimp, peeled and deveined - 2 bell peppers (any color), sliced into strips - 1 red onion, sliced into wedges - 2 cups broccoli florets - 3 tablespoons sweet chili sauce - 2 tablespoons olive oil - Juice and zest of 2 limes - 2 cloves garlic, minced - Salt and pepper to taste - Fresh cilantro, for garnish - Lime wedges, for serving Gather these fresh ingredients to make your Sweet Chili Lime Shrimp Sheet Pan. The shrimp add a nice protein base, while the peppers, onion, and broccoli bring color and crunch. The sweet chili sauce gives a lovely glaze that makes everything taste great. You can use any color bell pepper. Each adds its own twist. The lime juice and zest brighten the dish, making it fresh and zesty. Garlic adds depth to the flavor. For garnish, fresh cilantro adds a nice touch. Lime wedges on the side give a burst of flavor when squeezed over the dish. Enjoy the vibrant look and taste, and serve it hot! 1. Preheat your oven to 400°F (200°C). This step helps the shrimp cook just right. 2. Line a large sheet pan with parchment paper. This makes cleanup easy and quick. 3. In a large bowl, combine 1 pound of peeled shrimp, sliced bell peppers, red onion wedges, and broccoli florets. Mix them gently so they blend well. 1. In a small bowl, whisk together 3 tablespoons of sweet chili sauce, 2 tablespoons of olive oil, the juice and zest of 2 limes, and 2 minced garlic cloves. 2. Add salt and pepper to taste. Whisk until everything mixes well. 1. Pour the sweet chili lime sauce over the shrimp and veggies. Toss everything together until each piece gets coated in the sauce. 2. Spread the shrimp and vegetable mix evenly on the prepared sheet pan. Make sure they lie flat for even cooking. 3. Bake in the preheated oven for 12-15 minutes. Check the shrimp when they turn pink and opaque. The veggies should be tender-crisp. To get great results, lay the shrimp and veggies in a single layer. This helps everything cook evenly. If you stack them, some might cook too much while others stay raw. Check the shrimp for doneness after baking for about 12 minutes. The shrimp should turn pink and opaque. If they still look gray or see-through, give them more time. You can serve the sheet pan right on the table for a fun, casual meal. It looks great and saves you from extra dishes. If you want a fancier touch, transfer it to a large platter. Add lime wedges and fresh cilantro to brighten the dish. Arrange them around the shrimp and veggies for a vibrant look. This makes the meal more inviting and colorful. Want to boost the flavor? Try adding a pinch of red pepper flakes for heat. You can also mix in herbs like parsley or basil for a fresh twist. A squeeze of extra lime juice right before serving can enhance the zing. Don’t be afraid to experiment with your favorite spices or herbs! {{image_2}} You can change up the veggies in this dish. Try adding snap peas or carrots for extra crunch. Zucchini and asparagus work well too. Keep in mind the season. In summer, use fresh corn or cherry tomatoes. In fall, butternut squash adds sweetness. The key is to choose veggies that roast well and match your taste. If you prefer not to use shrimp, there are great options. Chicken breast works well; just cut it into bite-sized pieces. Tofu is another tasty choice, perfect for a plant-based meal. Press the tofu first to remove water, then cube it. This will help it soak up the sauce. You can make your own sweet chili sauce if you want. Blend honey, rice vinegar, and a touch of sriracha for heat. If you like it spicy, add more chili. For a milder taste, reduce the sriracha. Remember, adjust the sauce to fit your flavor needs. To store leftovers, let the dish cool first. Place the shrimp and veggies in an airtight container. You can keep it in the fridge for up to three days. Make sure to use a container that fits well. This helps keep the food fresh. When you want to reheat, there are a few good methods. The best way is to use the oven. Preheat it to 350°F (175°C). Place the shrimp and veggies on a sheet pan. Heat for about 10 minutes. You can also use a microwave. Just put it on a microwave-safe plate. Heat in short bursts to avoid overcooking. If you want to freeze the dish, it’s easy! Let it cool completely. Then, place it in a freezer-safe bag or container. Remove as much air as you can. The dish can stay frozen for up to three months. When you are ready to eat, thaw it in the fridge overnight. Then reheat as described above. Yes, you can use frozen shrimp. First, you need to thaw them. Place the shrimp in a bowl of cold water for about 15-20 minutes. This method is quick and easy. Once thawed, drain the shrimp and pat them dry. This helps the shrimp absorb the flavors better. This recipe is quick to make. It takes about 10 minutes to prep. The total cooking time is around 15 minutes. So, you can enjoy a delicious meal in just 25 minutes. This shrimp dish pairs well with several sides. Here are some great options: - Steamed rice for a filling base. - Quinoa for a healthy twist. - A fresh green salad to add crunch. - Garlic bread for a tasty side. These choices complement the sweet and spicy flavors of the shrimp. Enjoy mixing and matching! In this blog post, we explored a tasty sweet chili lime shrimp recipe. We covered key ingredients like shrimp, colorful vegetables, and a zesty sauce. You learned easy preparation steps and helpful cooking tips. I offered fun variations and storage advice, too. This dish is quick, bright, and perfect for any meal. Make it your own with your favorite veggies. Enjoy every bite!

Sweet Chili Lime Shrimp Sheet Pan Delight

Ready to spice up your weeknight meals? My Sweet Chili Lime Shrimp Sheet Pan Delight is the perfect dish to

- 2 cups fresh baby spinach, chopped - 1 teaspoon garlic powder - 1 teaspoon onion powder - 1 cup ricotta cheese - 1 cup mozzarella cheese, shredded - 1/2 cup cream cheese, softened - 1 batch pretzel dough (store-bought or homemade) - 1/4 cup baking soda (for boiling) - Coarse sea salt, for sprinkling - 1 egg, beaten (for egg wash) - 1/2 teaspoon salt - 1/4 teaspoon black pepper When making cheesy spinach stuffed pretzel rolls, fresh ingredients are key. The spinach brings a bright taste, while the cheeses add richness. Garlic and onion powder give a nice kick. For the dough, you can choose store-bought or make your own. Either way, it should be soft and easy to work with. The baking soda is essential for that classic pretzel flavor and texture. The coarse sea salt is a must for sprinkling on top. It enhances the taste and adds crunch. The egg wash gives the rolls a nice golden color. Each ingredient plays a part in making these rolls a delicious treat! Start by preheating your oven to 425°F (220°C). This heat helps the rolls bake perfectly. While the oven heats, line a baking sheet with parchment paper. This ensures the rolls do not stick. In a large mixing bowl, add the following ingredients: - 2 cups fresh baby spinach, chopped - 1 cup ricotta cheese - 1 cup mozzarella cheese, shredded - 1/2 cup cream cheese, softened - 1 teaspoon garlic powder - 1 teaspoon onion powder - 1/2 teaspoon salt - 1/4 teaspoon black pepper Mix them well until they combine into a creamy filling. Set this aside for later. Next, it’s time for the pretzel dough. If you use store-bought dough, follow the package's instructions. If you want to make it from scratch, do so and let it rise as your recipe states. Divide the pretzel dough into equal pieces. Aim for about 10-12 pieces. Flatten each piece into a small disk. Place about 1 tablespoon of the spinach mixture in the center. Fold the sides over the filling and pinch to seal. You want each roll to be neat and tight. In a large pot, bring about 4 cups of water to a boil. Add 1/4 cup of baking soda to this water. Carefully drop in a few rolls at a time. Boil each roll for about 30 seconds on each side. This step gives the rolls their unique pretzel flavor. Then, use a slotted spoon to remove them and place them on the baking sheet. Brush the tops of the boiled rolls with a beaten egg. Sprinkle coarse sea salt on top for an extra crunch. Bake the rolls for 12-15 minutes or until they turn golden brown. Once done, let them cool for a few minutes. Enjoy the rolls warm for the best cheesy experience! To keep the cheesy goodness inside, sealing is key. After placing the filling, fold the dough over and pinch the edges tightly. Make sure no filling escapes. You can also twist the ends for extra security. This step helps prevent leaks during boiling and baking. Practice makes perfect, so don't worry if your first few rolls aren't perfect. Boiling the dough creates that classic pretzel texture. Use a large pot with enough water. Add 1/4 cup of baking soda to the boiling water. This gives the rolls color and flavor. Drop in a few rolls at a time. Boil each side for about 30 seconds. Use a slotted spoon to remove them. Let excess water drip off before placing them on the baking sheet. The right bake time is crucial for that golden-brown look. Bake your rolls in a preheated oven at 425°F for 12-15 minutes. Keep an eye on them to avoid burning. If they look too pale, give them another minute. The egg wash adds shine, so don’t skip it. A sprinkle of coarse sea salt on top boosts flavor and gives a nice crunch. Enjoy the sight of your delicious rolls! {{image_2}} You can switch up the cheese in these pretzel rolls. Try using feta for a tangy kick. Gouda melts beautifully and adds a smoky touch. You can also mix in cheddar for a sharp flavor. Just remember to keep the texture in mind. Blend cheeses to create a creamy filling that melts well. Experiment with different combinations for fun and tasty results. Adding more veggies can enhance your rolls. Consider mixing in chopped artichokes for a unique taste. Sun-dried tomatoes can add a burst of flavor. You can also include bell peppers for crunch. Just make sure to chop any added veggies finely. This will help them blend seamlessly into the cheesy filling. Feel free to get creative and use what you have on hand! To make these rolls gluten-free, use a gluten-free pretzel dough. Many brands offer good options at stores. For a vegan twist, replace dairy cheese with vegan cheese. You can also use silken tofu instead of cream cheese. Adjust the seasonings to enhance flavors. These swaps make the rolls friendly for different diets. Enjoy your cheesy spinach stuffed pretzel rolls in a way that suits you! To keep your leftover cheesy spinach stuffed pretzel rolls fresh, place them in an airtight container. Make sure to let the rolls cool completely before sealing. You can store them at room temperature for up to two days. If you want to keep them longer, consider refrigerating them. They can last in the fridge for about a week. Reheating these rolls is simple. Preheat your oven to 350°F (175°C). Place the rolls on a baking sheet and cover them loosely with foil. Heat for about 10-15 minutes, or until warm. This method keeps the rolls soft and helps revive the cheesy goodness inside. If you want a crispier texture, remove the foil during the last few minutes. If you want to freeze these rolls, follow these steps. First, let them cool completely. Then, wrap each roll in plastic wrap, followed by aluminum foil. This helps prevent freezer burn. You can freeze them for up to three months. When ready to enjoy, thaw them in the fridge overnight and reheat as described earlier. This way, you can savor the cheesy goodness anytime! Yes, you can! Store-bought pretzel dough saves time. Just follow the package instructions for the best results. It’s a great way to enjoy these rolls without the hassle of making dough from scratch. To add some heat, mix in red pepper flakes or diced jalapeños into the spinach filling. You can also use spicy cheese, like pepper jack. This gives each bite a nice kick that balances well with the creamy filling. These rolls taste great with various dips. Here are some ideas: - Cheese sauce: A classic choice. - Spicy mustard: Adds a nice zing. - Ranch dressing: Creamy and cool. - Marinara sauce: Perfect for a twist. Look for a golden-brown color on the outside. The rolls should feel firm and not doughy when you tap them. If you use a thermometer, they should hit about 200°F (93°C) inside. Yes, you can! Prepare the rolls and freeze them before baking. When you're ready to eat, bake them straight from the freezer, adding a few extra minutes to the baking time. This way, you’ll always have a warm treat ready to enjoy! You learned how to make cheesy spinach-stuffed pretzel rolls. We covered ingredients and step-by-step instructions. You saw tips for perfect rolls and tasty variations. Finally, I shared how to store and reheat your rolls. These treats are fun to make and taste great. Enjoy your homemade pretzel rolls with family and friends!

Cheesy Spinach Stuffed Pretzel Rolls for a Tasty Treat

Are you ready to take your snack game to the next level? These Cheesy Spinach Stuffed Pretzel Rolls combine gooey

To make Lemon Garlic Chickpea Pasta, gather these key ingredients: - 8 oz whole wheat pasta (spaghetti or linguine) - 1 can (15 oz) chickpeas, rinsed and drained - 4 cloves garlic, minced - 1 lemon (juice and zest) - 3 tablespoons olive oil - 1 teaspoon red pepper flakes (adjust to taste) - Salt and pepper, to taste - Fresh parsley, chopped (for garnish) Each ingredient adds its own flavor and nutrition. Whole wheat pasta gives you fiber. Chickpeas bring protein and heartiness. Garlic adds a sharp taste, while lemon brightens the dish. You can elevate your dish with these optional ingredients: - Grated Parmesan cheese This cheese adds a creamy, salty touch. You can also serve with a lemon wedge for extra zest. Fresh herbs like basil or thyme can enhance the flavor too. If you need substitutes, here are some ideas: - Use gluten-free pasta instead of whole wheat. - Swap chickpeas for white beans if desired. - Try shallots or leeks instead of garlic for a different taste. - Use lemon juice from a bottle if fresh lemon is not available. These swaps can help fit your dietary needs or what you have on hand. Remember, cooking is all about creativity! First, bring a large pot of salted water to a boil. Add 8 ounces of whole wheat pasta. You can use spaghetti or linguine. Cook the pasta according to the package instructions until it is al dente. This should take about 8 to 10 minutes. After cooking, reserve ½ cup of the pasta water. Then, drain the pasta and set it aside. Next, heat 3 tablespoons of olive oil in a large skillet over medium heat. Once the oil is hot, add 4 minced garlic cloves and 1 teaspoon of red pepper flakes. Sauté them for about 1 minute. You want the garlic to smell great but not burn. Burning garlic will ruin the dish's flavor. After that, add 1 can of rinsed and drained chickpeas. Sauté them for another 2 to 3 minutes. This warms them up and lets them soak in the garlic oil. Now it’s time to combine everything. Toss the drained pasta into the skillet with the chickpeas and garlic. Mix them well to combine. Then, add the juice and zest of 1 lemon. Pour in the reserved pasta water too. Toss everything together again. Let it cook for an additional 1 to 2 minutes. This allows the sauce to coat the pasta. Season it with salt and pepper to taste. To serve, remove the skillet from heat. Garnish with chopped fresh parsley. If you like, sprinkle some grated Parmesan cheese on top. For a fun touch, serve the pasta in bowls. Drizzle some extra olive oil on top and add a sprinkle of lemon zest. You can also add a lemon wedge on the side for color and freshness. Enjoy your meal! Cook your pasta just right. Follow the package instructions for al dente. This means the pasta should be firm, but not hard. Start checking the pasta a minute early. Drain it, but save some pasta water. This water helps the sauce stick later. Use fresh herbs for bright taste. Chopped parsley adds color and flavor. Red pepper flakes give a kick. You can add more or less to fit your taste. A squeeze of lemon juice adds freshness. Zest the lemon too for extra zing. Make your dish look great. Serve in white bowls to show off the colors. Drizzle with olive oil for shine. A sprinkle of lemon zest adds brightness. Place a lemon wedge on the side for a pop of color. This makes your meal inviting and fun. {{image_2}} You can boost the nutrition of your Lemon Garlic Chickpea Pasta by adding veggies. Try spinach, cherry tomatoes, or bell peppers. These veggies add color and taste. Just sauté them with the garlic and chickpeas for a few minutes. They will get tender and soak in all the flavors. You can mix and match based on what you like or have on hand. If you want a gluten-free choice, use gluten-free pasta. There are many great options, like chickpea or rice pasta. These work well with the lemon and garlic. You can also make this dish vegan by skipping the Parmesan cheese. Instead, add nutritional yeast for a cheesy flavor that is plant-based. You don’t have to stick to just spaghetti or linguine. Try penne, rotini, or fettuccine for a fun twist. Each pasta shape holds the sauce differently, giving you a new taste. Just remember to adjust the cooking time based on the pasta type you choose. Enjoy experimenting with flavors and textures! To store your Lemon Garlic Chickpea Pasta, let it cool. Use an airtight container. This helps keep it fresh. You can store it in the fridge for up to 3 days. Make sure to label the container with the date. When you're ready to enjoy your leftovers, reheat them gently. Use a skillet over low heat. Add a splash of water or olive oil to prevent sticking. Stir often until heated through. You can also microwave it in a safe dish. Heat in 30-second bursts, stirring in between. You can freeze Lemon Garlic Chickpea Pasta for later. Place it in a freezer-safe container. Make sure to leave some space for expansion. It can last up to 3 months in the freezer. To reheat, let it thaw overnight in the fridge. Then, follow the reheating instructions above. This makes meal prep easy and quick! This dish takes just 15 minutes from start to finish. You can cook the pasta while you sauté the garlic and chickpeas. It’s quick and perfect for busy days. Yes, this recipe is already vegan! It uses chickpeas, pasta, and olive oil, which are all plant-based. Just skip the Parmesan cheese if you want to keep it vegan. You can serve this pasta with a simple green salad or garlic bread. Add a side of roasted veggies for extra flavor and nutrition. To boost protein, add more chickpeas or toss in some cooked lentils. You can also mix in grilled chicken or shrimp if you prefer animal protein. Absolutely! Canned chickpeas save time and work just as well. Just rinse and drain them before cooking. They add great flavor and texture to your pasta. This blog post covered a simple and tasty dish: Lemon Garlic Chickpea Pasta. We explored main ingredients, cooking steps, and tips to enhance flavor. Plus, we shared storage info and answered common questions. Incorporating these ideas will make your dish shine. Enjoy experimenting with different ingredients and serving options. This recipe is easy, healthy, and fun. You can impress anyone with your cooking skills. Keep it fresh and enjoy every bite!

Lemon Garlic Chickpea Pasta 15-Minute Flavor Fix

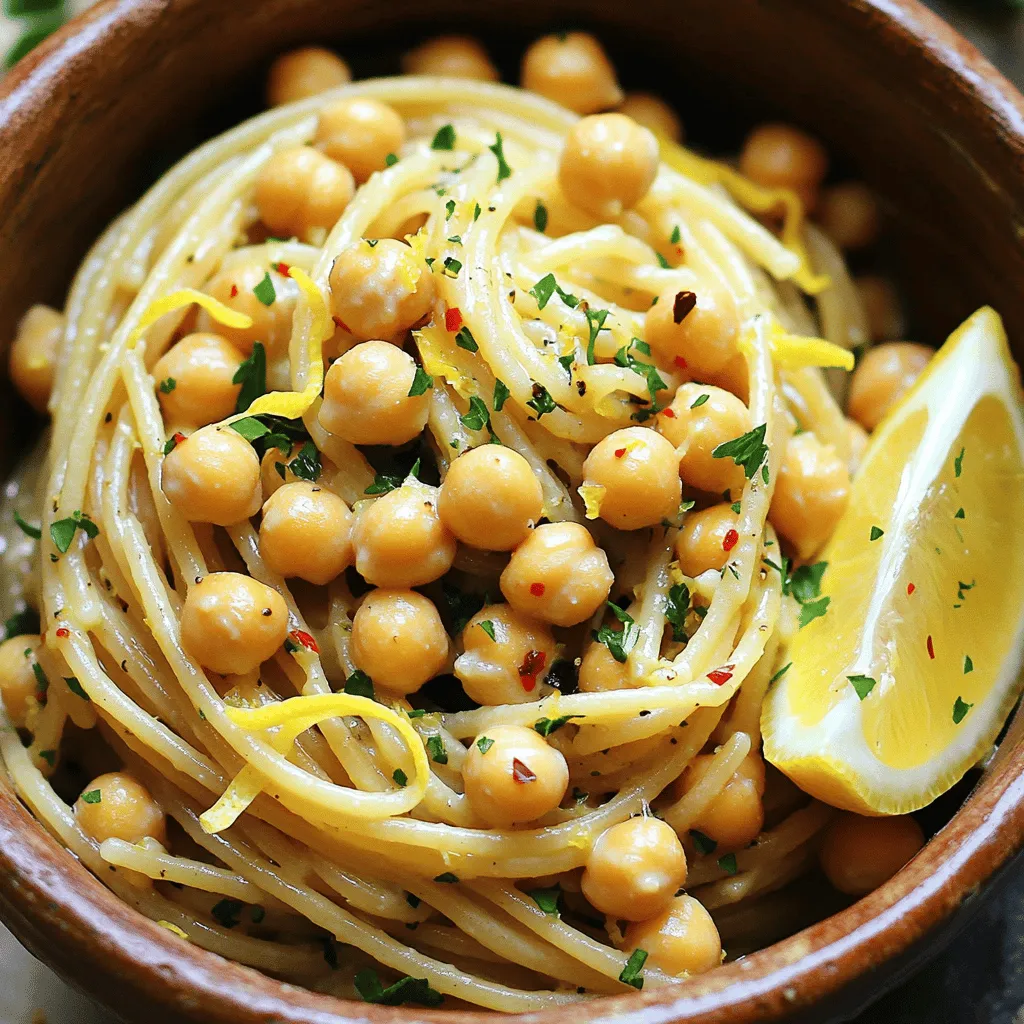
Looking for a quick and tasty meal? My Lemon Garlic Chickpea Pasta takes just 15 minutes to make! This dish

To make these tasty protein chocolate chip banana muffins, gather the following items: - 2 ripe bananas, mashed - 1 cup oats (blended into flour) - 1/2 cup protein powder (vanilla or chocolate) - 1/4 cup honey or maple syrup - 1/4 cup Greek yogurt - 1/4 cup unsweetened almond milk - 1 teaspoon baking soda - 1 teaspoon baking powder - 1/2 teaspoon cinnamon - 1/4 teaspoon salt - 1/2 cup dark chocolate chips These muffins pack a healthy punch. Each muffin offers about 150 calories. They have 5 grams of protein and 3 grams of fiber. The oats provide whole grains, while the bananas add natural sweetness. The Greek yogurt boosts protein, making these muffins a great snack or breakfast choice. For the best results, choose a high-quality protein powder. Look for brands that use natural ingredients. Here are some options to consider: - Whey protein: This is popular and mixes well. - Plant-based protein: Great for vegans or those with lactose issues. - Casein protein: This is slower-digesting, perfect for a filling snack. These choices help you customize the flavor and nutrition of your muffins! To start, gather all your ingredients. You will need: - 2 ripe bananas, mashed - 1 cup oats (blended into flour) - 1/2 cup protein powder (vanilla or chocolate) - 1/4 cup honey or maple syrup - 1/4 cup Greek yogurt - 1/4 cup unsweetened almond milk - 1 teaspoon baking soda - 1 teaspoon baking powder - 1/2 teaspoon cinnamon - 1/4 teaspoon salt - 1/2 cup dark chocolate chips First, preheat your oven to 350°F (175°C). This step is key to baking. While the oven heats, line a muffin tin with paper liners or grease it with cooking spray. Now, in a large mixing bowl, mash the ripe bananas until smooth. This makes a great base for your muffins. Next, add the honey or maple syrup, Greek yogurt, and almond milk to the bananas. Mix well until everything is combined. In a separate bowl, whisk together the blended oat flour, protein powder, baking soda, baking powder, cinnamon, and salt. This helps the muffins rise and gives them flavor. Now, it’s time to combine the mixtures. Gradually add the dry ingredients to the wet ingredients. Stir gently until just combined. Be careful not to over-mix; this keeps your muffins light and fluffy. Then, fold in the dark chocolate chips. This adds sweetness and richness to your muffins. Spoon the batter into the prepared muffin tin. Fill each cup about 2/3 full. This allows space for the muffins to rise. Bake for 18-20 minutes. To check if they are done, insert a toothpick into the center. It should come out clean. Once baked, remove the muffins from the oven. Let them cool in the tin for about 5 minutes. After that, transfer them to a wire rack to cool completely. This prevents sogginess. Serve these muffins warm for the best taste. You can dust them lightly with powdered sugar. A drizzle of almond butter on top adds a nice touch and flavor boost. Enjoy your delicious protein-packed treats! To get the best texture, use ripe bananas. Ripe bananas add sweetness and moisture. Blend your oats into flour for a smooth muffin base. Mixing wet and dry ingredients gently helps keep muffins soft. Over-mixing makes them tough, so mix just until combined. Adding a dash of cinnamon enhances the flavor. You can adjust the protein powder to your taste, too. One mistake is using unripe bananas. They do not provide enough sweetness. Another common error is over-mixing the batter. This can lead to dense muffins. Make sure to measure ingredients accurately. If you add too much protein powder, it can dry out the muffins. Lastly, check your oven temperature. An oven that is too hot can burn the muffins quickly. Warm muffins look great on a plate. Dust them lightly with powdered sugar for a sweet touch. You can also drizzle almond butter on top for extra flavor. Arrange the muffins on a colorful platter. Adding fresh banana slices or chocolate chips on top makes them pop. This makes your muffins not just tasty but also visually appealing! {{image_2}} You can easily make these muffins gluten-free. Instead of oats, use gluten-free oat flour. Make sure the protein powder you pick is also gluten-free. This way, everyone can enjoy them. Get creative with add-ins! You can mix in chopped nuts like walnuts or pecans for a nice crunch. Dried fruits like raisins or cranberries add sweetness. Fresh fruits, like blueberries or strawberries, also work great. Just remember to adjust the baking time if you add a lot of extra moisture. Switching protein powders can change the flavor. Vanilla powder gives a light, sweet taste. Chocolate powder enhances the chocolate flavor even more. You can even try plant-based protein powders if you prefer. Each choice adds a new twist to your muffins! To keep your Protein Chocolate Chip Banana Muffins fresh, store them in an airtight container. Place parchment paper between layers to avoid sticking. Keep them at room temperature for up to three days. If you need to store them longer, refrigeration is a good option. Just remember, chilling can change texture slightly. Freezing these muffins is a smart way to save some for later. Allow the muffins to cool completely first. Wrap each muffin in plastic wrap, then place them in a freezer bag. They can stay fresh in the freezer for up to three months. When you're ready to enjoy, remove a muffin and let it thaw on the counter. Reheating is easy and keeps your muffins tasty. For the best results, use an oven. Preheat it to 350°F (175°C), and place your muffin on a baking sheet. Heat for about 5 to 7 minutes. You can also microwave for about 20-30 seconds. Check to avoid overheating, as this may dry them out. Enjoy your warm muffin with a little almond butter! Yes, you can use other sweeteners. You can try agave syrup or coconut sugar. Both options work well in these muffins. You may need to adjust the amount. Start with the same amount and taste the batter. If you want it sweeter, add more. To make these muffins vegan, swap the Greek yogurt for a plant-based yogurt. Use applesauce instead of honey or maple syrup. You can also use a flax egg. Mix one tablespoon of ground flaxseed with three tablespoons of water. Let it sit for five minutes, and it will thicken. You can use several substitutes for Greek yogurt. Use sour cream or regular yogurt if you have them. For a dairy-free option, unsweetened coconut yogurt works great. Silken tofu blended until smooth is another good choice. Each option will keep the muffins moist and tasty. In this blog, we explored key ingredients and nutrition info for healthy muffins. I shared step-by-step instructions for prep, baking, and serving. Tips on texture, common mistakes, and presentation can help you create tasty treats. We discussed various options, like gluten-free choices and flavor swaps. I also covered storage practices, freezing tips, and answered common questions. Remember, small changes can enhance your muffins hugely. Enjoy your baking journey and have fun with your flavors!

Protein Chocolate Chip Banana Muffins Tasty and Simple

Are you ready to enjoy a tasty treat that boosts your protein intake? These Protein Chocolate Chip Banana Muffins are

- 2 cups fresh raspberries - 1 cup freshly squeezed lemon juice (about 4-6 lemons) Fresh raspberries bring a sweet and tart flavor. They make the sorbet vibrant and colorful. Use ripe raspberries for the best taste. Fresh lemons add tang and brightness. Squeezing your lemons right before use makes a big difference. The juice should be fresh, not bottled. - 1 cup granulated sugar - 1 cup water - A pinch of salt Granulated sugar is essential for sweetness. It helps balance the tartness of the lemonade. Water is needed to dissolve the sugar. It creates a simple syrup that makes the sorbet smooth. A pinch of salt enhances all the flavors. It may seem small, but salt plays a big role. - Zest of 2 lemons - Garnish suggestions like fresh mint or additional raspberries Lemon zest adds a bright, fragrant note. It enhances the lemon flavor without extra liquid. You can garnish with fresh mint leaves or extra raspberries. This adds color and makes the sorbet look fancy. Presentation matters, and these simple touches make a difference. {{ingredient_image_1}} 1. In a medium saucepan, combine 1 cup of granulated sugar and 1 cup of water over medium heat. 2. Stir until the sugar dissolves completely. This creates a simple syrup. 3. Remove from heat and let it cool. Cooling is important to keep the sorbet smooth. 1. Wash 2 cups of fresh raspberries under cold water. 2. Add the raspberries to a blender or food processor. Blend until smooth. 3. For an extra smooth texture, strain the mixture through a fine mesh sieve to remove seeds. 1. In a large mixing bowl, combine the raspberry puree, 1 cup of freshly squeezed lemon juice, and the zest of 2 lemons. 2. Add the cooled simple syrup and a pinch of salt. Mixing salt enhances the flavors. 3. Stir well until everything is fully mixed together. 1. Pour the mixture into a shallow dish or a sorbet maker. 2. If using a shallow dish, place it in the freezer. Stir the mixture every 30 minutes with a fork. This helps break up ice crystals. 3. After about 3-4 hours, the sorbet should be firm and flaky. If you have a sorbet maker, follow its instructions. 1. Once set, scoop the sorbet into bowls or cones. 2. For extra flair, garnish with fresh mint leaves or more raspberries. This adds color and freshness. 3. Serve immediately for a delightful treat on a hot day! To make your raspberry lemonade sorbet smooth and creamy, focus on preventing ice crystals. Ice crystals form when the sorbet freezes unevenly. Stirring the mixture is key. I recommend stirring every 30 minutes while it freezes. This keeps the texture light and fluffy. Sometimes, you might want to tweak the sweetness. If you find the sorbet too sweet, reduce the sugar by a bit. You can also use natural sweeteners like honey or maple syrup. They add a nice flavor, too. Just remember to adjust the amount based on how sweet you want it. To make your sorbet stand out, think about adding herbs or spices. A hint of fresh mint or basil can give it a new twist. You can also pair your sorbet with sauces or toppings. A drizzle of lemon glaze or fresh berries on top can really elevate the dish. Enjoy experimenting with flavors! Pro Tips Use Fresh Ingredients: The quality of raspberries and lemons will significantly impact the flavor of your sorbet. Always opt for fresh, ripe fruits for the best results. Adjust Sweetness: Depending on your taste preference and the tartness of the lemons, feel free to adjust the amount of sugar in the syrup. Start with less and add more to taste. Straining is Key: For an ultra-smooth sorbet, strain the raspberry puree to remove seeds. This step enhances the texture and makes for a more luxurious treat. Keep it Cold: Ensure all ingredients, especially the lemon juice, are chilled before mixing. This will help the sorbet freeze faster and maintain a smoother consistency. {{image_2}} You can easily switch up the fruits in this recipe. Instead of raspberries, try strawberries or blueberries for a different taste. Mixed berries create a fun flavor blend. If you want something tropical, use mango or pineapple. Their sweet taste pairs well with lemon. Herbs can add a unique twist to your sorbet. Fresh mint gives a refreshing touch. Basil also brings a sweet aroma that surprises the taste buds. You can mix in other citrus flavors too. Orange or lime juice can brighten your sorbet and deepen its flavor. If you want a creamier sorbet, consider using coconut milk or cream. This adds a rich texture while keeping it dairy-free. You can blend it with your raspberry puree. This makes a delicious, tropical-inspired treat. Enjoy this creamy version on hot summer days! To keep your Raspberry Lemonade Sorbet fresh, use an airtight container. Glass or plastic containers work well. Make sure they seal tightly. This helps prevent ice crystals from forming. Label your container with the date to track freshness. When you’re ready to serve your sorbet, take it out of the freezer. Let it sit on the counter for about 5 to 10 minutes. This softens the sorbet just enough for easy scooping. If it’s still too hard, give it a few more minutes. This sorbet lasts about 2 to 3 weeks in the freezer. After that, it may lose flavor. Watch for signs of spoilage, like ice crystals or a change in texture. If it looks icy or dry, it’s best to toss it. Enjoy your sorbet while it's still fresh and tasty! To make this sorbet vegan, replace the granulated sugar with a plant-based sweetener. You can use agave syrup or maple syrup. These options keep the sorbet sweet without using animal products. If you prefer a sugar-free option, try using stevia or erythritol. Adjust the amount based on the sweetness you desire. Yes, you can use frozen raspberries! Just let them thaw slightly before blending. This helps create a smooth puree. You may skip straining if you like the seeds. Frozen raspberries can be a great option when fresh ones are out of season. If you don’t have a sorbet maker, don't worry! You can still make this treat. Pour the sorbet mixture into a shallow dish and place it in the freezer. Stir it with a fork every 30 minutes. This breaks up ice crystals. Keep stirring until it becomes firm and flaky, which takes about 3-4 hours. To boost the lemon flavor, use fresh lemon zest. It adds a bright and fragrant note. You can also add more lemon juice if you like it tart. For a unique twist, try adding a small amount of lemon extract. Just a few drops can really intensify the citrus taste. Yes, Raspberry Lemonade Sorbet is gluten-free! All the ingredients used are naturally gluten-free. You can enjoy this sorbet without any worries about gluten allergens. It's a perfect refreshing treat for everyone, including those with gluten sensitivities. This blog post covered how to make Raspberry Lemonade Sorbet using fresh ingredients and pantry staples. I shared easy steps, tips for perfect texture, and fun variations. Remember, experimenting can lead to new flavors and your own twist. Storing and thawing the sorbet properly keeps it fresh for longer. Enjoy your delicious sorbet creation and impress your friends with your skills! This treat is simple, fun, and sure to please everyone.

Raspberry Lemonade Sorbet Refreshing Summer Treat

Looking for a cool, fruity treat this summer? Raspberry Lemonade Sorbet is the perfect way to beat the heat! It’s

To make these tasty wontons, gather these main ingredients: - 1 package of wonton wrappers (about 30 wrappers) - 1 cup cream cheese, softened - 1 cup shredded cheddar cheese - 2 jalapeños, finely chopped (seeds removed for less heat, if desired) - 1/4 cup green onions, chopped - 1/2 teaspoon garlic powder - 1/2 teaspoon onion powder - Salt and pepper to taste These ingredients create a creamy and spicy filling that packs a punch. The cream cheese gives a rich base, while the cheddar adds a sharp bite. Jalapeños bring heat and flavor, and green onions add freshness. You can enhance your wontons with optional ingredients: - 1/2 teaspoon smoked paprika - 1/4 teaspoon cumin - 1/4 teaspoon chili powder These spices add depth and warmth. Smoked paprika gives a nice smoky taste. Cumin and chili powder offer a subtle earthiness. Pair your jalapeño popper wontons with these tasty sauces: - Sriracha for a spicy kick - Ranch dressing for a cool contrast - Honey mustard for a sweet touch Dipping sauces add fun and flavor. Sriracha boosts the heat, while ranch cools it down. Honey mustard offers a sweet balance to the spice. Enjoy experimenting with different dips! Start by mixing the cream cheese and cheddar cheese. Use a bowl and make sure the cream cheese is soft. Add the chopped jalapeños, green onions, garlic powder, onion powder, salt, and pepper. Stir everything well until it becomes a creamy mixture. This blend is key for flavor and texture. Take a wonton wrapper and lay it flat on a clean surface. Place about one tablespoon of the cream cheese mixture in the center of the wrapper. Moisten the edges of the wrapper with a bit of water. This helps the edges stick together. Fold the wrapper over to form a triangle. Press the edges tightly to seal. Repeat this step until all the wrappers and filling are used. Preheat your air fryer to 350°F (175°C) for about five minutes. Spray the air fryer basket lightly with cooking spray to keep the wontons from sticking. Place a few wontons in a single layer in the basket. Make sure they do not touch each other. Lightly spritz the tops with more cooking spray. Cook for five to seven minutes, flipping them halfway through. They should turn golden brown and crispy. Once done, take them out and continue with the rest of the wontons. Serve them warm with Sriracha or your favorite dipping sauce for a tasty treat! When using wonton wrappers, freshness is key. Buy them just before you plan to use them. Store any unused wrappers in an airtight bag in the fridge to keep them fresh. If they dry out, they become hard and hard to fold. To make folding easier, keep a damp paper towel over the wrappers while you work. This helps them stay soft and pliable. To get that perfect crunch, preheat your air fryer to 350°F (175°C) for five minutes. This helps the wontons cook evenly. Make sure to spray the air fryer basket lightly with cooking spray. It prevents sticking and promotes crispiness. Place the wontons in a single layer without touching. Crowding them can lead to soggy results. Spraying the tops of the wontons with cooking spray also aids in achieving that golden brown finish. One common mistake is overfilling the wonton wrappers. Stick to about 1 tablespoon of filling. If you add too much, they won’t seal properly. Another mistake is not sealing the edges firmly. Ensure you press the edges well to avoid spilling the filling during cooking. Lastly, avoid cooking them too quickly. If they cook too fast, they may burn on the outside and remain soggy inside. Flip them halfway through cooking for even crispiness. {{image_2}} You can kick up the heat in your jalapeño popper wontons. Try adding diced habaneros or serrano peppers for extra spice. You can also mix in some spicy sausage or crumbled chorizo. This will add more flavor and depth. Just be sure to balance the heat with creamy cheese. If you want a meat-free version, this dish is easy to adapt. Use cooked spinach or artichokes instead of meat. You can also add black beans for a hearty texture. Swap in a vegan cream cheese for a plant-based treat. This keeps the wontons creamy and delicious without any animal products. Cheese is key to a great wonton. While cheddar is a classic choice, you can mix it up. Try pepper jack for a spicy twist or mozzarella for a gooey texture. For something bold, use gorgonzola or feta. Each cheese adds its own flavor profile. Experiment to find your perfect blend. Once you finish your meal, let the wontons cool down. Place them in an airtight container. This keeps them fresh. Store the container in the fridge. They will last for about 3 days. To enjoy your wontons again, preheat your air fryer to 350°F (175°C). Place the wontons in the basket in a single layer. Heat them for about 3-5 minutes. This makes them crispy again. You can also use a microwave. Just microwave them for about 30 seconds to 1 minute. But they may not stay as crispy. If you want to save wontons for later, freeze them before cooking. Arrange uncooked wontons in a single layer on a baking sheet. Freeze them for about 1-2 hours until firm. Then, transfer them to a freezer bag or container. They can stay frozen for up to 3 months. When ready to cook, do not thaw. Just cook them in the air fryer for a few extra minutes. Jalapeño popper wontons last about 3 days in the fridge. Store them in an airtight container. If you want to keep them longer, freeze them. They can last up to 3 months when frozen. Just make sure to wrap them well to avoid freezer burn. Yes, you can bake jalapeño popper wontons! Preheat your oven to 375°F (190°C). Place the wontons on a baking sheet lined with parchment paper. Bake for 15-20 minutes until they are golden brown. Spray them with cooking spray for a crispier texture. Air frying gives a crunchier result, but baking works too! You can use ricotta cheese or goat cheese as a substitute for cream cheese. For a vegan option, try using cashew cream or tofu blended until smooth. Each will give a different taste and texture, but they all work well in wontons. Adjust the seasoning as needed for the best flavor. Jalapeño popper wontons are a tasty treat with endless options. We discussed key ingredients, from cream cheese to dipping sauces. You learned how to prepare the filling and cook using an air fryer. I shared tips for perfect wontons and ways to store any leftovers. Remember, you can customize flavors to fit your taste. Enjoy experimenting with spicy and vegetarian variations! These wontons will impress your family and friends at any gathering.

Air Fryer Jalapeño Popper Wontons Crispy and Flavorful

Are you ready to spice up your snack game? Air Fryer Jalapeño Popper Wontons are easy to make and pack

- 4 cups fresh baby spinach, washed and dried - 2 cups strawberries, hulled and sliced - 1/4 cup red onion, thinly sliced - 1/2 cup feta cheese, crumbled - 1/4 cup walnuts, roughly chopped - 1/4 cup poppy seeds The main ingredients of this salad create a colorful and tasty dish. Fresh baby spinach is the base. It adds a nice crunch and lots of vitamins. Strawberries bring sweetness and a bright red color. Red onion adds a little bite, while feta cheese gives a creamy texture. Walnuts add crunch and healthy fats. Lastly, poppy seeds add a lovely look and nutty flavor. - 1/3 cup olive oil - 3 tablespoons apple cider vinegar - 2 tablespoons honey - Salt and pepper to taste The dressing is easy and quick to make. Olive oil provides a smooth base. Apple cider vinegar brings tanginess. Honey adds sweetness, balancing the flavors. Salt and pepper enhance everything. You can adjust the seasoning to your taste. - About 200 calories per serving - Carbohydrates: 15g - Protein: 5g - Fat: 15g - Vitamins A, C, and K; minerals like calcium and potassium This salad is not just tasty; it is healthy too. Each serving has around 200 calories, making it a light choice. You get great vitamins from spinach and strawberries. Feta adds protein and calcium. This salad is perfect for a fresh meal or a side dish. In a small bowl, combine the olive oil, apple cider vinegar, honey, salt, and pepper. Use a whisk to blend the ingredients well. This creates a smooth and tasty dressing. Taste it and adjust the seasoning if needed. You want it to be just right for your salad. Take a large salad bowl and add the fresh baby spinach. Next, layer in the sliced strawberries. Add the thinly sliced red onion and the roughly chopped walnuts. This mix gives great flavor and crunch. Make sure to keep the layers even for a balanced salad. Drizzle the prepared dressing over the salad. Toss it gently to coat all the ingredients. This helps every bite taste great. Now, sprinkle the crumbled feta cheese on top for creaminess. Finally, add the poppy seeds for a lovely finish. This step not only enhances flavor but also adds a nice visual touch. Using fresh ingredients: Always choose fresh baby spinach and ripe strawberries. Fresh produce makes a big difference in taste and texture. Look for vibrant colors and firm textures. They should be free from bruises or blemishes. Fresh ingredients give your salad a bright and lively flavor. Washing and preparing spinach and strawberries: Rinse the spinach under cold water. Use a salad spinner to dry it thoroughly. Wet spinach can make the salad soggy. For strawberries, remove the green tops and slice them thin. This helps them mix well with other ingredients. Best presentation techniques: A great presentation makes the salad more appealing. Use large, shallow bowls to serve. Layer the spinach, strawberries, red onion, and walnuts in a colorful way. Finish by sprinkling feta and poppy seeds on top. Add a few extra strawberry slices as a garnish for a pop of color. Ideal serving dishes: Choose clear glass or white plates for serving. These colors allow the bright salad to shine. You can also use wooden bowls for a rustic touch. Serve with a large spoon for easy tossing and sharing. Alternate sweeteners: While honey is a classic choice, you can try maple syrup or agave nectar. These options add different flavors while keeping the dressing sweet. Adjust the amount to taste; some may prefer less sweetness. Different vinegar options: Apple cider vinegar is great, but you can also use balsamic or red wine vinegar. Each type brings a unique tang to the dressing. Experiment to find your favorite flavor combination. {{image_2}} You can make your Strawberry Spinach Poppyseed Salad even better by adding proteins. Grilled chicken or shrimp both work great. These proteins turn the salad into a complete meal, perfect for lunch or dinner. You can also switch up the cheese. If you want a different taste, try goat cheese or blue cheese. Both add a unique flavor that pairs well with the sweet strawberries. This salad shines in every season. You can add seasonal fruits and nuts to change the flavors. In summer, try peaches or berries. In fall, sliced apples or pears work well. Nuts like pecans or almonds can add a nice crunch. This way, your salad stays fresh and exciting all year long. For those with dietary needs, this salad is easy to adapt. To make it gluten-free, ensure that all ingredients are certified gluten-free. For vegans, skip the cheese and honey. Instead, use a vegan cheese option and maple syrup for sweetness. You can still enjoy a delicious and healthy salad that fits your diet. To store your salad, keep it in an airtight container. Refrigerate it right away to keep it fresh. Make sure the salad is cool before sealing it. This salad can last for about two days in the fridge. After that, the spinach may wilt, and the strawberries may lose their firmness. You do not need to reheat this salad. It tastes best when chilled. If you want to keep it fresh, eat it within a day or two. If you have leftover dressing, store it separately. This way, you can add it just before serving. Freezing the whole salad is not a good idea. The spinach and strawberries will become mushy when thawed. However, you can freeze the dressing. Just keep it in a small container. When you are ready to use it, thaw it in the fridge overnight. Avoid freezing the feta cheese and walnuts, as they don’t hold up well in the freezer. You can prepare this salad ahead of time. Start by washing and drying the spinach. Slice the strawberries, and chop the red onion and walnuts. Keep these ingredients in separate containers. This keeps them fresh. You can mix the dressing in a jar. Store it in the fridge. The salad stays crisp and tasty this way. Combine all ingredients just before serving. This ensures the salad stays bright and fresh. If you need a feta cheese substitute, try goat cheese. It has a creamy texture. You can also use ricotta for a milder taste. For a strong flavor, blue cheese works well. Each choice adds a unique twist to the salad. Choose based on your taste or dietary needs. Yes, this salad is very healthy! Spinach is rich in vitamins A and C. Strawberries are full of antioxidants. They help protect your body. Walnuts add healthy fats and protein. Feta cheese provides calcium. This salad gives you a balanced mix of nutrients. Eating it can boost your health while being delicious. You can use frozen strawberries, but with care. Thaw them first and drain excess liquid. This helps avoid a soggy salad. Cut them into smaller pieces if needed. Frozen strawberries are often sweeter, which can enhance the taste. Just remember to enjoy them in a fresh way! In this blog post, we explored the delightful Strawberry Spinach Poppyseed Salad. We covered its fresh ingredients, from baby spinach to strawberries and walnuts. I shared step-by-step instructions for making the salad and tips for perfecting its presentation. We also discussed variations, storage tips, and answered common questions. This salad not only tastes great but offers health benefits too. Enjoy making this dish, and feel free to add your own twist to it!

Strawberry Spinach Poppyseed Salad Fresh and Tasty Dish

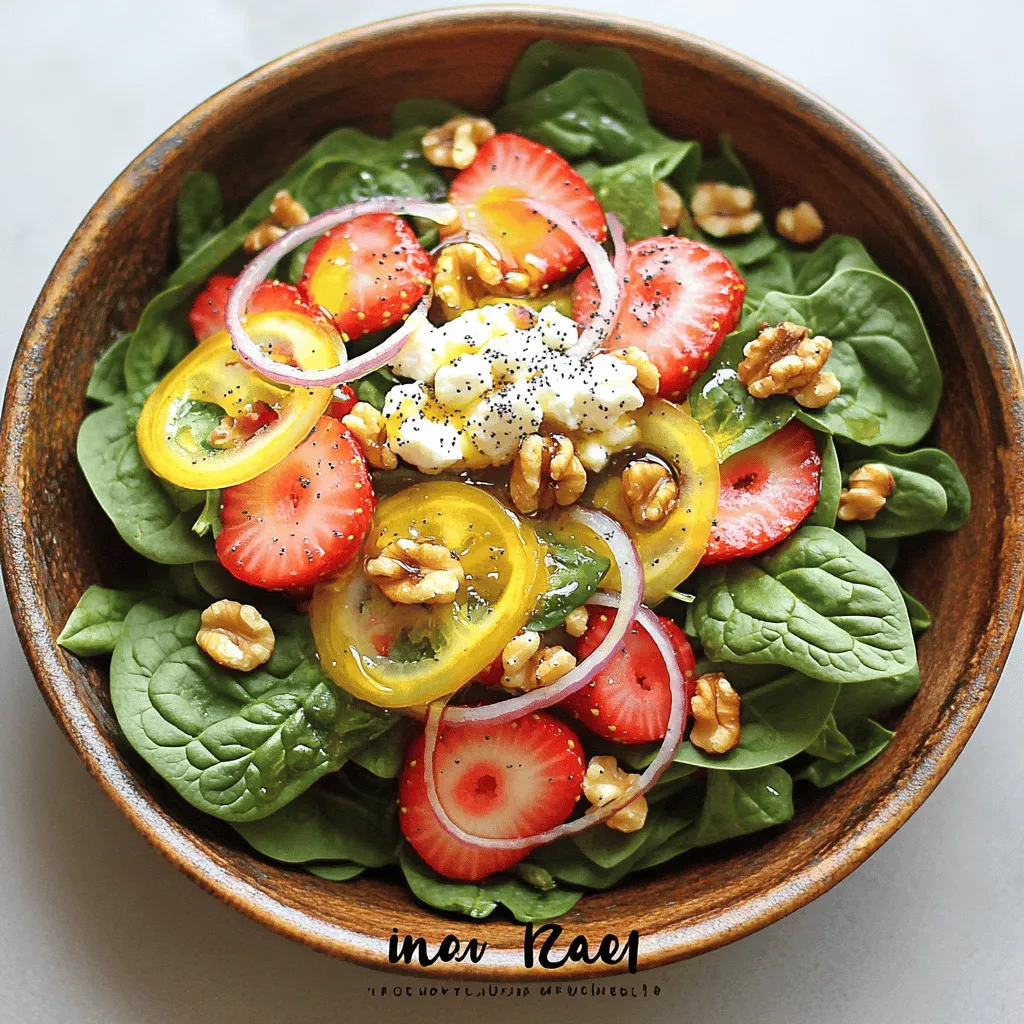
Are you searching for a fresh, tasty dish that delights your senses and is easy to make? Look no further!

Older posts
Newer posts
← Previous Page1 … Page23 Page24 Page25 … Page86 Next →

dsad

© 2026 Cooking Wells • Built with GeneratePress

Our Policies

  • Copyright Policy
  • Cookie Policy
  • GDPR Policy
  • Privacy Policy
  • Disclaimer
  • Terms Of Use

More Information

  • Home
  • About
  • Contact
  • Appetizers
  • Dessert
  • Dinner
  • Drinks
©2026, Cooking Wells About Back To Top