Skip to content
DisclaimerTerms Of UseGDPR PolicyCookie Policy

Cooking Wells

  • Home
  • Drinks
  • Appetizers
  • Dinner
  • Dessert
  • About
  • Contact
  • Privacy Policy
DisclaimerTerms Of UseGDPR PolicyCookie Policy

NO-ING-IMG

To make Roasted Garlic Mashed Cauliflower, you need a few key ingredients. Here’s what you will need: - 1 large head of cauliflower, cut into florets - 6 cloves of garlic, unpeeled - 2 tablespoons olive oil - 1/4 cup cream cheese, softened - 1/4 cup unsweetened almond milk (or regular milk) - Salt and pepper to taste - Fresh chives, chopped (for garnish) These ingredients create a creamy dish that packs a punch of flavor. The cauliflower serves as a great base. Roasting the garlic adds a sweet and rich taste. You can add a few things to enhance the flavor. Here are some ideas: - Grated Parmesan cheese for a cheesy kick - Fresh herbs like thyme or rosemary for extra aroma - A pinch of nutmeg for warmth - A splash of lemon juice for brightness These add-ins make it easy to customize the dish to your taste. Experiment and find your favorite flavor combinations! Roasted Garlic Mashed Cauliflower is not just tasty; it is also healthy. Here’s a quick look at its nutritional benefits: - Low in calories and carbs compared to regular mashed potatoes - High in fiber, which helps digestion - Packed with vitamins C and K - Contains antioxidants that support overall health This dish is a great choice for anyone looking to eat healthier without losing flavor. You can enjoy it guilt-free! For the full recipe, check out the [Full Recipe]. Start by cutting your large head of cauliflower into small florets. This helps them cook evenly. Next, take six cloves of garlic and leave them unpeeled. The skin protects the garlic and helps it roast perfectly. Toss the cauliflower and garlic together with two tablespoons of olive oil. Make sure every piece is well coated. This oil adds flavor and helps create a nice texture. Preheat your oven to 425°F (220°C) before you start roasting. Spread the cauliflower and garlic on a baking sheet lined with parchment paper. This prevents sticking and makes cleanup easier. Roast them in the oven for 25-30 minutes. You’ll know they are done when the cauliflower is tender, and the garlic is caramelized. Take them out and let them cool for a few minutes. This step is important to avoid burns when you squeeze the garlic. Once cooled, squeeze the roasted garlic cloves out of their skins and into a large bowl with the cauliflower. Add 1/4 cup of softened cream cheese and 1/4 cup of unsweetened almond milk. You can use regular milk if you prefer. Now, use a potato masher or an immersion blender to mash the mixture. Keep mashing until it reaches a smooth and creamy texture. If it feels too thick, add more almond milk to adjust. Finally, season with salt and pepper to taste. Serve hot, adding garnished fresh chives on top for a lovely finish. For the full recipe, check the details provided earlier. When you pick cauliflower, look for heads that are firm and heavy. The leaves should be fresh and green. Avoid any that have brown spots or dark patches. A good head of cauliflower will have tightly packed florets. This means it is fresh and will taste great. One common mistake is overcooking the cauliflower. It can turn mushy and lose flavor. Roast it just until tender. Another mistake is not seasoning enough. Salt and pepper can make a big difference in taste. Always taste your mash before serving. Adjust the seasoning to your liking. You can add more flavor to your roasted garlic mashed cauliflower with spices. Try adding a pinch of nutmeg for warmth. Paprika can give it a nice color and slight heat. If you like herbs, consider using thyme or rosemary. These can bring out the best in your dish. For the full recipe, check the details above. {{image_2}} You can add cheese or herbs to elevate the flavor of your mashed cauliflower. For a rich taste, mix in shredded cheddar or Parmesan cheese. These cheeses melt well and add creaminess. Fresh herbs like rosemary or thyme also work great. They bring a fresh touch that adds depth. If you want a vegan version, swap cream cheese for cashew cream. Soak cashews in water for a few hours, then blend them until smooth. Use plant-based milk, like oat or coconut milk, instead of regular milk. This keeps your dish creamy without dairy. You can also cook cauliflower in an Instant Pot or steamer for quick results. For the Instant Pot, add water and cook on high for 5 minutes. Use a quick release to let the steam out. If you use a steamer, cook the florets for about 10-15 minutes. Both methods keep the cauliflower tender and flavorful. For the full recipe, check the complete guide to Roasted Garlic Mashed Cauliflower. To keep leftovers fresh, first let them cool. Then, place the mashed cauliflower in an airtight container. Make sure to seal it well to avoid air exposure. Store it in the fridge for up to three days. If you want to keep it longer, freezing is a great option. When you're ready to eat, reheat on the stove or in the microwave. If using the stove, heat on low and stir often to prevent sticking. Add a splash of almond milk to restore creaminess. If you're using the microwave, cover the bowl with a lid or wrap. This keeps moisture in and helps it heat evenly. To freeze, spoon the leftovers into a freezer-safe container. Leave some space at the top for expansion. Seal tightly and label it with the date. This dish can freeze well for up to three months. When ready to enjoy, thaw it in the fridge overnight before reheating. For a quick thaw, use the microwave on defrost. For more details on making this dish, check out the Full Recipe. The best way to reheat Roasted Garlic Mashed Cauliflower is on the stove. Place it in a saucepan over low heat. Stir it often, and add a splash of almond milk or cream if it seems too thick. You can also use a microwave. Put it in a microwave-safe bowl, cover it, and heat it for one minute. Check and stir, then heat for another minute if needed. Yes, you can make Roasted Garlic Mashed Cauliflower ahead of time. Prepare it, then let it cool. Store it in an airtight container in the fridge for up to three days. When you are ready to eat, just reheat it. This makes it easy for meal prep or family dinners. Cauliflower is very healthy. It is low in calories and high in fiber. This helps with digestion and may keep you feeling full. Cauliflower is also rich in vitamins C and K. These vitamins help support your immune system and keep your bones strong. Plus, it has antioxidants that fight free radicals in your body. Enjoying this mashed cauliflower dish gives you all these great benefits and a tasty meal. For the complete recipe, check out the Full Recipe section. Roasted garlic mashed cauliflower is a tasty, healthy dish. We covered key ingredients, step-by-step instructions, and helpful tips. I shared versatile options for all diets and cooking methods. Remember to choose fresh cauliflower for the best flavor and texture. Storing and reheating leftovers properly keeps it delicious. Explore all these ideas for a fun cooking experience. Enjoy your meal and its yummy benefits!

Roasted Garlic Mashed Cauliflower Creamy Delight

Are you ready to transform your dinner into something special? Roasted Garlic Mashed Cauliflower is a creamy delight that delights

To make cheesy cauliflower breadsticks, you will need a few key ingredients. Here’s the list: - 1 medium head of cauliflower, riced (about 4 cups) - 1 cup shredded mozzarella cheese - 1/2 cup grated parmesan cheese - 1 large egg - 1 teaspoon garlic powder - 1 teaspoon onion powder - 1 teaspoon Italian seasoning - Salt and pepper to taste These ingredients give the breadsticks a rich and cheesy flavor. The cauliflower acts as the main base, while the cheeses add creaminess. If you want to add a bit more flair, consider these optional garnishes: - 1/4 cup finely chopped fresh parsley Fresh parsley not only adds color but also a refreshing taste. You can sprinkle it on top just before serving. For dipping, I recommend using marinara sauce. It pairs well with the cheesy flavors. You can also try pesto or ranch dressing for a different twist. These sauces enhance the overall eating experience and make each bite even tastier. For the complete details on making these delicious breadsticks, check out the Full Recipe. How to rice cauliflower To rice cauliflower, first, wash the head. Cut it into smaller pieces. Then, use a food processor to pulse the florets. You want it to look like rice grains. This step is key for your breadsticks. Steaming tips After ricing, steam the cauliflower. Place it in a steamer basket over boiling water. Steam for about 5-7 minutes until it is tender. Don’t skip this step; it helps remove moisture. Drain the cauliflower well and let it cool slightly. Use a kitchen towel to squeeze out any extra water. This makes your breadsticks crispier! In a large bowl, mix the riced cauliflower with the other ingredients. Add mozzarella, parmesan, egg, garlic powder, onion powder, Italian seasoning, salt, and pepper. Use a spatula to blend everything well. You want a thick dough-like mix. This step is important for the right texture. Preheat the oven to 425°F (220°C). Line a baking sheet with parchment paper. Spread the cauliflower mix onto the sheet. Shape it into a rectangle about 1/2 inch thick. Bake for 20-25 minutes. Look for a golden brown top to know it's ready. Let it cool, slice, and serve with marinara sauce for a tasty treat! For the full recipe, check the previous section. To get the best texture for your cheesy cauliflower breadsticks, moisture control is key. After steaming the cauliflower, you must squeeze out any extra water. If you skip this step, the breadsticks may become soggy. Aim for a thick dough-like mix. It helps hold the shape when baking. The right blend of cheeses also matters. Use fresh mozzarella for stretch and flavor. One common mistake is not ricing the cauliflower well. Big chunks can lead to uneven baking. Make sure it resembles rice. Another error is overbaking. Keep an eye on them towards the end of the bake time. You want a golden color, not too brown. Lastly, don’t skip the seasoning. Garlic powder and Italian seasoning add great flavor. To boost flavor, try adding herbs like basil or oregano. You can also mix in some red pepper flakes for a spicy kick. If you want a cheesy burst, add more mozzarella. For a unique twist, consider adding sun-dried tomatoes or olives to the mix. These enhancements make each bite delicious. For the full recipe, visit the earlier section. {{image_2}} To make these cheesy cauliflower breadsticks low-carb, focus on the ingredients. Stick to cauliflower, cheese, and eggs. You can skip any high-carb items. Use almond flour instead of regular flour if you want a firmer texture. This keeps the breadsticks keto-friendly while adding a nutty flavor. For a dairy-free version, swap the cheeses. Try using nutritional yeast for a cheesy taste. You can also use vegan cheese. Just ensure it melts well. This option keeps the flavor while making it suitable for those avoiding dairy. You can add spice to your breadsticks with herbs and spices. Consider adding paprika or red pepper flakes for heat. Fresh herbs like basil or cilantro also work well. These additions make each bite more exciting. You can adjust the seasoning based on your taste. Explore different flavors to create your perfect cheesy cauliflower breadsticks. For more details, check the Full Recipe. To keep your cheesy cauliflower breadsticks fresh, start by letting them cool. Once cooled, place them in an airtight container. You can store them in the fridge for up to three days. This keeps them moist and tasty. Make sure to separate layers with parchment paper to avoid sticking. When you are ready to enjoy the breadsticks again, preheat your oven to 350°F (175°C). Place the breadsticks on a baking sheet. Heat them for about 10 to 15 minutes. This way, they get warm and crispy again. You can also use a microwave for a faster option. Heat for 30 seconds at a time until warm, but the oven gives better texture. If you want to save some for later, freezing is a great option. First, let the breadsticks cool completely. Then, wrap each stick in plastic wrap. Place them in a freezer-safe bag or container. They can last in the freezer for up to three months. When you are ready to eat, thaw them overnight in the fridge. Reheat them in the oven for best results. This way, you’ll always have a tasty snack ready! For the complete recipe, check out the Full Recipe. Yes, you can use frozen cauliflower rice. Just thaw it first. Squeeze out extra water. This helps keep your breadsticks from being soggy. Using frozen riced cauliflower can save you time. It’s a great shortcut when you want to make these tasty breadsticks quickly. Cauliflower packs a punch of nutrients. It is low in calories but high in fiber. This helps with digestion. Cauliflower is also rich in vitamins C and K. These vitamins boost your immune system and help with bone health. Plus, it has antioxidants that fight free radicals. This makes cauliflower a smart choice for a healthy diet. Yes, you can make these breadsticks ahead of time. Prepare the mixture and shape it into a slab. Then, cover and refrigerate it for up to 24 hours. When you are ready, just bake it. You can also bake them in advance and store them. Keep them in the fridge for up to three days. Reheat them in the oven for a crispy finish. For the full recipe, check out the earlier section. This blog post covered how to make delicious cauliflower breadsticks. We looked at ingredients, step-by-step instructions, and tips for the best results. I shared storage advice and answered common questions. In summary, these breadsticks fit well into many diets and taste great. You can customize them to suit your needs. Enjoy making these healthy snacks for any meal.

Cheesy Cauliflower Breadsticks Simple and Tasty Recipe

Looking for a tasty snack that’s also healthy? I’ve got you covered with my Cheesy Cauliflower Breadsticks recipe! These breadsticks

- 2 cups fresh raspberries - 1 tablespoon lemon zest - 2 tablespoons fresh lemon juice - 2 tablespoons honey or maple syrup - 3 tablespoons chia seeds - A pinch of salt To make Raspberry Lemon Chia Jam, start with fresh raspberries. They bring bright flavor and color. Lemon zest adds a zesty kick, while lemon juice brightens the entire mix. Sweeten your jam with honey or maple syrup. This will balance the tartness of the raspberries. Chia seeds are the magic ingredient. They thicken the jam and pack in healthy omega-3s. Just a pinch of salt rounds out the flavors. - Additional sweeteners - Flavorful extracts - Fresh herbs for garnish Feel free to adjust the sweetness. You can add more honey or maple syrup if needed. For a twist, consider adding vanilla or almond extract. Fresh herbs like mint or basil can add a unique touch as a garnish. Get creative! The goal is to make your jam truly yours while keeping it healthy. For the full recipe, check the details provided above. To start, gather your fresh raspberries, lemon zest, lemon juice, and sweetener. Place them in a medium saucepan. I love using honey, but maple syrup works too. Heat the mixture over medium heat. Stir occasionally for about 5-7 minutes. You will see the raspberries break down as they cook. The mixture should become syrupy and fragrant. Next, remove the saucepan from the heat. Stir in the chia seeds and a pinch of salt. The chia seeds are key. They will absorb liquid and help thicken the jam. Allow the mixture to cool for about 10-15 minutes. This cooling time is important for the perfect jam consistency. After cooling, take a taste. Adjust the sweetness if needed by adding more honey or maple syrup. Once you are happy with the flavor, transfer the jam to a clean jar. Seal it well and refrigerate. You can enjoy this jam for up to two weeks. The chia seeds will continue to thicken the jam as it chills. For the full recipe, check out the section above. To get the best texture in your jam, watch the cooking temperature. Medium heat works well. If it’s too high, the jam may burn. Stir the mix often to help it cook evenly. After cooking, let the jam cool for about 10-15 minutes. The chia seeds will absorb liquid and thicken the mix. This cooling time is key for the right consistency. When measuring honey or maple syrup, use a liquid measuring cup. This helps you see the amount clearly. Taste the jam before it cools down. If it needs more sweetness, you can add a bit more honey or syrup. Mix well and taste again. You want it just right for your taste buds. Make your jam look pretty in a jar. You can tie a ribbon around the jar or add a cute label. For serving, spread it on toast for breakfast. It also tastes great on yogurt or pancakes. You can even use it as a topping for desserts. The bright color and flavor will impress anyone! {{image_2}} You can mix and match flavors for your Raspberry Lemon Chia Jam. Try adding a berry mix. Use strawberries or blueberries to create a vibrant blend. This mix gives a sweet and tangy taste. It brightens up your breakfast. Alternatively, add a citrus twist. Zest some orange or lime into the jam. This adds a fresh layer of flavor that wakes up your taste buds. Want to make your jam even healthier? You can add superfoods like cinnamon or turmeric. These spices not only add flavor but also boost nutrition. Cinnamon can help with blood sugar. Turmeric has anti-inflammatory benefits. You can also use lower-calorie sweeteners. Try using stevia or monk fruit. These options keep the jam sweet without extra calories. If you follow a vegan diet, you can swap honey for maple syrup. This keeps the jam plant-based and still tasty. Also, this recipe is gluten-free. You don’t need to worry about gluten in chia seeds. This makes it a perfect treat for everyone. Enjoy this jam on toast, yogurt, or even in desserts. For the full recipe, check out the [Full Recipe]. To keep your raspberry lemon chia jam fresh, seal it tightly in a jar. Use a clean spoon each time you scoop out jam. This helps prevent bacteria from growing. The ideal temperature for your refrigerator is around 34°F to 40°F. This cooler range keeps your jam tasty and safe to eat. If you want to store the jam longer, freezing is a great choice. Use an airtight container or freezer-safe jar to prevent freezer burn. Leave some space at the top for expansion. To thaw, move the jar to the fridge for several hours or overnight. You can also run the jar under cool water for a quick thaw. In the fridge, your jam lasts about two weeks. Look for signs of spoilage like mold or an off smell. If you see any changes, it’s best to toss it. Keeping your jam sealed and stored properly helps it stay fresh longer. For more details on how to make this delicious jam, check the Full Recipe. Raspberry Lemon Chia Jam lasts up to two weeks in the fridge. Store it in a clean jar. Make sure the jar is sealed well to keep it fresh. After two weeks, check for any signs of spoilage. If it smells off or looks different, it's best to toss it. Yes, you can use frozen raspberries! Just let them thaw first. Frozen raspberries work well and save time. They may have more water, so cook them a little longer. This helps to get the right jam texture. Chia seeds add fiber, protein, and healthy fats. They are great for digestion and can help keep you full. They also contain omega-3 fatty acids, which are good for heart health. Plus, they help thicken the jam without using pectin. Absolutely! You can lower the sweetener to fit your taste. Start with less honey or maple syrup and taste as you go. The natural sweetness from the raspberries and lemon will still shine through. To make this jam without added sugar, skip the sweeteners altogether. Use ripe, sweet raspberries for natural sweetness. You can also add a bit of mashed banana for extra flavor and sweetness. This keeps the jam tasty and healthy. For the full recipe, check out the instructions above. This blog shared how to make Raspberry Lemon Chia Jam. I covered ingredients, cooking steps, and helpful tips. You learned about mixing flavors and health boosts too. Remember to store it right for best taste. Experimenting with this recipe can lead to yummy variations. Enjoy your jam on toast or in yogurt. Making it your way makes it special. I hope you feel inspired to create.

Raspberry Lemon Chia Jam Flavorful Healthy Spread

If you’re on the hunt for a tasty yet healthy spread, you need to try Raspberry Lemon Chia Jam! Packed

- 4 large flour tortillas - 1 cup black beans, rinsed and drained - 1 cup bell peppers (red, yellow, green), diced - 1 small red onion, diced - 1 cup spinach, chopped - 4 large eggs - 1/2 cup shredded cheese (cheddar or Mexican blend) - 1 avocado, sliced - 2 tablespoons olive oil - 1 teaspoon ground cumin - 1 teaspoon smoked paprika - Salt and pepper to taste - Salsa and fresh cilantro for serving I love starting my day with a tasty breakfast burrito. These burritos are packed with flavors and nutrients. You need the right mix of ingredients to make them shine. First, let’s talk about the base: the flour tortillas. They hold everything together and give a soft bite. Next, black beans add protein and fiber. Bell peppers bring a sweet crunch and vibrant color. Diced red onion adds a zesty kick. Spinach adds freshness and is a great way to sneak in greens. Now, we can’t forget the eggs. They give the burrito a creamy texture. Shredded cheese melts beautifully and adds richness. Slices of avocado on top make each bite creamy and delicious. You can also customize your burrito. If you like mushrooms or zucchini, feel free to add those. Want some heat? Toss in jalapeños or a splash of hot sauce. If you're plant-based, swap the eggs for tofu or use plant-based cheese. This mix of ingredients makes for a satisfying breakfast. For the full recipe, check out the section below where I break down each step. Enjoy exploring these flavorful options! Start by heating 2 tablespoons of olive oil in a large skillet over medium heat. Add the diced bell peppers and red onion. Sauté them for about 5 minutes until they soften. This brings out their amazing flavors. Next, stir in 1 cup of chopped spinach. Cook for an additional 2-3 minutes until it wilts. Finally, add 1 cup of rinsed black beans, 1 teaspoon of ground cumin, and 1 teaspoon of smoked paprika. Mix everything well and let it cook for 2 more minutes. Remove from heat and set aside. In a bowl, whisk together 4 large eggs with a pinch of salt and pepper. This adds flavor and keeps the eggs fluffy. In a separate non-stick skillet, pour in the egg mixture. Scramble the eggs over medium heat for 3-4 minutes. Stir gently until they are just set. You want them soft but not runny. Take a large flour tortilla and lay it flat on a clean surface. In the center, add a generous portion of the veggie-bean mix. Next, scoop in some of the scrambled eggs. Sprinkle 1/2 cup of shredded cheese on top. For a creamy touch, add a few slices of avocado. Fold the sides of the tortilla over the filling. Then roll it up tightly from the bottom to the top. Make sure everything stays inside. Repeat this with the rest of the tortillas and filling. To make your burritos crispy, place them back in the skillet. Toast the assembled burritos for 2-3 minutes on each side until they are golden brown. This step adds a nice crunch. For serving, cut the burritos in half diagonally. Pair them with salsa and fresh cilantro for a bright touch. Enjoy this delicious meal that’s easy to make and packed with flavor. To enhance the taste of your veggie packed breakfast burritos, use some great spices. I recommend ground cumin for warmth and smoked paprika for a hint of smokiness. These spices elevate the flavor and add depth. To avoid soggy tortillas, make sure to drain your black beans well. Excess moisture leads to a limp wrap. Also, toast the assembled burritos in a skillet for a few minutes. This helps create a crispy edge while keeping the filling warm. Preparing your ingredients in advance saves you time. Chop your veggies the night before and store them in airtight containers. You can also scramble your eggs ahead of time. This makes morning assembly a breeze! Freezing burritos is a smart way to enjoy quick breakfasts. Wrap each burrito tightly in foil or plastic wrap. Store them in a freezer bag. When you need one, just heat it in the microwave or oven. It’s that easy! Pair these burritos with fresh fruit or creamy yogurt for a balanced meal. Slices of fresh avocado on the side add a nice touch. For dips, salsa is a classic choice. You can also try guacamole or a zesty yogurt sauce. These add flavor and freshness to your meal. For more ideas, check out the Full Recipe. Enjoy your tasty creation! {{image_2}} You can make your breakfast burrito even more exciting. One fun swap is using chickpea scramble instead of eggs. This adds protein and a nutty flavor. Just mash cooked chickpeas with spices. You can also add a variety of greens. Consider kale, arugula, or Swiss chard. Each green brings a unique taste and boosts nutrition. If you want more protein, add cooked chicken or turkey. Shredded meat works great and gives you a hearty bite. Another option is using lentils. They pack protein and fiber, making your burrito filling and satisfying. Simply cook lentils until soft, then mix them in with your veggies. Want to spice things up? Try Southwest-inspired ingredients. Add corn, jalapeños, and chipotle sauce for a kick. Or go for Mediterranean-style burritos. Use feta cheese, olives, and sun-dried tomatoes. These twists bring fresh flavors and make breakfast fun. You can find the full recipe in the main article to explore these variations further! You can keep leftover burritos in the fridge for up to three days. To keep them fresh, wrap each burrito tightly in plastic wrap or foil. This helps prevent drying out and keeps flavors intact. To freeze the burritos, follow these steps: 1. Allow the burritos to cool to room temperature. 2. Wrap each burrito in plastic wrap, making sure to seal it well. 3. Place the wrapped burritos in a freezer-safe bag or container. 4. Label the bag with the date and type of burrito. For reheating, here are best practices: - Remove the plastic wrap before reheating. - Microwave: Heat on high for 1-2 minutes. Check if hot in the center. - Oven: Preheat to 350°F (175°C). Place burritos on a baking sheet and heat for 15-20 minutes. - Air fryer: Set to 350°F (175°C) and heat for about 8-10 minutes. These methods keep your burritos tasty and warm, ready for quick mornings! To make breakfast burritos healthier, you can try these tips: - Use whole grain tortillas instead of flour. - Add more veggies like tomatoes or zucchini. - Reduce cheese or use low-fat options like feta. - Swap regular eggs for egg whites or tofu. - Use cooking spray instead of oil for less fat. These steps can help cut calories while keeping the taste. You still enjoy a tasty meal without feeling guilty. Yes, you can easily make these burritos vegan. Here are some ideas: - Use a plant-based egg substitute, like tofu or chickpea flour. - Replace cheese with vegan cheese or nutritional yeast. - Add more beans or lentils for a protein boost. This way, you can enjoy a delicious breakfast burrito while sticking to a vegan diet. Toppings can make your breakfast burrito even better. Here are some popular ideas: - Fresh salsa or pico de gallo for a spicy kick. - Sliced avocado or guacamole for creaminess. - Chopped cilantro or green onions for freshness. - Hot sauce for extra flavor. Mix and match these toppings to balance flavors and make your burrito fun! This post covered making tasty breakfast burritos from fresh ingredients. You can customize them with extra veggies, proteins, or spices. I shared tips for meal prep and storage options to make your mornings easier. Enjoy experimenting with different flavors and combinations. With these easy steps, you can craft delicious burritos every time. So, gather your ingredients and get cooking!

Veggie Packed Breakfast Burritos for Quick Mornings

Are you tired of rushed mornings with no time for a healthy breakfast? I’ve got the perfect solution for you:

- 1 lb chicken breast, cut into bite-sized pieces - 1/4 cup honey - 1/4 cup soy sauce (low sodium preferred) - 4 cloves garlic, minced - 1 tablespoon fresh ginger, grated - 1 tablespoon cornstarch - 2 tablespoons vegetable oil - Salt and pepper to taste The main star of this dish is chicken breast. It cooks fast and stays juicy. Honey adds a sweet touch, while soy sauce brings depth. Garlic and ginger add a punch of flavor. Together, these ingredients create a tasty bite. - Sesame seeds - Sliced green onions - Extra honey for drizzling Garnishes make your dish pop. Sesame seeds add crunch. Sliced green onions bring fresh flavor. A drizzle of extra honey gives a sweet finish. These tiny touches make a big difference in presentation and flavor. For the full recipe, check out the Honey Garlic Chicken Bites . Start by grabbing a mixing bowl. Add 1/4 cup of honey, 1/4 cup of soy sauce, 4 minced garlic cloves, and 1 tablespoon of grated ginger. Whisk these ingredients together until they blend well. This will create a sweet and savory marinade. It's important to reserve 2 tablespoons of this marinade for later use. This reserved portion will add extra flavor at the end. Next, take your chicken breast, cut into bite-sized pieces. In another bowl, toss the chicken with 1 tablespoon of cornstarch, salt, and pepper. This step is key for a crispy texture. Make sure each piece is evenly coated. An even coating helps the chicken cook properly and keeps it juicy inside. Now, heat 2 tablespoons of vegetable oil in a large skillet over medium-high heat. Once the oil is hot, add the chicken bites in a single layer. If your skillet is small, you may need to cook in batches. Cook the chicken for about 5 to 6 minutes. Turn the pieces occasionally until they are golden brown and cooked through. This browning adds flavor and a nice crunch. After the chicken is cooked, reduce the heat to medium. Pour the remaining marinade over the chicken. Stir well to coat each piece. Cook for an additional 2 to 3 minutes until the sauce thickens slightly. This will create a sticky glaze on the chicken. Remove from heat and drizzle the reserved marinade over the bites for added flavor. Finally, garnish with sesame seeds and sliced green onions before serving. For the full recipe, check out the previous section. Enjoy your cooking! To get the best flavor and texture, start with dry chicken. Pat the chicken pieces with paper towels. This step helps the coating stick well. If the chicken is wet, it will not brown nicely. Another mistake is overcrowding the pan. If you add too many pieces at once, they will steam instead of fry. Cook in batches for crispy chicken bites. To boost the taste, consider adding spices like paprika or chili powder. These spices can give a nice kick. You can also experiment with herbs, like basil or thyme, for a fresh twist. If you want more sweetness, add a little more honey. For saltiness, add a splash more soy sauce. Always taste as you go to find your perfect balance. Honey garlic chicken bites pair well with rice or noodles. You can serve them with a side salad for freshness. For a fun touch, use toothpicks for easy snacking. To make your dish look great, drizzle some extra honey on top. A sprinkle of sesame seeds and sliced green onions adds color and crunch. Enjoy these bites as a tasty snack or a meal! {{image_2}} You can switch chicken for shrimp or tofu. Shrimp cooks quickly and gets a nice texture. Tofu soaks up flavors well and is great for a plant-based option. For shrimp, use about 1 pound of large shrimp. Peel and devein them first. For tofu, choose firm tofu and cut it into bite-sized pieces. Both options still work great with the honey garlic sauce. Try different sauces for new tastes. Teriyaki sauce gives a sweet and savory kick. If you like heat, add some chili sauce. You can also mix in vegetables for more flavor and nutrition. Bell peppers, broccoli, or snap peas add color and crunch. Just toss them in with the chicken for a tasty twist. You can bake the chicken for a healthier option. Preheat your oven to 400°F. Place the coated chicken bites on a lined baking sheet. Bake for about 20 minutes, flipping halfway through. They’ll be crispy and delicious! Alternatively, use a slow cooker for ease. Just mix the chicken and sauce in the cooker. Set it on low for 4 hours or high for 2 hours. This method keeps the chicken juicy and full of flavor. For the full recipe, check back to ensure you have all the steps. To keep your honey garlic chicken bites fresh, store them in an airtight container. This method locks in flavors and moisture. Place the container in the fridge right after the meal. They will stay good for about 3 to 4 days. If you want to enjoy them later, make sure they cool down before sealing. You can freeze these chicken bites for longer storage. First, let them cool completely. Then, place them in a freezer-safe bag. Squeeze out as much air as you can before sealing. They can last up to 3 months in the freezer. When you're ready to eat, thaw them in the fridge overnight. To reheat, use the oven for the best results. Preheat your oven to 350°F (175°C). Spread the chicken bites on a baking sheet and cover with foil. Heat for about 15-20 minutes, or until hot throughout. You can also use a microwave, but they might lose some crispness. Enjoy your meal! For the full recipe, check out Honey Garlic Chicken Bites. You can serve honey garlic chicken bites with many tasty sides. Here are some great ideas: - Steamed rice or fried rice - Crispy vegetables like carrots or broccoli - Fresh salad with a light dressing - Dipping sauces such as sweet chili or ranch - Corn on the cob for a fun touch These sides will balance the sweet and savory flavors of the chicken. Yes, you can prepare this recipe ahead of time! Here are some tips: - Marinate the chicken bites in the sauce the night before. This makes them extra flavorful. - Cook the chicken and store it in the fridge for up to three days. - Reheat the chicken bites in a pan over low heat or in the microwave. This makes dinner easy on busy nights. To add heat to the sauce, try these options: - Add red pepper flakes for a little kick. - Mix in sriracha or chili sauce for a spicy twist. - Use fresh chopped jalapeños for a fresh heat. These simple changes will make your honey garlic chicken bites more exciting! For the full recipe, check out the section above. In this blog post, we explored how to make delicious honey garlic chicken bites. We discussed key ingredients like chicken, honey, soy sauce, garlic, and ginger. You learned the step-by-step process for marinating, cooking, and enhancing flavors. We also provided tips for avoiding common mistakes and suggested variations for protein and cooking methods. Remember, experimenting is key to making this dish your own. Enjoy your cooking adventure!

Honey Garlic Chicken Bites Tasty and Simple Recipe

Ready to spice up your dinner routine? Let’s dive into my tasty and simple Honey Garlic Chicken Bites recipe! It’s

To make egg salad avocado boats, gather the following ingredients: - 4 large eggs - 2 ripe avocados - 2 tablespoons Greek yogurt - 1 tablespoon Dijon mustard - 1 celery stalk, finely chopped - 2 green onions, thinly sliced - Salt and pepper to taste - Fresh dill, for garnish (optional) - Paprika, for garnish (optional) These ingredients blend to create a tasty and healthy dish. The eggs provide protein, while the avocados add healthy fats. Greek yogurt gives a creamy texture without too many calories. Celery and green onions add crunch and freshness. You can play with the spices to make it your own. If you want the full recipe, check the Egg Salad Avocado Boats section above. Each ingredient plays a key role in the dish, so choose fresh ones for the best flavor. - Boil the eggs: Place 4 large eggs in a pot. Cover them with water. Bring the water to a boil over medium heat. Once it boils, cover the pot and take it off the heat. Let the eggs sit for 12 minutes. - Cool the eggs in an ice bath: After 12 minutes, move the eggs to an ice bath. This helps them cool quickly and makes peeling easier. - Halve and pit the avocados: Take 2 ripe avocados and slice them in half. Remove the pit carefully to avoid injury. - Create a well for the egg salad: Use a spoon to scoop out a little of the avocado flesh. This creates a well for your egg salad, so it fits nicely. - Chop and mix the ingredients: Once the eggs cool, peel off the shells. Chop the eggs into small pieces. In a mixing bowl, combine the chopped eggs with 2 tablespoons of Greek yogurt, 1 tablespoon of Dijon mustard, 1 finely chopped celery stalk, and 2 thinly sliced green onions. Mix gently until all ingredients blend well. - Season the mixture: Add salt and pepper to taste. This step enhances the flavor of the salad. - Fill the avocado halves with egg salad: Generously scoop the egg salad into each avocado half. Each bite will be creamy and delicious. Now, you have a tasty treat ready to enjoy! For the complete recipe, check out the Full Recipe section. To make the best egg salad, start with fresh eggs. Fresh eggs give a better taste and texture. Look for eggs that are free-range or organic when possible. These eggs often have richer flavor and vibrant yolks. Next, balance your flavors with seasonings. Greek yogurt adds creaminess without excess fat. Dijon mustard gives a nice tang. I like to chop celery and green onions for crunch. Don’t forget to season with salt and pepper. Taste as you mix to find the perfect blend. Serving your egg salad avocado boats well is key. Use a nice platter to display them. You can arrange them in a circle or a line. Each avocado half should sit flat on the plate. Garnishing adds visual appeal. Sprinkle paprika over the top for a pop of color. Fresh dill is a great choice for an extra touch of flavor. These small details make your dish look gourmet and inviting. For the full recipe, check the section above. {{image_2}} You can switch up the Greek yogurt in egg salad. If you want a creamier taste, try sour cream or even cottage cheese. These options keep the dish tasty and rich. You can also use avocado instead of yogurt for extra creaminess. Adding different vegetables or herbs can change the flavor. Chopped bell peppers can add a nice crunch. Fresh parsley or cilantro can bring a bright taste. You can even toss in some diced pickles for a tangy twist. To make it vegan or vegetarian, swap the eggs and yogurt. Use chickpeas instead of eggs. Mash them up and mix with vegan mayo or tahini. This gives you a similar texture while keeping it plant-based. For low-carb options, skip the avocados and serve the egg salad in lettuce wraps. This keeps the meal light and fresh. You can also reduce the amount of yogurt to cut down on carbs while still enjoying the dish. For the full recipe, check out the details above. To store your egg salad avocado boats, use an airtight container. Keep the egg salad separate from the avocado halves. This helps the avocado stay fresh. You can store the egg salad in the fridge for up to three days. The avocados will brown quickly, so try to eat them within a day. If you have leftover avocado, sprinkle lemon juice on it to slow browning. Reheating egg salad is not common since it tastes best fresh. If you need to warm it up, gently heat it in the microwave for a few seconds. Cover the bowl to keep moisture in. To prevent your avocados from browning, store them with the pit inside. This simple trick can help maintain their color. Also, you can brush them with lemon juice. This adds flavor and keeps them looking fresh longer. For the full recipe, check out the Egg Salad Avocado Boats section. You can use Greek yogurt instead of mayonnaise. It adds creaminess and tang. Other options include mashed avocado or hummus. Each choice adds a unique flavor. You can mix and match these ingredients to find your favorite. Yes, you can prep the egg salad ahead. Make the egg salad and store it in the fridge. Keep it in an airtight container. Cut the avocados just before serving. This keeps them fresh and green. These boats pair well with many sides. Try whole-grain toast for a crunchy contrast. A light salad adds freshness. You can also serve with fresh fruit for a sweet touch. For a complete meal, include soup or chips. You now have a clear guide to making egg salad avocado boats. This recipe combines flavorful ingredients like eggs and ripe avocados. I shared simple steps for preparation and serving. You learned tips for the perfect salad, including ingredient swaps and storage ideas. Enjoy experimenting with flavors and presentations. These avocado boats are not just tasty; they are healthy too. Try them for lunch or a snack. Your friends and family will love them!

Egg Salad Avocado Boats Perfect and Tasty Delight

Looking for a fun and healthy meal idea? Try Egg Salad Avocado Boats! This dish combines creamy, nutritious avocados and

- 2 ripe bananas, frozen - 2 tablespoons smooth peanut butter - 1 cup almond milk (or milk of choice) - 1 tablespoon honey or maple syrup (optional) - 1/2 teaspoon vanilla extract - 1/4 teaspoon ground cinnamon - 1/4 cup Greek yogurt (for added creaminess) - Ice cubes (optional, for thickness) I love making this smoothie because it is quick and easy. You only need a few simple items. The key ingredient is ripe, frozen bananas. They give the smoothie a sweet and creamy base. Make sure to peel and slice them before freezing for easy blending. Smooth peanut butter adds richness. It pairs well with bananas. You can use any nut butter if you like. Just keep the ratio the same. I often choose almond milk for a lighter feel, but you can use any milk you prefer. If you want extra sweetness, add honey or maple syrup. This is optional, so taste first. Vanilla extract and ground cinnamon add nice flavor notes. They make the smoothie feel special and cozy. Greek yogurt makes the treat creamy and boosts protein. You can skip it for a vegan option. Finally, ice cubes can thicken it up if you like a colder drink. Mix all these ingredients, and you have a delicious smoothie. Check out the Full Recipe for detailed steps on how to blend everything together. - Step 1: Prepare the Bananas Start with two ripe bananas. Peel them and break them into chunks. Frozen bananas work best. They make the smoothie thick and cold. - Step 2: Add Ingredients to Blender Place the banana chunks in a blender. Next, add two tablespoons of smooth peanut butter. Then, include a quarter cup of Greek yogurt. This will make your smoothie creamy. - Step 3: Blend Until Smooth Pour in one cup of almond milk. If you like it sweet, add one tablespoon of honey or maple syrup. Don’t forget half a teaspoon of vanilla extract and a quarter teaspoon of ground cinnamon. Now, blend everything on high speed until it is smooth and creamy. - Step 4: Adjust Consistency and Taste Check the thickness of your smoothie. If you want it thicker, add ice cubes and blend again. Taste the smoothie and adjust sweetness if needed. Add more honey or syrup if you like it sweeter. Now you have a delicious Peanut Butter Banana Smoothie ready to enjoy! For the complete recipe details, check the Full Recipe section. - Achieving the Perfect Consistency To make a smooth smoothie, blend on high speed. Start with frozen bananas for a thick base. If it's too thick, add more almond milk. Blend again until you reach your desired texture. - Making it Creamier with Yogurt Adding Greek yogurt makes your smoothie creamier. It gives a rich flavor and adds protein. Use 1/4 cup as suggested in the recipe. This simple step creates a more satisfying drink. - Flavor Boosters and Sweetness Adjustments If you want a sweeter taste, add honey or maple syrup. You can also try other sweeteners like agave or stevia. Taste as you blend and adjust to your liking. - Beautifying Your Smoothie Presentation matters! Pour your smoothie into clear glasses. This lets the vibrant color shine through. Sprinkle ground cinnamon on top for a nice look. Add banana slices or a drizzle of peanut butter for extra flair. - Serving Suggestions Serve your smoothie chilled for the best taste. You can also garnish with nuts or seeds. This adds crunch and makes it more appealing. Enjoy it as a quick breakfast or a refreshing snack. {{image_2}} Vegan Peanut Butter Banana Smoothie If you're vegan, you can still enjoy this smoothie. Just swap almond milk for any plant-based milk. Use maple syrup for sweetness. This change keeps the flavors rich without dairy. High-Protein Options Want more protein? Add a scoop of your favorite protein powder to the mix. You can also use Greek yogurt, which adds creaminess and protein. This makes the smoothie a great post-workout snack. Nut-Free Alternatives If you need a nut-free option, use sunflower seed butter instead of peanut butter. It gives a similar flavor and is just as delicious. You can still use almond milk or switch to oat milk for a nut-free choice. Adding Greens (Spinach or Kale) Want to sneak in some veggies? Toss in a handful of spinach or kale. These greens blend well and add nutrients without changing the taste much. It’s a great way to boost your smoothie's health factor. Enhancing with Other Fruits Feel free to mix in other fruits. Berries like strawberries or blueberries pair well with bananas. You can also try mango or pineapple for a tropical twist. This adds flavor and makes your smoothie even more fun! Try these variations next time you whip up your Peanut Butter Banana Smoothie. For the full recipe, check out the details above! If you have leftover smoothie, refrigeration is best for short-term storage. Pour the smoothie into a jar or a glass. Seal it tightly with a lid. Store it in the fridge for up to 24 hours. The smoothie may separate after sitting. Just shake it well before drinking. For longer storage, freezing is an option. Pour the smoothie into ice cube trays or freezer bags. This way, you can save portions for future use. Smoothies can last in the freezer for about 2 to 3 months. When ready to enjoy, let it thaw in the fridge overnight or blend it frozen for a thick treat. Choose containers that seal well to keep the smoothie fresh. Glass jars are great. They do not absorb flavors. They also do not stain. Plastic containers with tight lids work well too. If you're freezing, use freezer-safe bags or trays. These are easy to store and take up less space. Can I use fresh bananas instead of frozen? Yes, you can use fresh bananas. But frozen bananas make the smoothie colder and creamier. If you use fresh, add some ice cubes for thickness. How to make a lower-calorie version? To cut calories, use unsweetened almond milk and skip the honey or syrup. You can also use less peanut butter or low-calorie peanut butter. What is the nutritional information for this smoothie? This smoothie has about 300 calories per serving. It includes protein, healthy fats, and fiber from bananas and peanut butter. The Greek yogurt adds extra protein and creaminess. How can I make this smoothie more filling? Add a scoop of protein powder or some oats. Both options will boost the fiber and protein content, making the smoothie more satisfying. Is it okay to use flavored peanut butter? Yes, flavored peanut butter adds a nice twist. Try chocolate or cinnamon flavors for a fun change. Just be aware that these may increase sugar content. How long does the smoothie last in the fridge? The smoothie is best when fresh. However, it can last up to 24 hours in the fridge. Just give it a good shake or stir before drinking. This blog post detailed how to make a Peanut Butter Banana Smoothie. You learned about key ingredients, easy steps for making it, and creative variations. These tips help you create a tasty drink. You can adjust flavors and make it fit your diet. Remember, storing leftovers properly ensures freshness. Now, you’re ready to blend your smoothie with confidence and enjoy a delicious treat!

Peanut Butter Banana Smoothie Quick and Tasty Treat

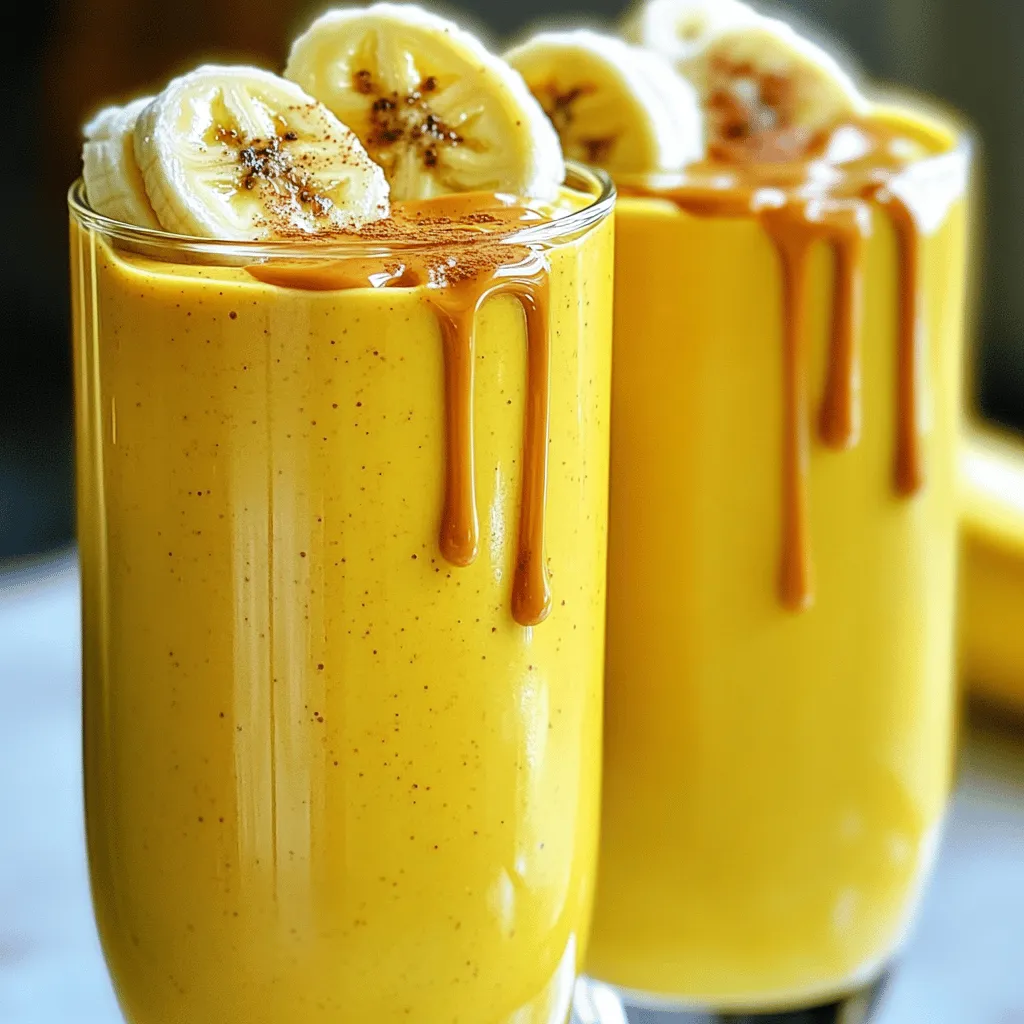
Looking for a quick, tasty treat? This Peanut Butter Banana Smoothie is your answer! With just a few simple ingredients,

- 2 boneless, skinless chicken breasts - 1 tablespoon olive oil - 1 teaspoon chili powder - 1 teaspoon cumin - 1 teaspoon garlic powder - 1 teaspoon onion powder - Salt and pepper to taste The chicken is the star of our salad. The marinade makes it juicy and tasty. Seasoning helps bring out the best flavors. Use enough spices to coat the chicken well. This step is key for a delicious meal. - 4 cups romaine lettuce, chopped - 1 cup cherry tomatoes, halved - 1 cup black beans, rinsed and drained - 1 cup corn (fresh, frozen, or canned) - 1 avocado, diced - ½ cup shredded cheese (cheddar, Monterey Jack, or Mexican blend) - ½ cup salsa - ¼ cup sour cream or Greek yogurt - Fresh cilantro, chopped (for garnish) - Tortilla chips (for crunch) Fresh veggies add texture and color. Romaine lettuce forms the base. Cherry tomatoes give a sweet burst. Black beans and corn add protein and fiber. Avocado brings creaminess. You can top it with cheese and salsa for extra flavor. For more fun, try adding extra toppings like jalapeños, olives, or lime juice. You can also serve this with a side of rice or tortilla chips. These extras can make the meal even more enjoyable. To make the chicken flavorful, start with the marinade. In a bowl, mix together 1 tablespoon of olive oil, 1 teaspoon of chili powder, 1 teaspoon of cumin, 1 teaspoon of garlic powder, 1 teaspoon of onion powder, salt, and pepper. This mix gives the chicken a zesty kick. Coat the chicken breasts well with this mixture. Let them sit for about 15 minutes. This short time allows the flavors to soak in without being too long. You can grill or pan-sear the chicken. If you grill, preheat your grill or grill pan to medium-high heat. Cook the chicken for about 6-7 minutes on each side. You want the internal temperature to reach 165°F (75°C). This ensures the chicken is safe to eat. If you do not have a meat thermometer, slice the chicken open. The meat should be white and no longer pink. After cooking, remove it from heat and let it cool slightly. Dice it into bite-sized pieces for the salad. Now, it’s time to build your salad bowl! Start by layering the chopped romaine lettuce at the bottom. This gives a nice base and adds crunch. Next, add the halved cherry tomatoes, black beans, corn, diced avocado, and the grilled chicken. Layering your salad not only looks great but also mixes flavors well. Fresh ingredients make a big difference in taste. The more colorful your bowl, the better it looks and tastes! Finish with salsa, sour cream or Greek yogurt, cheese, and crushed tortilla chips. Enjoy your tasty Chicken Taco Salad Bowl! For more details, check out the Full Recipe. To boost the taste of your chicken taco salad, adjust the spices. - Add cayenne pepper for heat. - Use smoked paprika for depth. Fresh herbs can also make a big difference. - Cilantro brightens the dish. - Try green onions for a mild bite. Meal prep makes life easier. You can prepare components in advance. - Cook the chicken and store it in the fridge. - Chop veggies and keep them in separate containers. This will help maintain freshness. Make your salad bowl fun and appealing. - Layer ingredients in a clear bowl for a colorful look. - Serve with crispy tortilla chips on the side. For parties, consider a taco salad bar. - Let guests build their own bowls with toppings. This keeps it interactive and fun! For the full recipe, check the link above. {{image_2}} For a tasty vegetarian version, you can swap the chicken for grilled vegetables or beans. Try using: - Grilled zucchini - Bell peppers - Sliced mushrooms - Chickpeas These options add great texture and flavor. Use spices like cumin and chili powder to keep the taste bold. You can also add roasted corn for a sweet touch. Fresh herbs like cilantro or parsley brighten up the dish. If you're looking for low-carb options, use lettuce wraps instead of tortilla chips. For gluten-free, check your salsa and toppings. Make sure they are certified gluten-free. For dairy-free variations, replace cheese with avocado or use nutritional yeast for a cheesy flavor. You can also skip sour cream and use a dairy-free yogurt or guacamole instead. To mix things up, try adding different cuisines to your salad. You could: - Incorporate Mediterranean flavors with feta cheese and olives. - Use Asian-inspired ingredients like sesame dressing and edamame. - Add Mexican flair with jalapeños and pico de gallo. Unique ingredients can take your salad to new heights. Try adding roasted nuts or seeds for crunch. You can also mix in fruits like mango or pineapple for a sweet twist. For the full recipe, check out the Zesty Chicken Taco Salad Bowls. To keep your Chicken Taco Salad Bowls fresh, use airtight containers. Store any leftovers in the fridge. The salad will stay good for up to three days. Keep the dressing separate to avoid soggy greens. This way, your salad stays crisp and tasty. If you have leftover chicken, reheat it gently. Use a microwave or stovetop. Heat the chicken just until warm. This keeps the meat tender and juicy. Avoid overheating to prevent dryness. Always store your dressing separately. This keeps your salad fresh longer. You can freeze some salad components. Chicken and black beans freeze well. Store them in freezer-safe bags. Remove as much air as possible for longer shelf life. Avoid freezing lettuce and tomatoes; they don't thaw well. Prepare your salad fresh for the best flavor and texture. To make Chicken Taco Salad Bowls, follow these key steps: 1. Marinate the chicken with olive oil, chili powder, cumin, garlic and onion powders, plus salt and pepper. 2. Grill or pan-cook the chicken until it reaches 165°F (75°C). 3. Chop romaine lettuce and place it at the bottom of your bowl. 4. Add toppings like tomatoes, black beans, corn, avocado, and the cooked chicken. 5. Drizzle salsa and add sour cream or Greek yogurt on top. 6. Finish with shredded cheese and crushed tortilla chips. This [Full Recipe] makes a colorful, tasty meal. Yes, you can use leftover chicken. Just ensure it is stored properly. Here are some best practices: - Shred or chop the chicken into small pieces. - Reheat it gently to avoid drying it out. - Mix it with a little salsa or dressing for added moisture. Using leftover chicken saves time and still brings great flavor. You can add many toppings to boost the flavor of your salad. Here are some popular choices: - Sliced jalapeños for heat - Chopped green onions for freshness - Black olives for a briny taste - Diced bell peppers for crunch - Fresh cilantro for a burst of flavor These toppings add nutrition, too. For example, jalapeños contain vitamin C, while black beans provide fiber. To give your salad a spicy kick, try these tips: - Add sliced jalapeños or diced serrano peppers. - Use spicy salsa or hot sauce as a dressing. - Mix in some crushed red pepper flakes. These spicy ingredients can elevate the taste and add excitement to your meal. This blog post showed you how to make a tasty chicken salad bowl. We covered ingredients like chicken, fresh veggies, and fun toppings. You learned step-by-step marinating and cooking tips to ensure flavor. I shared ways to customize your meal for different diets and cuisines. Now, you can enjoy a fresh salad that's easy to make and mix! Try the tips for meal prep and storage to keep your meals great all week. Your salad bowl creation can wow family and friends. Enjoy your cooking journey!

Chicken Taco Salad Bowls Flavorful and Healthy Meal

Craving a meal that’s both tasty and healthy? Chicken taco salad bowls are your perfect answer! Packed with fresh veggies,

The Avocado BLT Salad bursts with color and flavor. To make this salad, gather these simple ingredients: - 4 cups mixed salad greens (e.g., arugula, spinach, romaine) - 1 ripe avocado, diced - 6 slices of cooked turkey bacon, chopped - 1 cup cherry tomatoes, halved - ½ cup cucumber, diced - ¼ cup red onion, thinly sliced - 3 tablespoons olive oil - 2 tablespoons apple cider vinegar - 1 teaspoon Dijon mustard - Salt and pepper to taste - Fresh chives or parsley for garnish This mix creates a delightful, crunchy texture and a burst of flavors. The creamy avocado pairs well with the crispy turkey bacon. Each bite offers a sweet note from the cherry tomatoes and a refreshing crunch from the cucumber. The red onion adds a sharp kick, making it even tastier. When you gather these ingredients, look for ripe avocados. They should yield slightly when you squeeze them gently. Fresh greens are key, too. Choose vibrant, crisp leaves for the best taste. You can find the full recipe online to guide you through the cooking process, making it easy to whip up this fresh salad. Enjoy the mix of flavors and textures that this Avocado BLT Salad offers! Start by washing and drying the mixed salad greens. Use your favorite greens, like arugula, spinach, or romaine. Next, take one ripe avocado and cut it into small cubes. This adds creaminess to the salad. Then, chop six slices of cooked turkey bacon into bite-sized pieces. This gives a nice, smoky flavor. Halve one cup of cherry tomatoes for a burst of sweetness. Dice half a cup of cucumber for crunch. Finally, thinly slice a quarter cup of red onion to add a sharp taste. In a small bowl, combine three tablespoons of olive oil. Add two tablespoons of apple cider vinegar for tang. Mix in one teaspoon of Dijon mustard to enhance flavor. Season with salt and pepper to taste. Whisk these ingredients together until smooth. This dressing will bring all the salad components together. In a large bowl, combine the prepared salad ingredients. Pour the dressing over the top. Gently toss everything until it’s well coated. Taste the salad and add more salt or pepper if needed. Let it sit for five minutes. This helps the flavors blend. Before serving, sprinkle fresh chives or parsley on top for a pop of color. You can find the full recipe for this delicious salad [Full Recipe]. Enjoy your fresh and flavor-packed Avocado BLT Salad! When selecting an avocado, look for one that feels slightly soft. You want a ripe avocado, but not too mushy. The skin should be dark green to black, depending on the type. Gently press the avocado; it should yield to light pressure. If it's too firm, it needs more time to ripen. You can speed this up by placing it in a paper bag. For the bacon in your Avocado BLT Salad, I recommend using turkey bacon. It has less fat than pork bacon but still packs a savory punch. Cook it until crisp for the best texture. You can also try plant-based bacon if you want a vegetarian option. It gives a unique flavor while keeping the dish light. Adding fresh herbs can really boost your salad's taste. Chives and parsley are great choices. They add brightness and freshness. Just chop them finely and sprinkle them on top before serving. You can also try adding basil or cilantro for a twist. Experiment with flavors to find your favorite mix. For the full recipe, check out the provided link. {{image_2}} You can add proteins to the Avocado BLT Salad for extra flavor. Grilled chicken works well. Just slice it up and mix it in. Cooked shrimp is another tasty choice. It adds a nice touch. You can also use tofu for a meat-free option. Protein boosts keep you full longer. If you want a vegan salad, swap turkey bacon for crispy chickpeas. They add crunch and protein. Replace the dressing with a vegan option made from tahini and lemon juice. This keeps the salad fresh and tasty. For a vegetarian twist, try using regular bacon or tempeh bacon. Both add great flavor and texture. You can easily swap ingredients to fit your diet. For gluten-free needs, ensure your dressing is gluten-free. You can use quinoa or lentils instead of bacon. They add protein and fiber. If you're low on carbs, skip the bacon altogether. Use more veggies or some nuts. Almonds or walnuts add a nice crunch without carbs. For the full recipe, check the [Full Recipe]. If you have leftover salad, store it in an airtight container. Keep it in the fridge for up to two days. The longer it sits, the soggier it gets. So, try to eat it soon for the best taste. To keep your salad fresh, store the dressing separately. When ready to eat, pour it on the salad. This helps keep the greens crisp. You can also wrap the avocado with lemon juice. This slows down browning. If you want warm turkey bacon, reheat it in the microwave. Use a plate and cover it with a paper towel. Heat for 20 to 30 seconds. You can also re-crisp it in a skillet for extra crunch. Enjoy your salad while everything is fresh! For the full recipe, check out the details above. Yes, you can make the Avocado BLT Salad in advance. However, I suggest you keep the avocado and dressing separate. This keeps everything fresh. You can mix the salad just before serving. It will taste better this way. You can use regular bacon if you prefer. Another option is plant-based bacon for a vegan spin. Crispy pancetta also works well. Each option gives a different taste, so choose what you like best. To keep avocado from browning, use lemon juice or lime juice. Just squeeze a little over the diced avocado. This helps slow down the browning process. You can also mix the avocado in right before serving. That way, it stays fresh and green. This blog post showed you how to make a tasty Avocado BLT Salad. We covered the needed ingredients, step-by-step instructions, and tips for the best flavors. You learned how to customize the recipe for your diet and store any leftovers. Cooking can be fun and easy. With this salad, you have a fresh meal packed with good stuff. Enjoy making it your own!

Avocado BLT Salad Fresh and Flavorful Delight

Are you ready to experience a fresh and flavorful delight? My Avocado BLT Salad combines crisp greens, creamy avocado, and

- Orzo pasta: This small pasta looks like rice. It cooks fast and absorbs flavors well. - Vegetables and herbs: Use fresh cherry tomatoes, crisp cucumbers, and red onions. Add a touch of parsley for a fresh taste. - Dressings and seasonings: A mix of olive oil, lemon juice, and oregano gives this salad a sunny flavor. Salt and pepper bring everything together. - Protein options: You can add grilled chicken, shrimp, or chickpeas for extra protein. - Nuts and seeds: Toss in some toasted pine nuts or sunflower seeds for a nice crunch. - Additional cheeses: Try using goat cheese or grated Parmesan for a different flavor. For the full recipe, check out the Mediterranean Orzo Delight. To start, bring two cups of vegetable broth to boil in a medium pot. This adds great flavor to the orzo. Once boiling, add one cup of orzo pasta. Cook it for about eight to ten minutes. You want it to be al dente, which means it should be firm but cooked through. Tips for achieving the perfect al dente texture: - Stir the orzo occasionally to avoid sticking. - Taste it a minute or two before the time is up. This helps you catch the perfect texture. - Once cooked, drain the orzo in a colander. Rinse it under cold water. This stops the cooking and cools it down quickly. Now, let’s make the salad. In a large mixing bowl, combine the cooled orzo, one cup of halved cherry tomatoes, one diced cucumber, half a finely chopped red onion, and one cup of halved Kalamata olives. Next, add one cup of crumbled feta cheese and a quarter cup of chopped fresh parsley. These ingredients create a colorful and tasty mix. For the dressing, take a small bowl. Whisk together a quarter cup of olive oil, two tablespoons of lemon juice, one teaspoon of dried oregano, and a pinch of salt and pepper. Pour the dressing over your salad mix. Gently toss all the ingredients together until well combined. This helps each bite be full of flavor. Taste your salad and adjust the seasoning with extra salt or pepper if needed. Let the salad sit for about 15 minutes at room temperature. This helps all the flavors meld together beautifully. For the full recipe, check out the Mediterranean Orzo Delight. Enjoy making your Greek Orzo Salad! One common mistake is overcooking the orzo. You want it al dente, which means firm. Follow the package instructions closely. Once cooked, drain it right away and rinse it under cold water. This stops the cooking process and keeps it from getting mushy. Another mistake is forgetting to let the flavors meld. After tossing your salad, let it sit for about 15 minutes. This time allows the dressing and ingredients to blend. You’ll be surprised how much better it tastes! To enhance flavor, adjust the seasoning to your liking. Start with the salt and pepper. Taste your salad after mixing. If it’s too bland, add a pinch more salt or pepper. Fresh herbs can make a big difference too. I love using parsley, basil, or mint. They add a burst of freshness. Try mixing in a bit of each for a unique twist! Presentation matters. Serve the salad in a large, colorful bowl. This makes it more inviting. For garnishing, add extra parsley or whole olives on top. It not only looks pretty but also adds flavor. Choosing the right serving dish can elevate your salad. A shallow bowl or platter works best. This way, everyone can see the beautiful colors and textures. Enjoy your meal! {{image_2}} To make your Greek Orzo Salad unique, try adding Mediterranean ingredients. You can toss in roasted red peppers or artichoke hearts. They add great texture and flavor. Fresh herbs like dill or mint can brighten the dish, too. Seasonal vegetable swaps also work well. In summer, add ripe zucchini or bell peppers. In fall, think about using roasted butternut squash. These swaps keep the salad fresh and exciting all year. If you need gluten-free options, use rice or quinoa instead of orzo. Both grains bring a great taste and varied texture. You can find gluten-free orzo in some stores as well. For vegan adaptations, skip the feta and use avocado or a nut-based cheese. You can also add chickpeas for protein. They taste amazing and add extra nutrition. To make a full meal, pair your salad with grilled chicken or fish. These proteins complement the fresh flavors well. You could also serve it alongside pita bread or hummus for a fun twist. For a light lunch, enjoy the Greek Orzo Salad with a cup of soup. A lemony lentil soup goes perfectly with it. For the full recipe of Mediterranean Orzo Delight, be sure to check out the complete instructions. It will guide you to create this flavorful dish with ease. After enjoying your Greek Orzo Salad, store any leftovers right away. Use an airtight container to keep it fresh. This will help lock in the flavors and moisture. Place the salad in the fridge within two hours of serving. The cool air will slow down spoilage. To keep the salad fresh, avoid adding the dressing until you're ready to eat. The dressing can make the orzo soggy. Store it separately in a small container. When you're ready to enjoy it again, simply mix in the dressing. If you have more salad than you can eat, you can freeze it. However, freezing can change the texture of some ingredients. It’s best to freeze only the orzo and vegetables. Avoid freezing feta cheese and olives, as they do not thaw well. To freeze, place the salad in a freezer-safe container. Leave some space at the top for expansion. To thaw, take it out of the freezer and move it to the fridge overnight. Once thawed, give it a good stir. You can add fresh dressing before serving. In the fridge, your Greek Orzo Salad will last for about 3 to 5 days. Keep an eye on the smell and look for any signs of spoilage. If it smells off or looks slimy, it’s best to toss it out. If you freeze the salad, it can last for 2 to 3 months. After this time, it may lose flavor and quality. Always check for signs of spoilage before eating. If it looks or smells bad, do not eat it. Orzo is a type of pasta shaped like rice. It is typically made from semolina flour or whole wheat. One serving of orzo gives you about 200 calories, 7 grams of protein, and 42 grams of carbs. It also has some fiber and iron. This makes orzo a filling and tasty base for salads. Yes, you can make Greek Orzo Salad ahead of time. To prep, cook the orzo and cool it down. Chop your veggies and store them in the fridge. Mix the dressing in a separate container. Combine everything for the best taste just before serving. This keeps the salad fresh and crunchy. If you need a feta cheese substitute, try using goat cheese or ricotta. For a dairy-free option, use tofu or a nut-based cheese. These options still give a nice creaminess to your salad while meeting different dietary needs. For the full recipe, check out Mediterranean Orzo Delight. Greek Orzo Salad is a simple dish that packs flavor. We covered the main ingredients like orzo, fresh veggies, and dressings. You learned how to cook orzo perfectly and mix the salad. Avoid common mistakes and try my tips to enhance the taste. Explore variations to make it your own, and don’t forget to store your leftovers properly. This salad is not just tasty; it fits many diets. Enjoy making this dish again and again!

Greek Orzo Salad Flavorful and Fresh Mealtime Dish

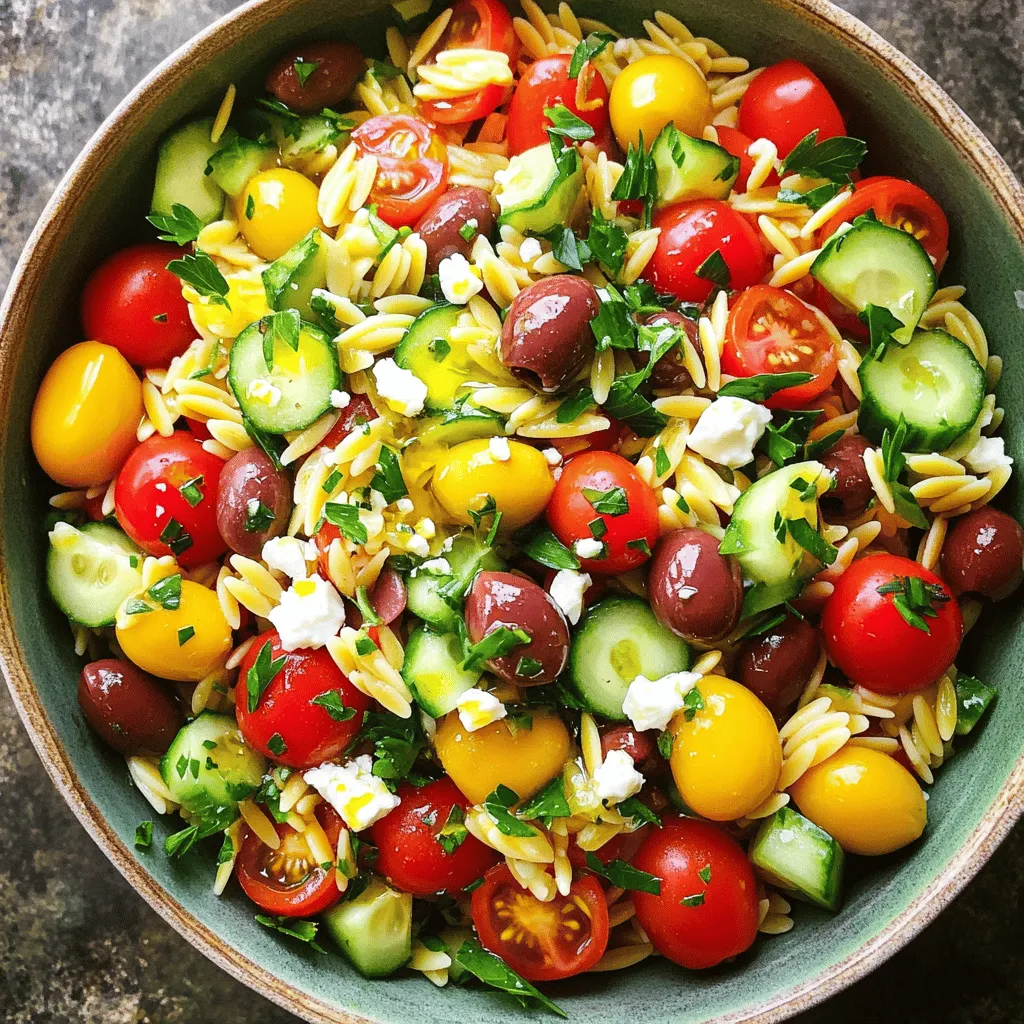
Are you craving a fresh and vibrant dish that bursts with flavor? Look no further than Greek Orzo Salad! This

Older posts
Newer posts
← Previous Page1 … Page62 Page63 Page64 … Page86 Next →

dsad

© 2026 Cooking Wells • Built with GeneratePress

Our Policies

  • Copyright Policy
  • Cookie Policy
  • GDPR Policy
  • Privacy Policy
  • Disclaimer
  • Terms Of Use

More Information

  • Home
  • About
  • Contact
  • Appetizers
  • Dessert
  • Dinner
  • Drinks
©2026, Cooking Wells About Back To Top