![To make a great stew, you need fresh and hearty ingredients. Here’s what you’ll need: - 1 cup green or brown lentils, rinsed - 1 medium onion, diced - 2 cloves garlic, minced - 2 carrots, diced - 2 celery stalks, diced - 1 medium zucchini, diced - 1 bell pepper (red or yellow), diced - 1 can (14 oz) diced tomatoes (with juice) - 4 cups vegetable broth - 1 teaspoon ground cumin - 1 teaspoon smoked paprika - 1 bay leaf - Salt and pepper to taste - 2 tablespoons olive oil - 1 cup fresh spinach - Fresh parsley, chopped for garnish These ingredients create a rich flavor and a filling texture. The lentils are the stars, providing protein and fiber. The veggies add color and nutrients, making this dish warm and healthy. Feel free to make this stew your own! You can add or swap ingredients based on what you have. Here are some ideas: - Potatoes for extra heartiness - Kale or Swiss chard instead of spinach - Sweet potatoes for a touch of sweetness - Different spices like curry powder or chili flakes for heat - Fresh herbs like thyme or rosemary for a fragrant twist These options let you customize the stew to your taste. It’s fun to experiment and find your favorite combo! To cook this hearty stew, you’ll need a few basic tools: - A large pot or Dutch oven - A cutting board and sharp knife - A wooden spoon for stirring - Measuring cups and spoons for accuracy Having the right equipment makes cooking easier and more enjoyable. With these tools, you can create a delicious meal that warms the heart and soul. Check out the [Full Recipe] for more details on preparation and cooking! To start, gather all your ingredients. You will need: - 1 cup green or brown lentils, rinsed - 1 medium onion, diced - 2 cloves garlic, minced - 2 carrots, diced - 2 celery stalks, diced - 1 medium zucchini, diced - 1 bell pepper (red or yellow), diced - 1 can (14 oz) diced tomatoes (with juice) - 4 cups vegetable broth - 1 teaspoon ground cumin - 1 teaspoon smoked paprika - 1 bay leaf - Salt and pepper to taste - 2 tablespoons olive oil - 1 cup fresh spinach - Fresh parsley, chopped for garnish Wash and dice all the vegetables. This helps them cook evenly. Rinsing the lentils removes any dust or small stones. In a large pot, heat your olive oil over medium heat. Add the diced onion. Sauté for about 3-4 minutes until it turns translucent. Then add the minced garlic and cook for one more minute. Be careful not to burn the garlic, as it can taste bitter. Next, add the diced carrots and celery. Stir them for about 5 minutes until they start to soften. Now, toss in the diced zucchini and bell pepper along with the rinsed lentils. Mix everything well. Pour in the can of diced tomatoes with their juice. Add the vegetable broth to create a rich base. Sprinkle in the ground cumin, smoked paprika, bay leaf, and season with salt and pepper. Bring the mixture to a boil. Once it boils, lower the heat. Cover the pot and let it simmer for about 30-35 minutes. Check that the lentils are tender and the vegetables are cooked through. In the last few minutes, stir in the fresh spinach until it wilts. Be sure to taste and adjust the seasoning if needed. Don't forget to remove the bay leaf before serving. Ladle the stew into deep bowls. Garnish with fresh chopped parsley for a pop of color. This stew pairs well with crusty bread on the side. It makes for a warm and nourishing dish that you will love. For the complete recipe, check out the Full Recipe section. To make your stew even better, try a few simple tips: - Sauté your onions until golden. This adds depth. - Use fresh herbs like thyme or rosemary for an extra kick. - Add a squeeze of lemon juice just before serving. It brightens flavors. - For creaminess, stir in a splash of coconut milk or a spoonful of yogurt. These tips help create layers of flavor that make your stew special. Some common errors can ruin your stew: - Skipping the sauté step can lead to dull flavors. Always sauté first. - Adding too much salt at once can overpower the dish. Season gradually. - Not rinsing lentils might lead to grit in your stew. Always rinse well. - Forgetting to remove the bay leaf before serving can confuse diners. Avoiding these pitfalls helps you make the best stew. This stew is great for various diets: - Vegan: It’s naturally vegan since it uses no animal products. - Gluten-free: All ingredients are gluten-free, making it safe for celiac folks. - Nut-free: No nuts in this recipe, so it’s safe for nut allergies. Feel free to adjust ingredients based on dietary needs. You can also find the Full Recipe for more details. {{image_2}} You can add unique flavors by changing up the spices. For a Mexican flair, use chili powder and cumin. For an Italian touch, try adding Italian herbs like oregano and basil. You could even use curry powder for an Indian twist. Each region's spices can change the taste, making it new and exciting. Feel free to swap ingredients based on what you like or have on hand. If you want more protein, add cooked chicken or tofu. If you prefer a different legume, chickpeas or black beans work well. For a creamier stew, stir in coconut milk or a splash of cream. You can even switch out the vegetables for whatever you enjoy the most. Using seasonal veggies boosts both flavor and nutrition. In the spring, add asparagus or peas for a fresh taste. In the summer, try corn or fresh green beans. Fall brings great root veggies like sweet potatoes or butternut squash. In winter, hearty greens like kale or collards add warmth. Each season offers new options to keep your stew vibrant! For the full recipe, check out the Hearty Lentil and Vegetable Stew. After you enjoy your hearty lentil and vegetable stew, you can store the leftovers. Let the stew cool down to room temperature. Next, scoop it into airtight containers. This will keep the stew fresh. You can store it in the fridge for up to four days. If you want to keep it longer, consider freezing it. To reheat the stew, you have a few options. You can use the microwave or the stove. If using a microwave, place your portion in a bowl. Cover it with a microwave-safe lid or wrap. Heat in short bursts, stirring in between, until hot. If you prefer the stove, pour the stew into a pot. Heat it over medium heat, stirring often until warm. If you want to freeze your stew, it’s easy! Use freezer-safe containers or bags. Leave some space at the top since the stew can expand. Label the containers with the date. Your stew can last in the freezer for about three months. When you’re ready to eat it, thaw it in the fridge overnight. You can then reheat it as mentioned above. This way, you can enjoy a warm and nourishing dish anytime you want! For the full recipe, check out the main article. For this stew, I recommend using green or brown lentils. They hold their shape well during cooking. These lentils add a nice texture to the dish. Red lentils can work too, but they will become mushy. If you want a stew with more bite, stick to green or brown. Yes, you can use a slow cooker or an Instant Pot. For a slow cooker, add all the ingredients and cook on low for 6-8 hours. If you use an Instant Pot, follow the same steps as the pot method but cook on high pressure for about 15 minutes. Both methods will yield a delicious stew. To spice up your stew, add red pepper flakes or diced jalapeños. For more flavor, use herbs like thyme or rosemary. You can also try adding a splash of hot sauce or a little curry powder. These simple tweaks can elevate your dish and make it even tastier. For the full recipe, check the earlier section. Enjoy your cooking! This blog post shared all you need to make a hearty lentil and vegetable stew. We covered ingredients, cooking steps, and tips for extra flavor. Avoid common mistakes to make your dish great. Don’t forget about the different regional twists and seasonal vegetable options. Proper storage and reheating methods keep your leftovers fresh and tasty. Enjoy your stew and make it your own by trying different variations. Cooking can be fun and simple. Get ready to enjoy a warm, healthy meal!](https://cookingwells.com/wp-content/uploads/2025/06/6ad3567c-e1ea-4bd1-af9b-679255048f6a.webp)
Hearty Lentil and Vegetable Stew Warm and Nourishing Dish
Warm up your kitchen with my Hearty Lentil and Vegetable Stew! This dish not only fills your belly but also
Warm up your kitchen with my Hearty Lentil and Vegetable Stew! This dish not only fills your belly but also

If you’re craving a delightful and healthy treat, look no further! In this post, I’ll show you how to make
. 1. Combining ingredients in a food processor: Place all the ingredients into a food processor. Pulse the mixture until it is mostly smooth. But remember, some texture is key. You want it to hold together later. 2. Achieving the right texture: If the mix feels too wet, add a bit of breadcrumbs. This helps bind everything. The right texture is sticky but not runny. It should form into balls easily. Now it's time to shape your falafel. 1. Shaping falafel balls or patties: Take a scoop of the mixture and roll it into a ball. Aim for about 1.5 inches in size. You can also flatten the balls into patties if you prefer. Place them on a lined baking sheet. 2. Baking instructions and tips: Preheat your oven to 400°F (200°C). Bake the falafel for 20-25 minutes. Flip them halfway through for even crispiness. They should be golden brown when done. While the falafel bakes, let’s whip up the tahini sauce. 1. Whisking the sauce ingredients: In a small bowl, combine tahini, water, lemon juice, minced garlic, and a pinch of salt. Whisk until smooth. 2. Adjusting consistency for serving: If the sauce is too thick, add a bit more water. You want it pourable but not runny. Taste and adjust the salt if needed. This simple process creates a delightful dish. Enjoy your baked falafel with the creamy tahini sauce! To get the best falafel, avoid dryness. Dry falafel is not fun to eat. To keep your falafel moist, make sure you do not over-process the chickpeas. Leave some texture for a better bite. You can adjust the moisture with breadcrumbs. If your mix seems too wet, add more breadcrumbs. Use panko for extra crunch. This will help the falafel hold together while baking. Baking is a healthier choice than frying. It cuts down on oil and keeps the calories lower. Plus, baking can still give you a nice crunch. To achieve this, make sure to space out the falafel on the baking sheet. This allows hot air to circulate and crisp them up. You can also brush them lightly with olive oil before baking. This helps create that golden brown color and crunchy texture. Pair your baked falafel with fresh sides. Warm pita bread, crunchy veggies, or a simple salad work well. You can also add garnishes like fresh herbs, lemon wedges, or pickles for extra flavor. For presentation, serve the falafel on a large platter. Drizzle the tahini sauce over the top. Add a sprinkle of herbs for color. This makes for a beautiful and tasty dish that everyone will enjoy. You can find the full recipe to make this delicious meal. {{image_2}} You can change the flavor of your baked falafel easily. Try adding spices like paprika for warmth. A pinch of cayenne gives it a spicy kick. You can also mix in different herbs. Fresh dill or mint adds a unique taste. Each herb brings a new twist to your falafel. Baked falafel is flexible in how you serve it. You can wrap it in pita bread or flatbreads. This makes a lovely sandwich filled with veggies and sauces. Alternatively, serve it as part of a salad. A fresh salad with greens, tomatoes, and cucumbers pairs well. For a traditional touch, present your falafel on a Middle Eastern platter. This can include hummus, tabbouleh, and olives for a feast. You can also adjust the tahini sauce to fit your taste. Try adding different citrus juices, like lime or orange, for a new flavor. If you enjoy heat, add chili paste or red pepper flakes for spice. This will make your tahini sauce exciting and bold. You can explore these variations while following the Full Recipe for baked falafel. To keep your baked falafel fresh, place it in an airtight container. Store it in the fridge for up to four days. When you want to eat it, reheat the falafel in the oven. Set the oven to 350°F (175°C) and bake for about 10 minutes. This method helps keep the falafel crispy. You can also use a toaster oven for a quick reheat. Tahini sauce lasts about a week in the fridge. Store it in a clean, sealed jar. If the sauce thickens, add a little water and stir to bring it back to life. You can use tahini sauce in other dishes, too. Drizzle it on salads or use it as a dip for veggies. It adds a nice nutty flavor. You can freeze baked falafel for later use. Place the falafel in a single layer on a baking sheet. Freeze until solid, then move them to a freezer bag. They stay good for about three months. For tahini sauce, pour it into an ice cube tray. Once frozen, transfer the cubes to a bag. This way, you can use small amounts whenever you want. Yes, you can make baked falafel ahead of time. To do this, follow these steps: - Prepare the falafel mixture as per the full recipe. - Form the balls or patties but do not bake them. - Place the shaped falafel on a tray and freeze them. - Once frozen, transfer them to a zip-top bag. - To cook, bake directly from the freezer. Add a few extra minutes to the baking time. If you don’t have tahini, you can use other options. Here are some alternatives: - Sunflower seed butter offers a nut-free choice. - Greek yogurt gives a creamy texture. - Peanut butter can work for a different flavor. - You can also mix sesame seeds with olive oil for a homemade version. If your falafel is falling apart, it may be too wet. Here are some tips to fix this: - Add more breadcrumbs to bind the mixture. - Make sure to drain the chickpeas well before using. - Pulse the mixture just until combined, not too smooth. - Chill the mixture for about 30 minutes before forming the falafel. To check if your falafel is done, follow these tips: - Look for a golden brown color on the outside. - The falafel should feel firm but not hard. - A toothpick inserted should come out clean. - You can also taste one to check the texture and flavor. You now know how to make delicious baked falafel and tahini sauce. We covered main ingredients like chickpeas, fresh herbs, and garlic. You also learned how to bake for a crispy texture and tried different variations for added flavor. Remember, storing your falafel and sauce correctly keeps them fresh. Enjoy exploring new ways to serve this dish. Baked falafel is a healthy option that's fun to make and eat. I hope you feel inspired to try these recipes!](https://cookingwells.com/wp-content/uploads/2025/06/1c45949f-8cf2-4041-aed4-63d07f0c0ca3.webp)
Are you ready to elevate your dinner with a simple yet delicious dish? This Baked Falafel with Tahini Sauce is
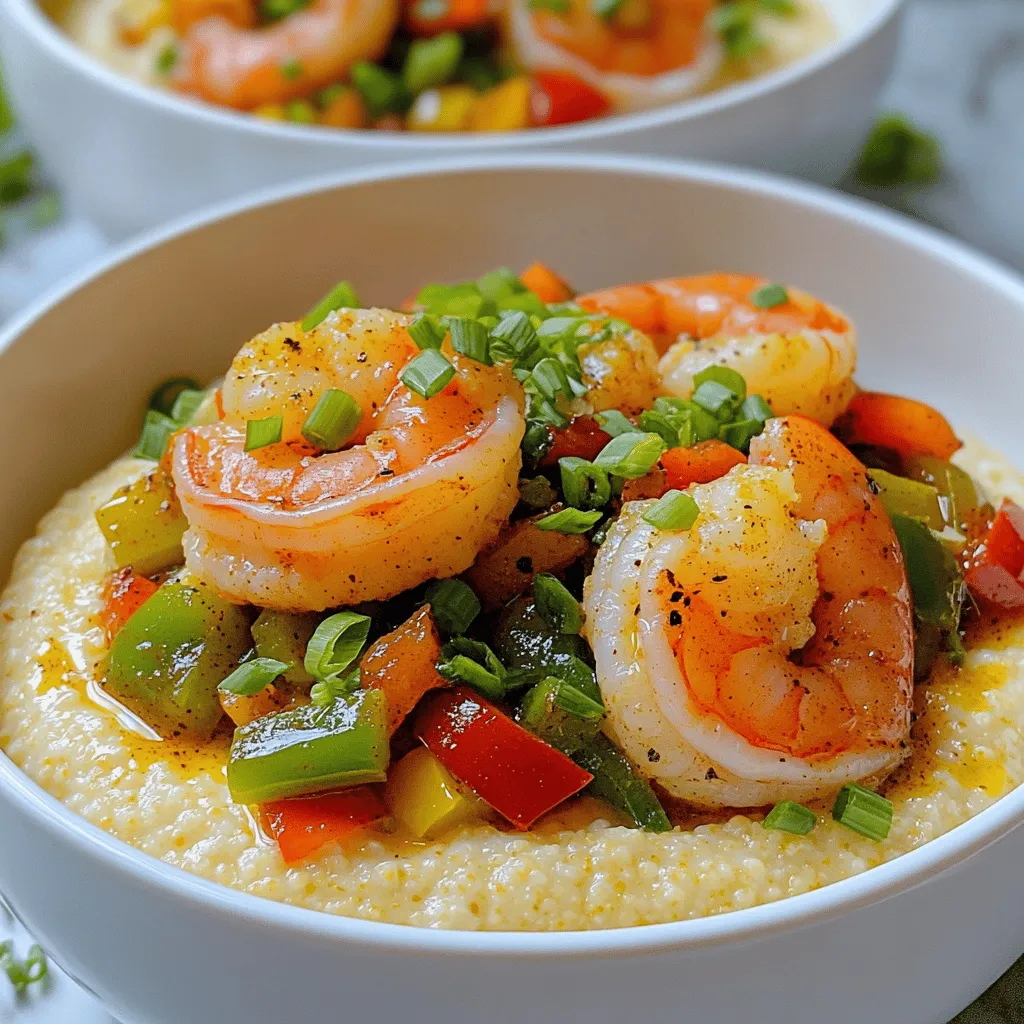
Welcome to a tasty journey through Cajun Shrimp and Grits! This dish brings comfort and flavor to your table. You’ll
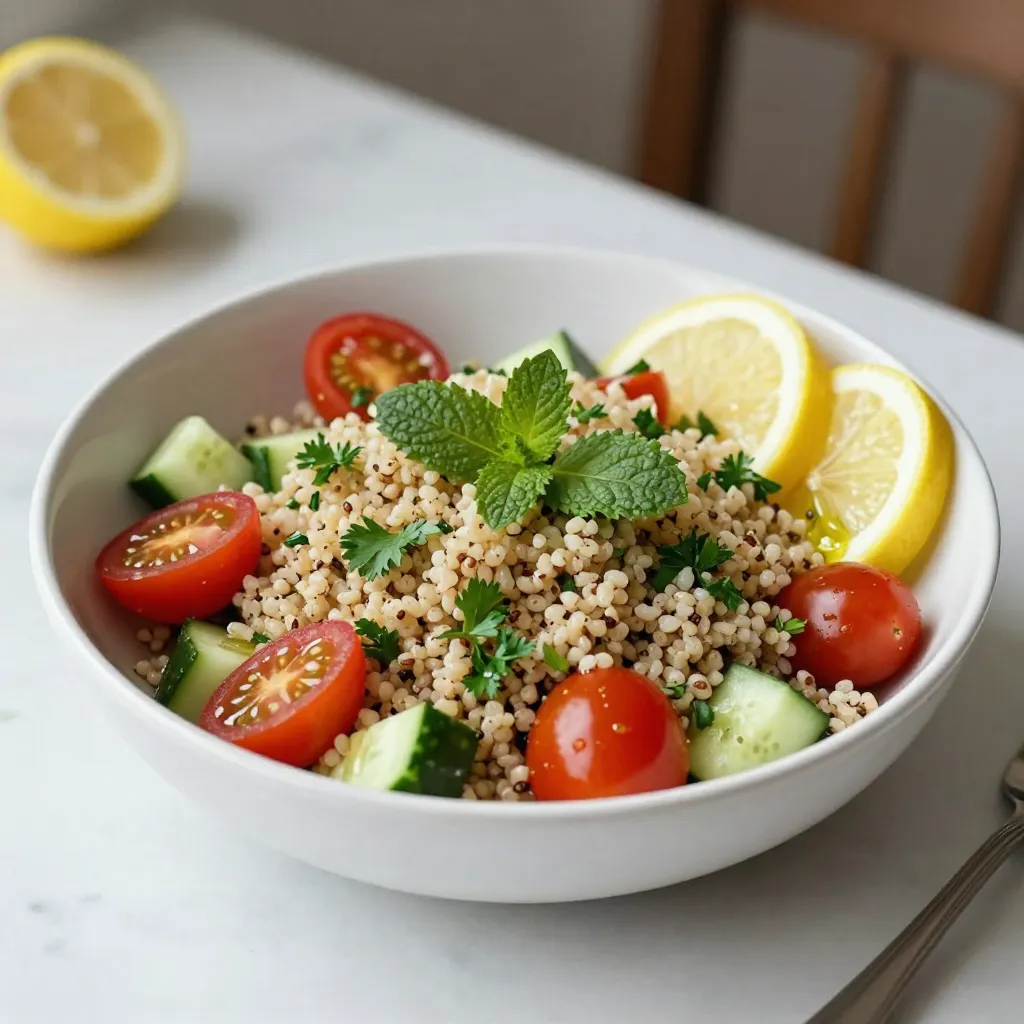
Looking for a fresh and vibrant dish to brighten your meals? You’ll love this Lemon Herb Quinoa Salad! Packed with
![To make classic stuffed peppers, gather these ingredients: - 4 large bell peppers (any color) - 1 cup quinoa (or rice) - 1 can (15 oz) black beans, rinsed and drained - 1 cup corn (fresh or frozen) - 1 cup diced tomatoes (canned or fresh) - 1 small onion, finely chopped - 2 cloves garlic, minced - 1 teaspoon cumin - 1 teaspoon chili powder - 1 cup shredded cheese (cheddar or pepper jack) - Salt and pepper to taste - Fresh cilantro or parsley for garnish You can switch some ingredients if you need to. For grains, use rice instead of quinoa. If you want a meat option, ground turkey or beef can work well. Use kidney beans instead of black beans for a different flavor. If you can’t find fresh corn, frozen corn is a great substitute. For cheese, try mozzarella or feta for a unique twist. When picking bell peppers, look for ones that are firm and shiny. The skin should not have any soft spots or wrinkles. Choose peppers with bright colors, as they tend to be sweeter. Check the stem too; it should be green and fresh. If you can, smell the pepper! A sweet aroma means it is fresh and ready to enjoy. Start by washing the bell peppers. Choose any color you like. Cut off the tops and remove the seeds. Make sure not to cut too deep. You want a nice bowl to hold the filling. Place the peppers upright in a baking dish. This will keep them stable while baking. Next, cook the quinoa. Use one cup of quinoa and follow the package instructions. While it cooks, heat a splash of olive oil in a skillet. Add the chopped onion and minced garlic. Cook them for 3 to 4 minutes until soft. Then, mix in the cooked quinoa, black beans, corn, and diced tomatoes. Add the cumin, chili powder, salt, and pepper. Stir well and cook for another 3 to 4 minutes. This will help blend all the flavors together. Now comes the fun part: stuffing the peppers! Take your quinoa mixture and pack it into each pepper. Press down gently to fill them well. Top each pepper with some shredded cheese. Cover the dish with aluminum foil and bake in the preheated oven at 375°F for 25 to 30 minutes. After that, remove the foil and bake for another 10 to 15 minutes. This will make the peppers tender and the cheese bubbly. Once they are done, let them cool for a bit. Garnish with fresh cilantro or parsley. Enjoy your classic stuffed peppers! For the full recipe, check out the details above. To get the best texture, make sure your quinoa is fluffy. Cook it well, following the package directions. Overcooked quinoa turns mushy, so watch it closely. When you mix the filling, don’t mash the beans too much. You want some chunks for good texture. The peppers should be tender but not too soft. Bake them until they have a little bite left. One big mistake is not pre-cooking the quinoa. This step helps the stuffing stay moist. Also, don’t skip seasoning the filling. Salt and spices bring out all the flavors. Another pitfall is overstuffing the peppers. You want them full but not bursting. Lastly, don’t forget to cover the dish while baking. This helps cook the peppers evenly. For this recipe, a sharp knife is key for cutting the peppers. A large skillet helps cook the filling evenly. Use a measuring cup for the quinoa and beans to keep your ratios right. A baking dish is necessary to hold the stuffed peppers. Lastly, keep a spatula handy for mixing the filling. These tools make cooking easy and fun! For more details, check the Full Recipe. {{image_2}} You can make stuffed peppers even more colorful and tasty. Try adding extra veggies. Use chopped zucchini, mushrooms, or spinach. These veggies blend well with the filling. You can even add some chopped carrots for a bit of sweetness. This way, you boost the nutrition while keeping the flavor high. If you love meat, this version is for you. Substitute the beans with ground beef or turkey. Brown the meat in the skillet before adding the other ingredients. This will give your peppers a hearty twist. Use spices like cumin and chili powder to enhance the flavor. You can also mix in some cooked sausage for a more robust taste. Adjust the heat to fit your taste. For mild flavors, skip the chili powder. Instead, use sweet paprika for a gentle kick. If you like it spicy, add jalapeños or crushed red pepper flakes. Mixing in hot sauce is another great way to spice things up. Just be careful; you can always add more heat, but it’s hard to take it away! For the complete recipe and more ideas, check out the [Full Recipe]. After enjoying your stuffed peppers, store leftovers in an airtight container. Make sure they cool down first. This helps keep them fresh. Place the container in the fridge. Your stuffed peppers will last for 3 to 4 days. If you want to keep them longer, freezing is a great option. To freeze stuffed peppers, wrap each one in plastic wrap. Then place them in a freezer-safe bag. Remove as much air as you can to prevent freezer burn. You can freeze them for up to 3 months. When you're ready to enjoy them, just thaw them in the fridge overnight. Reheat stuffed peppers in the oven for the best texture. Preheat your oven to 350°F (175°C). Place the peppers in a baking dish and cover with foil. Bake for about 20-25 minutes until heated through. You can also use a microwave for a quicker option. Just place a pepper on a microwave-safe plate and heat for 2-3 minutes. Enjoy your meal again! For the full recipe, check out the Classic Stuffed Peppers Delight. Yes, you can use many types of peppers. Bell peppers are common, but you can try poblano or Anaheim peppers too. These peppers have a different taste. They can add a nice kick to your dish. Just make sure they are big enough to hold the filling. Stuffed peppers take about 35 to 45 minutes to cook. First, bake them covered for 25 to 30 minutes. This softens the peppers. Then, remove the foil and bake for 10 to 15 more minutes. This part makes the cheese bubbly and golden. Stuffed peppers pair well with many sides. You can serve a simple salad for freshness. Rice or quinoa makes a great side too. If you want something warm, try garlic bread. Each of these options complements the flavors in the peppers. You can find the Full Recipe for more ideas. You now know how to make stuffed peppers from start to finish. We covered ingredients, cooking steps, and tips to avoid mistakes. I shared variations for different tastes and how to store leftovers. Remember, you can use any pepper you like and customize the filling. Stuffed peppers can be a fun and healthy meal. Enjoy experimenting with flavors and have fun in the kitchen!](https://cookingwells.com/wp-content/uploads/2025/06/061f945d-aef4-4aeb-8c6b-b56573401bb5.webp)
Looking for a tasty and easy dinner? Classic stuffed peppers are here to save the day! This dish is colorful,

Craving a sweet treat that’s easy to make? My No Bake Pumpkin Cheesecake combines creamy pumpkin flavor with a delicious
![- 12 oz penne pasta - 2 chicken breasts, diced - 1 cup heavy cream - 1 cup ranch dressing - 2 tablespoons olive oil - 1 teaspoon garlic powder - 1 teaspoon onion powder - Salt and pepper to taste - Fresh parsley, chopped (for garnish) - 1 cup grated Parmesan cheese - 1 cup baby spinach - 1/2 cup cherry tomatoes, halved Gathering the right ingredients is key for making creamy ranch chicken pasta. Start with 12 ounces of penne pasta. This pasta shape holds the sauce well. Next, you need two chicken breasts. Dice them into bite-sized pieces for even cooking. The sauce comes from one cup of heavy cream and one cup of ranch dressing. This mix creates a rich and tasty flavor that everyone will love. For the seasoning, use two tablespoons of olive oil. This helps cook the chicken and adds great taste. You will also need one teaspoon of garlic powder and one teaspoon of onion powder. These spices give your dish more depth. Don’t forget salt and pepper to taste. For a fresh touch, add chopped parsley as a garnish. If you want to make the meal even better, consider these optional add-ins. One cup of grated Parmesan cheese adds creaminess. Baby spinach adds color and nutrition, while cherry tomatoes give a burst of sweetness. Now that you have your ingredients ready, you can start making this simple and satisfying meal. For the complete recipe, check out the [Full Recipe]. To cook the penne pasta, fill a large pot with water. Add a pinch of salt. Bring the water to a rolling boil. Add the penne pasta. Stir it well to prevent sticking. Cook the pasta for about 10-12 minutes. You want it to be al dente, meaning it should have a slight bite. Once done, drain the pasta and set it aside. In a large skillet, heat two tablespoons of olive oil over medium heat. Add the diced chicken breasts. Sprinkle in one teaspoon of garlic powder and one teaspoon of onion powder. Season with salt and pepper to taste. Sauté the chicken for about 7-10 minutes. Cook until the chicken is golden brown and fully cooked. This brings out all the flavors. Now for the sauce! Lower the heat and pour in one cup of heavy cream. Stir well to mix it with the chicken. Let it simmer for about two minutes. Then, add one cup of ranch dressing. Mix it in nicely. Next, slowly add one cup of grated Parmesan cheese. Keep stirring until the cheese melts, creating a smooth, creamy sauce. Time to combine everything! Add the cooked penne pasta to the skillet. Toss it gently until the pasta is fully coated in the creamy ranch sauce. Stir in one cup of baby spinach and half a cup of halved cherry tomatoes. Cook for an extra 2-3 minutes. This helps the spinach wilt and the tomatoes soften. Taste your dish and adjust the seasoning if needed. Serve right away with fresh parsley on top. For the full recipe, check the link above! To get the right thickness for your sauce, start with heavy cream. It gives a rich base. After cooking your chicken, lower the heat before adding the cream. This prevents it from boiling too much. Stir the cream in gently and let it warm. When you add ranch dressing, it will blend well. The Parmesan cheese helps thicken it too. If the sauce seems thin, let it simmer a bit longer. Remember, it will thicken as it cools. You can play with flavors to make this dish even better. Try adding some smoked paprika for a hint of smokiness. A pinch of cayenne pepper can kick up the heat. Fresh herbs like basil or thyme add freshness. You can also use a squeeze of lemon juice for a bright twist. Don’t forget to taste as you go. Adjust the salt and pepper to match your preference. This dish is great for meal prep. You can cook it ahead and store it in the fridge. Just let it cool before putting it in a container. It stays good for about three days. When you’re ready to eat, reheat it on the stove. Add a splash of milk or water to keep it creamy. Stir often to avoid sticking. You can also freeze it for up to three months. Just make sure to let it thaw in the fridge overnight before reheating. For the full recipe, check out the detailed steps above. {{image_2}} You can switch up the protein in this dish. Shrimp adds a nice twist. Cook them quickly in the skillet. Turkey is another great choice; it’s lean and flavorful. For plant-based options, try tofu or chickpeas. They soak up the sauce well and keep it creamy. Adding veggies can boost flavor and nutrition. Bell peppers bring crunch and sweetness. Sauté them with chicken for extra taste. Zucchini is another fun choice. Slice it thin and add it in the last few minutes of cooking. You can also use broccoli or peas for color. If you need gluten-free options, use gluten-free pasta. Many brands offer great choices. For dairy-free adaptations, try coconut cream instead of heavy cream. Use dairy-free ranch dressing and nutritional yeast for a cheesy flavor. These swaps keep the dish creamy and tasty. To store your Creamy Ranch Chicken Pasta, let it cool first. Place it in an airtight container. This keeps the flavors fresh and the pasta from drying out. Store it in the fridge for up to three days. When you’re ready to eat, just reheat it gently. If you want to freeze this dish, follow these steps. First, let the pasta cool completely. Then, place it in a freezer-safe container. It can last in the freezer for up to three months. To reheat, thaw it overnight in the fridge. Warm it on the stove over low heat. Add a splash of milk or cream to keep it creamy. Creamy Ranch Chicken Pasta stays fresh for about three days in the fridge. If frozen, it can last up to three months. Always check for any signs of spoilage, like off smells or changes in texture. This ensures you enjoy it at its best. You can add some heat to this dish easily. Consider using red pepper flakes. They add a nice kick without changing the flavor much. You can also add hot sauce. Just a few drops will spice it up. If you like fresh flavors, try diced jalapeños. They add heat and great taste. Mix in any of these options while cooking the chicken. Adjust the amount based on your heat preference. Yes, you can swap out the penne pasta. Some great choices are fusilli or rotini. These shapes hold onto the sauce well. If you prefer a whole grain option, use whole wheat pasta. Cook times vary slightly but usually take around 8-12 minutes. Always check the package instructions for the right cooking time. This dish pairs well with many sides. A simple green salad adds freshness. You can use romaine, spinach, or mixed greens. Garlic bread is also a great choice. It helps soak up the creamy sauce. Roasted vegetables, like broccoli or carrots, work well too. They add color and nutrients to your meal. Absolutely, kids usually love this dish! The creamy ranch flavor is mild and tasty. The pasta is easy to eat, and the chicken adds protein. You can adjust the ingredients to make it even more kid-friendly. For example, leave out any spicy elements. You can also add more veggies to sneak in some nutrition. In this blog post, we explored how to create a delicious Creamy Ranch Chicken Pasta. We covered the main ingredients, from penne pasta to chicken and ranch dressing. I shared steps for cooking the pasta, preparing the chicken, and making the creamy sauce. You learned tips for achieving the right texture and variations to fit your taste. Overall, this dish is easy to make and fun to customize. Enjoy your cooking and savor every bite!](https://cookingwells.com/wp-content/uploads/2025/06/14ed8c84-faf4-4b87-b1b5-34d52b2170f9.webp)
Looking for a quick and yummy dinner? Creamy Ranch Chicken Pasta is your answer! This dish combines tender chicken, rich
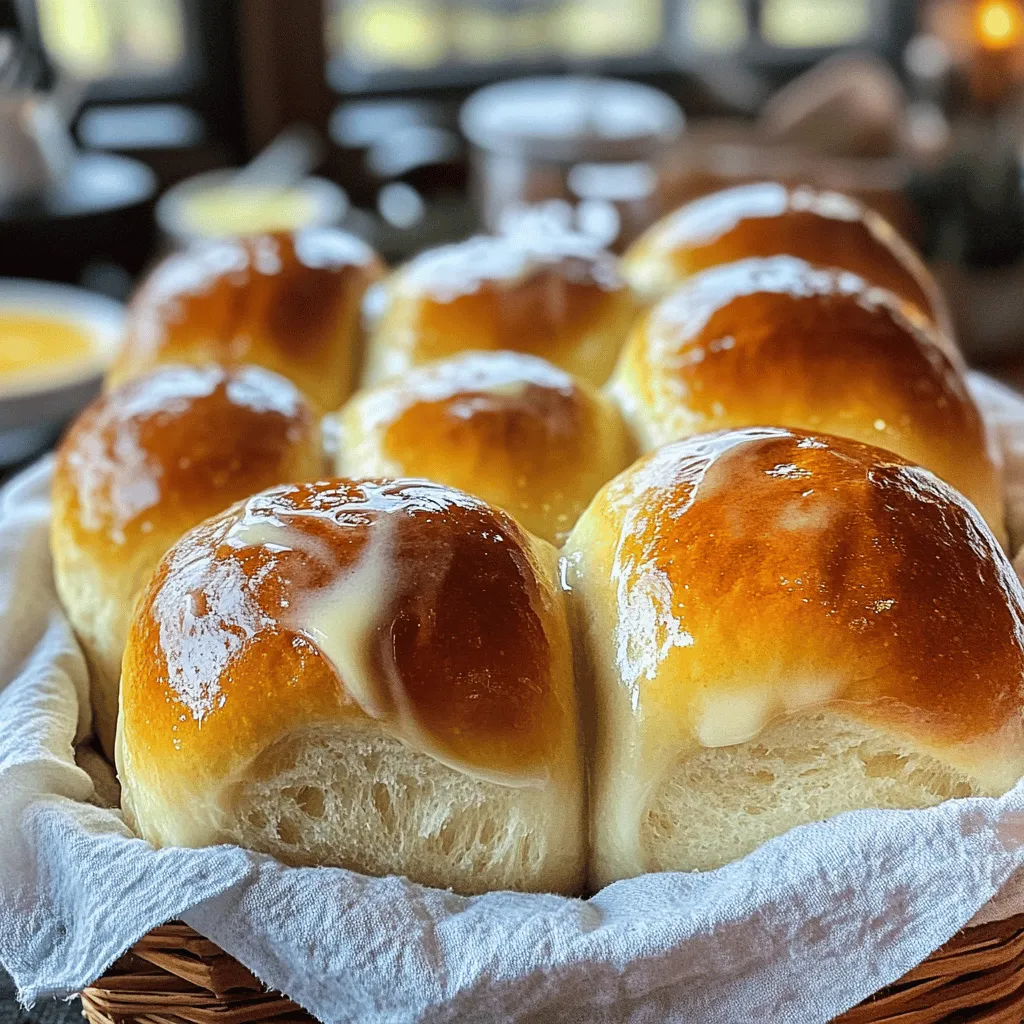
Are you ready to impress your family with the fluffiest rolls ever? In this simple recipe for homemade soft dinner
![To make delicious loaded chicken nachos, gather these key ingredients: - 2 cups cooked chicken, shredded - 1 bag (12 oz) tortilla chips - 2 cups shredded cheddar cheese - 1 cup black beans, rinsed and drained - 1 cup corn kernels (fresh or canned) - 1 jalapeño, sliced (optional) - 1 cup pico de gallo or fresh salsa - 1 avocado, diced - ½ cup sour cream - ¼ cup fresh cilantro, chopped - 1 tablespoon olive oil - Salt and pepper to taste These ingredients create a perfect mix of flavors and textures. The chicken adds protein, while the cheese melts beautifully over the chips. Black beans and corn give it a hearty feel. Fresh toppings like pico de gallo and avocado add brightness. For a smooth cooking experience, have these tools ready: - Large baking sheet - Skillet - Mixing spoon - Oven mitts - Serving platter These tools help you prepare and serve the nachos easily. A large baking sheet ensures even cooking, while a skillet helps heat the chicken mixture. Remember to use oven mitts when handling hot trays. Using the right ingredients and tools will make your loaded chicken nachos fun and tasty. Check out the Full Recipe for all the details on making this dish! 1. Preheat oven: Set your oven to 375°F (190°C). This helps the cheese melt perfectly. 2. Heat ingredients in skillet: In a skillet, warm 1 tablespoon of olive oil over medium heat. Add 2 cups of shredded chicken, 1 cup of black beans, and 1 cup of corn. Mix well and season with salt and pepper. Heat for about 5 minutes until warm. 3. Layer tortilla chips: On a large baking sheet, spread out 1 bag (12 oz) of tortilla chips in a single layer. This gives each chip a chance to get crispy. 4. Distribute chicken mixture and cheese: Spoon the warm chicken mixture over the chips. Sprinkle 2 cups of shredded cheddar cheese on top. If you like heat, add slices of 1 jalapeño. 1. Baking time and temperature: Bake your nachos in the preheated oven for 10-12 minutes. The cheese should be melted and bubbly. 2. Checking for doneness: Keep an eye on the nachos. You want the cheese melty but not burnt. 3. Adding toppings post-bake: Once done, remove from the oven. Top with 1 cup of pico de gallo, 1 diced avocado, and a drizzle of ½ cup sour cream. Finish with ¼ cup chopped cilantro for a fresh kick. - Alternative serving methods: For a fun twist, serve the nachos directly on the baking sheet. Or, transfer them to a large platter for a festive touch. - Pairing ideas: Enjoy your nachos with an extra bowl of salsa on the side. A cold drink like soda or lemonade pairs perfectly with this dish. For the complete recipe, check out the [Full Recipe]. How do I prevent soggy nachos? To avoid soggy nachos, layer your chips carefully. Start with a layer of chips. Then, add your chicken mixture on top. This keeps the chips crisp. You can also bake them for a shorter time. Baking them for about 10 minutes will help. Remove them as soon as the cheese melts. What are the best cheese choices for melting? For nachos, I love using cheddar cheese. It melts well and adds great flavor. You can also mix in Monterey Jack. This cheese is creamy and adds a nice touch. Blend both for a delicious topping. How can I adjust spice levels? You can easily change the spice level. If you like it mild, skip the jalapeños. For more heat, add diced jalapeños or hot sauce. You can also use spicy cheese to kick it up a notch. What are some creative toppings beyond the basics? Think outside the box! You can add black olives, pickled onions, or green onions. Try fresh corn salsa or guacamole for a twist. These toppings bring new flavors and textures to your nachos. What are mistakes in layering? A common mistake is piling on too many toppings. This makes it hard for the cheese to melt. Start with chips, then chicken, and finish with cheese. This way, every bite is balanced and tasty. What are timing issues while baking? Baking for too long can ruin your nachos. Watch them closely in the oven. If you see the cheese bubbling, they are ready. Remove them right away to keep them crisp and warm. {{image_2}} You can make loaded nachos without chicken. Use plant-based protein like tofu or tempeh. These options work great when marinated. Add extra vegetables for crunch and flavor. Consider bell peppers, mushrooms, or zucchini. Each will boost taste and nutrition. You can roast or sauté them for extra depth. This twist keeps the dish hearty and satisfying. Do you want more heat in your nachos? You can easily boost spice levels. Add hot sauce to your chicken mix or drizzle it on top. You can also use spicy cheese. Look for pepper jack or add diced jalapeños. For even more flavor, consider diced serrano peppers or a sprinkle of cayenne. These ingredients will give your nachos a fiery kick. Try adding different salsas to enhance your nachos. A mango salsa adds sweetness, while a tomatillo salsa gives a tangy twist. You can also explore international flavors. Mix in toppings inspired by Mexican cuisine, like pickled onions or cotija cheese. These additions will create a fun fusion dish that's full of flavor. Each bite will be a taste adventure! For the full recipe, check the [Full Recipe]. To store nachos, use an airtight container. Place the nachos in a single layer to keep them crisp. If you stack them, they may get soggy. Refrigerate them within two hours of cooking. They stay fresh for up to three days in the fridge. To reheat nachos, the oven is your best friend. Preheat it to 350°F (175°C). Spread the nachos on a baking sheet and warm them for about 10 minutes. This keeps the chips crunchy and the cheese melty. The microwave works too but may make them soft. If you use the microwave, reheat in short bursts of 30 seconds. You can freeze nachos, but it's not ideal. Freezing can change their texture. If you want to freeze them, layer the nachos on a baking sheet. Place them in the freezer until solid, then transfer them to a freezer bag. To thaw, leave them in the fridge overnight. Bake them straight from the freezer at 350°F (175°C) for about 15-20 minutes to warm through. You can prep Loaded Chicken Nachos ahead of time. First, cook the chicken and mix it with beans and corn. Let this cool. Store it in the fridge. When you are ready to serve, layer the tortilla chips on a baking sheet. Add the chicken mix and cheese on top. Bake it when your guests arrive. This keeps the nachos fresh and warm. Yes, using rotisserie chicken is a great idea. It saves time and adds flavor. The chicken is already cooked and seasoned. Just shred it and mix it with beans and corn. This shortcut makes your nachos quick and easy to prepare. Cheddar cheese is my favorite for nachos. It melts nicely and has a strong flavor. You can also mix in Monterey Jack for extra creaminess. For a twist, try pepper jack for some heat. A blend of cheeses makes the nachos even tastier. To keep nachos crisp, layer them carefully. Use a large baking sheet and spread chips evenly. Avoid piling too much topping on them. Bake them just until the cheese melts. Serve them right away for the best crunch. Absolutely! Use gluten-free tortilla chips. Check labels on canned beans and corn to ensure they are gluten-free. This way, everyone can enjoy the nachos without worry. Loaded chicken nachos combine fun flavors and easy prep. You learned the key ingredients, tools, and steps to create this dish. Customizations let you switch things up, while tips help prevent sogginess. Store and reheat leftovers wisely for future snacks. Enjoy sharing these nachos at parties or with family. The questions on common issues provide answers for great results. Get creative and make this recipe yours! Ready to dig in?](https://cookingwells.com/wp-content/uploads/2025/06/e5c4c424-207e-48cf-b537-b43f6c8029c6.webp)
Are you ready to take your snack game to the next level? Loaded Chicken Nachos are a flavorful and satisfying
